PDFs are the best format for document sharing and storage, though it doesn’t allow one to make changes. To insert a picture to PDF or a PDF document isn’t a simple task.
But you can find different versions of the tools offering multiple PDF editing features. We’ll show you several ways to add pictures to PDF, so choose the best method.

Both online and offline software tools convert the PDF format to a document that can be edited whenever you wish. Some of these tools add image to PDF, while others do the reverse. Nonetheless, they all give excellent results.
Tip 1. Add Image to PDF with Few Clicks
PDF Agile is a software service that accelerates your PDF workflow to the maximum point. It creates, edits, secures and compresses your PDF documents faster. In addition, you can easily and quickly update your PDF document with PDF Agile.
It consists of work processors, reflow features like columns and pages, modified text size, line spacing, and multimedia options. In addition, the PDF Agile easily converts PDF files to Word, PowerPoint, and Excel while retaining the original formatting.
Using its robust Optical Character Recognition (OCR) feature, you can extract texts from scanned PDF documents or any image using its robust Optical Character Recognition (OCR) feature. You can also organize PDF pages to support your workflow by using its merge and split, watermark, headers, footers, and drag and drop elements.
Key Features of PDF Agile
The software comes packed with several features, and one of them is perfect for adding image to PDF.
- Powerful Editing and Conversion Tools
With PDF Agile, you can easily edit and scan PDF documents without returning to the source file. You can also convert your PDF document to a wide range of file formats that anyone can view.
- Heading and Annotating Experience
PDF Agile makes it easy to apply and switch between full-screen mode, screen mode, and slide show as it suits your need.
With the help of highlighters, underlines, texts, shapes, and free-hand drawing, you can communicate easier with your PDF.
- Security Of Information Changes
You can protect your PDF document with a password to prevent unauthorized access to the file’s content.
In addition, PDF Agile gives you a chance to permanently delete sensitive information, including illustrations and texts, from your PDF document.
Step-by-Step Guide on How to Add Image to PDF with PDF Agile
Below are the steps on how to add an image to PDF with PDF Agile:
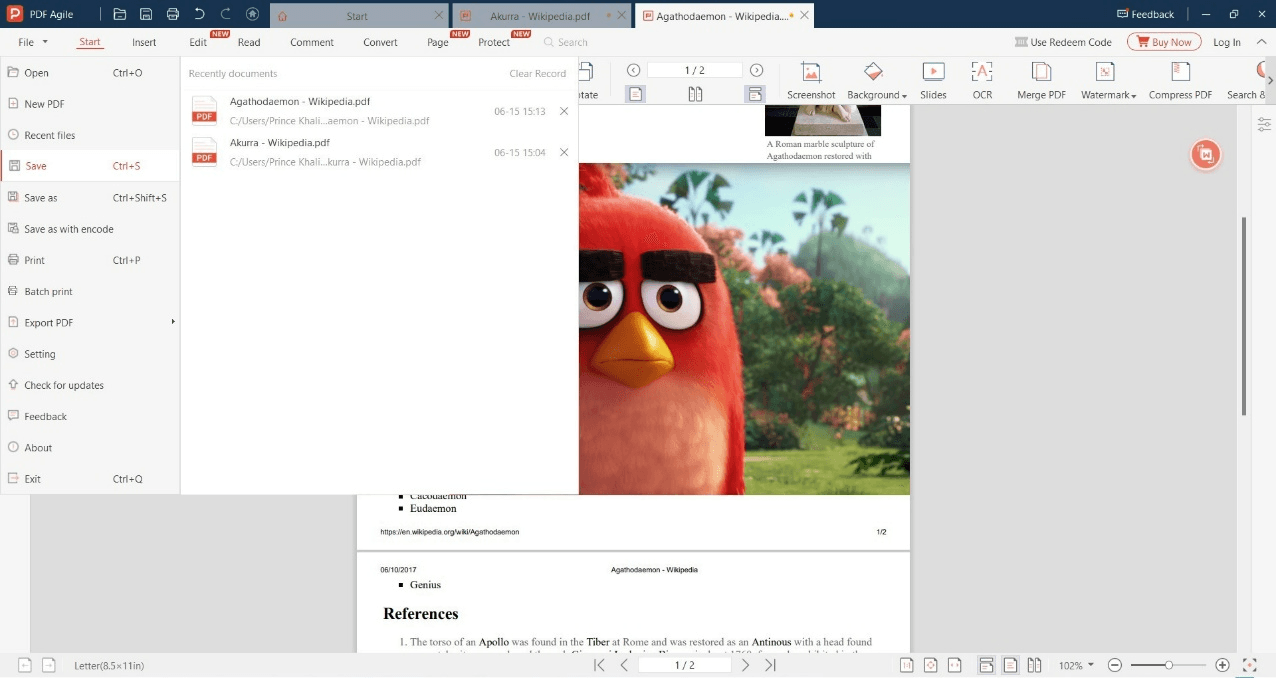
Step 1: Once you download and install the PDF Agile tool, launch it. On the first page, navigate to the top bar and click on ‘insert.’
Step 2: You’ll see a drop-down menu with a few options. Click on ‘image’ to add image to PDF.
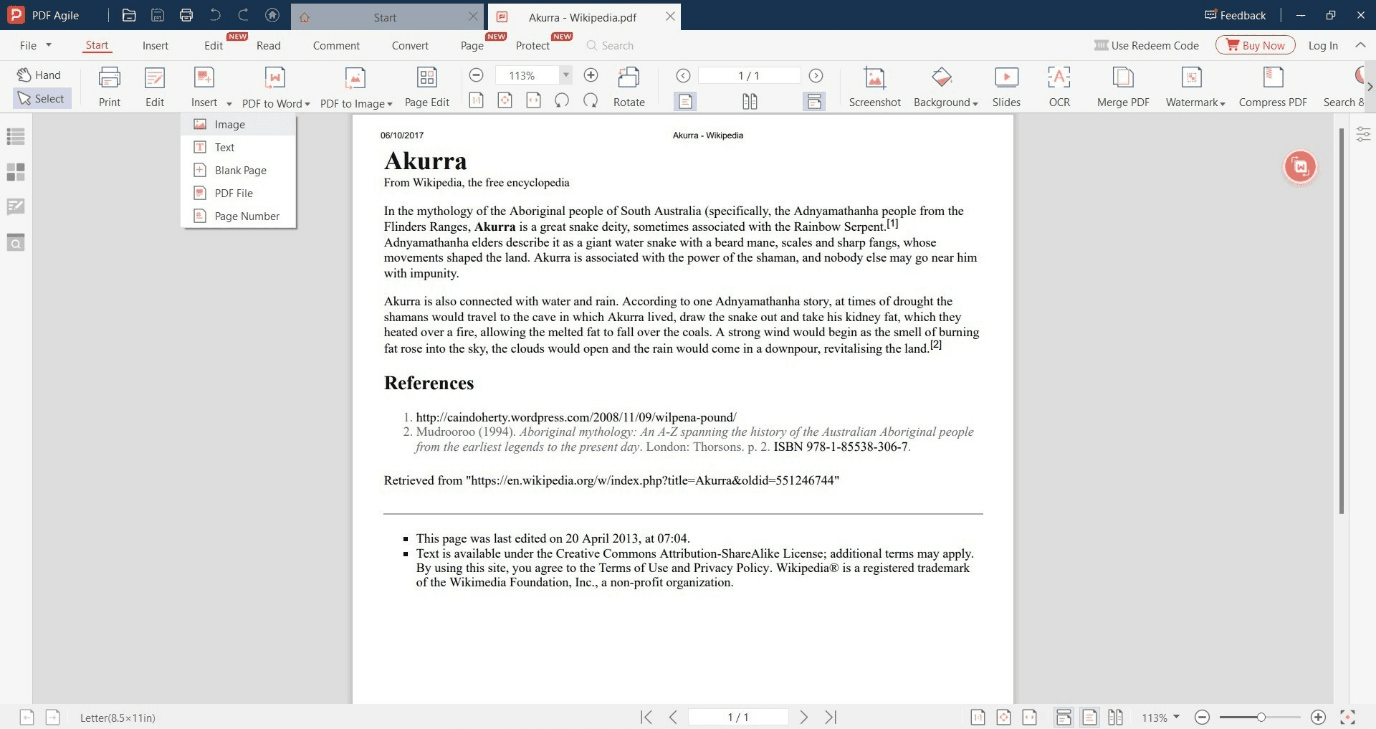
Step 3: The software will open up an explorer window for you to select the image you want to add to the PDF. Choose the picture or image and click on ‘open.’

Step 4: The image you selected will be inserted into the PDF. If you want, you can crop it, rotate it, etc., using PDF Agile’s features.
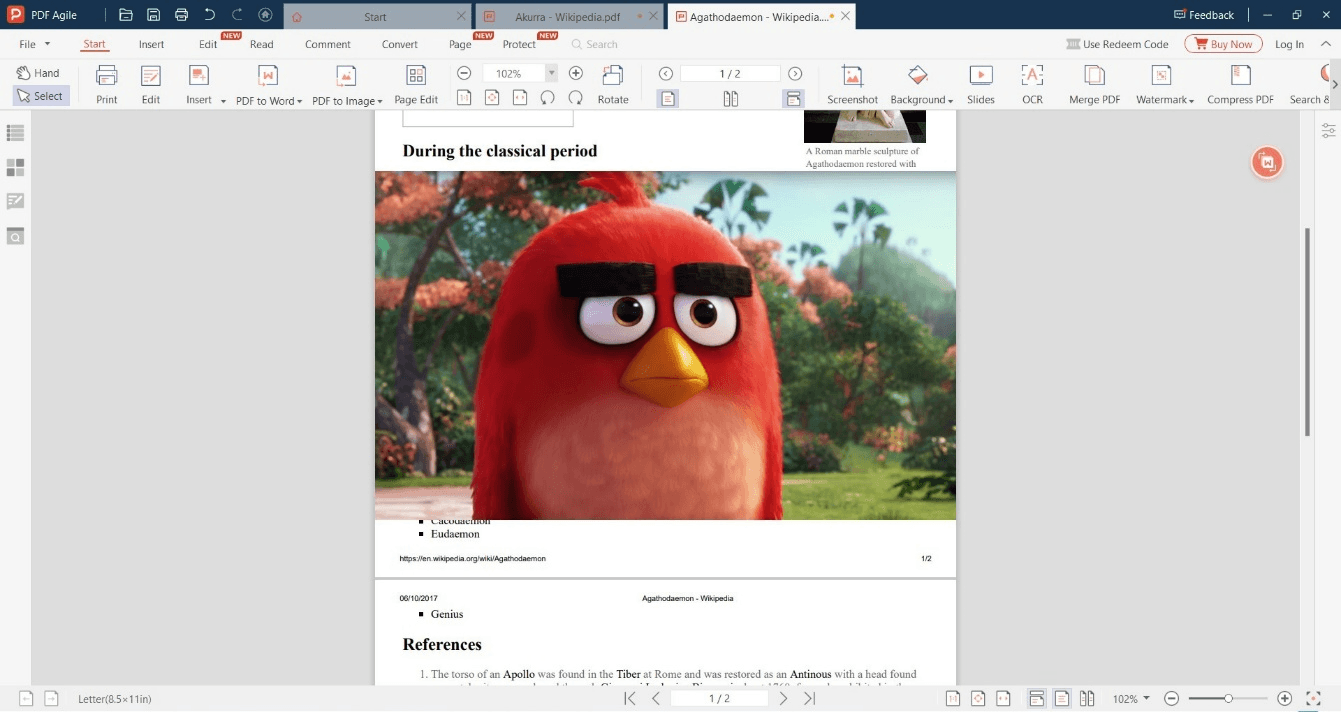
Step 5: Finally, to see the image you added to the PDF, go to the top panel of the software and click on ‘file.’ A drop-down menu will appear. Click on ‘save’ to save the file to the default or desired location.
Tip 2. Add Image to PDF with Preview on Mac
Preview is the default application in the Mac Operating system (macOS) used for viewing and printing image files like PDF files and JPG.
It encrypts PDF documents, constrains their use, and offers you an easy and quick way to view the various documents.
With Preview, one can change how documents are displayed. In addition, it allows editing and annotation, the basic functionality needed when working with files. Plus, you can use it to add image to PDF. This is good because macOS has always had lesser tools for its users, so tools like Preview are necessary.
Preview has several editing and markup features like the Aqua graphical user interface, the Quartz graphic layer, and Core Image frameworks. In addition, it offers primary image correction tools using Core Image Processing technology carried out in macOS.
Even users new to Mac computers agree it’s relatively easy to use this tool to add image to PDF.
Preview automatically saves one’s changes, so there’s no need to save your edited PDF manually. Your changes will be saved once you close the document. For example, once you insert an image into PDF, the action will be automatically saved.
Step-by-Step Guide on How to Add Image to PDF With Preview on Mac
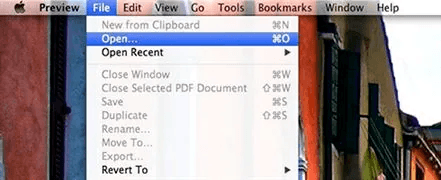
Step 1: Open the folder containing the image you want to insert into your PDF. Right-click the image and select open with Preview on the menu.
Or, you can navigate to the top toolbar and click on ‘File’ to open the PDF file to which you want to add the image.
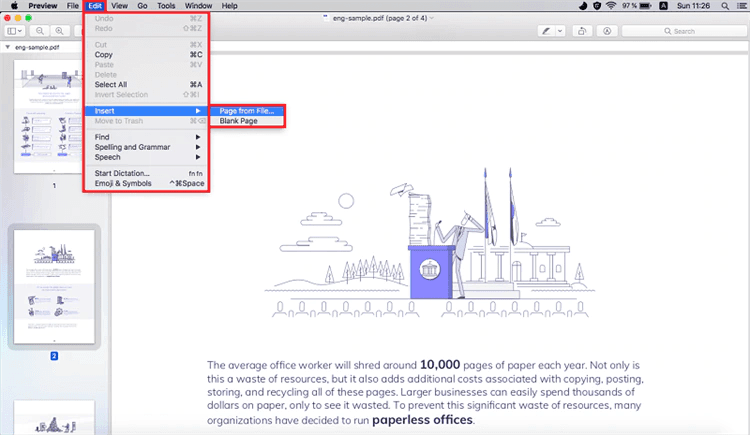
Step 2: For this step, click on ‘Edit,’ ‘insert,’ and finally, ‘page from file.’ Next, select the image you intend to add to the PDF file. That’s all you have to do to inset or add image to PDF.
Tip 3. Insert Image into PDF online
iLovePDF is a software designed to work with PDF files for free. It offers essential tools you need to use for your PDF, and it’s pretty easy to use. With iLovePDF, you can easily merge, split, compress, rotate, convert, and watermark PDFs.
It integrates with your business and software with the PDF library API available, and this aids the growth of small businesses. iLovePDF has three plans to pick from, including two free options.
The premium option is used when you need to handle more enormous volumes of records, and a small monthly subscription is paid for the software. In addition, it offers extra features such as a user panel, a more secure connection, and control over PDF downloads.
You can choose a registered or unregistered account from the two free options to work and benefit from. The PDF converter software operates on a wide range of operating systems, browsers, and devices to enable smooth continuous work.
iLovePDF has been around for quite some time. Users love how efficient it is, and we’re sure you love all it offers you when you want to add image to PDF or add picture to PDF.
Guide on How to Insert Image into PDF Online With iLovePDF
Go to the iLovePDF’s Edit PDF tool and select the file you want to drag, drop, or edit from your drive.
Step 1. Select the Add image icon at the main toolbar to import a file
Step 2. Click on the image to drag and drop it into its proper position. To adjust or resize the image, click and drag the corners of the picture.
Step 3. Click on the Edit PDF button to download your edited PDF file or upload it to the cloud.
Conclusion
This article offers three helpful tips on how to add images to PDF. Now you can choose to use one of them to insert an image into your PDF document successfully.

