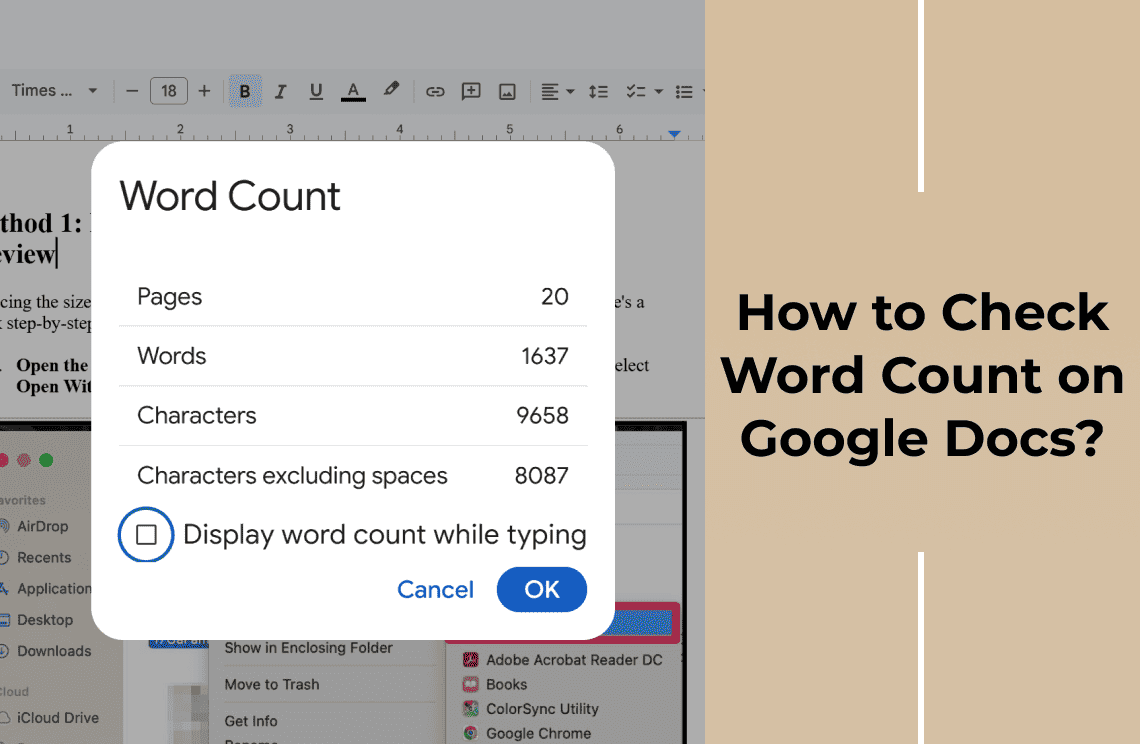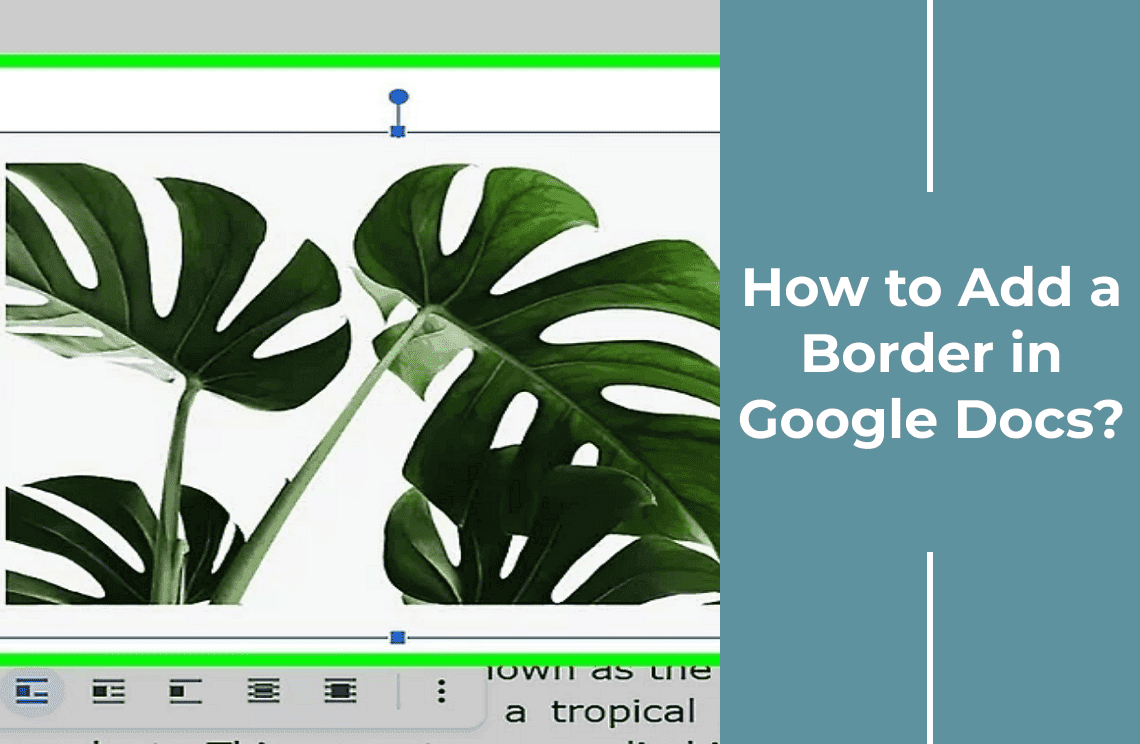
Adding borders to your Google Docs can significantly enhance the document's visual appeal and organization. Borders help segment information clearly, making it easier for readers to navigate and understand the content. They can also be used to highlight important sections, giving your document a polished and professional look. Whether you are preparing a report, a resume, or creative content, borders play a crucial role in improving readability and aesthetics.
Method 1: Using the Drawing Tool
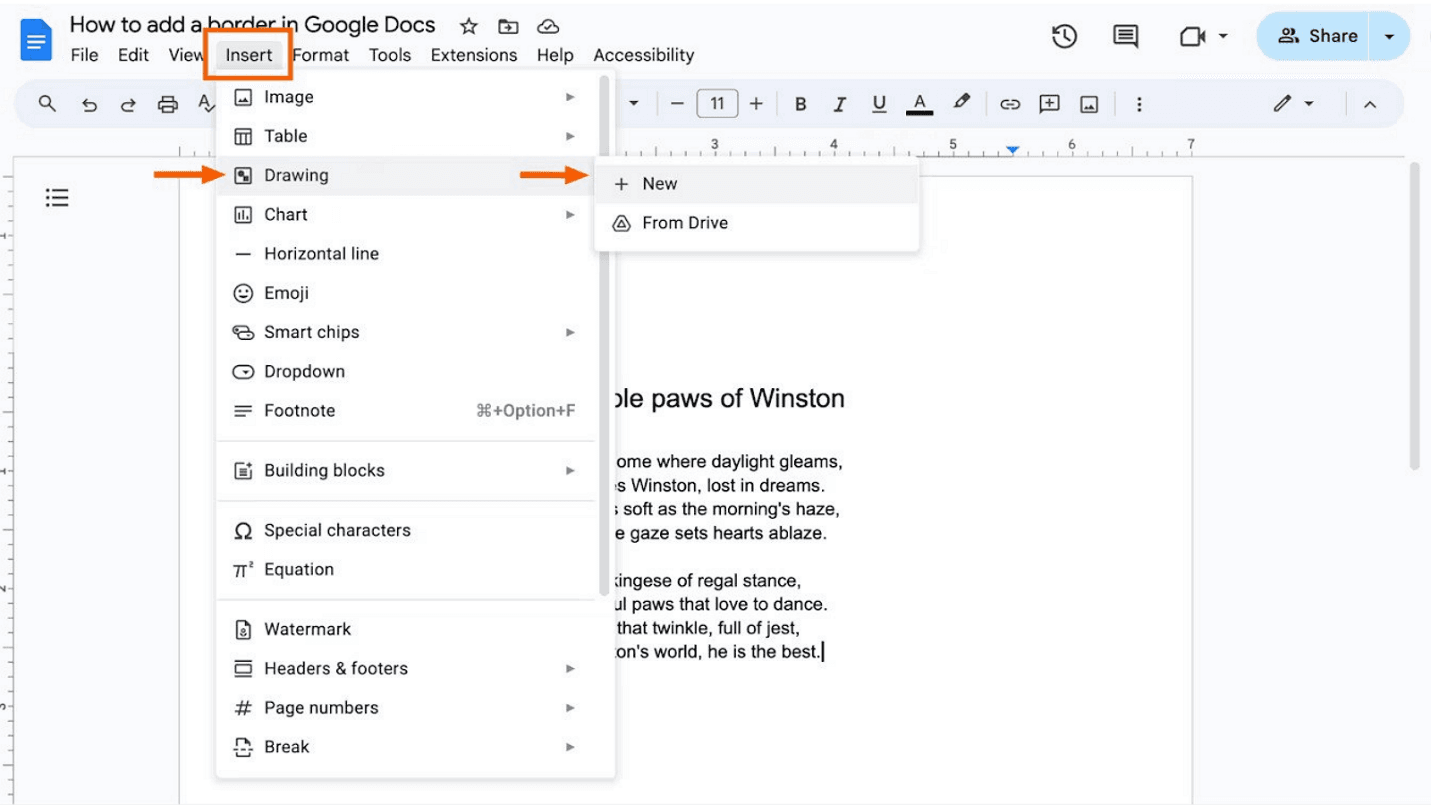
1. Navigate to the 'Insert' menu and select 'Drawing' > 'New'.
Open your document, click the 'Insert' menu, and choose 'Drawing,' then 'New' to open a new drawing canvas.
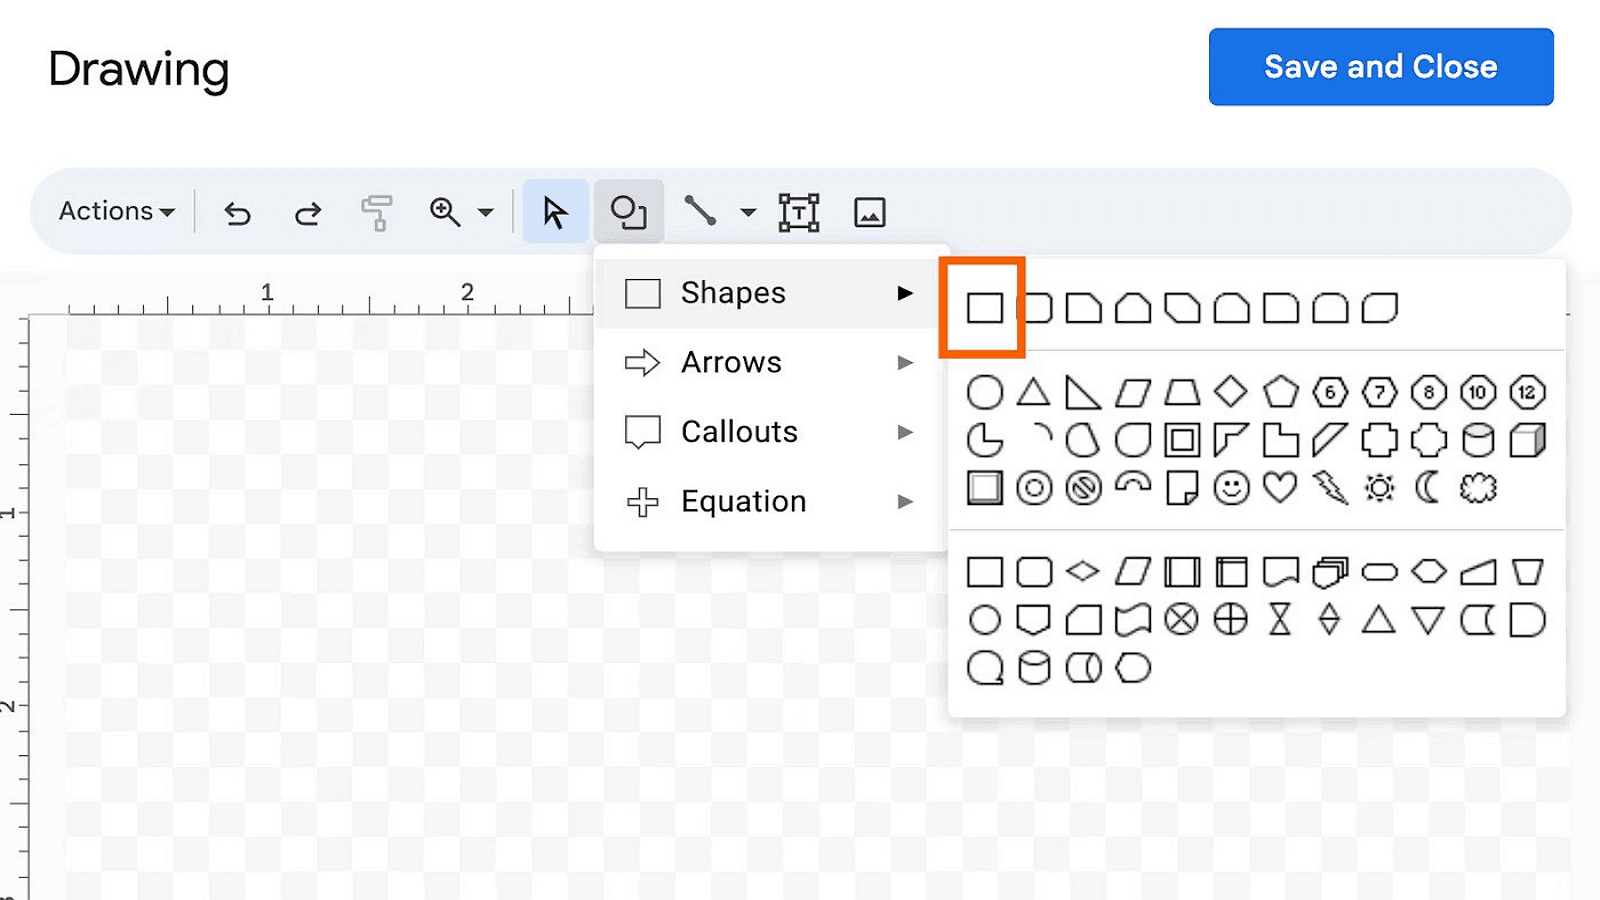
2. Choose a shape from the 'Shapes' menu.
Select a suitable shape, like a rectangle, from the 'Shapes' menu to create your border.
3. Draw the border and adjust its size.
Click and drag to draw the shape on the canvas, adjusting its size to fit the desired area.
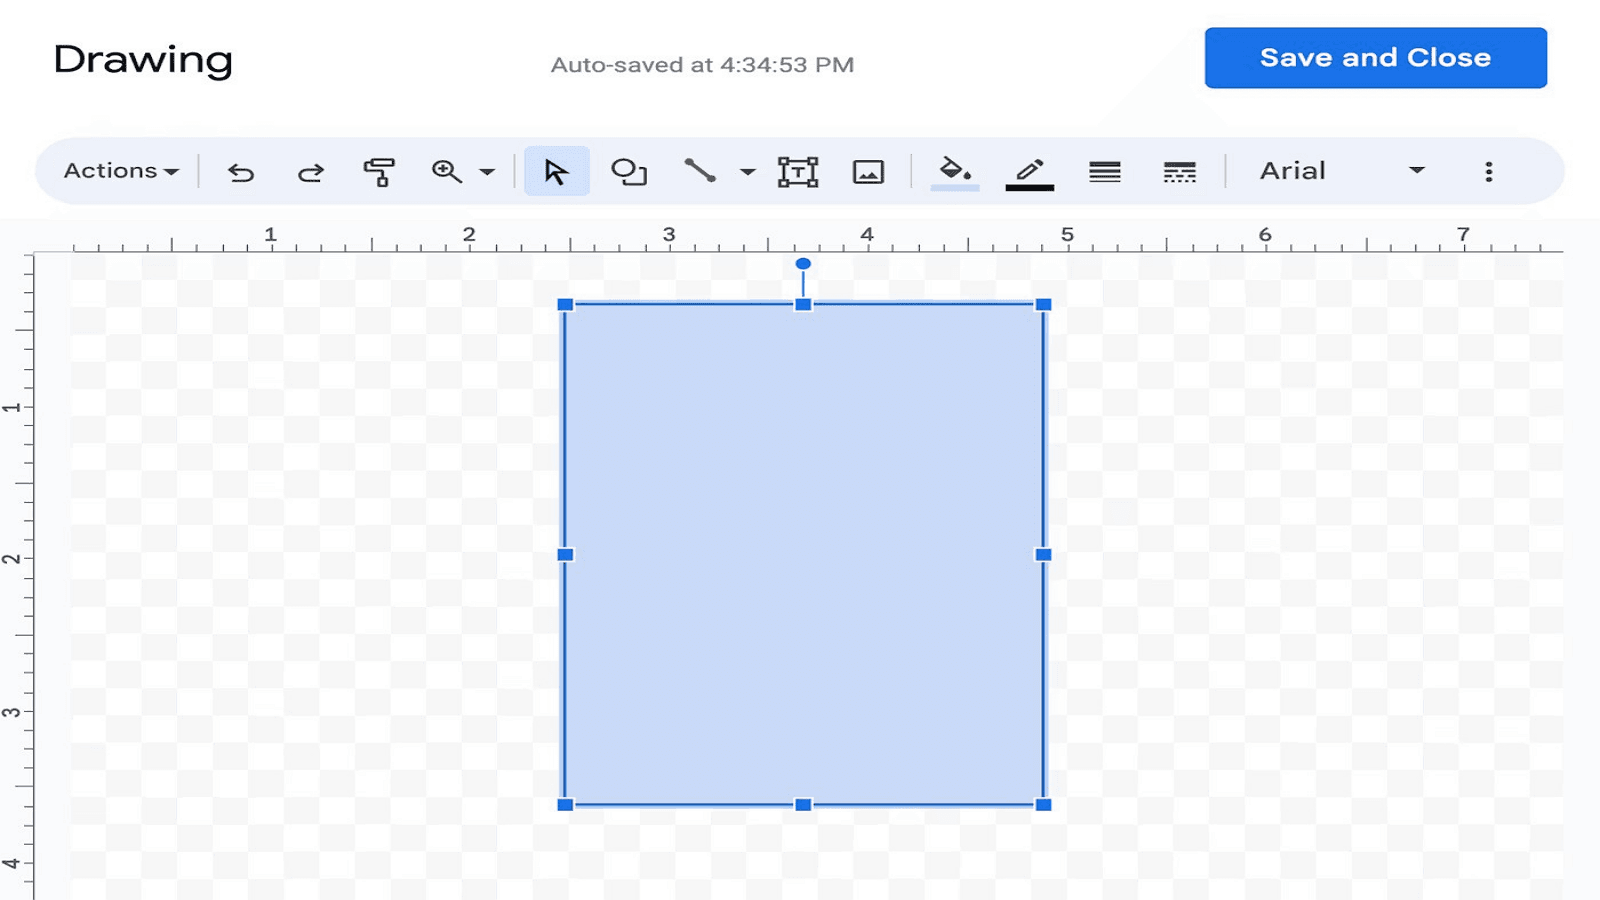
4. Customize the border color, style, and thickness.
Modify the shape's color, line style, and thickness using the toolbar options to suit your document's theme.
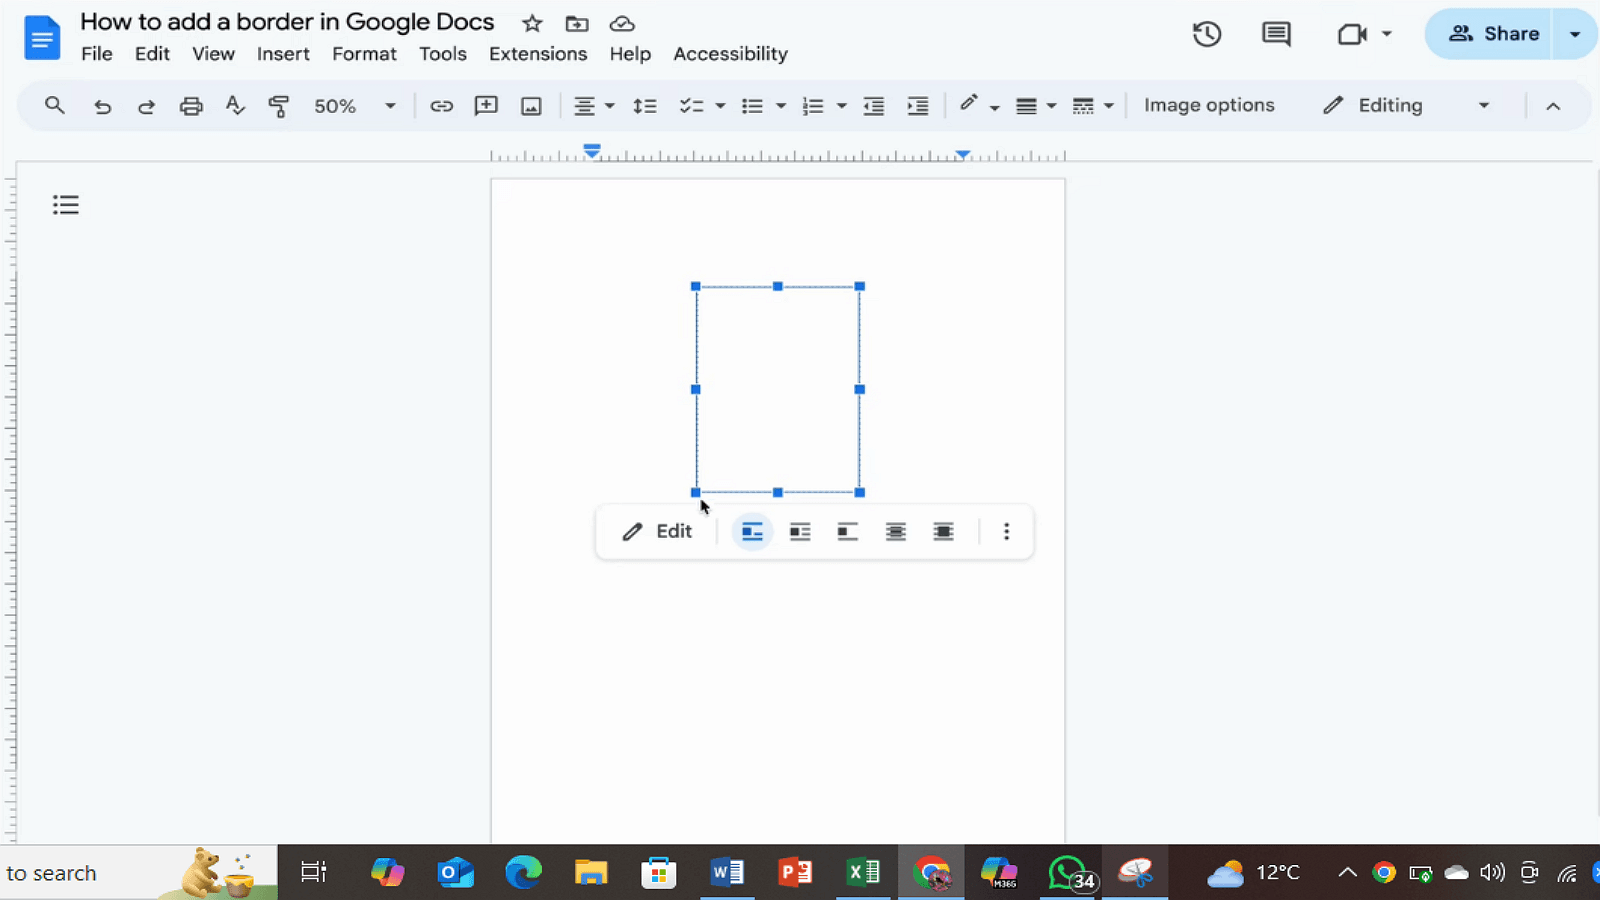
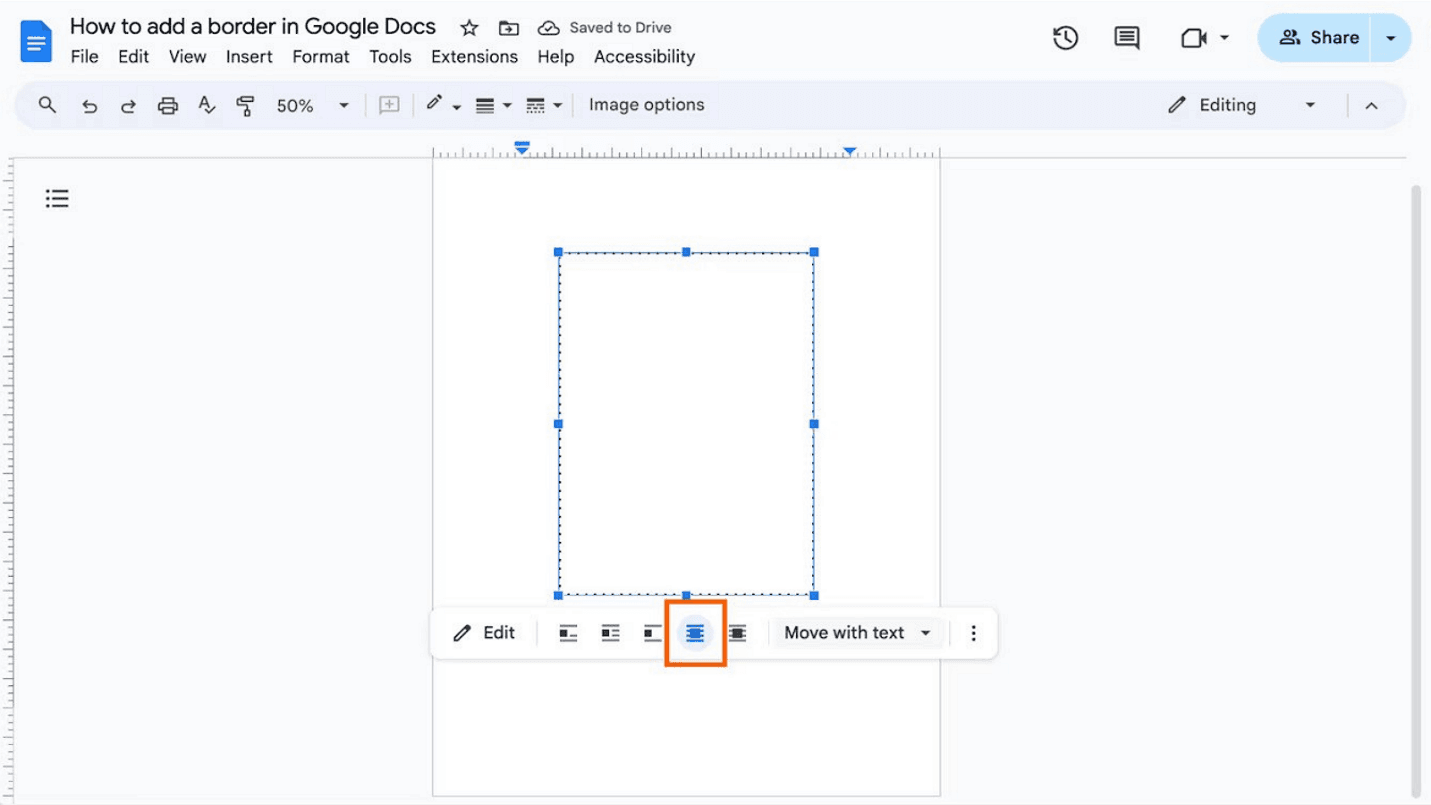
5. Position the border behind existing text.
Arrange the shape behind the text using the 'Arrange' menu options for proper layering.
Method 2: Using a Table
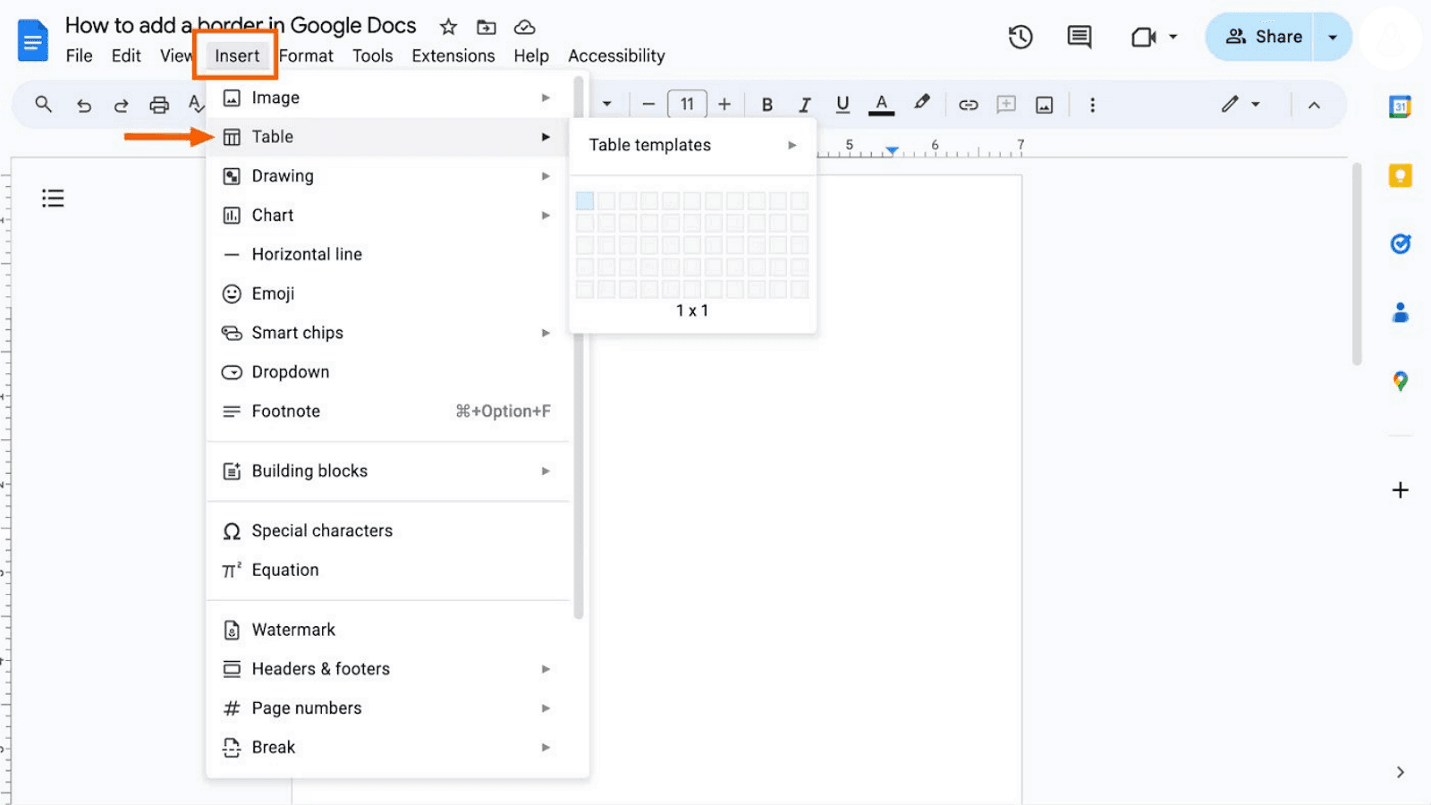
1. Insert a 1x1 table for border creation.
In your document, go to the 'Insert' menu and select 'Table', then insert a single cell (1x1) table.
2. Adjust the table size to fit the desired area.
Click and drag the borders of the table to resize it. Make it fit the area you want to surround.
3. Customize the border using tools for color, thickness, and style.
Use the table toolbar to change the border color, thickness, and style, tailoring it to your aesthetic preferences.
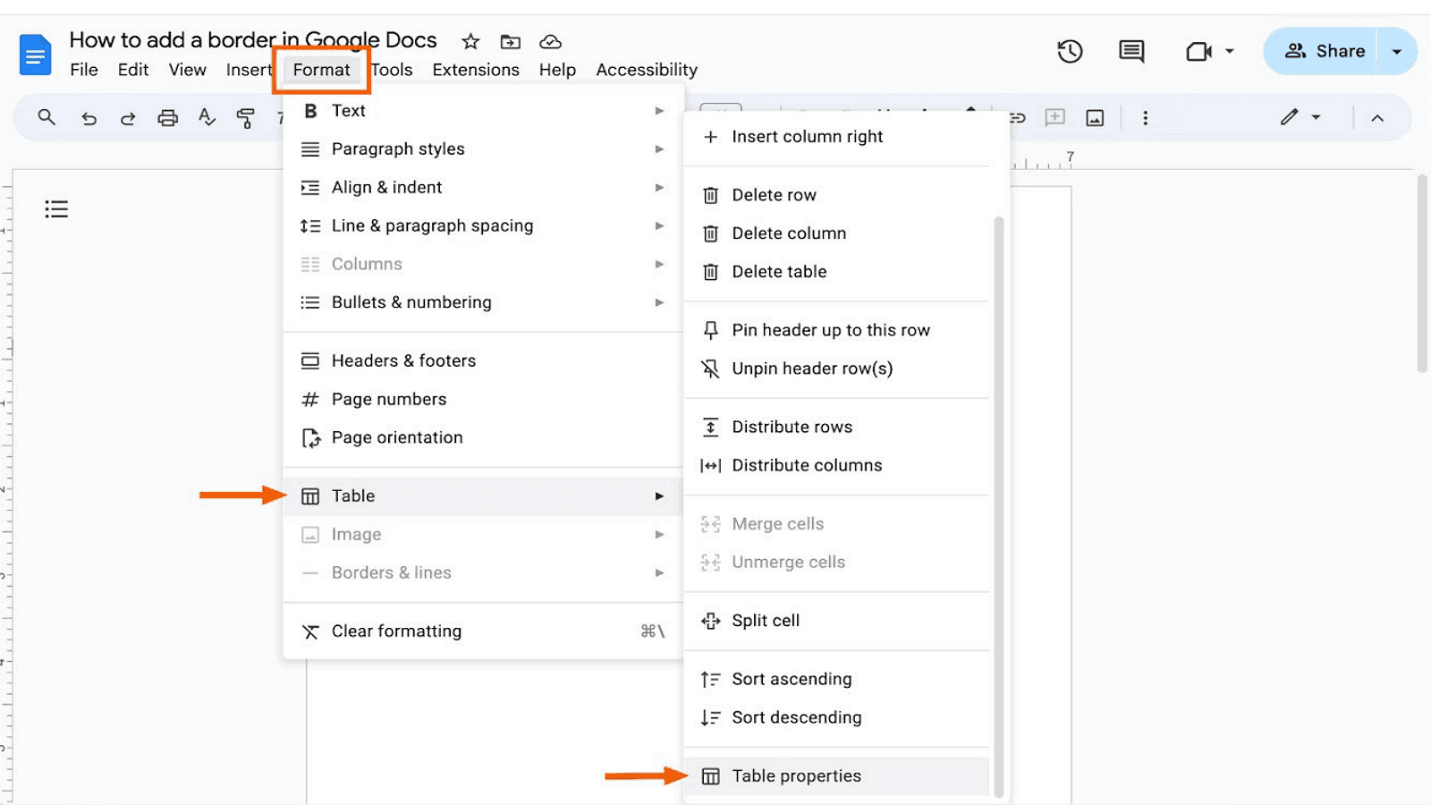
4. To modify the border style, navigate to Format > Table > Table Properties.
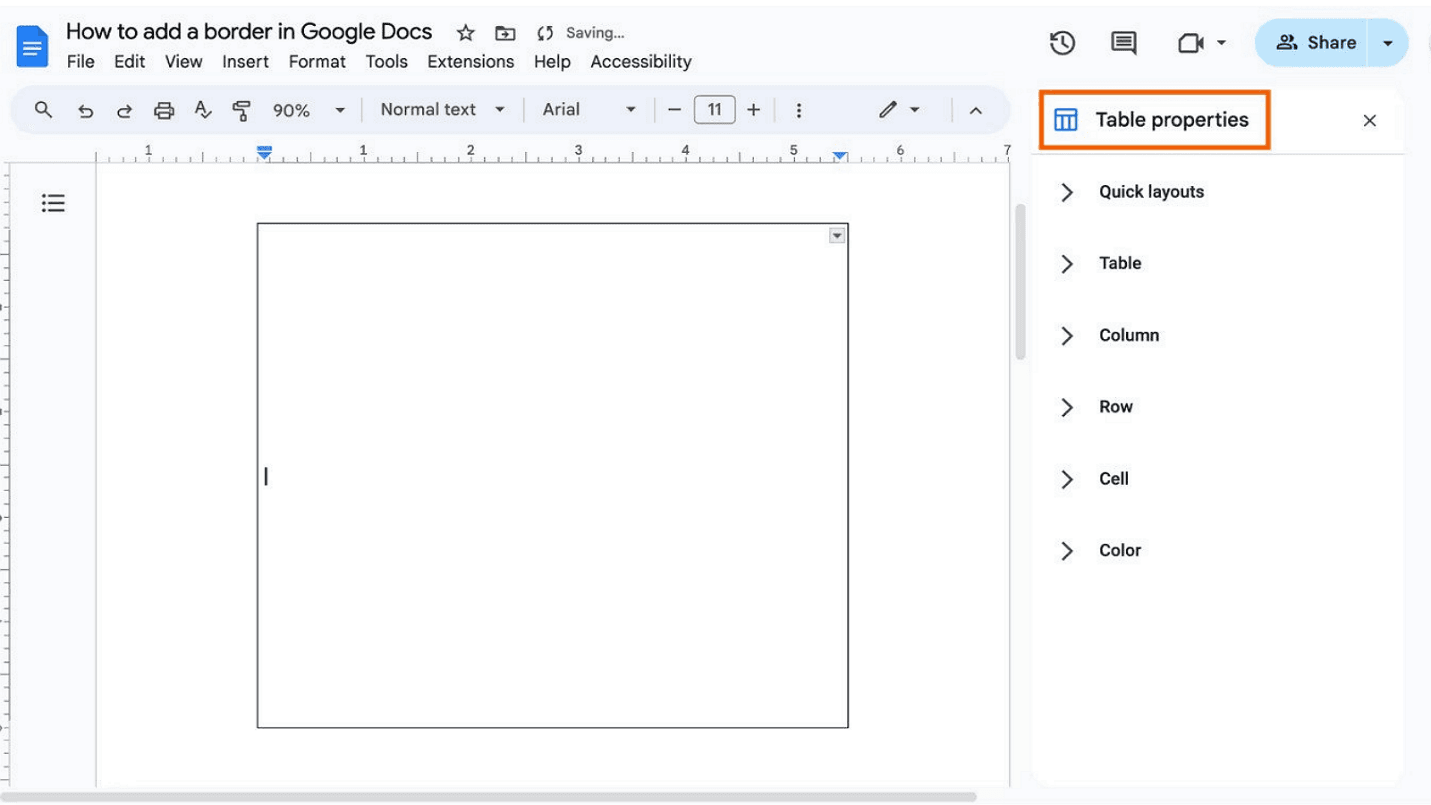
Below is an overview of the Table properties options you might frequently adjust when using a table as a border:
Cell: Adjust the vertical alignment of the cell (Top, Middle, or Bottom) to determine where your text begins. To increase space between the border and the text, modify the cell padding.
Color: Customize the border by changing its color, thickness, and fill.
Method 3: Adding a Paragraph Border
1. Select the paragraph to be bordered.
Highlight the specific paragraph you want to add a border to.
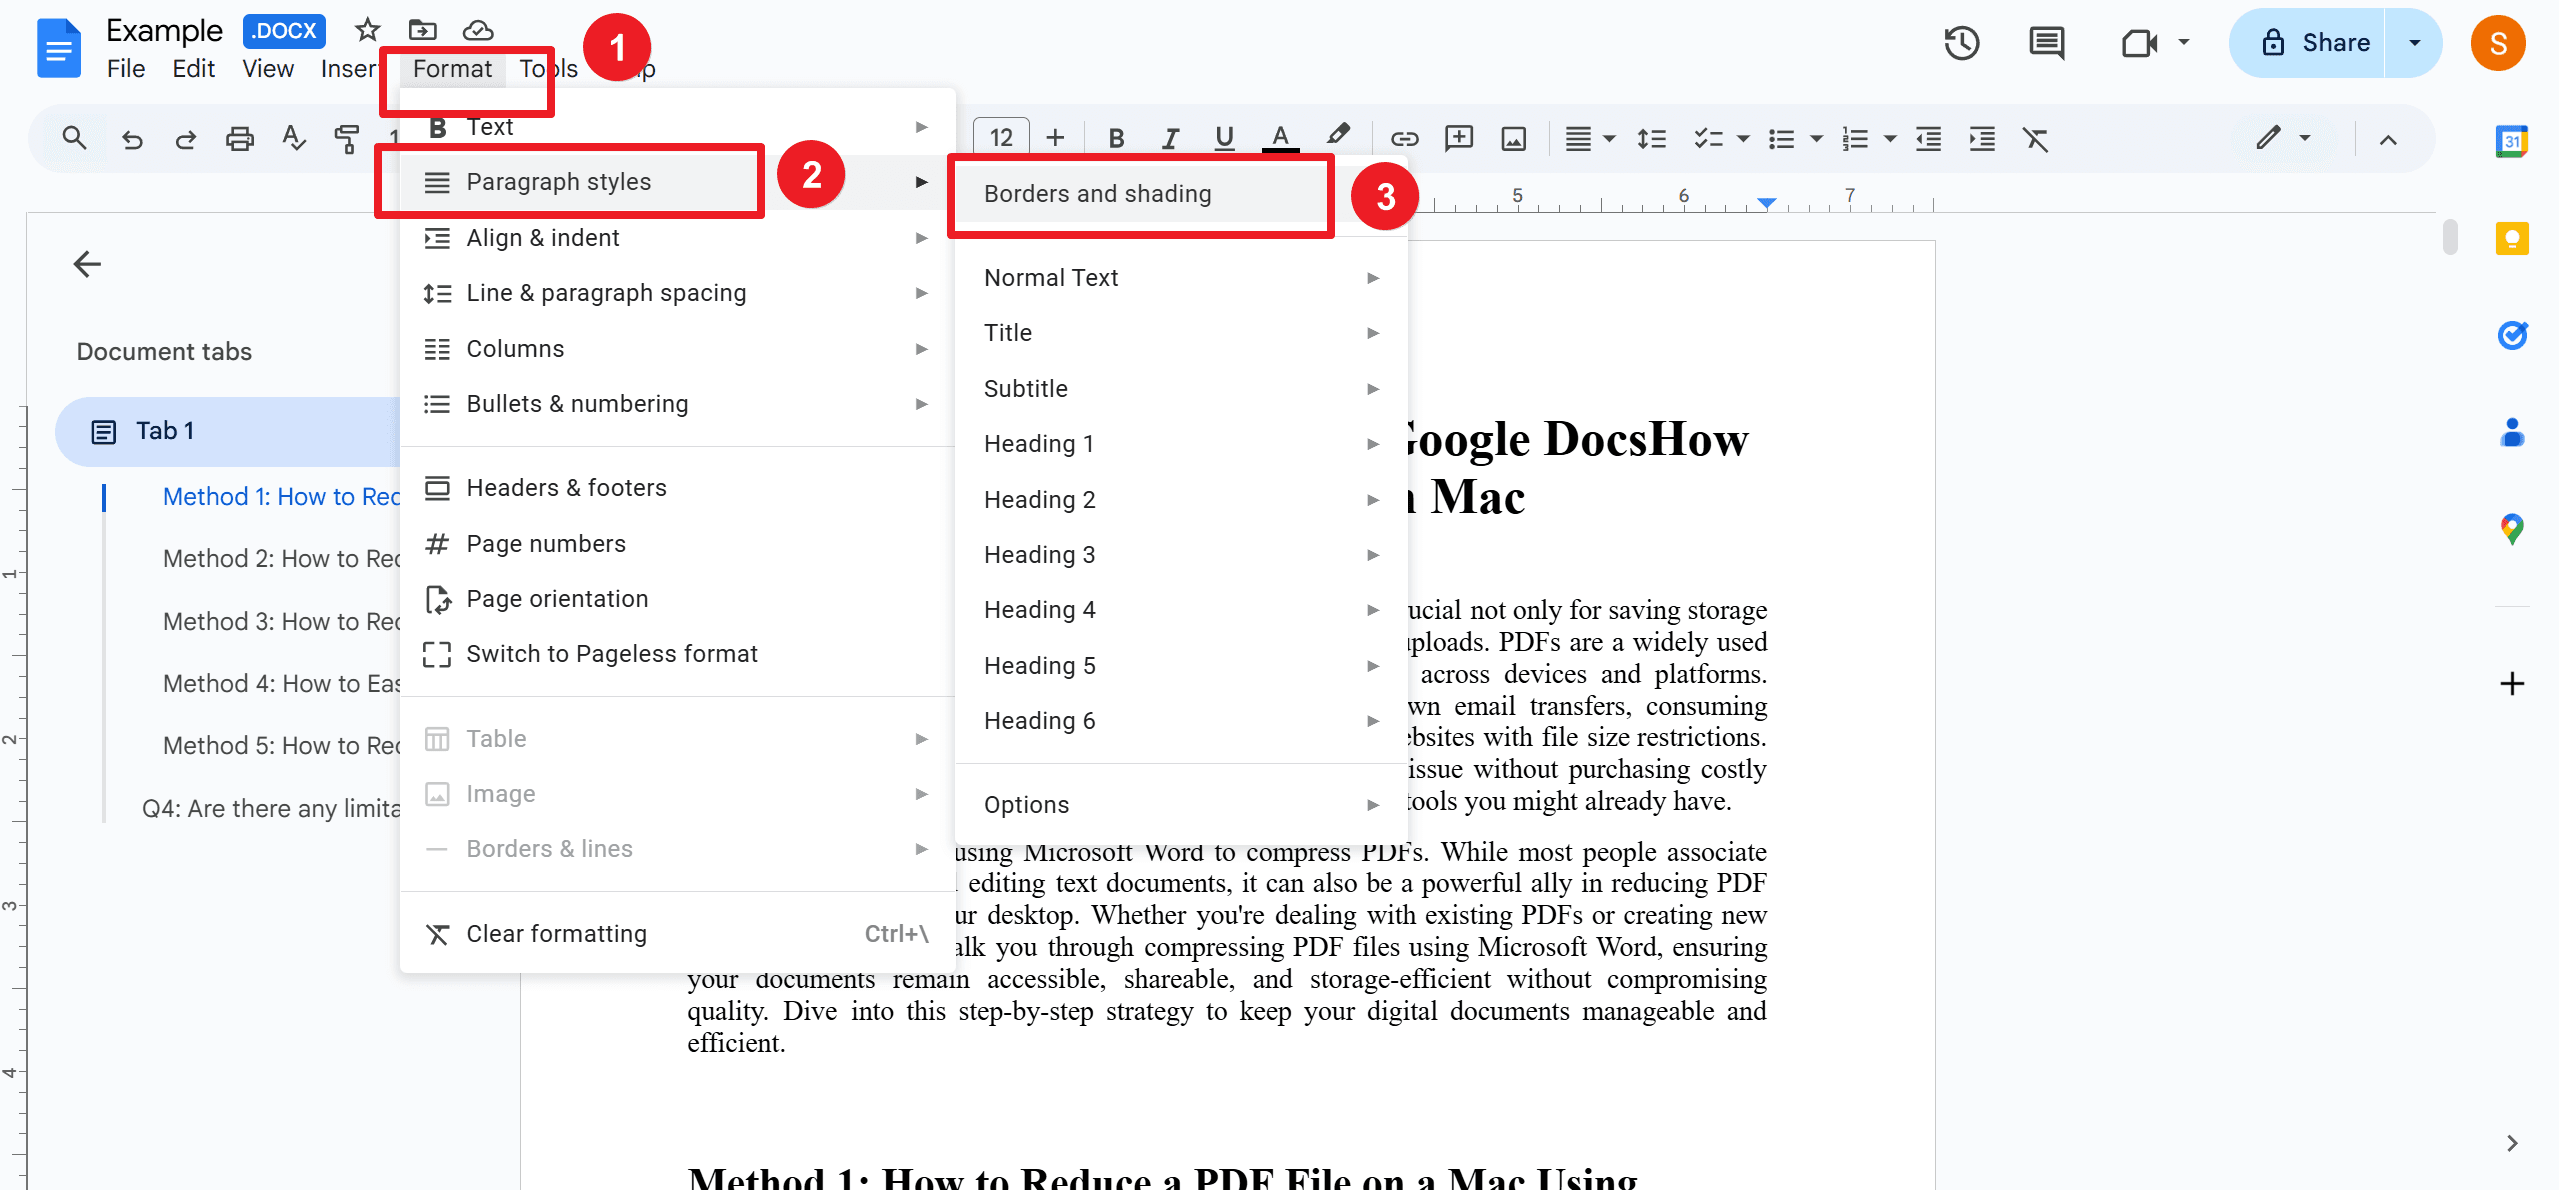
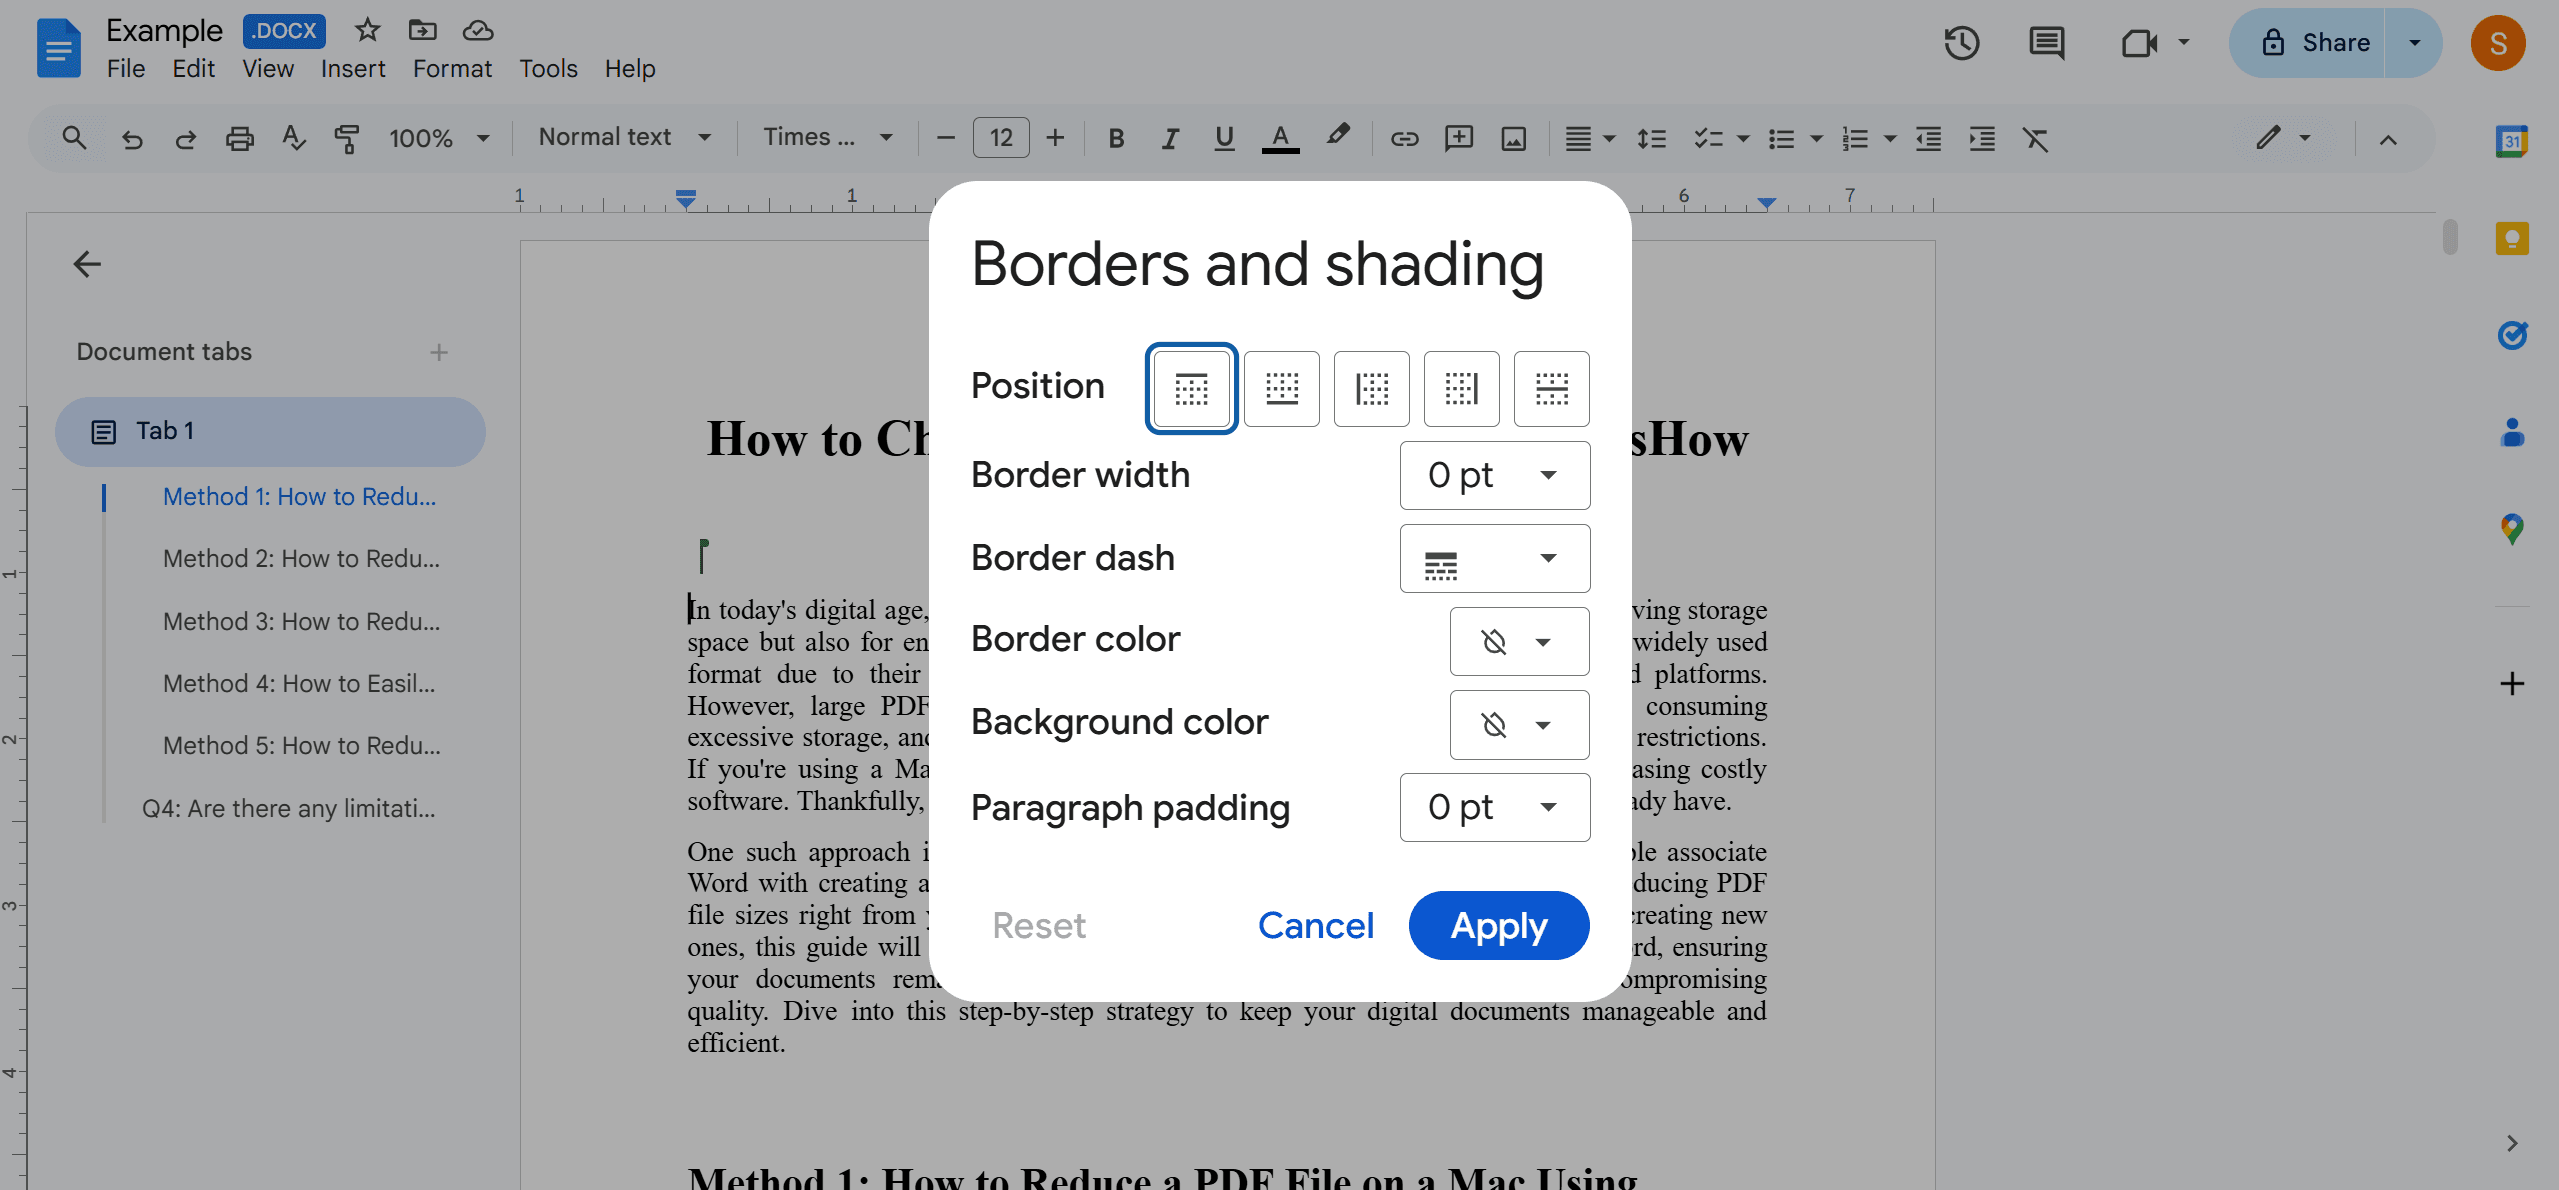
2. Access the 'Borders and Shading' tool via 'Format' > 'Paragraph Styles'.
Go to the 'Format' menu, select 'Paragraph Styles,' and choose 'Borders and Shading.'
3. Choose border placement and customize the appearance.
Decide the border placement—top, bottom, left, or right. Customize the color, style, and thickness to suit your needs.
If you prefer to place the border on only one side of the paragraph, choose the icon that indicates the side where you want the border to appear.
Click the 'Apply' button. This blue button is located in the bottom right corner of the Borders and Shading window.
Method 4: Adding an Image Border
1. Select or insert the desired image.
Choose the image you want to add a border to or insert a new image into your document.
2. Use the border color tool to add a border.
Once the image is selected, locate the border color tool in your image formatting options. Click on it and choose your preferred color for the border.
3. Adjust border thickness and style.
Customize the border's thickness and style (solid, dashed, or dotted) to your liking. Ensure the adjustments complement the image and the overall document design.
Method 5: Creating a Text Box
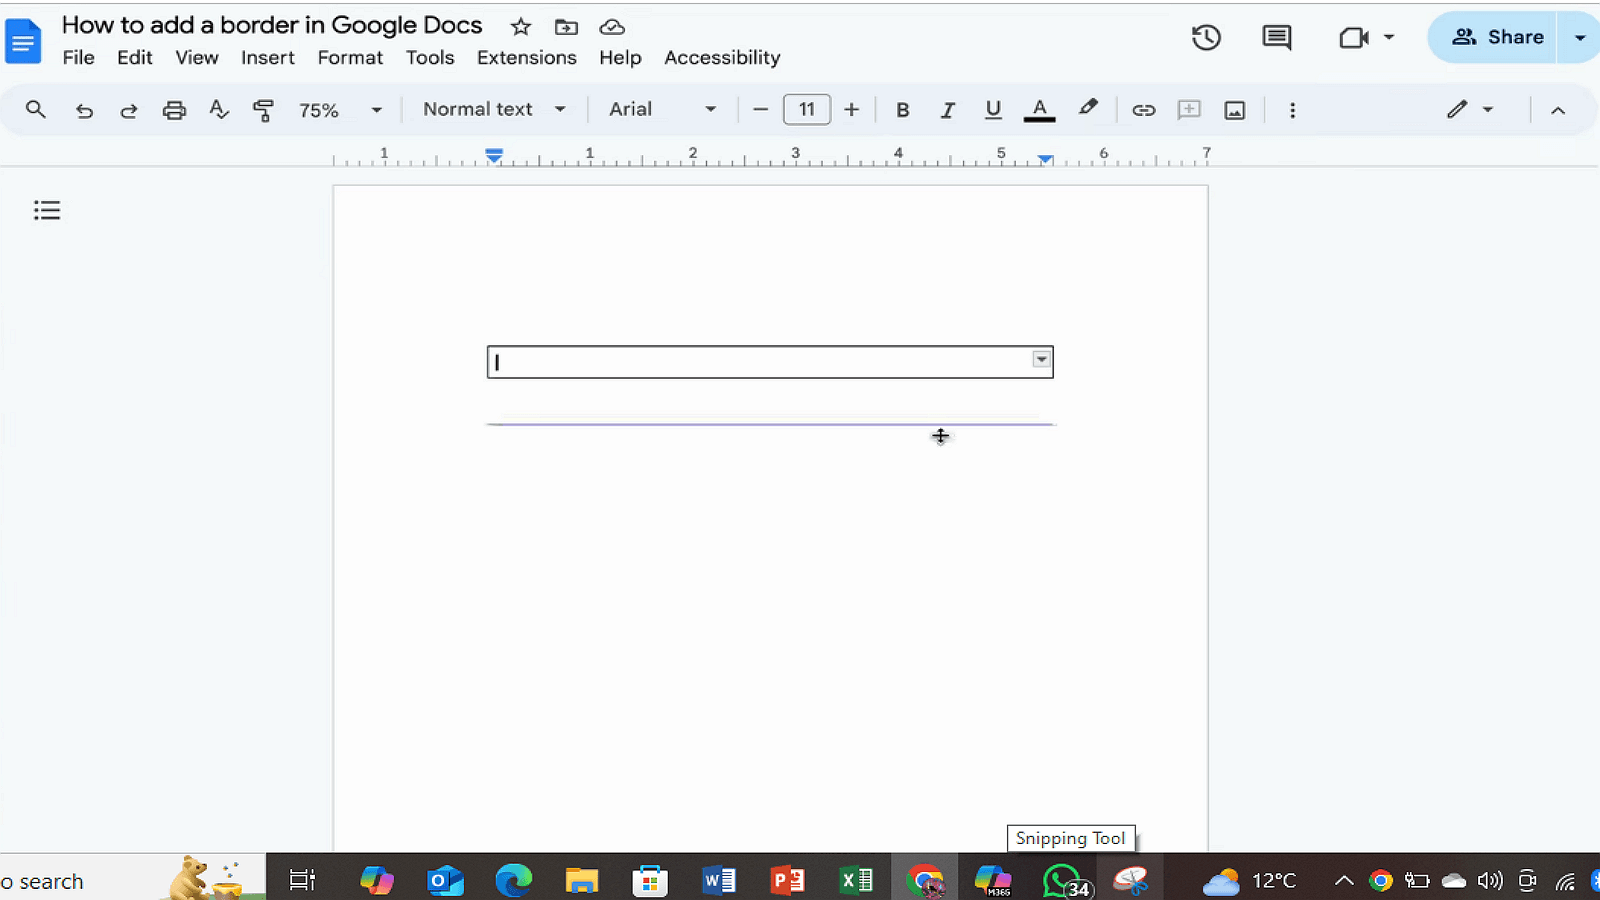
1. Insert a 1x1 table at the desired location.
Navigate to the 'Insert' menu in your document editor and choose 'Table.' Select a single cell, 1x1 table to position where you want the text box to appear.
2. Enter text into the table.
Click inside the newly created cell and type or paste the text you wish to feature prominently. This allows you to have a dedicated space for specific content.
3. Resize the text box by dragging its borders.
To make it narrower, position your cursor over the left or right edge of the text box until two arrows pointing in opposite directions appear. Click and drag the border until it reaches the size you want. The text inside will automatically adapt to fit the new dimensions. To adjust the height, do the same with the top or bottom edges.
4. Adjust the cell's borders and padding for proper layout.
Customize the cell's borders by right-clicking and selecting 'Table Properties' or similar options. Configure the border style and padding to make sure the text is visually appealing and adequately separated from other content.
Benefits of Adding Borders
1. Visual Appeal: Adding borders enhances the document's aesthetics by giving it a polished and professional look. Borders create a visual frame that makes the content more appealing and engaging to readers. This added touch of design can significantly improve the overall presentation of your document.
2. Organization: Borders improve organization by clearly segmenting different sections within the document, making it easier for readers to navigate. By visually separating different parts of the text, borders help readers quickly identify and focus on specific sections, ultimately enhancing the readability and comprehensibility of the information presented.
3. Highlighting: Using borders to frame key points, headings, or quotes helps to emphasize important information, ensuring it stands out. This visual emphasis draws attention to critical sections, guiding the reader’s focus and making sure that essential details are not overlooked or missed in the broader context.
Troubleshooting Common Issues
1. Border Not Visible: If your border is not visible, check the color contrast and border thickness. Ensure the border color is distinct enough from the background to stand out. Also, increase the border thickness if needed for better visibility.
2. Misaligned Borders: To fix misaligned borders, adjust the margins and padding of your elements. Proper alignment helps maintain a neat and organized appearance in your document. Check the layout settings to ensure everything is properly positioned.
3. Borders Overlapping Text: When borders overlap text, it's essential to ensure proper text wrapping settings. Go to your text box or border properties, and adjust the text wrapping options to prevent any overlap. This ensures readability and a clean presentation.
Final Thoughts
To recap, various methods such as adding padding, experimenting with colors, layering borders, and using custom shapes can significantly enhance your document's aesthetics. These techniques contribute to creating professional, educational, and creative projects that stand out.
Moreover, for those seeking to optimize their document management and processing skills, it is highly recommended to consult How-to & Tips Articles | PDF Agile and Google Docs Tips and Tricks | PDF Agile. These resources offer in-depth insights and practical guidance on Microsoft Word and PDF, enabling users to harness the full potential of this ubiquitous tool.