Adding crop marks in PDFs is essential to ensure a precise cut when preparing a document for professional printing. It gives your finished product a polished and professional expression. Walk with us through the process of adding crop marks in PDF using Adobe Acrobat. Also, learn how to create a bleed border in Acrobat for designs that extend to the page edge. Explore the differences between Adobe Acrobat Pro and Standard versions to help you choose the right tool for adding crop marks. These elements can greatly enhance your printed materials quality. So, they come out strictly as projected. Mastering these techniques will improve the workflow and output of a seasoned designer or a beginner.
What Are Crop Marks?
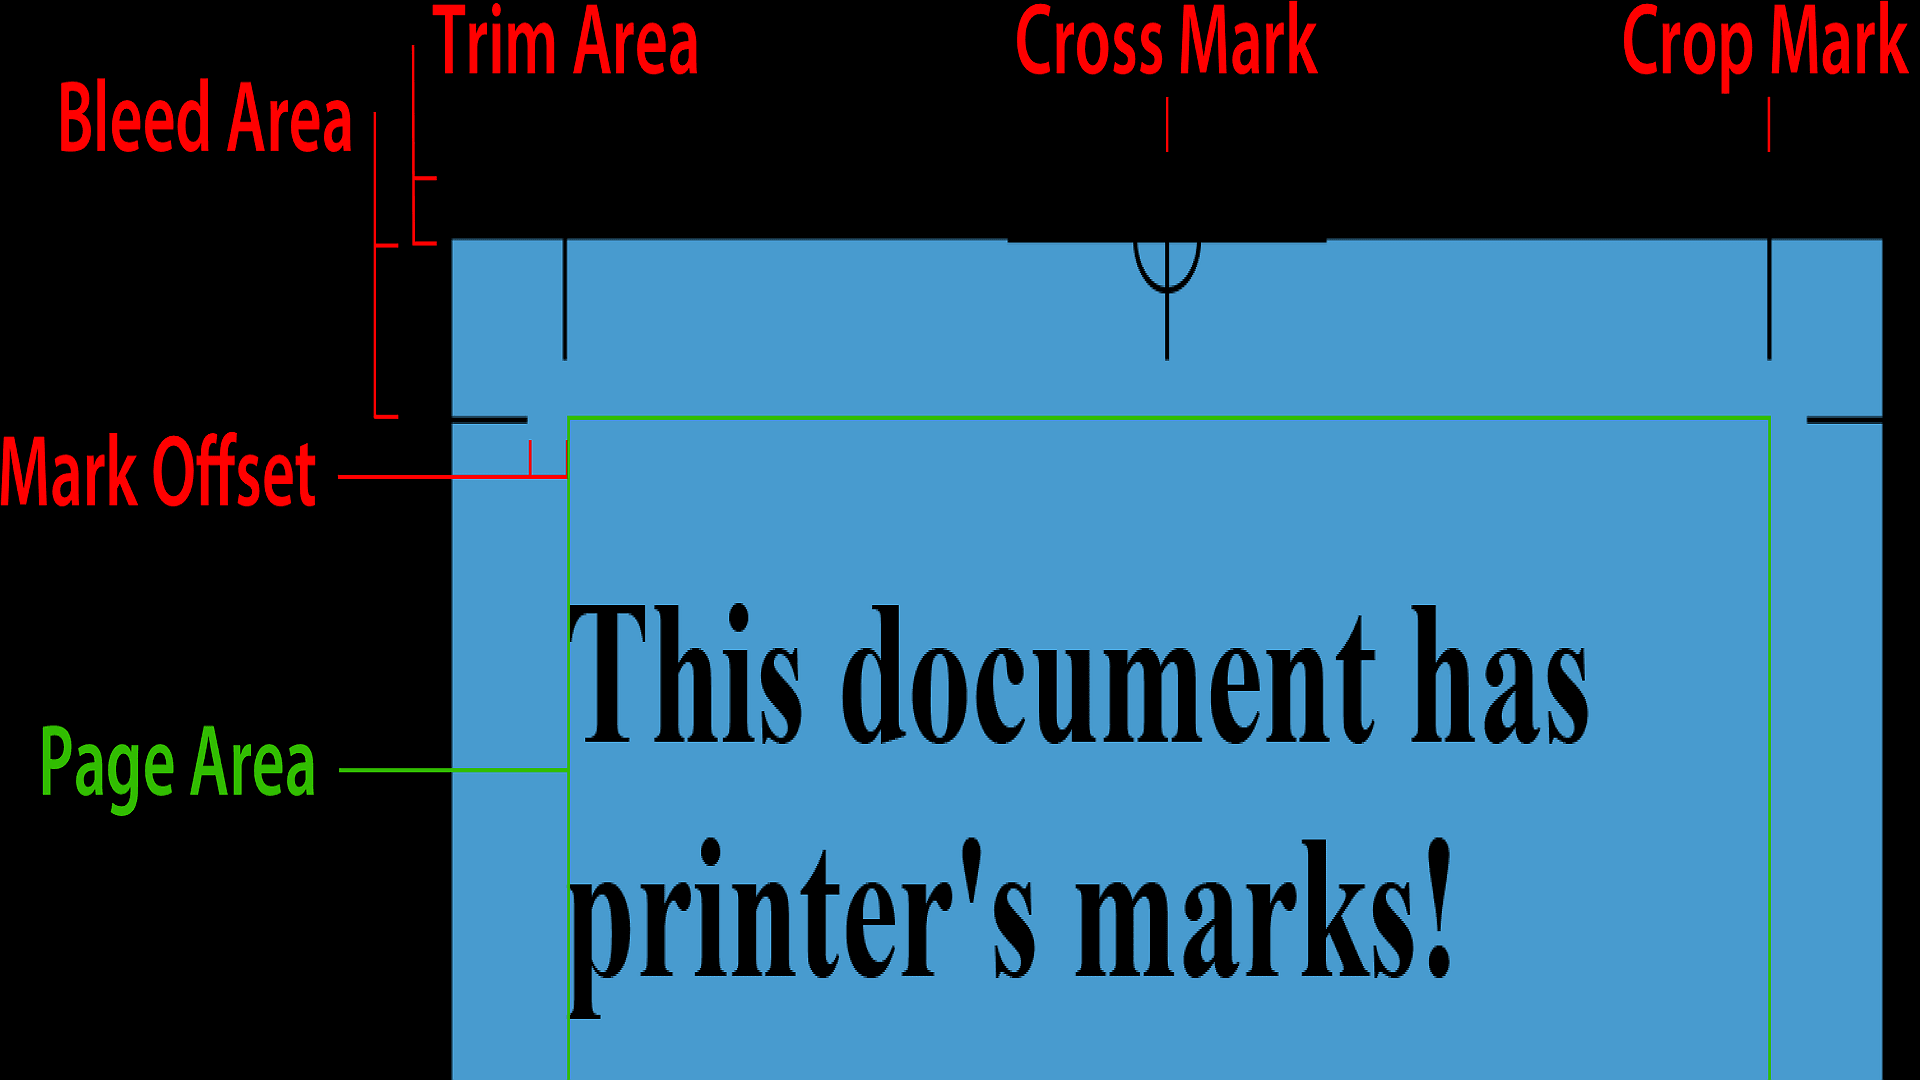
Trim marks or Crop marks are thin lines printed at the corners of your document. They indicate where to cut the paper. Yet, these marks ensure that your final printed material is trimmed precisely to the intended size. It can be important for designs with minimal margins or full bleed images at all.
Why Are Crop Marks Important?
1. Precision: Crop marks provide a visual guide for the printer to follow. So, your document is cut accurately without any presumption. It maintains your design's integrity so no critical elements are trimmed during the cutting process.
2. Consistency: Crop marks size and trim all copies of your printed material uniformly. It maintains a professional appearance when involving multiple pages or elements.
3. Professionalism: Crop marks emphasize your attention to detail and commitment to work. Professional printers expect these marks to be present. Their absence can signify inexperience or omission. They demonstrate that you understand industry standards and are serious about producing high-quality printed stuff.
When to Use Crop Marks?
1. Graphic Design
- Ensures precision in cutting complex designs.
- Maintains the integrity of borderless designs.
2. Publishing
- Essential for books and magazines.
- Maintains consistency in printed media.
3. Marketing Materials
- Necessary for business cards.
- Important for brochures and flyers.
- Achieves a professional and uniform look.
How Do Crop Marks Work?
They are typically placed outside your document bleed area. However, the bleed area is the part of your design that extends beyond the final trim size. So no white edges remain after cutting. However, placing crop marks outside this area ensures they won't be visible in the final printed section.
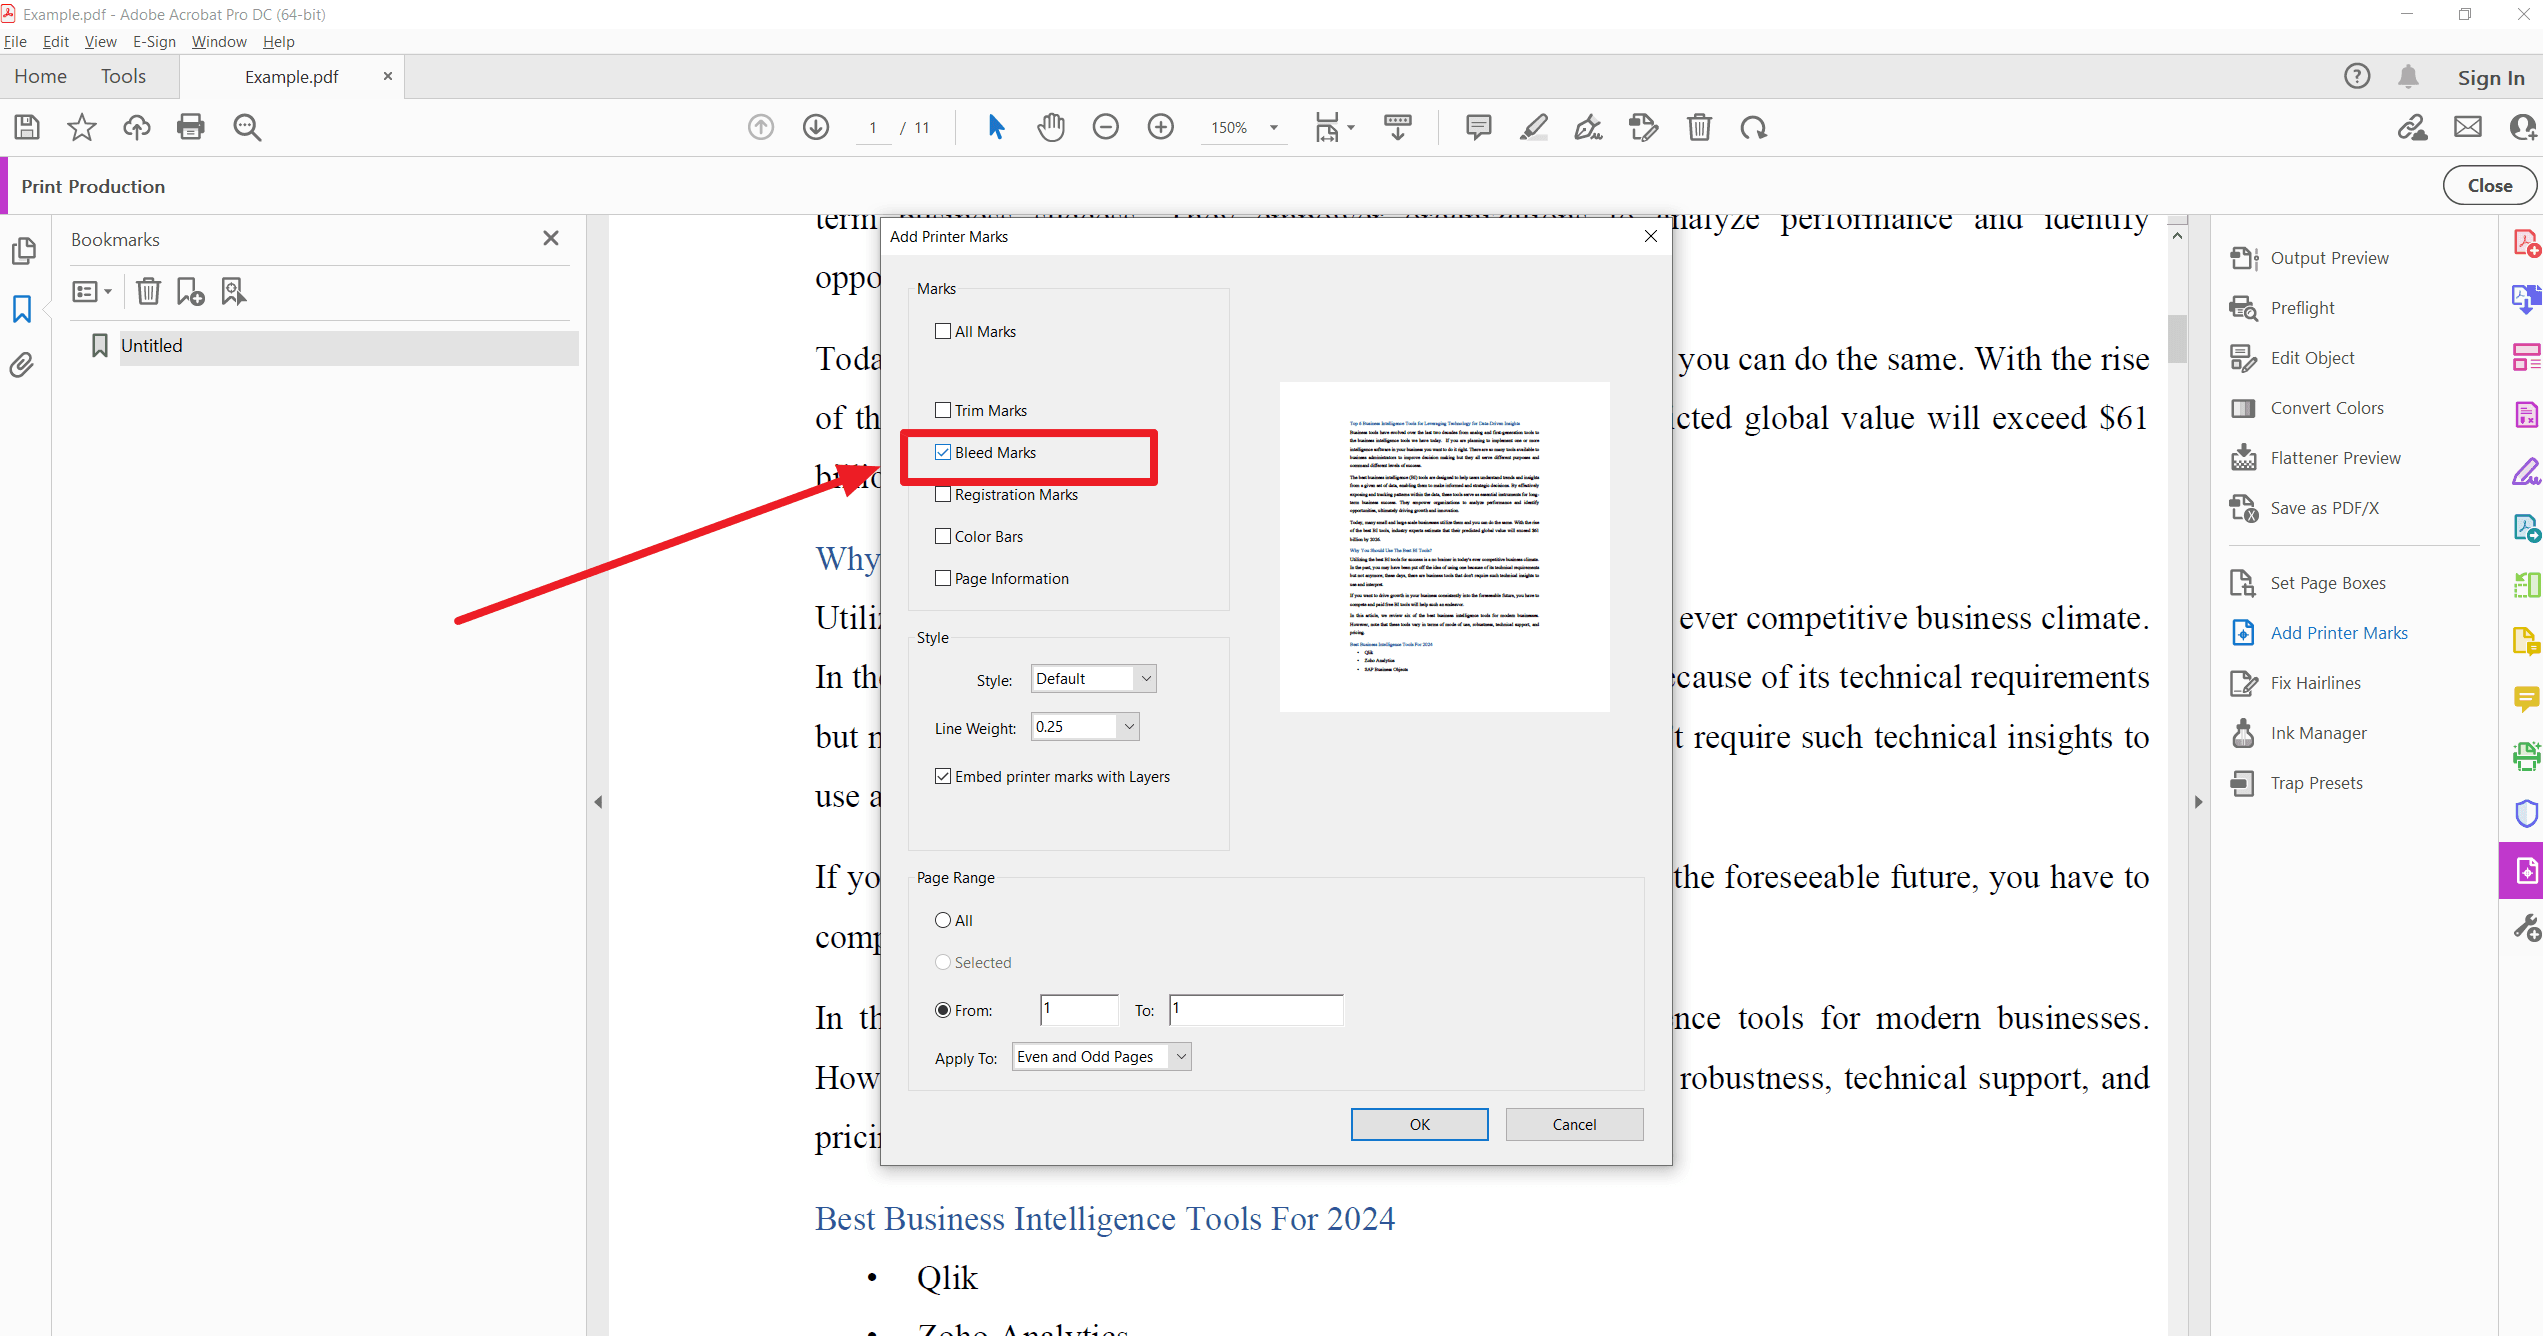
Method 1: Adding Crop Marks in Adobe Acrobat
So, now that you understand the importance of crop marks. Let us explore the practical steps for adding them to your PDF using Adobe Acrobat software. The simple process ensures your documents are print-ready using Adobe Acrobat Pro or Standard.
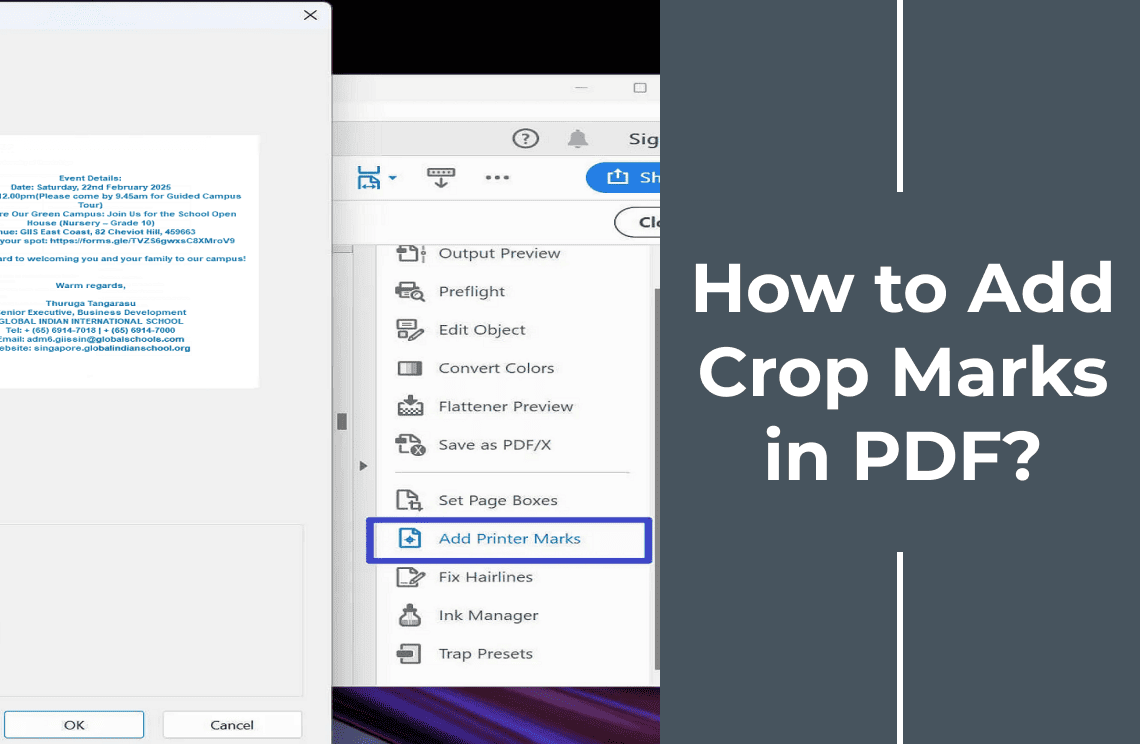
1. Open PDF: Launch Adobe Acrobat and open the PDF file to add crop marks.
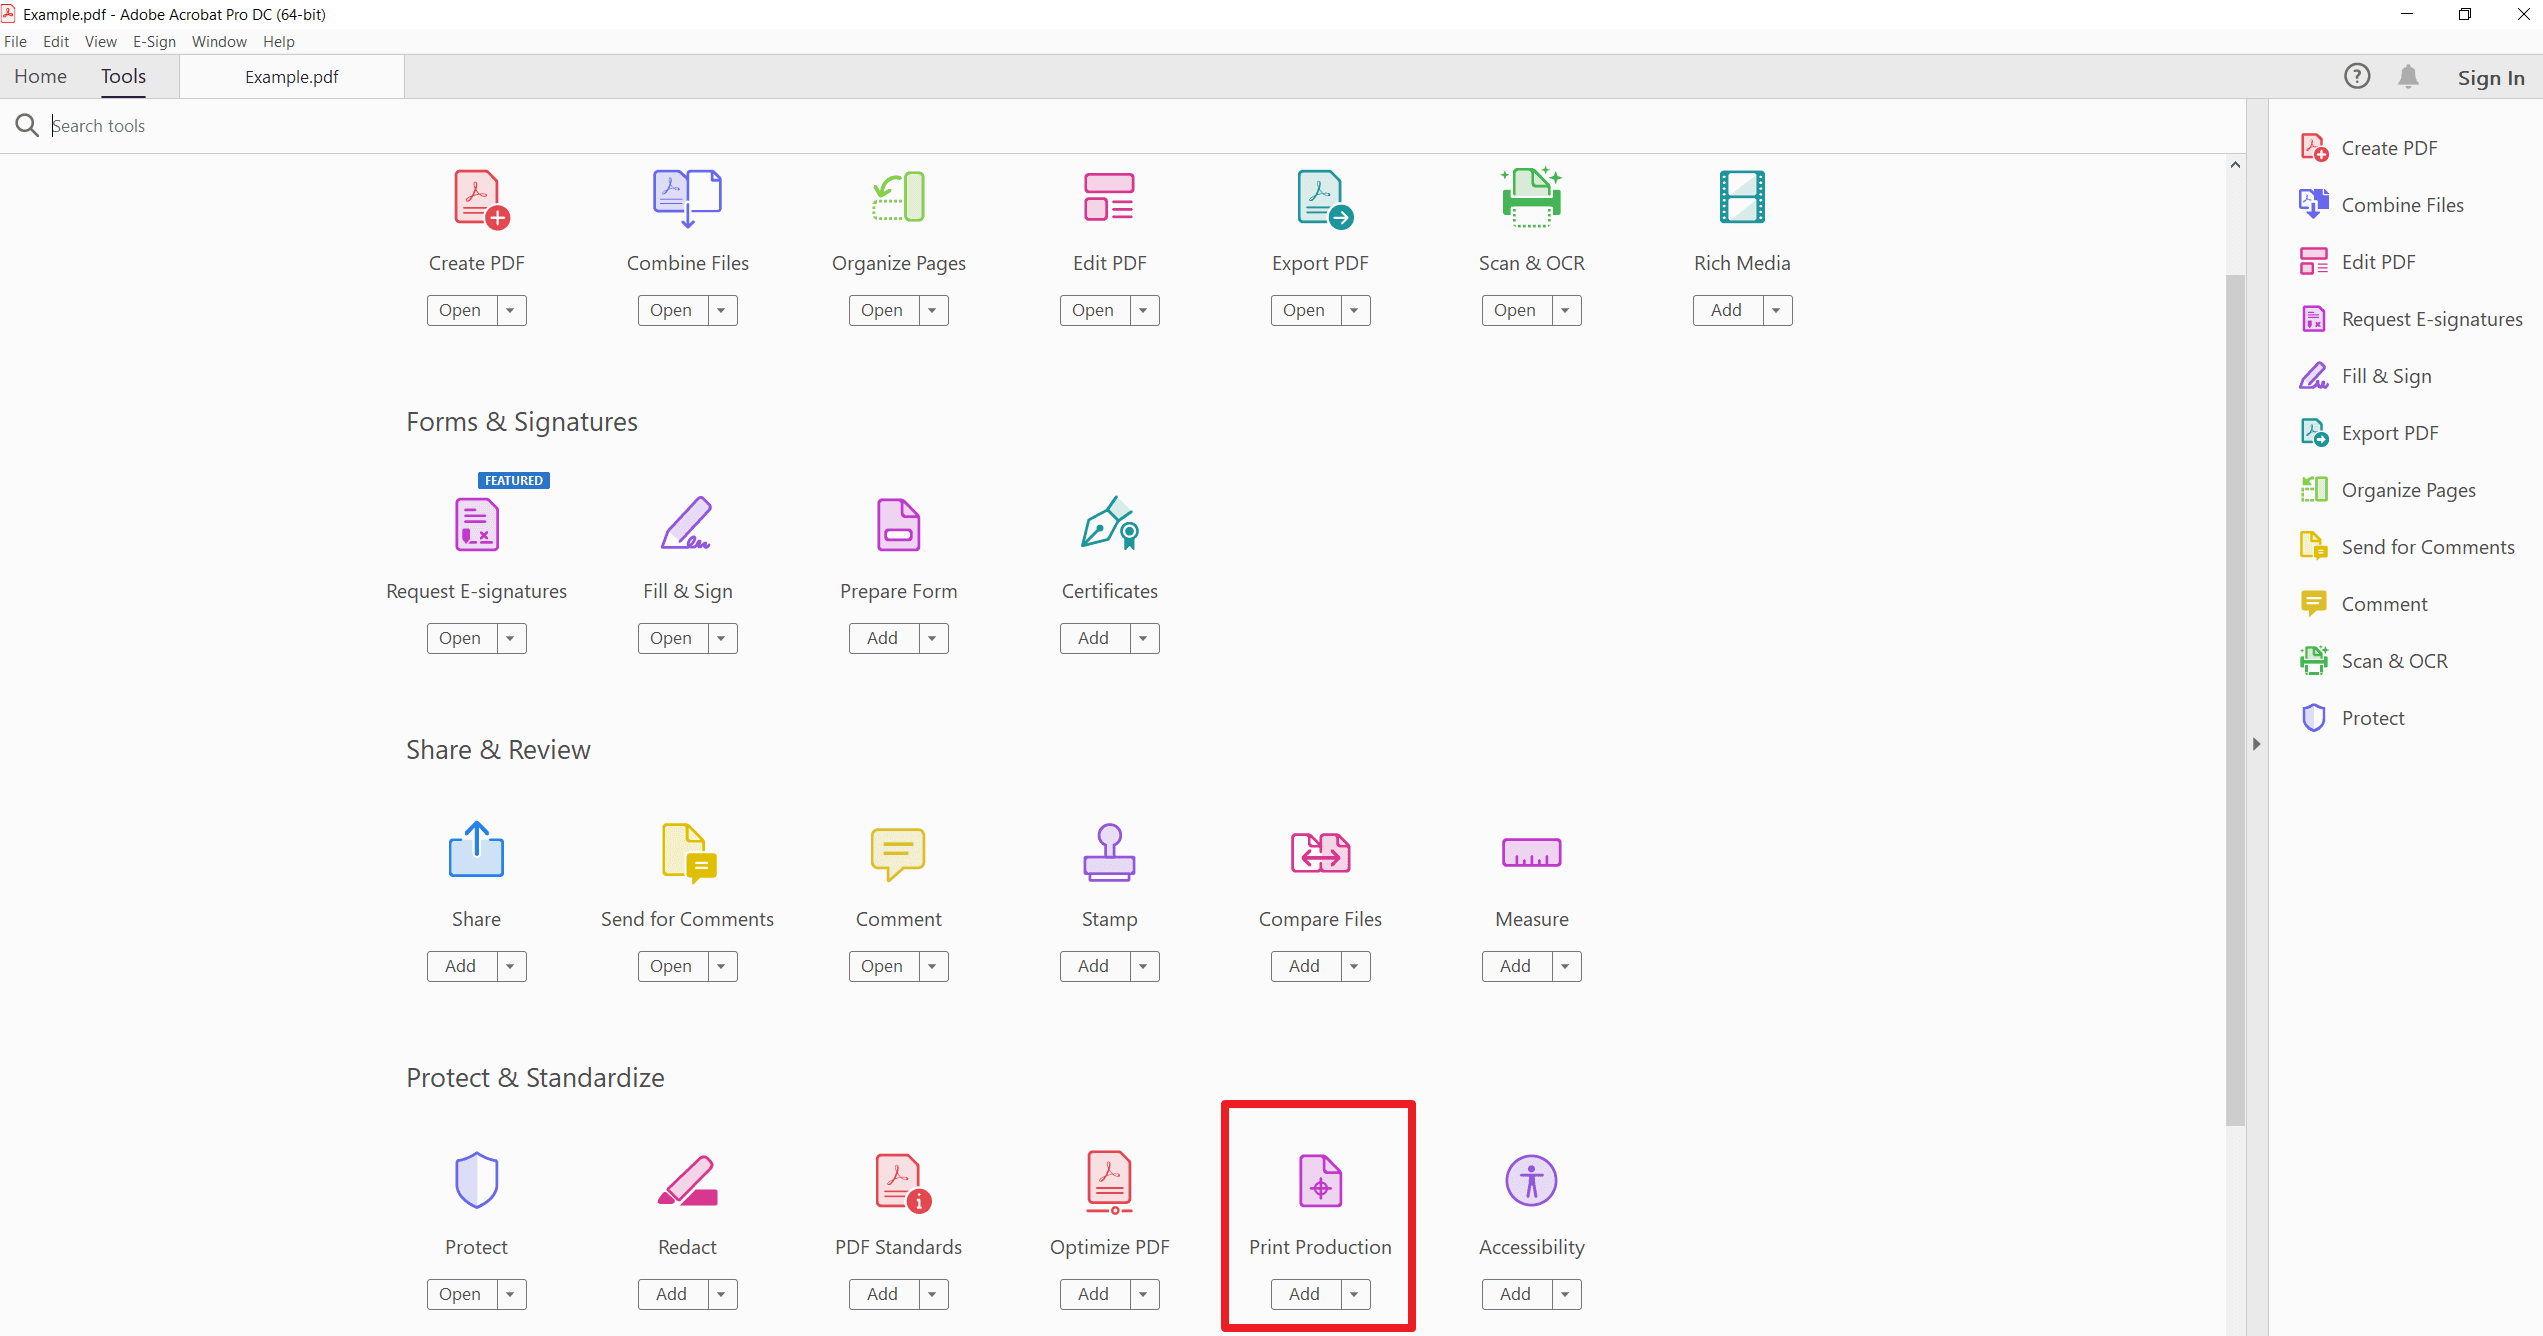
2. Access Print Production Tool: Go to "Tools" in the upper left corner and select "Print Production."
3. Choose Add Printer Marks: In the Print Production panel, click on "Add Printer Marks."
4. Select Crop Marks: A dialog box will appear. Check the box labeled "Crop Marks" to include them.
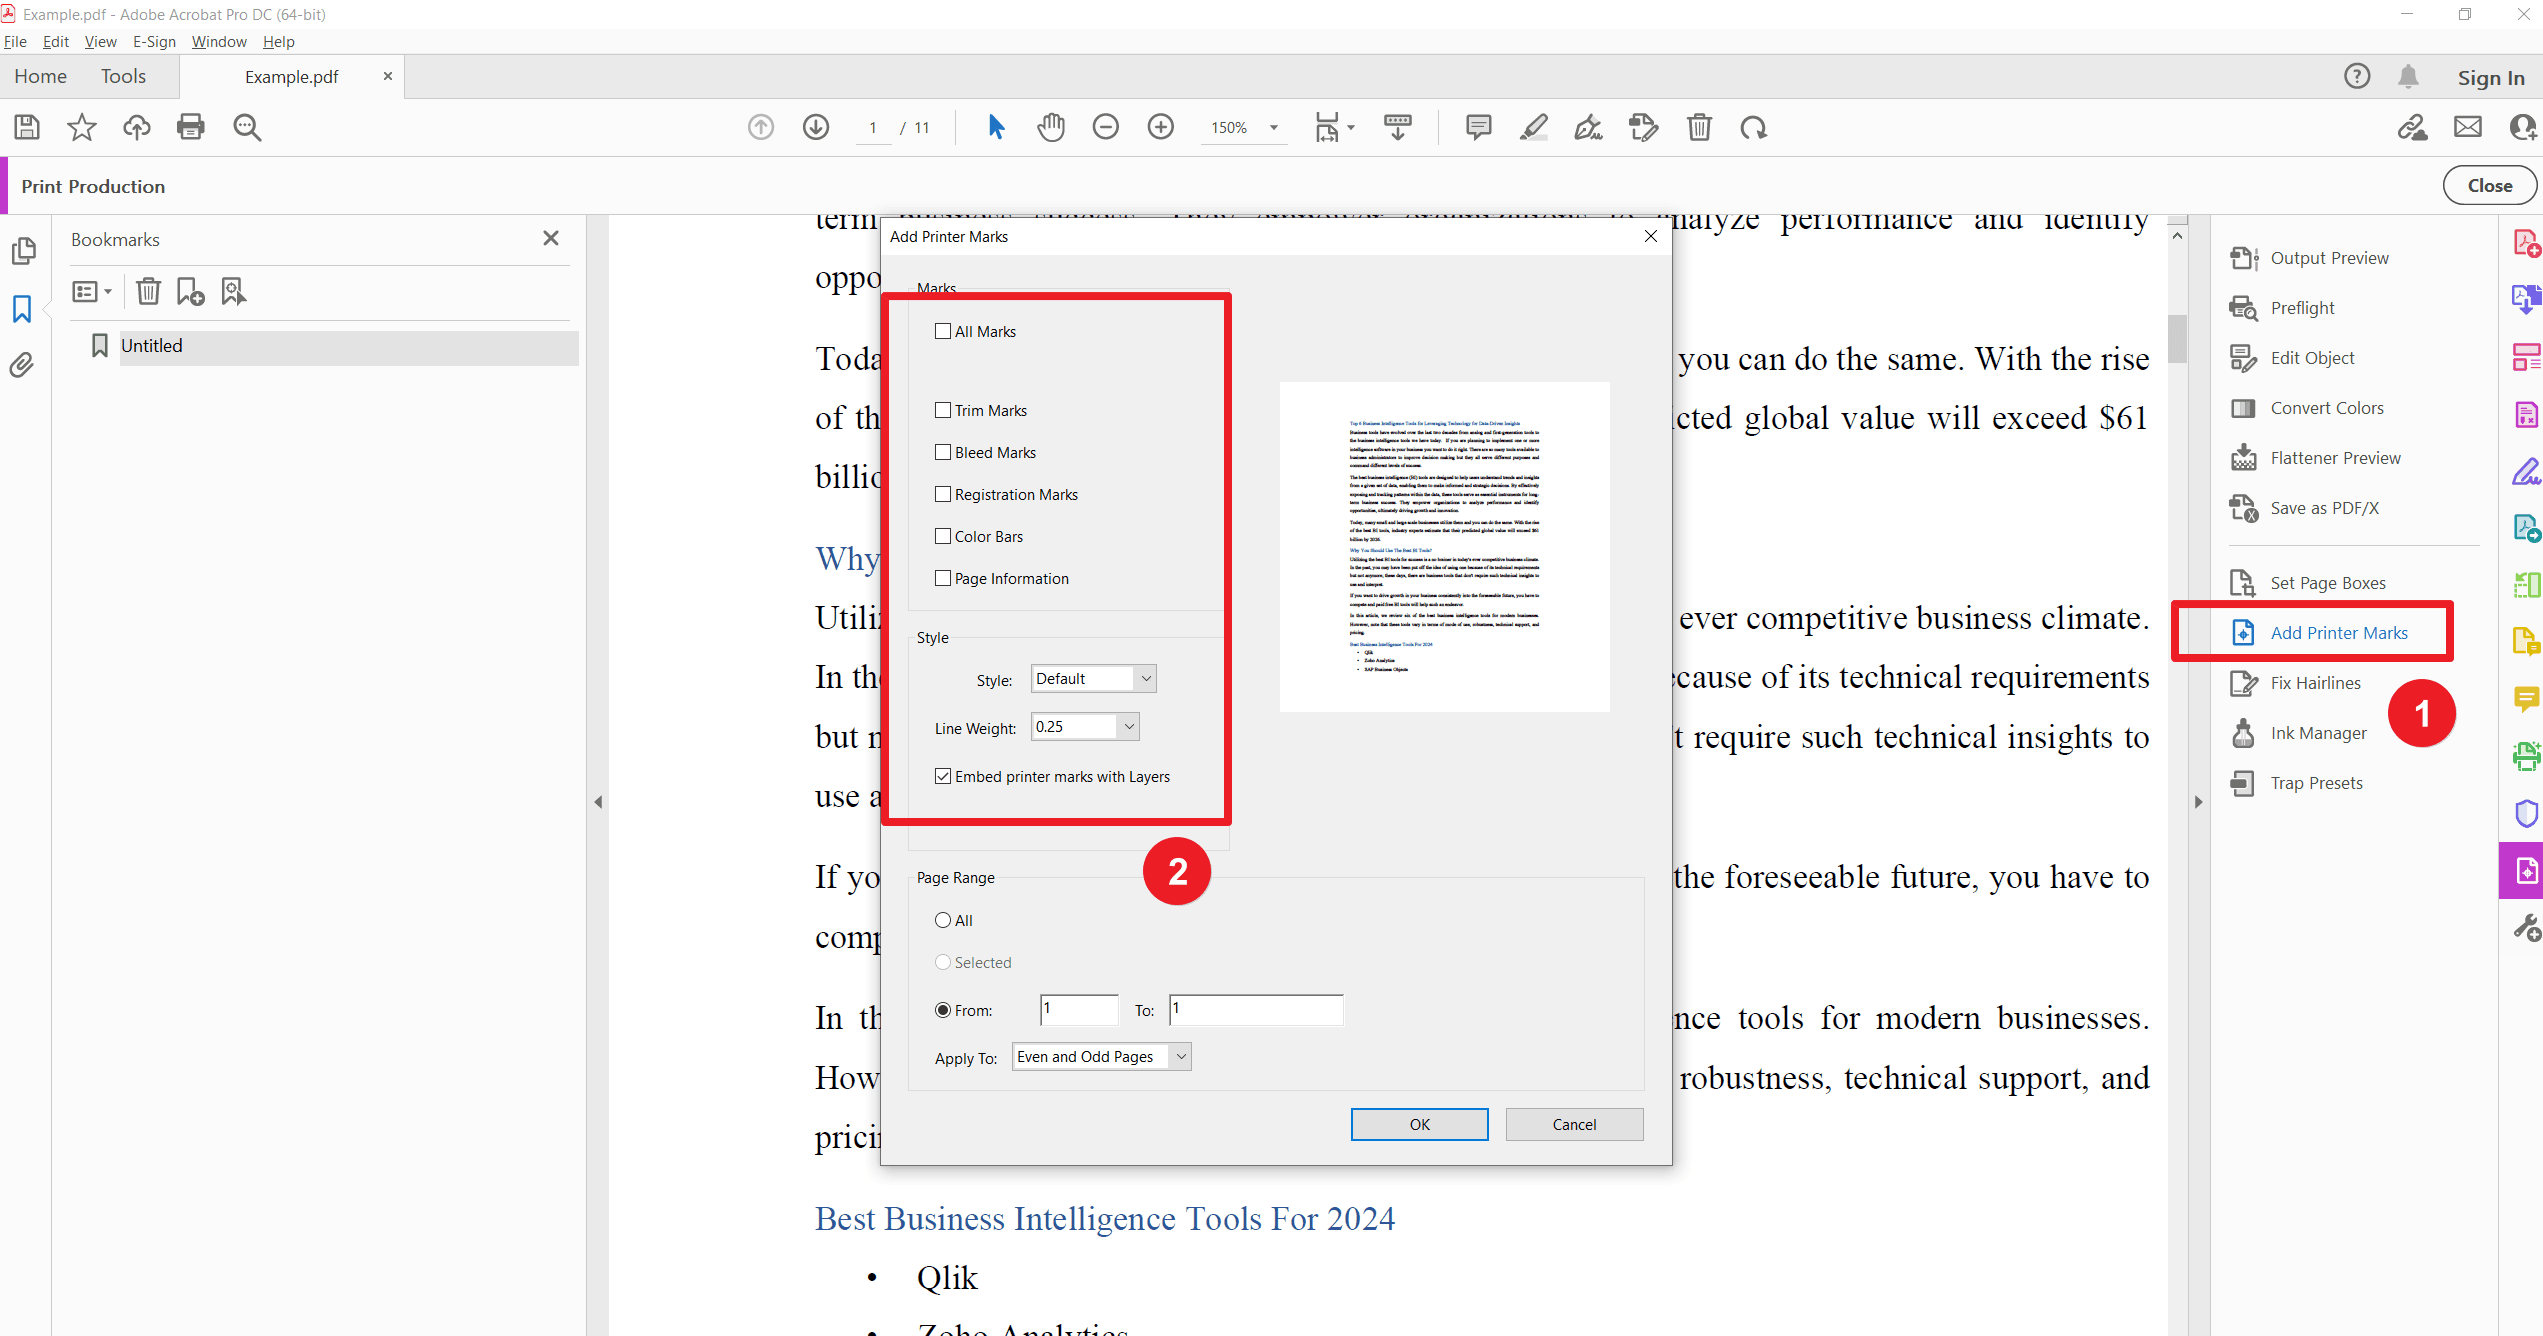
5. Configure Settings: Adjust settings such as offset or size to fit the document layout.
6. Apply and Save: Click "OK" to apply the changes. Save the PDF with the newly added crop marks.
7. Review: Open the saved PDF to ensure the crop marks appear as expected.
Part 2: Creating Bleed Borders in Acrobat
Crop marks is just one part of preparing your PDF for professional printing purposes. However, another crucial aspect is creating bleed borders in it. They ensure your design extends beyond the trim edge. It prevents unwanted white borders after cutting. See how you can generate bleed borders in Adobe Acrobat offline
1. Open Your PDF: Launch Adobe Acrobat and open the PDF file where you want to create bleed borders.
2. Access the Set Page Boxes Tool: Go to "Tools" in the upper left corner and select “Print Production.” And then, in the Print Production panel, click on "Set Page Boxes."
3. Set Bleed Box Settings: In the Set Page Boxes dialog box, find the "BleedBox" section. Enter the desired values for the bleed area. It usually requires adding a few millimeters to each side.
4. Apply the Settings: After entering the values, click "OK" to apply the bleed settings to your document.
5. Save the PDF: Save your edited PDF file to ensure the bleed borders are included.
6. Review: Open the saved PDF and verify that the bleed borders are set correctly.
Method 2. Add Bleed or Crop Marks Using PDFelement
Step 1
Download and install PDFelement on your computer. And then, launch the program. Finally, click "Open PDF" or use the drag-and-drop tool to open the PDF in the main program window.
Step 2
Navigate to Organize > More > Page Box. A pop-up window containing the page box control panel will appear. Thereafter, select BleedBox to add bleed to the PDF. Enter your custom margins, page size, and page range in the control panel. Once you have finished, click Apply to finalize the process.

Method 3: Add Bleeds to PDF with A-PDF
Looking for an alternative to Adobe? A-PDF offers a solution for setting bleed areas on PDFs intended for printing. It provides a range of affordable and free PDF tools for Windows and various customization services.
Step 1
Download and install A-PDF Page Crop on your computer. And then, launch the program. Open the desired PDF file.
Step 2
Click on Draw a crop box and begin drawing the box on your PDF page. Right-click on the box and select Auto Draw Bleed Box to add bleeds to your PDF. Thereafter, click Apply and specify the applicable page range.
Troubleshooting Issues
Here are some common issues and their solutions for adding crop marks in PDF
Issue 1. Crop Marks Not Showing
- Correctly apply the crop marks to the PDF. Reconsider the steps to make sure you haven't missed any step.
- Also, check your view settings to enable crop marks in your PDF viewer.
Issue 2. Incorrect Bleed Border
- Make sure you enter the correct dimensions and settings while creating a bleed border in Acrobat. Precision is key. Even a small error can affect the final output.
- Confirm that the bleed settings in Adobe Acrobat or any other PDF tool you are using are configured properly.
Issue 3. PDF Not Saving Changes
- Ensure you have the permission to edit and save the PDF file.
- Confirm that you are saving the file in the correct format and location.
Issue 4. Page Size or Margin Issues
- Double-check your PDF editor's page size and margin settings to ensure they match your requirements.
- Adjust the settings if necessary and reapply the crop marks and bleed border.
Issue 5. Software Glitches
- Restart the PDF editing software to resolve any temporary glitches.
- Ensure your software is updated to the latest version to avoid compatibility issues.
Following these troubleshooting steps, you can effectively resolve common issues and add crop marks to your PDF. For more detailed guidance, always refer to the documentation provided with your PDF editing tool.
PDF Agile – A PDF Editor That Works Throughout
Regarding editing PDFs with precision and ease, PDF Agile emerges as a robust option. This PDF editor offers a comprehensive suite of tools to simplify your workflow, whether adding crop marks in PDF or making other modifications. PDF Agile provides features that include:
- Seamless editing capabilities to adjust text, images, and layouts directly within your PDF.
- Efficient conversion tools to easily change PDF, Word, Excel, and more file formats.
- Advanced print settings to ensure your documents are print-ready with customized options such as bleed borders and crop marks.
- An intuitive interface caters to novice and advanced users, making PDF modifications straightforward.
Whether you're a professional handling detailed print designs or managing everyday PDF tasks, PDF Agile can enhance your editing efficiency and ensure high-quality results.
For Further Information
Attention to detail can make all the difference in digital design and printing. Adding crop marks and creating bleed borders in your PDFs are essential to ensure your printed materials look professional and polished However, PDF Agile is your go-to resource when mastering the art of printing PDFs. With its powerful PDF editing and printing capabilities, you can handle any document with ease and precision. We strongly recommend diving into the wealth of information on the PDF Agile blog, especially their detailed print-related articles.