Audio can be a real game-changer in improving one's storytelling and engagement in Google Slides. Be it background music, voiceovers, or sound effects, adding audio to slides is relatively easy once the process is learned. Herein, we will go into great detail about how to add audio to Google Slides, from its preparation to insertion and playback options.
Integrating audio can make your presentations more dynamic and impactful, enhancing the viewer’s experience and retention. Whether for educational content or professional pitches, understanding how to effectively use audio ensures your message is clear, engaging, and memorable.
Importance of adding audio to Google Slides?
Audio additions in presentations are made for several reasons:
- Enhance engagement: Catch the audience's attention with audio elements and let them remember your presentation. This can make your content more interactive and lively.
- Provide context: Voiceovers may explain complex visuals or give more context to something that was not clear from the actual slides. They add depth to your presentation.
- Set the mood: Background music may set the atmosphere according to the theme of your presentation. This helps evoke specific emotions and complement your message.
- Accessibility: Audio can provide better accessibility of material for those who either struggle to read or process visual information. It makes presentations inclusive and user-friendly.
Preparing Your Audio File
Before adding audio to your Google Slides presentation, you need to prepare your audio file. Here are steps to prepare that audio file:
Step 1: Record or Select Your Audio
You can record your audio or select pre-existing audio files. How do you do it?
Record Your Own Audio: Use a recording tool like Audacity or GarageBand, or even a smartphone app to create high-quality audio. Save the file in a compatible format such as MP3 or WAV.
Choosing Existing Audio: You can find royalty-free music and sound effects at:
- YouTube Audio Library at https://www.youtube.com/audiolibrary/music
- Free Music Archive at https://freemusicarchive.org/
- Pixabay at https://pixabay.com/music/
Step 2: Upload Your Audio File to Google Drive
Login to Google Drive: Go to the official website of Google Drive at https://drive.google.com and sign in with your Google Account.
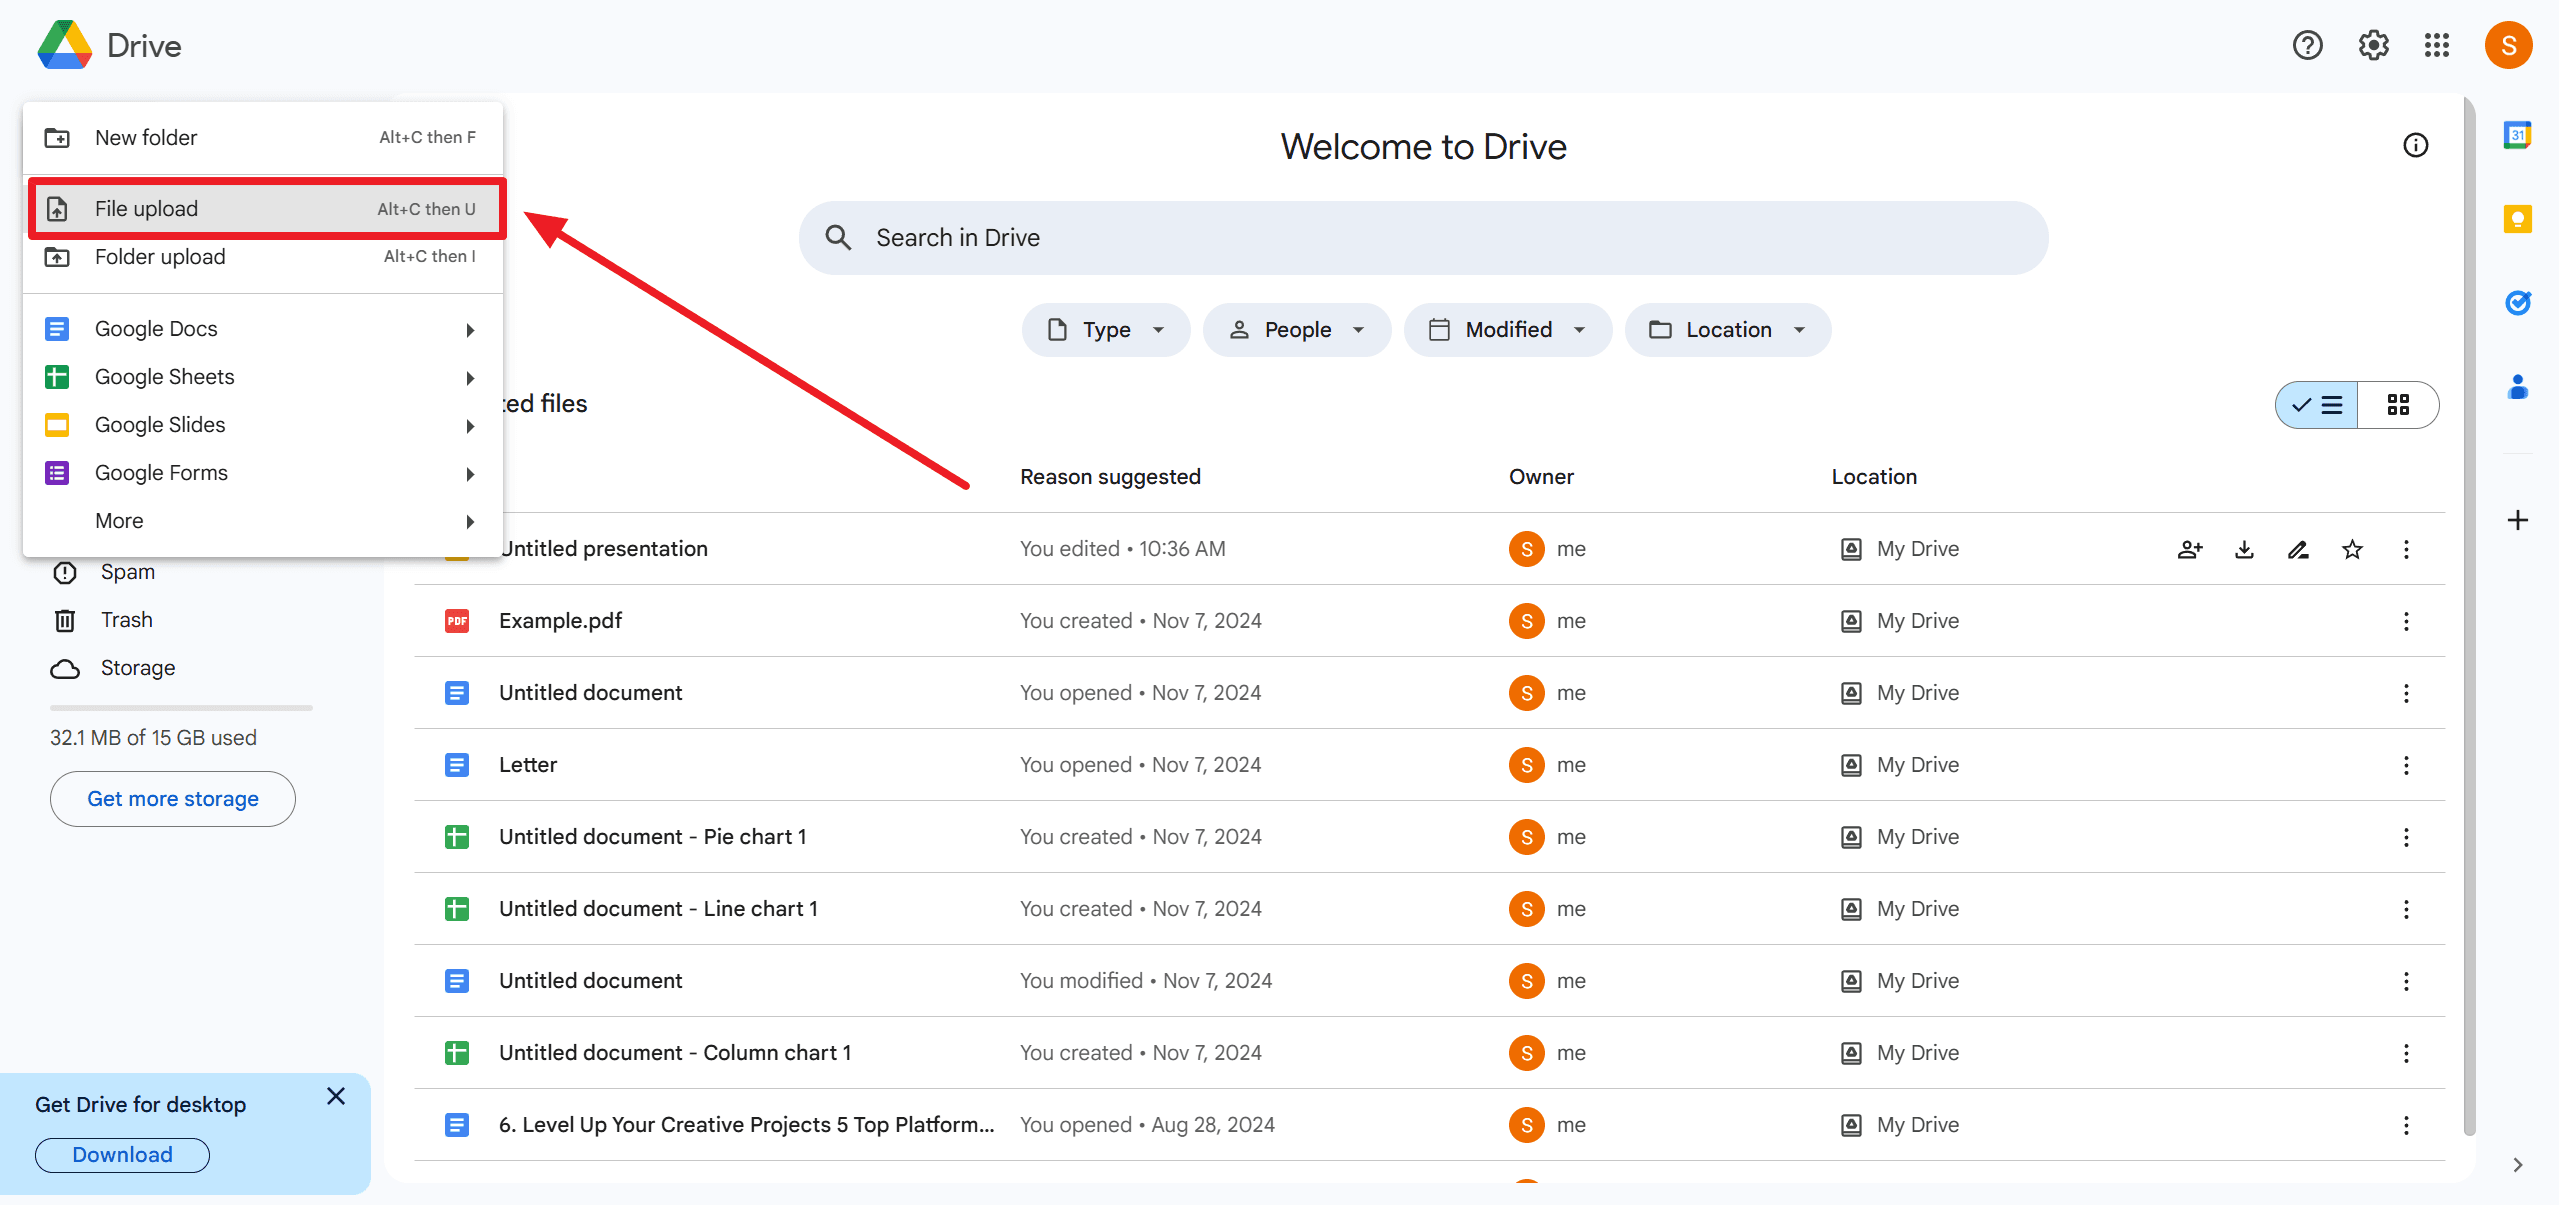
Upload Your Audio File: On the left side of the page, click on the + New button. From the list of options that will appear, click File Upload. Search and select the audio file that you want to upload, and click Open. The file will begin uploading.
Step 3: Set Sharing Permissions If Necessary
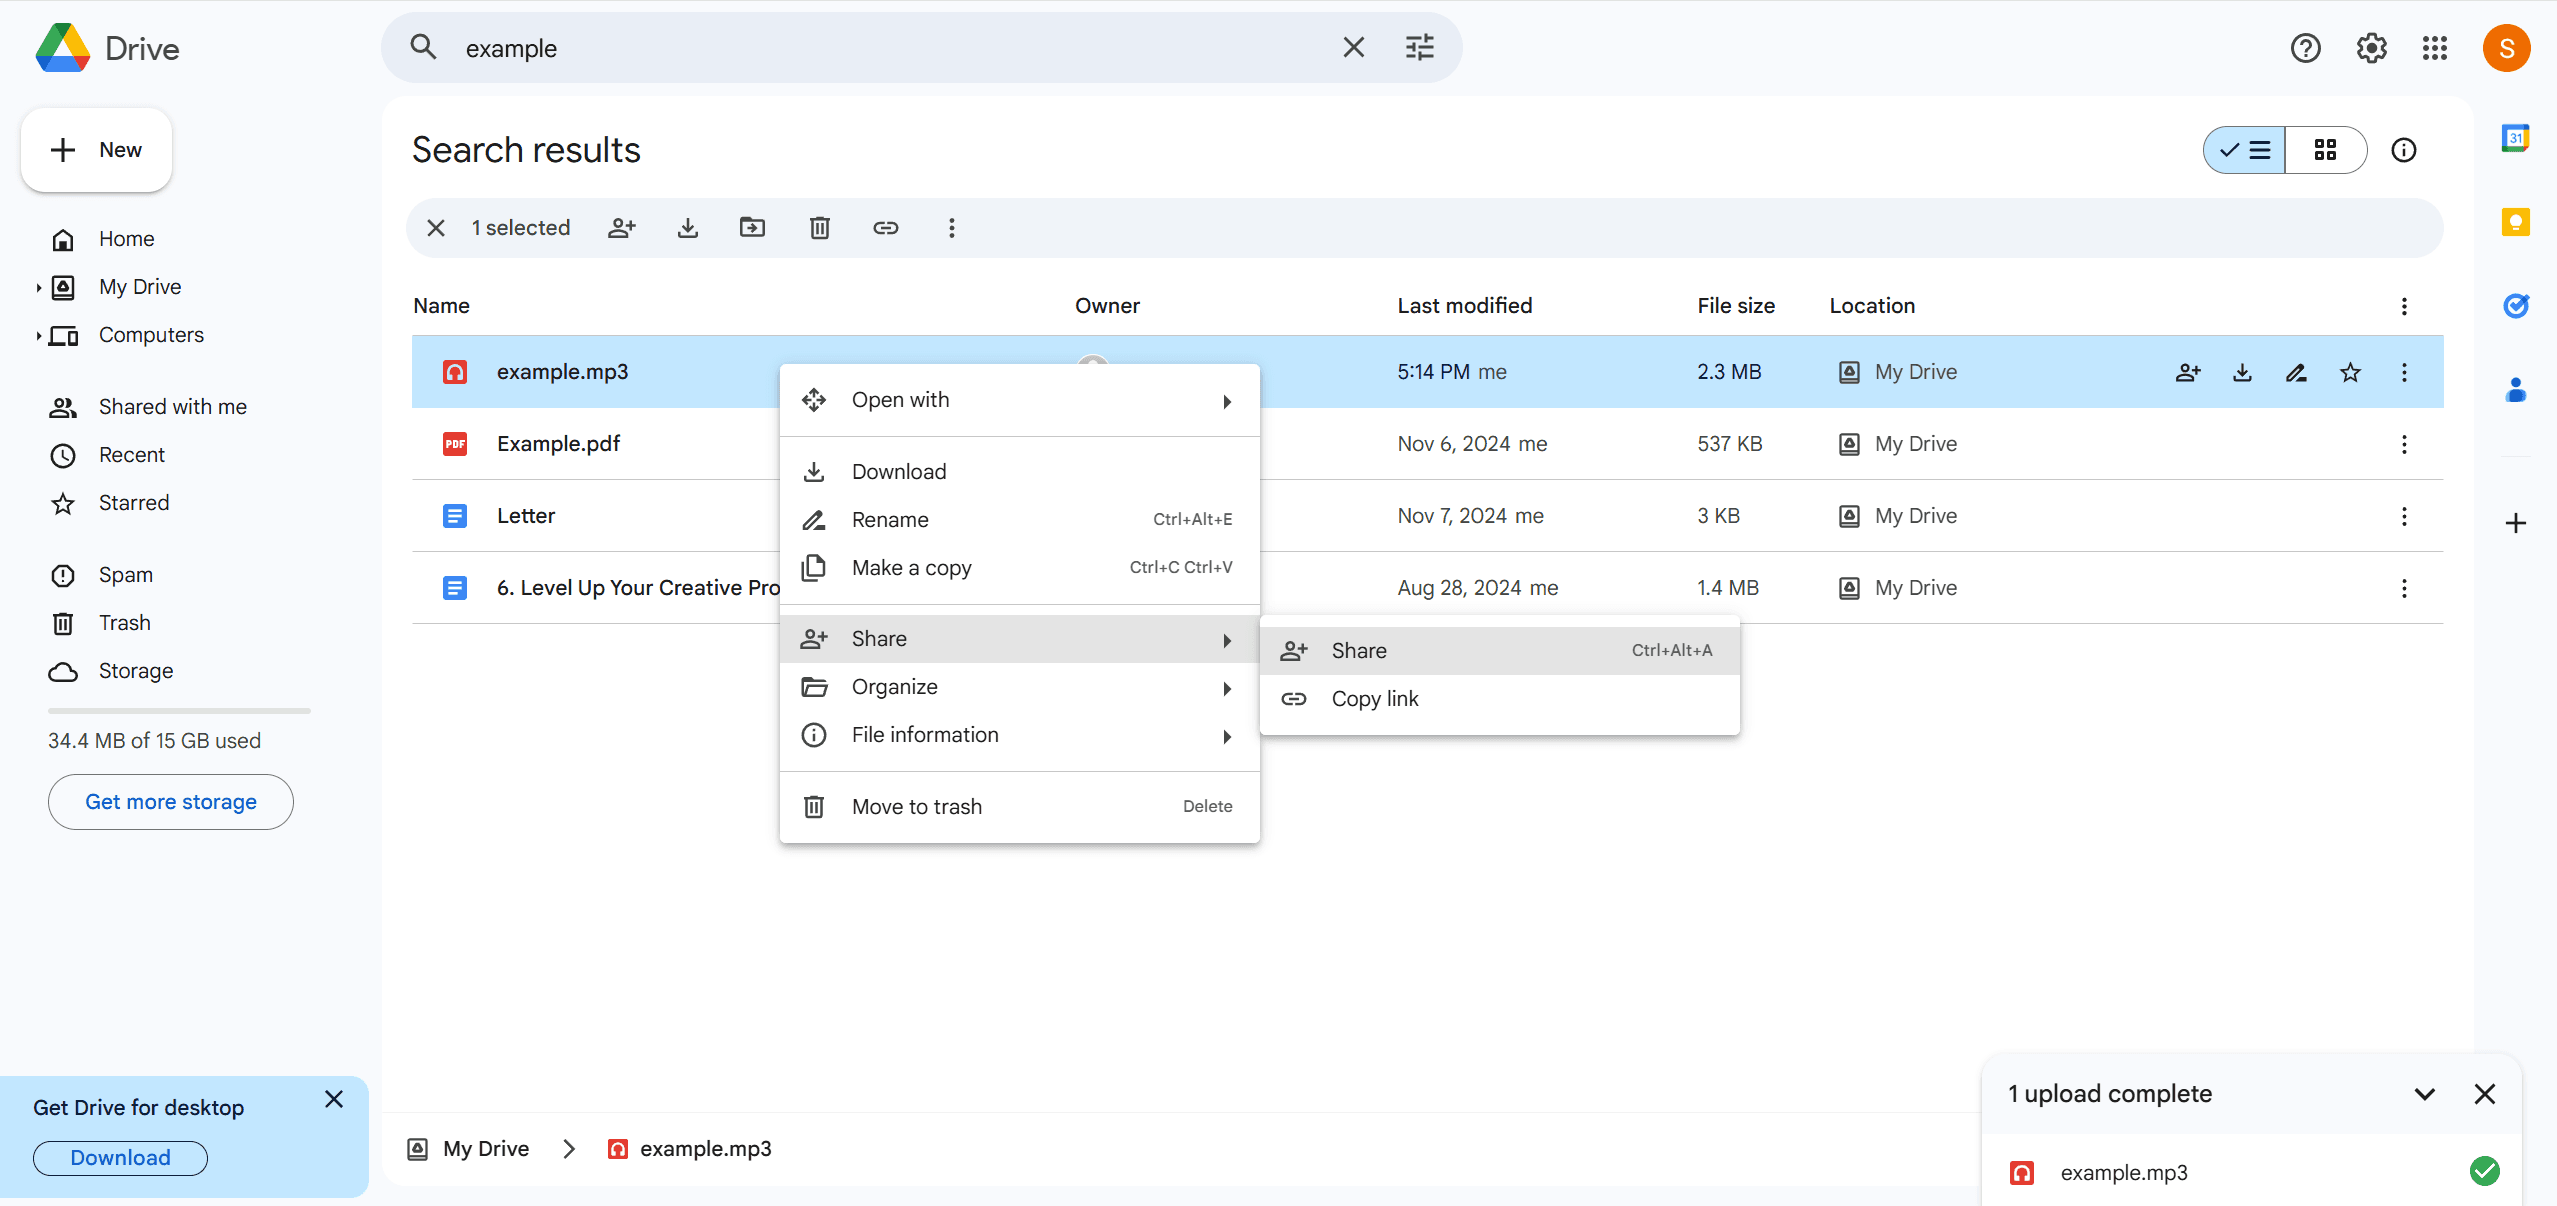
If you need to share the presentation with others requiring access to the audio: Right-click on the uploaded audio file in Google Drive. Click Share. Under "Get Link," give permission for "Anyone with link can view" if necessary.
Adding Audio to Your Google Slides Presentation
Now that your audio file is prepared and uploaded, you can add it to your Google Slides presentation.
Step 1: Open Your Presentation
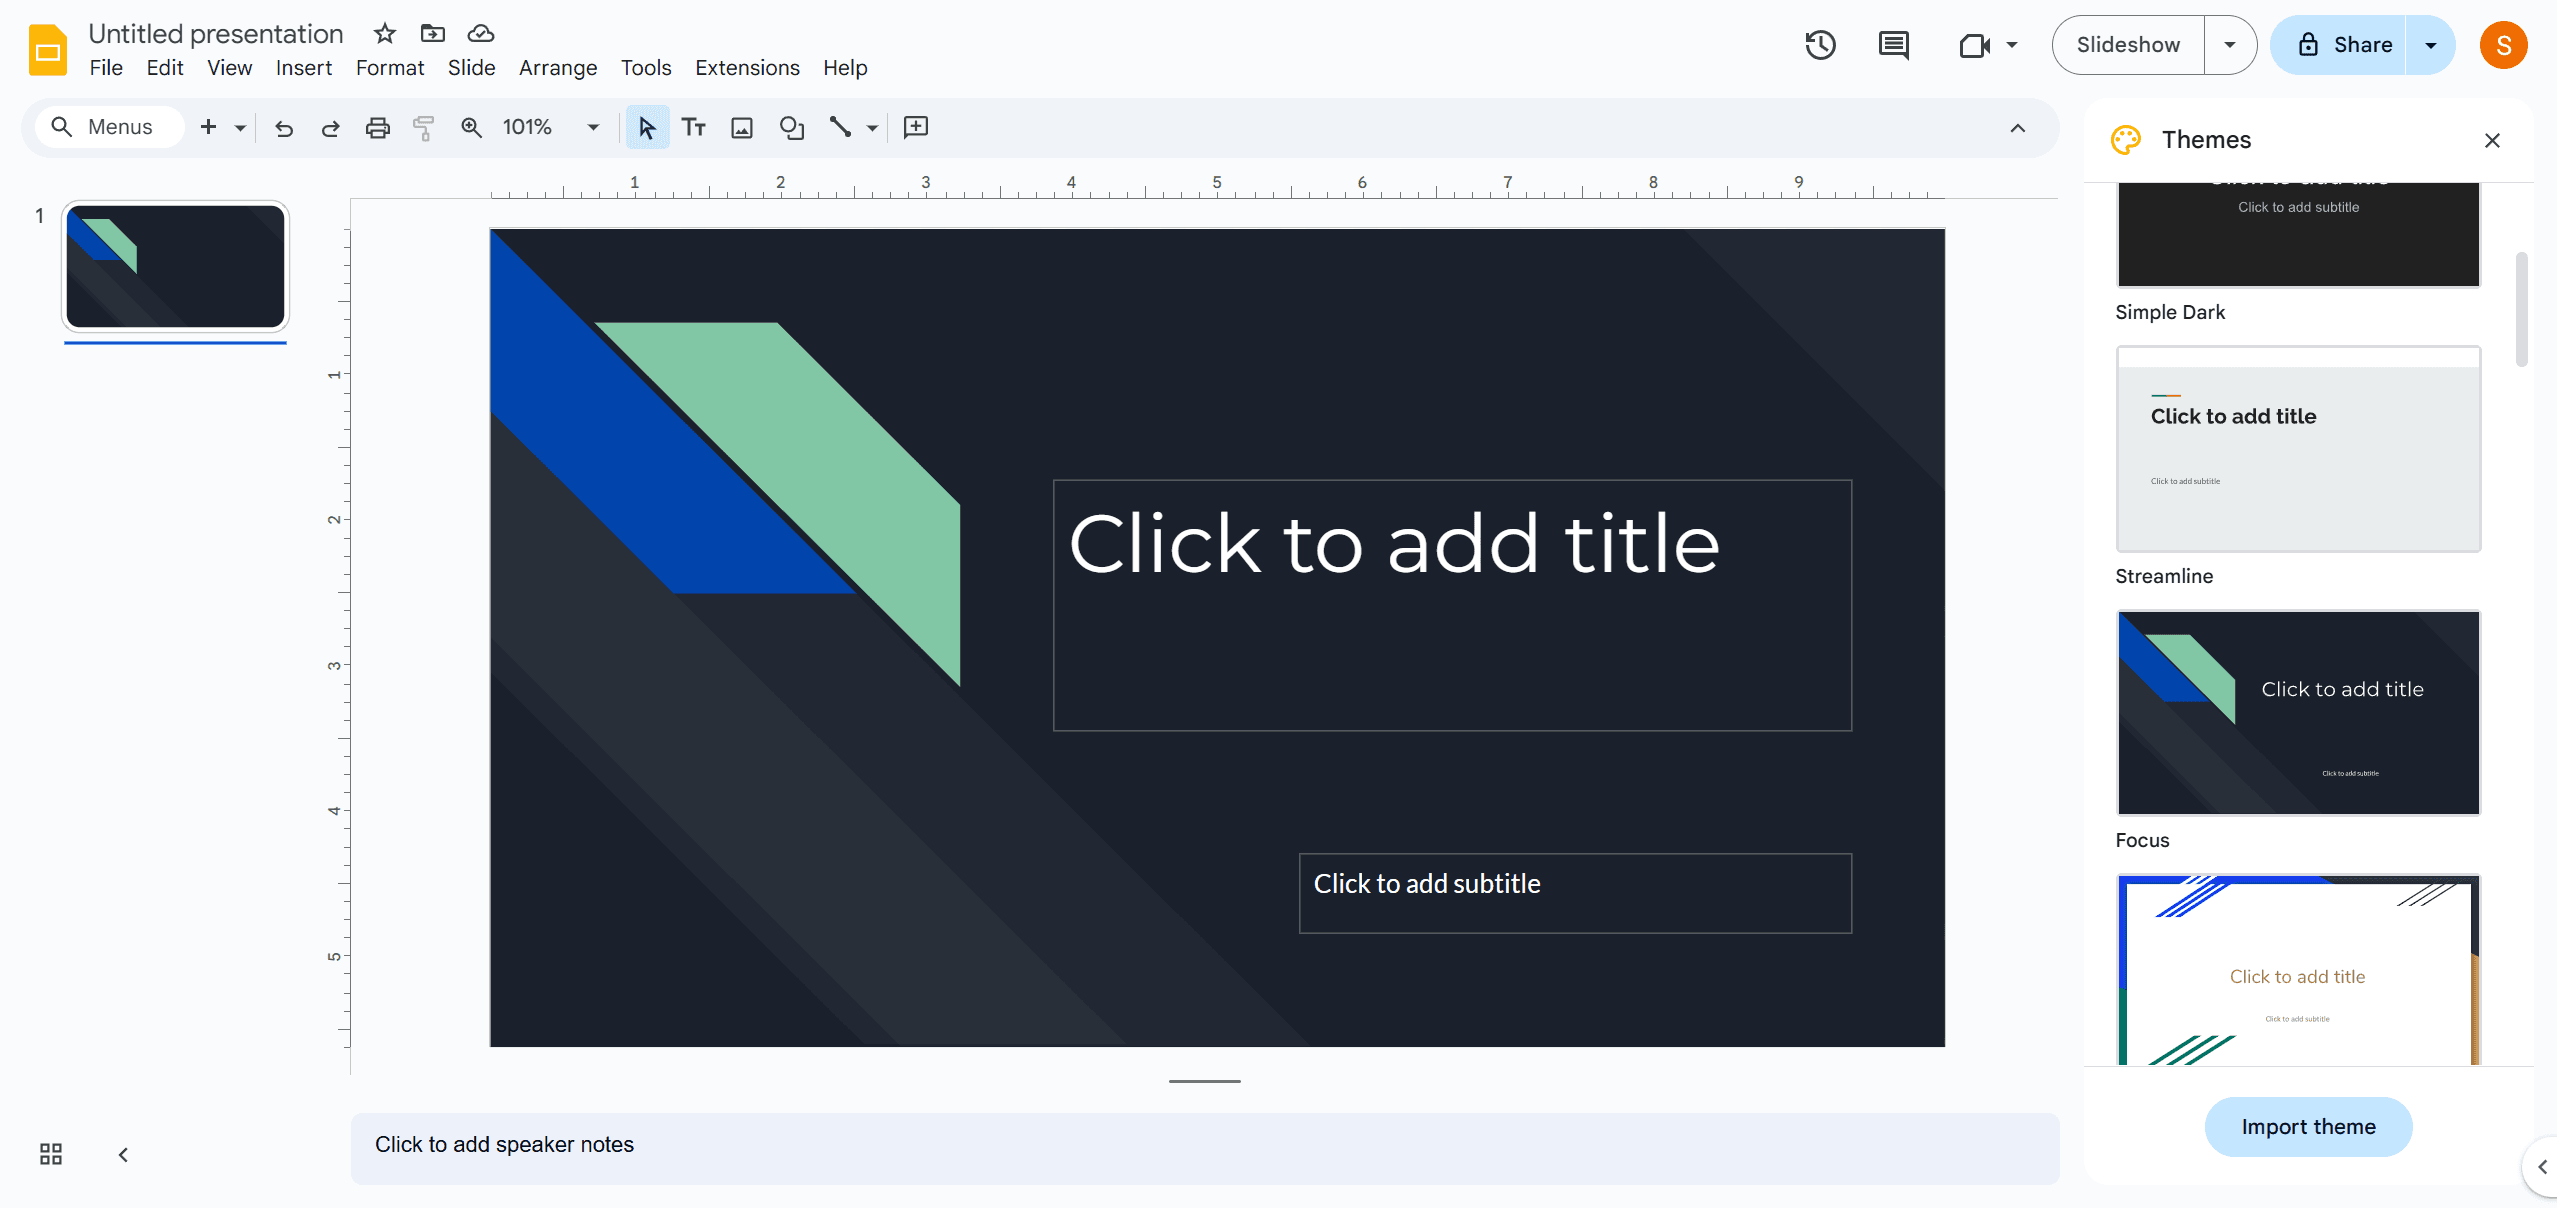
Open Google Slides at https://slides.google.com. Click on + Blank to create a new presentation or open an existing one.
Step 2: Choose a Slide to Insert Audio
Practice navigating through your slides then click on the slide where you want your audio to be located.
Step 3: Add Audio
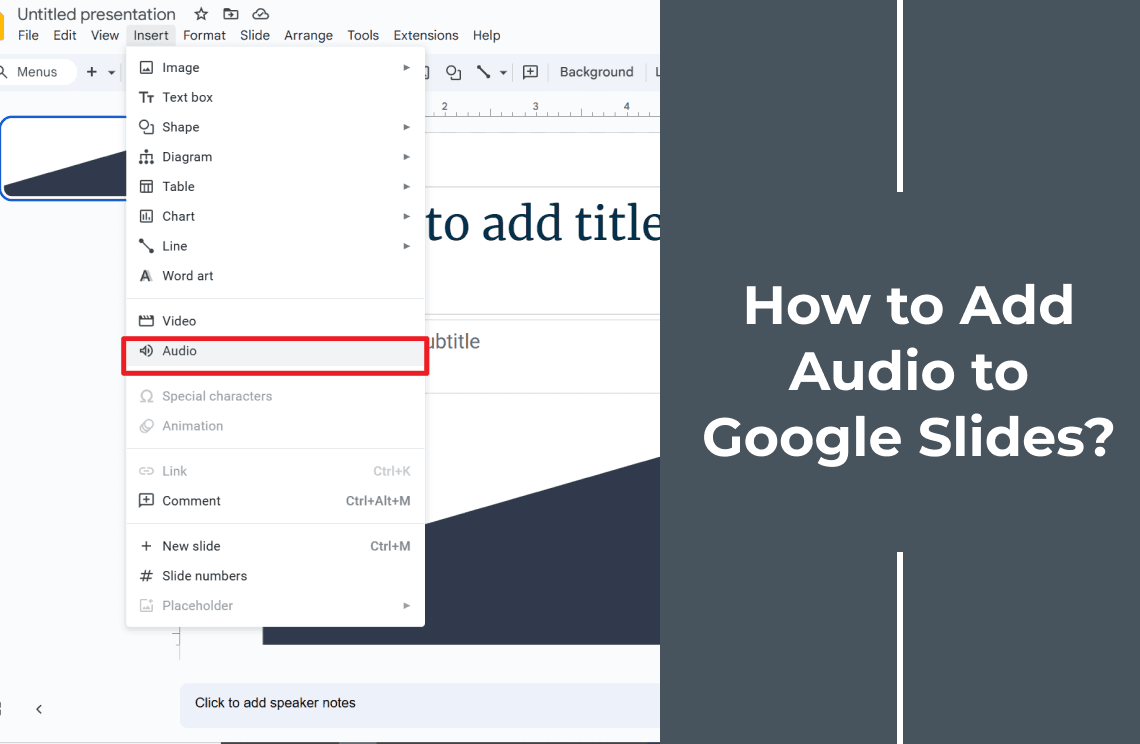
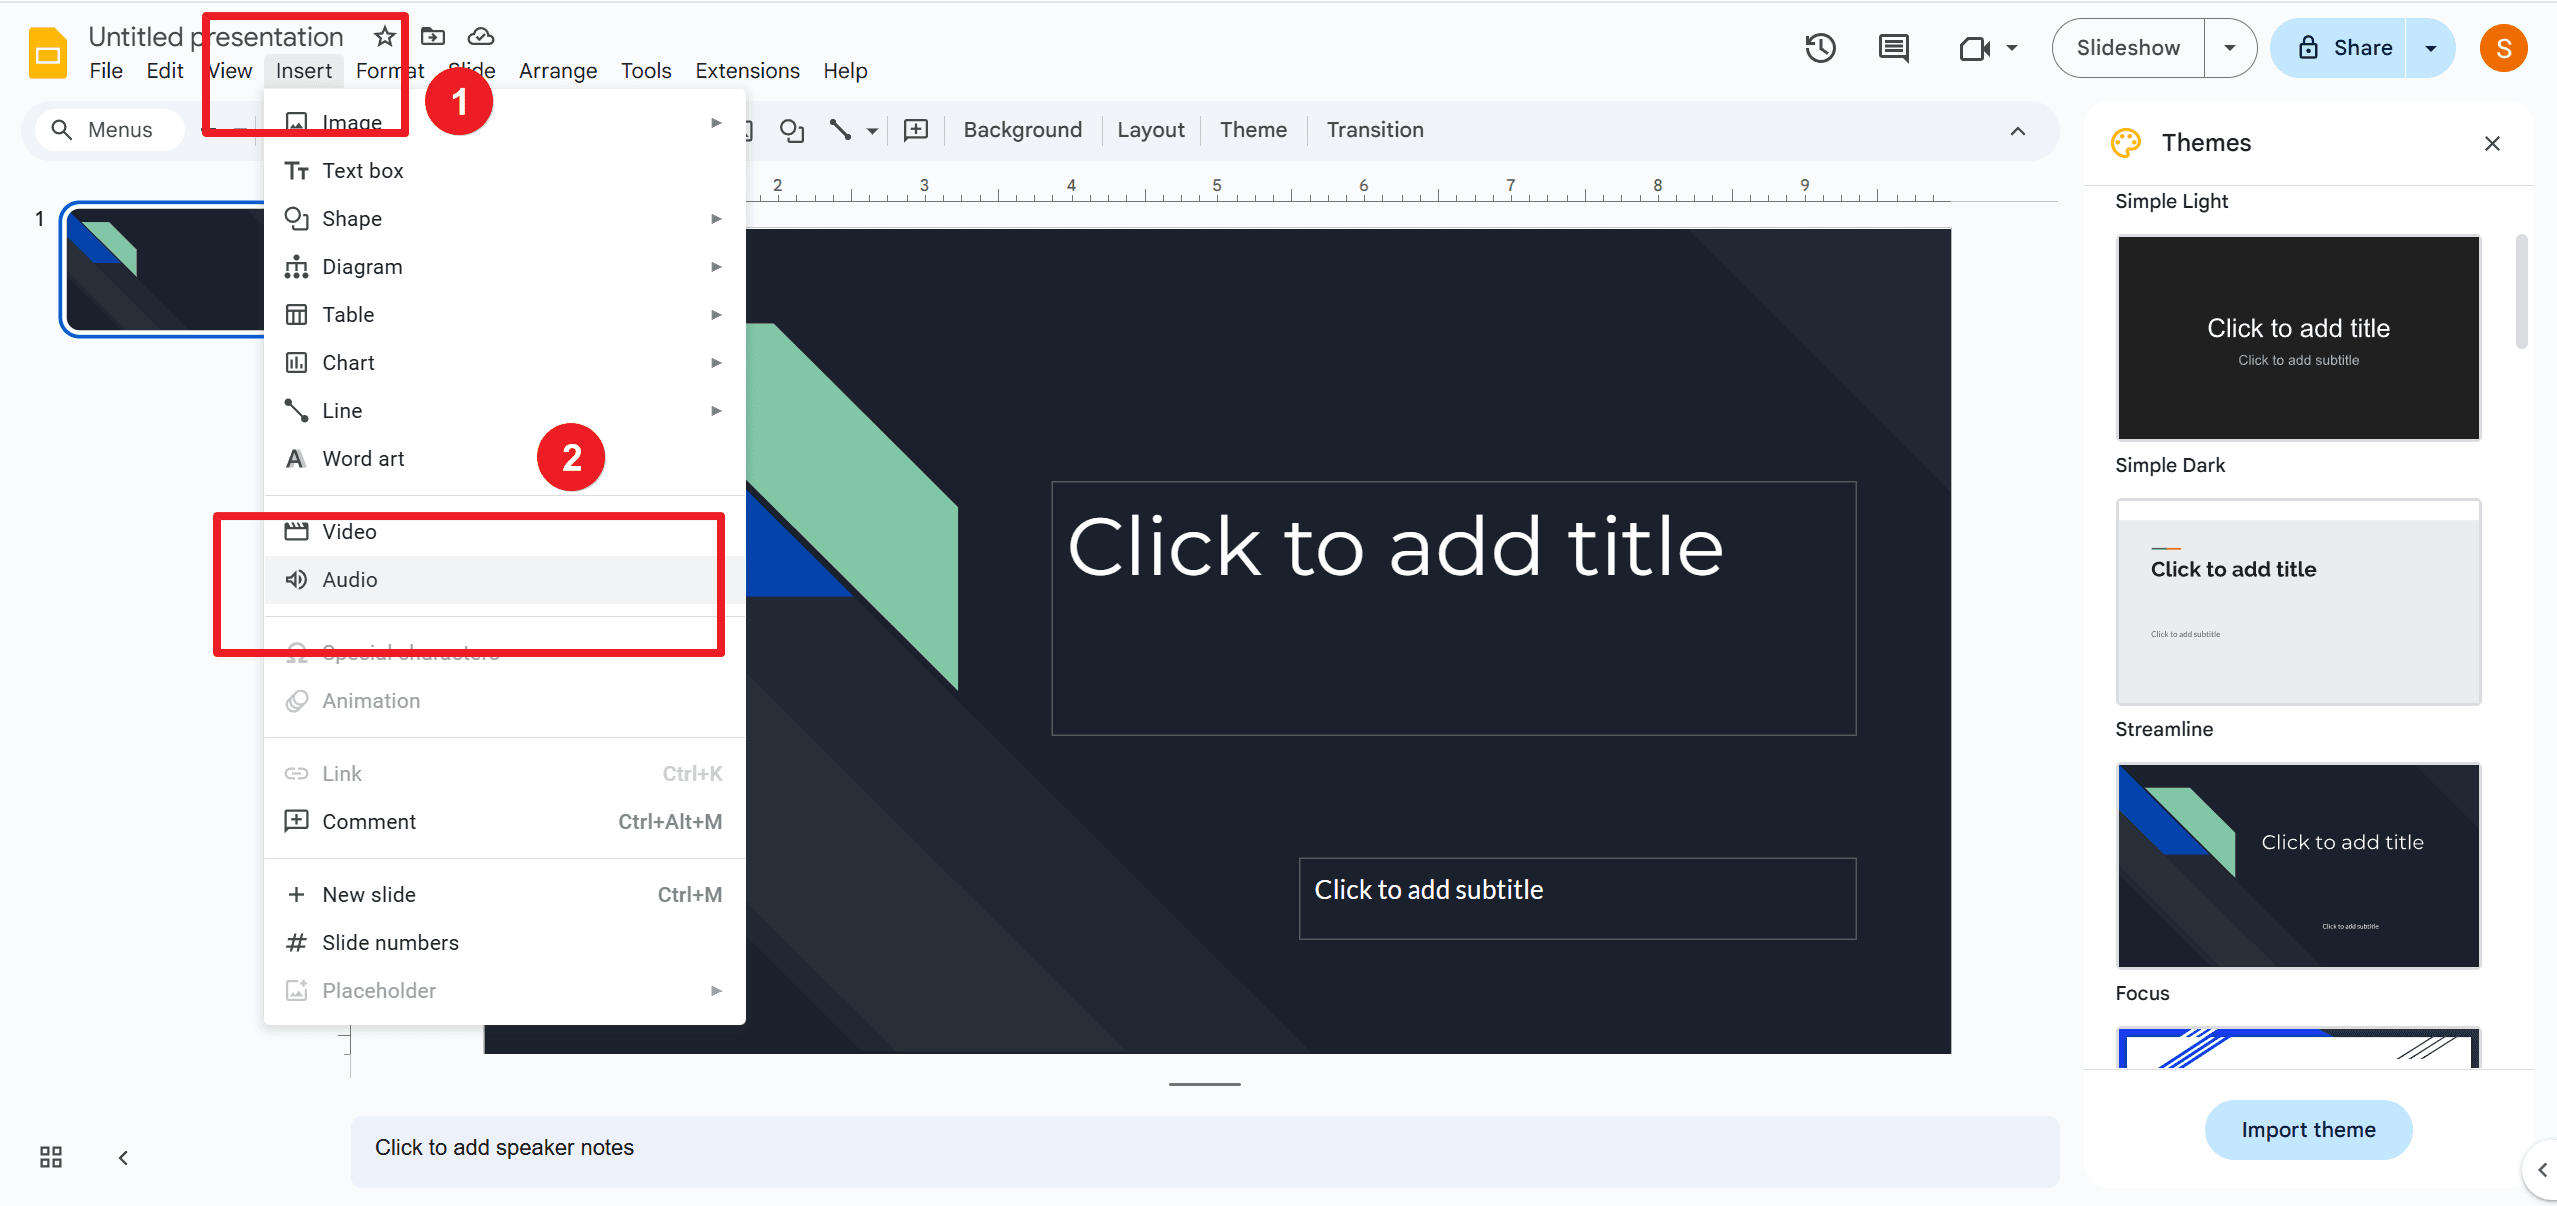
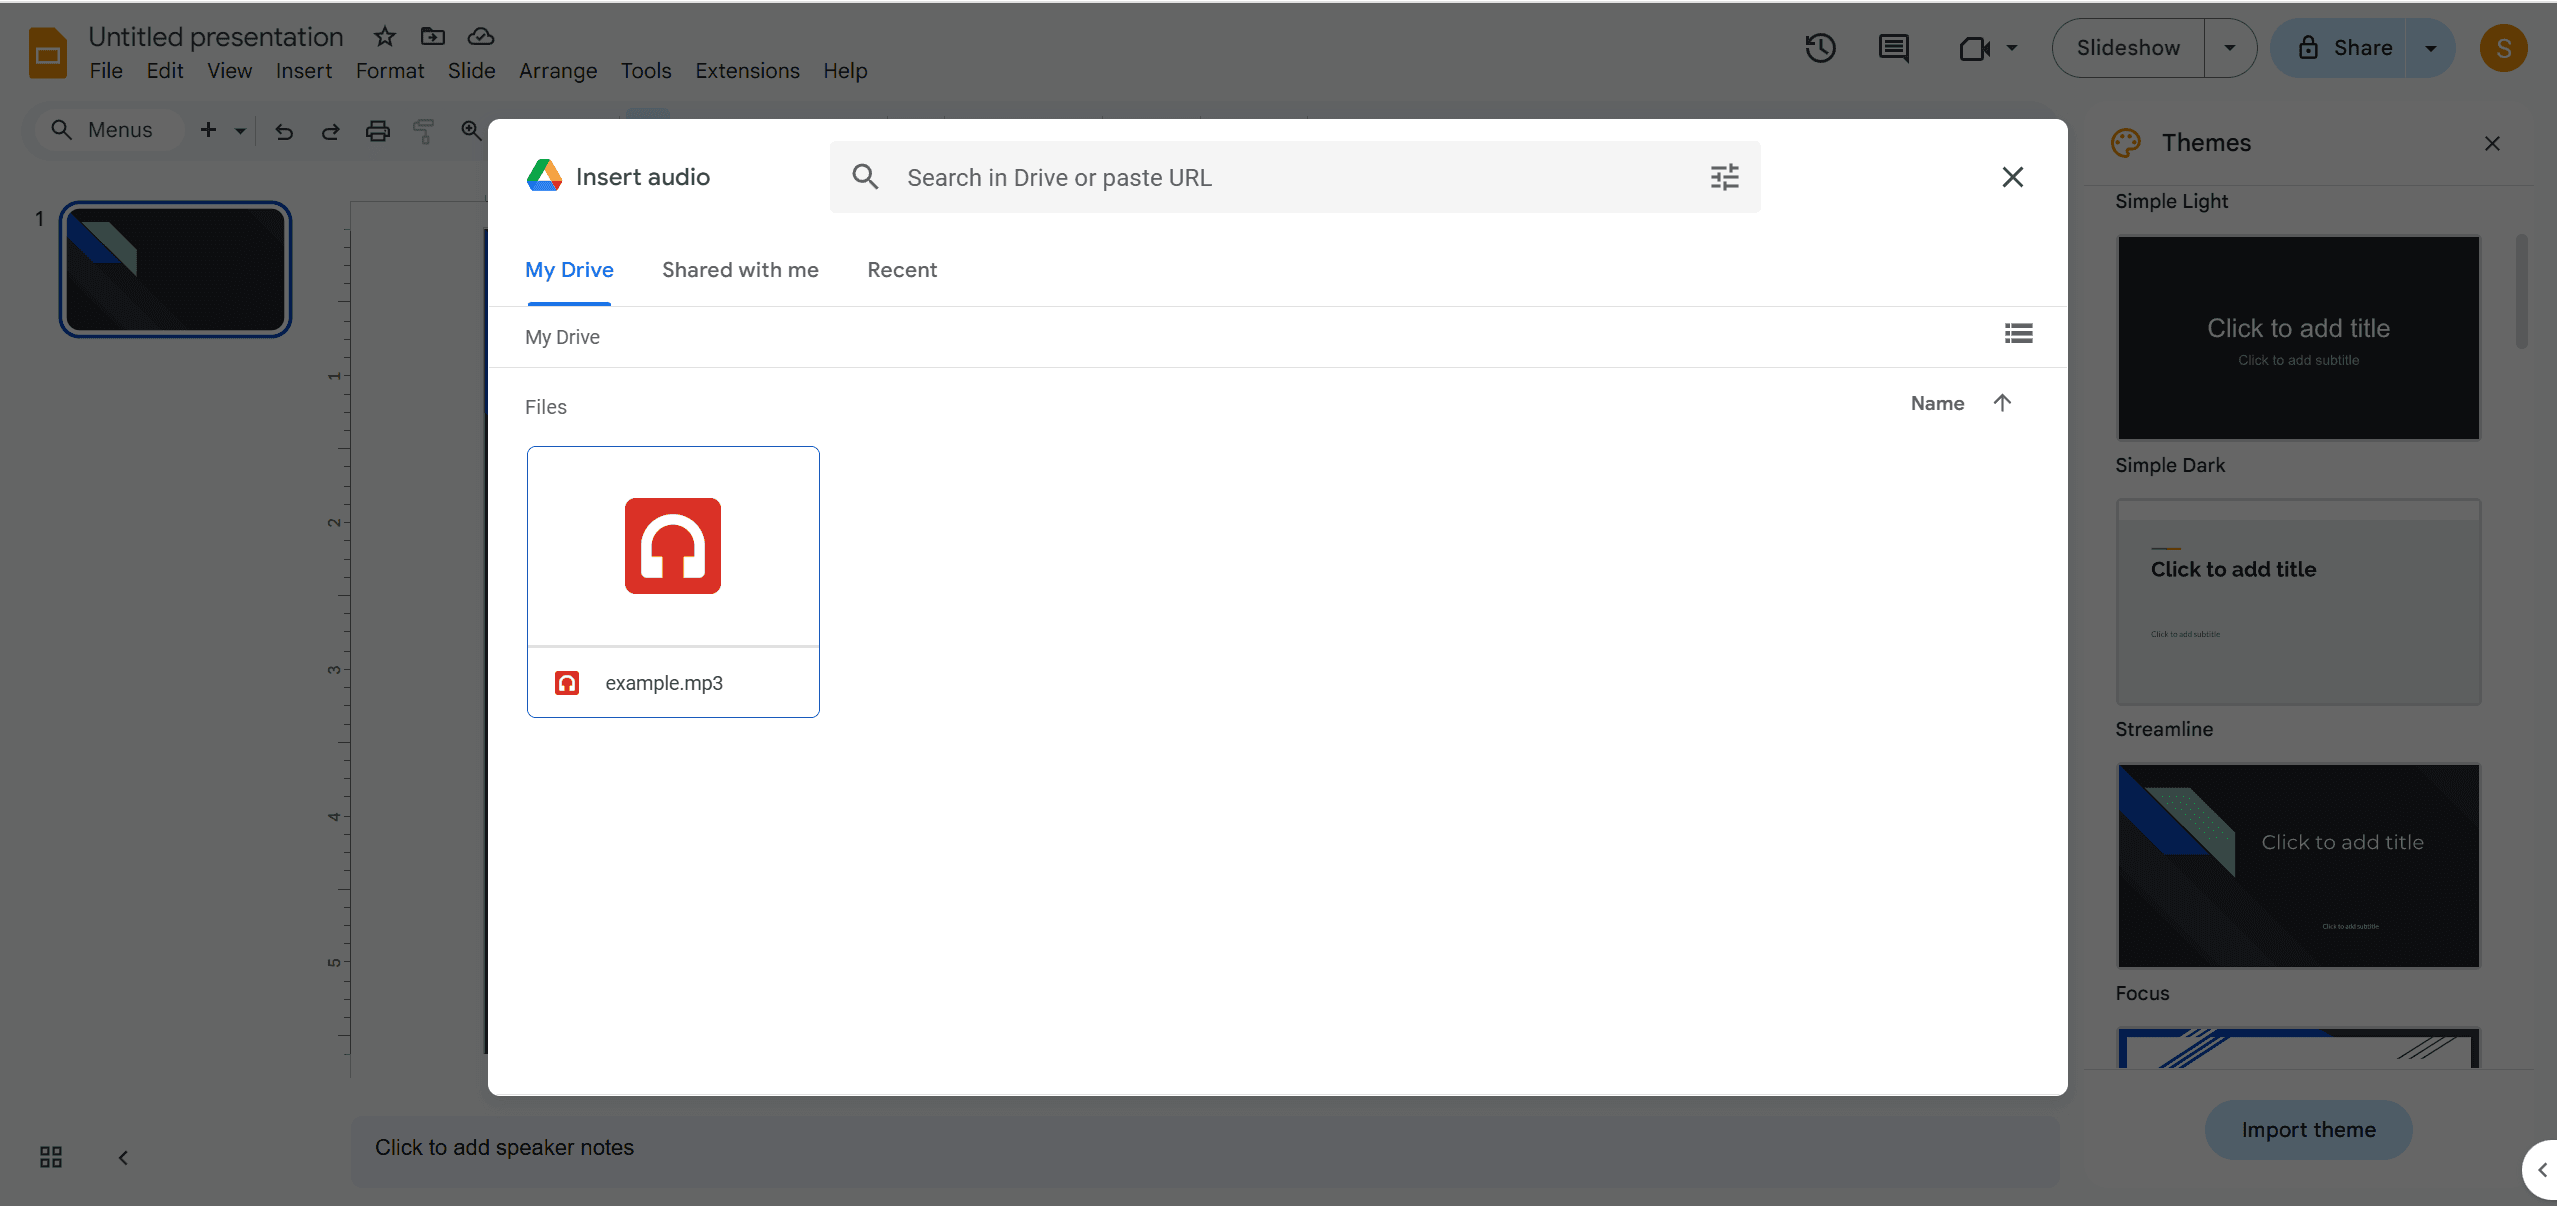
Up on the top menu click on Insert. From the pull-down menu, click on Audio. A box will open showing your Google Drive files. Choose the audio that you have uploaded and click Select. You will then see an added speaker icon on your slide, signaling that the audio has been added.
Select Your Audio Options
Once you have inserted audio into your presentation, you can edit how it will play.
Step 1: Format Options
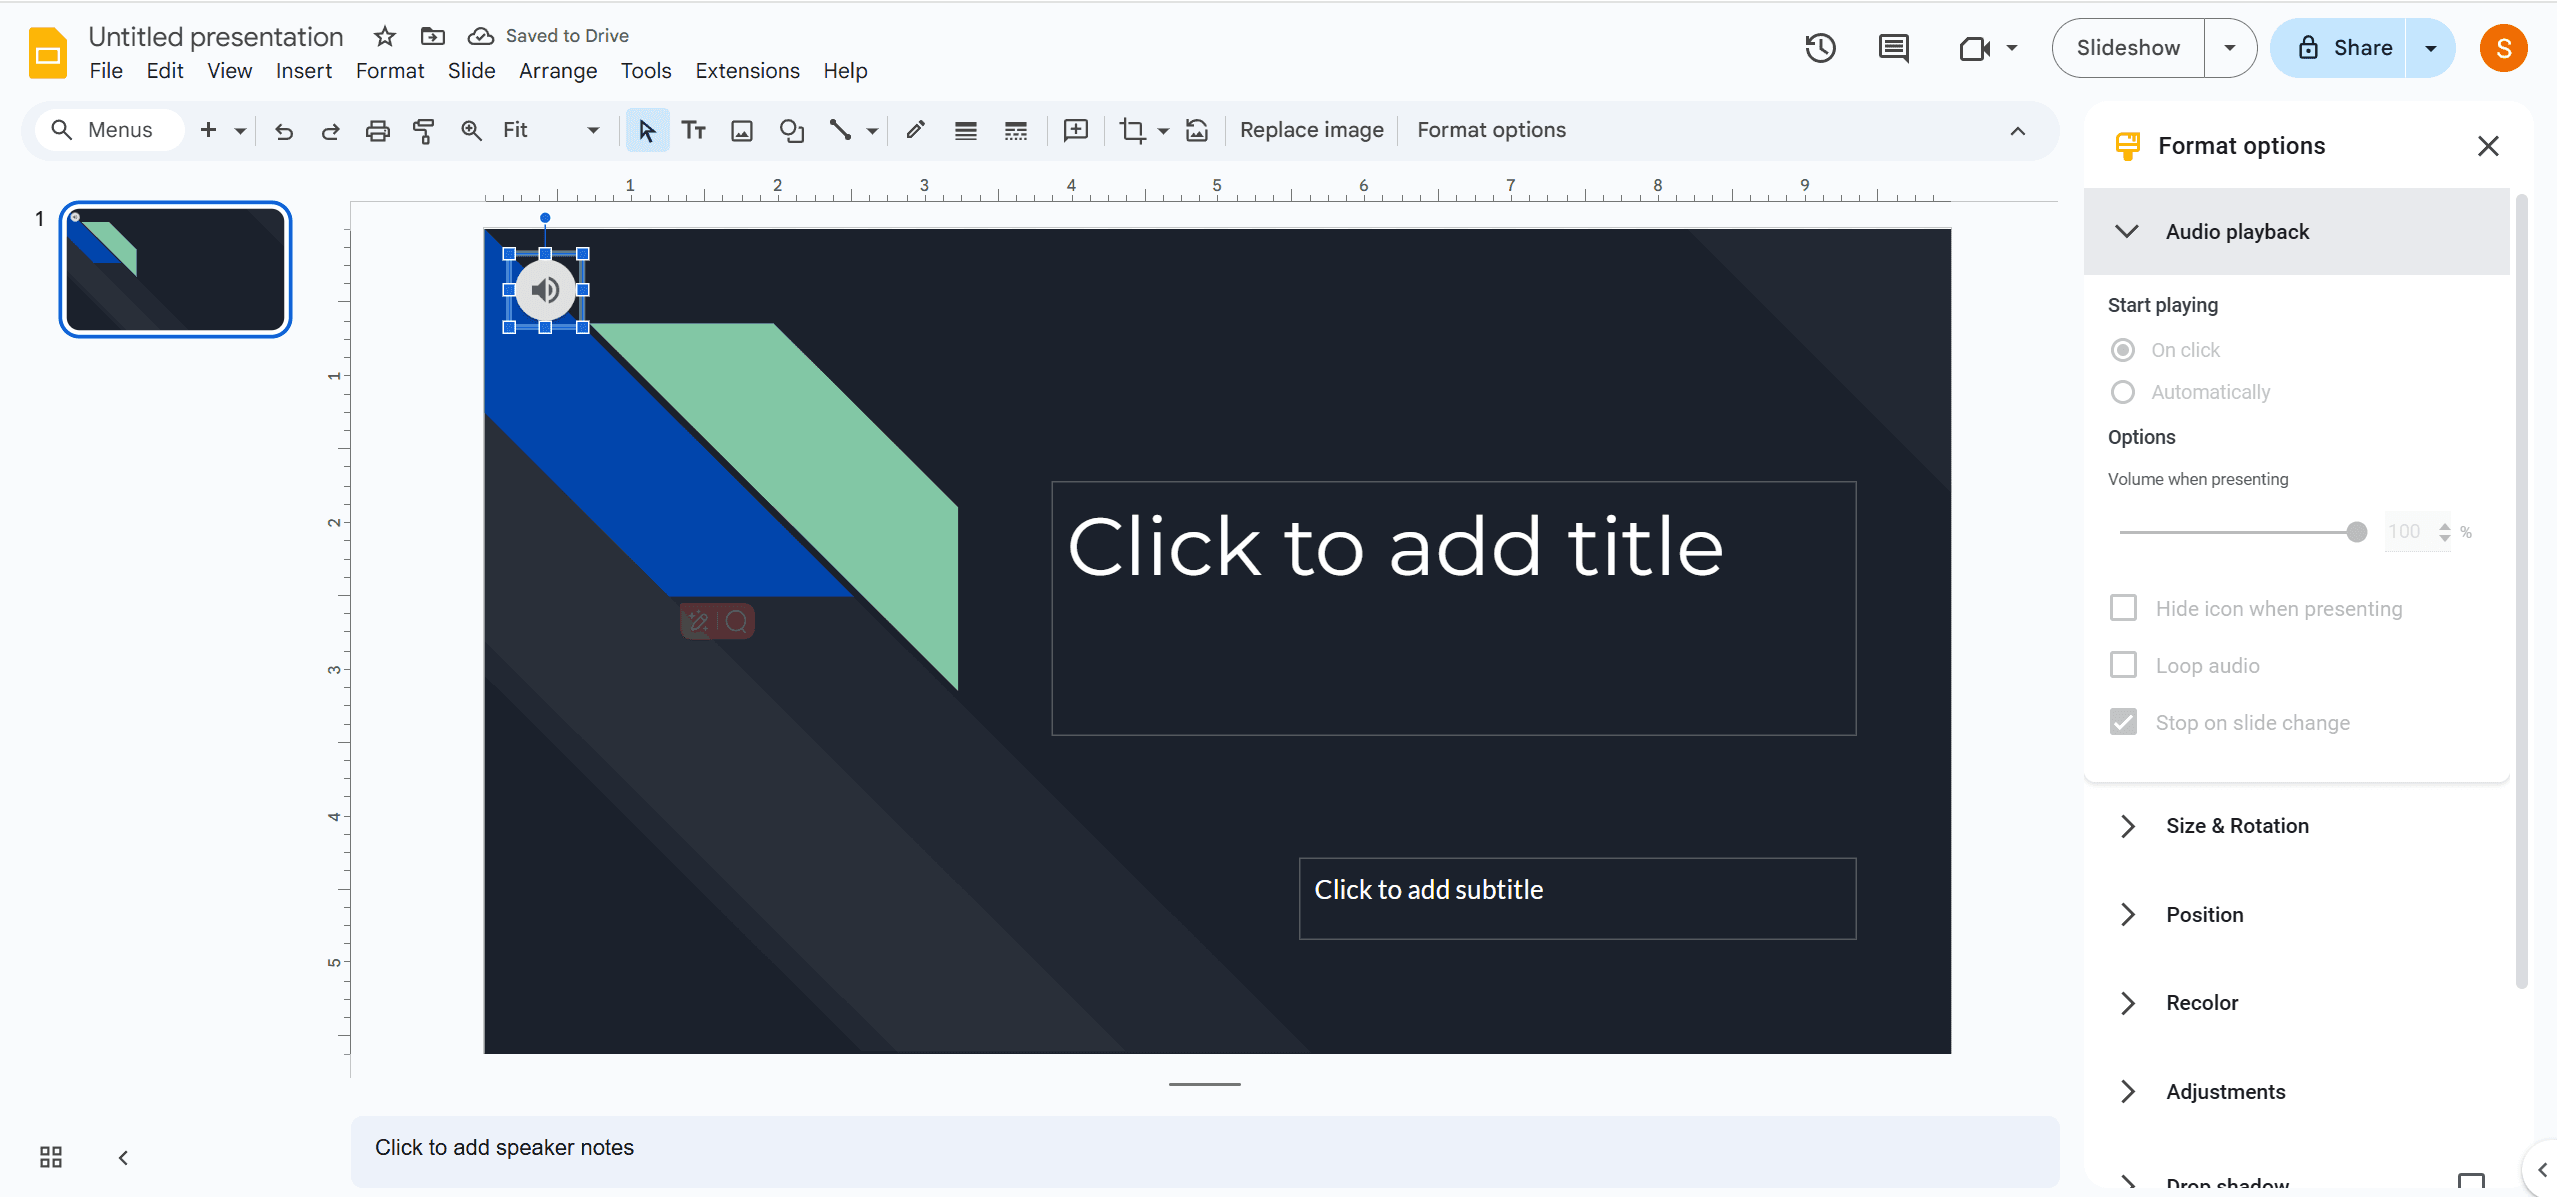
Click on the speaker icon in your slide. In the toolbar above click on Format options - or right-click on the icon and choose from the dropdown menu Format options.
A sidebar will appear with various playback options; among them are:
- Play: Choose "On click" or "Automatically" from the list to decide when the audio should start playing.
- Volume: You can adjust the volume to increase or decrease the volume level of the audio playing.
- Loop: When you want the audio to play continuously during that slide, you can check the box "Loop."
- Stop on slide change: Check it if you want playback to stop on moving to some other slide. If unchecked, it continues playing across slides.
Step 2: Positioning the Speaker Icon
You could also move and resize the speaker icon according to your needs: Drag-click it anywhere on the slide to reposition it. Corner handles will help in resizing, in case you need to.
Testing Your Audio
Before presenting, it is important to test the audio settings of your Google Slides presentation.
Click Present at the top right side of your Google Slideshow.
On the slide with audio, click the speaker if you've set "On click" or wait for automatic play. Everything should work: volume levels and playback quality.
Troubleshooting Common Issues
While adding audio is usually pretty easy, there are a few snags you might run into:
Problem 1: Audio Isn't Playing
Make sure that your browser's settings aren't blocking the playing of audio.
It might seem simple, but make sure the volume control on your computer isn't off or muted.
Problem 2: Formatting Doesn't Look Right After Importing
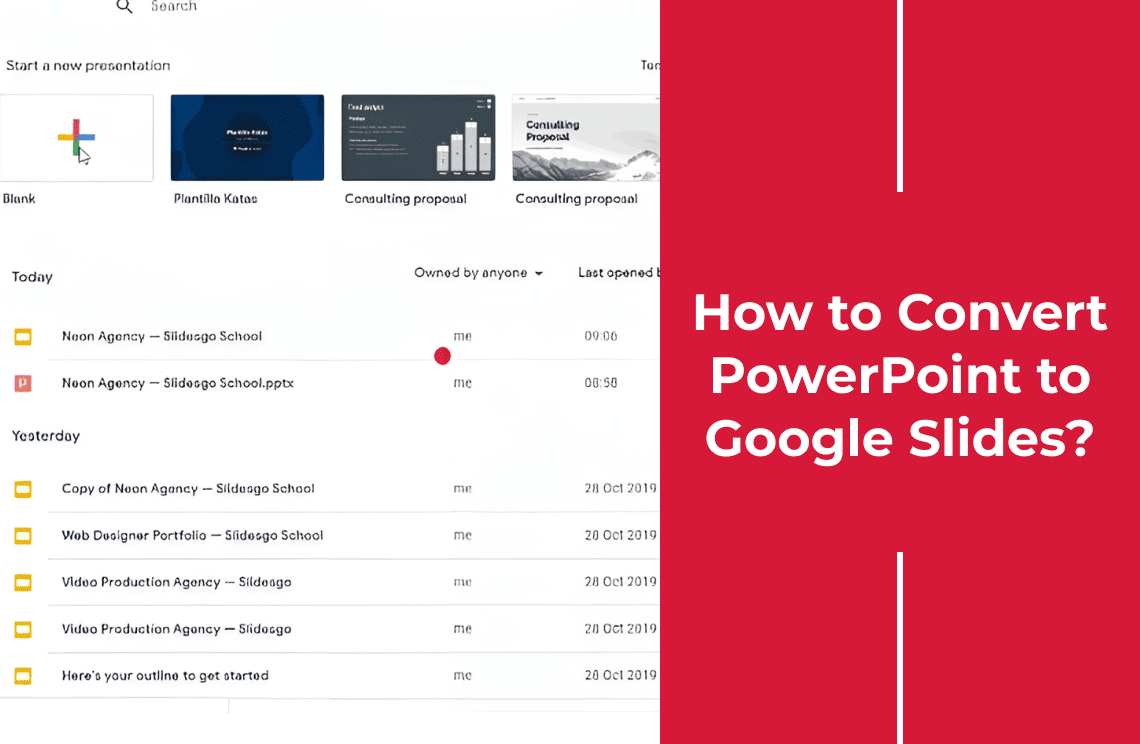
If you imported a presentation from another format, such as PowerPoint, some things in your presentation may not look exactly right:
Manual revisions of any misplaced text or elements in the new, converted slides are needed.
Problem 3: Sharing Issues
If others cannot hear your audio:
Share the presentation and all the linked audio files in the right manner in Google Drive.
Problem 4: File Type not Supported
Google Slides supports MP3 and WAV formats for audio files:
In case there is any problem uploading an audio file, convert the format to the one mentioned above.
Advanced Audio for Presentations
To further involve your audience using audio in your presentations, here are some advanced tips:
1. Use Background Music Wisely
- Including background music can enhance mood, but it cannot distract from spoken content
- Select instrumental pieces that support and not overwhelm narration.
2. Add Sound Effects
Sound effects are to emphasize points or transitions of:
Use them rarely for the greatest effect and do not overwhelm a viewer.
3. Record Narration for Each Slide
Instead of having to add an individual audio track to every slide, consider recording the narration of exactly what the contents of each slide are saying, right from that slide, to enhance the cohesion of the presentation.
4. Introduce Interactive Elements
Audio can be accompanied by interactive elements in a presentation such as quizzes and polls:
It keeps audiences active and absorbs them into the participation process.
FAQs
Q: Is it possible to add audio to one slide?
Yes, you can add multiple audios on a single slide. This can be achieved simply by following the insertion of audio steps several times. However, you have to be warned that multiple audios can give you extra work when trying to manage playback during your presentation.
Q: How do I test whether my audio works?
Test your audio by:
- Click on Present in the upper right corner of Google Slides.
- When clicking the slide with the audio, it should be able to click the speaker icon if it is set to "On click" or if the slide will play automatically.
- Test your presentation for everything to make sure the volume and playback are at the right sound level.
Q: Can I insert music from YouTube or any other online streaming service?
It is not possible to directly insert music from YouTube into Google Slides. What one can do, though, is insert a link to a YouTube video:
- Find the video on YouTube and copy its link.
- Click Insert in your slide, then click Link.
- Paste the link in the box that opens and apply it.
This will open up the video in a new tab during the presentation when clicked.
Conclusion
If you need an answer to the question: how do I add audio to Google slides? The information provided above can answer the question perfectly. Adding audio to Google Slides is an effective way to improve presentations by making them both more interesting and informative. This is the preparation of your audio files, insertions into slides, altering the options of playback, and then finally, testifying of its functionality. In return, you are now in the best position to come up with lively presentations that shall stay with your audience for some time.
Are you a teacher seeking ways to enhance the ideas for lessons, or is a business professional out there seeking a way to produce your pitches, or else perhaps a way to enrich how he or she expresses him or herself in terms of presentations? Mastering this feature can greatly enhance how your visuals and audio elements work together, creating a more engaging experience.

