You may feel like adding shapes to the PDF file as you add annotations or highlight some parts of a PDF. You can insert multiple shapes like circles, lines, and arrows into your PDF to add stamps or some notes. You can take the help of various online and offline tools if you want to add shapes to PDF files. Here is a guide that you may use to learn how to draw on PDF documents.
How to add shapes to PDF on Windows
If you are looking for a tool that you may use to add shapes on Windows, then PDF Agile can be the best for you. It is a user-friendly PDF editor which can offer you a unique experience. Using the tool, you can add shapes to PDF files. Here is a step-by-step guide that you may follow while working on PDF Agile:
Add a circle to PDF
Step 1: To add a circle to PDF documents, you need to launch the PDF Agile tool on your device and open the PDF on it. Then you have to go to the Insert tab. Here you will find different options to insert a page number, Watermark, signature, stamp, shapes, etcetera.
Step 2: Click on the Shapes option and select Oval from the list of shapes. Now click on the location of the PDF where you want to add the circle shape.

Step 3: Now, use the cursor to place the circle shape, and you can adjust its shape and position using the tiny blue boxes around it. Once you complete, click anywhere on the PDF outside the circle.

Step 4: Similarly, you can draw the circle from the Oval option in the “Comment” option. You can click on the Oval shapes and place your cursor in the position of your choice.
Add lines to PDF
Step 1: To add a line to PDF files, you should go to the Insert tab after opening the PDF file on your computer. There you will find multiple options, including Shapes.
Step 2: Click on the Shapes option and choose “Line.” Then place the cursor to the position you want to add the line. Drag it and position the line shape.

Step 3: After placing the line on the PDF, use the tiny blue boxes at both ends to adjust its position and direction.

Step 4: Alternatively, you may draw lines in PDF by going to the Comment Tab. Click on the “Line” option and then place it on the PDF.
Add Arrow to PDF
Step 1: You can add an arrow to PDF files using the PDF Agile tool. Go to the Insert tab. There you will find the Shapes option.
Step 2: Select Arrow from the Shapes option and place the cursor on the PDF document where you want it. Drag and drop the arrow to position it on the location.
Step 3: You can make further adjustments to the arrow shape by clicking on the small blue boxes at their ends.
Step 4: As an alternative way, you may add an arrow to the PDF with the drag and drop method by selecting the Arrow option from the Comment Tab

How to add shapes to PDF online
Smallpdf
If you wish to add shapes to PDF online, you may use the Smallpdf tool. Here is a step-by-step guide for you –
Step 1: To add shapes to a PDF document, you need to open the Smallpdf tool on your device and then upload the PDF file.
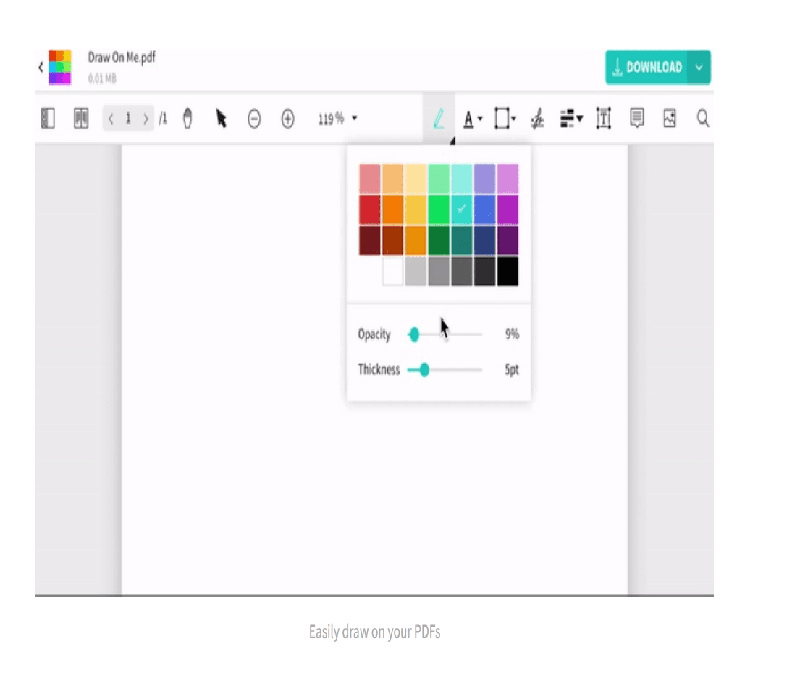
Step 2: Go to the top toolbar and select the ‘Freehand Tool.’ Or press the ‘F‘ shortcut.
Step 3: You can select the color thickness and opacity of the drawing tool before adding the shapes.

Step 4: Click on the Rectangle shape from the top toolbar. Select the desired shape you want to add. Once you complete, download the PDF for future use.
How to add shapes to PDF on Mac for free
If you are a Mac user, then you can add shapes to PDF files from Preview. You may follow these steps for that:
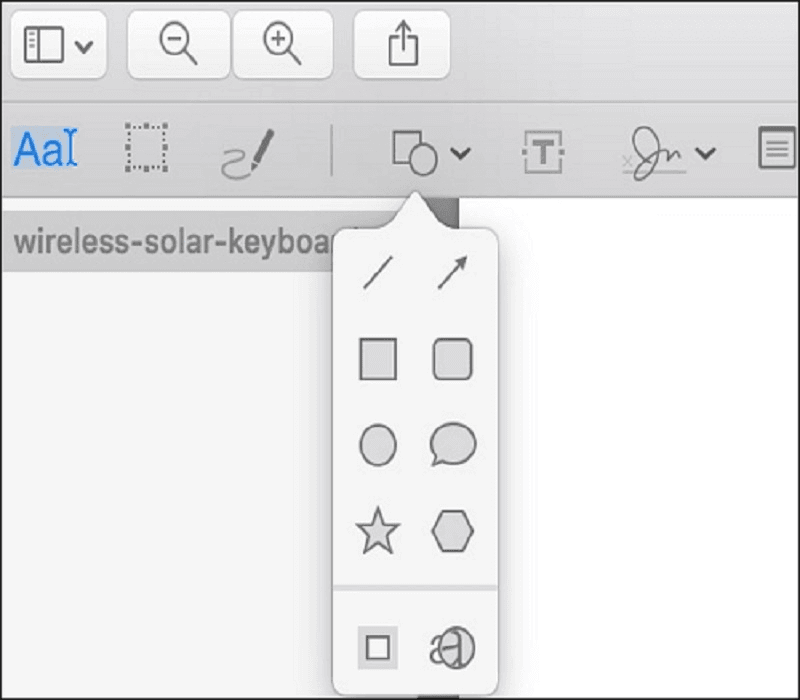
Step 1: Open the PDF you want to edit on Preview. Go to the toolbox button in the main toolbar. Here you will find the Markup toolbar for your work.
Step 2: Now, click on the Shapes icon where you will get common shapes like lines, arrows, rectangles, circles, hexagons, etcetera. Select the desired shape you want to add to your PDF, and it will appear in the middle of your PDF.

Step 3: Drag the shape to the position of your choice. When you finish editing, you may export it to your Mac.
FAQ about Adding Shapes to PDF
How do I add shapes to a PDF for free?
If you want to add shapes to PDF documents, you can easily do that for free on the PDF Agile tool. You can go to the Insert tab and click on the Shapes option. Now, select the Oval, Lines, Rectangle, or Arrow shape and drag the cursor to place it at the location of your choice.
You may also make adjustments to its position. You can also take shapes from the Comment Tab of the tool.
How to add shapes in Adobe Acrobat?
You can add shapes to PDF files on Adobe Acrobat. Open the PDF on Adobe Acrobat and click on the tools in the top toolbar. Click on Comments and choose to add shapes. You can select circles, arrows, lines, rectangles, polygons, etcetera. Position it in the location of your choice and save the file to your device.
Conclusion
When you require a shape tool for editing a PDF, you may look for various online and offline tools.
You can select the tool of your choice and then adjust it on the PDF editors. However, if you want a unique experience and seamlessly work on your PDF, you must use PDF Agile to add shapes to PDF documents.
Apart from adding shapes, you can do other things like merging PDF files, deleting or arranging pages, inserting signatures, time stamps, and many more.


