In today's digital age, managing document sizes efficiently is crucial not only for saving storage space but also for ensuring easy document sharing and quick uploads. PDFs are a widely used format due to their professional appearance and consistency across devices and platforms. However, large PDF files can become a hurdle, slowing down email transfers, consuming excessive storage, and sometimes causing upload failures on websites with file size restrictions. If you're using a Mac, you might wonder how to tackle this issue without purchasing costly software. Thankfully, solutions are readily available, even using tools you might already have.
One such approach is using Microsoft Word to compress PDFs. While most people associate Word with creating and editing text documents, it can also be a powerful ally in reducing PDF file sizes right from your desktop. Whether you're dealing with existing PDFs or creating new ones, this guide will walk you through compressing PDF files using Microsoft Word, ensuring your documents remain accessible, shareable, and storage-efficient without compromising quality. Dive into this step-by-step strategy to keep your digital documents manageable and efficient.
Method 1: How to Reduce a PDF File on a Mac Using Preview?
Reducing the size of a PDF on your Mac is super easy with the built-in Preview app. Here's a quick step-by-step guide to help you do it:
1. Open the PDF: If Preview isn't set as your default app, just right-click the PDF, select Open With, and then choose Preview.
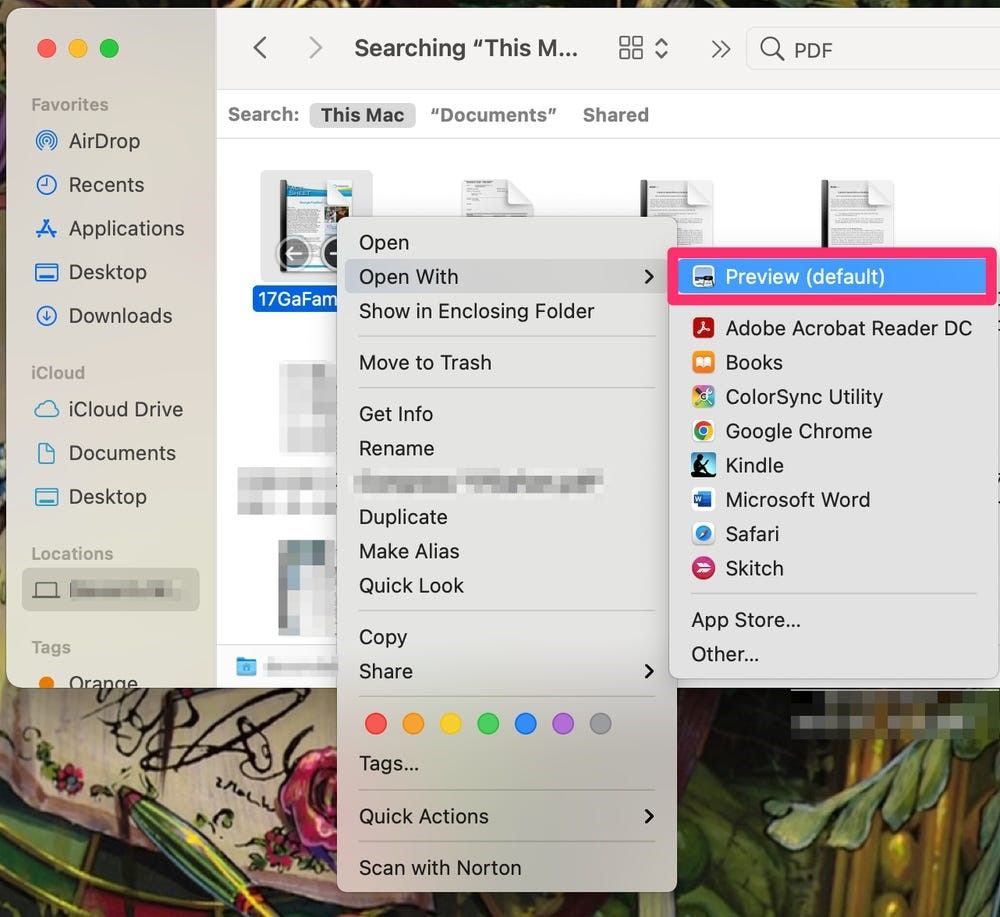
2. Once the PDF is open, head up to the top toolbar.
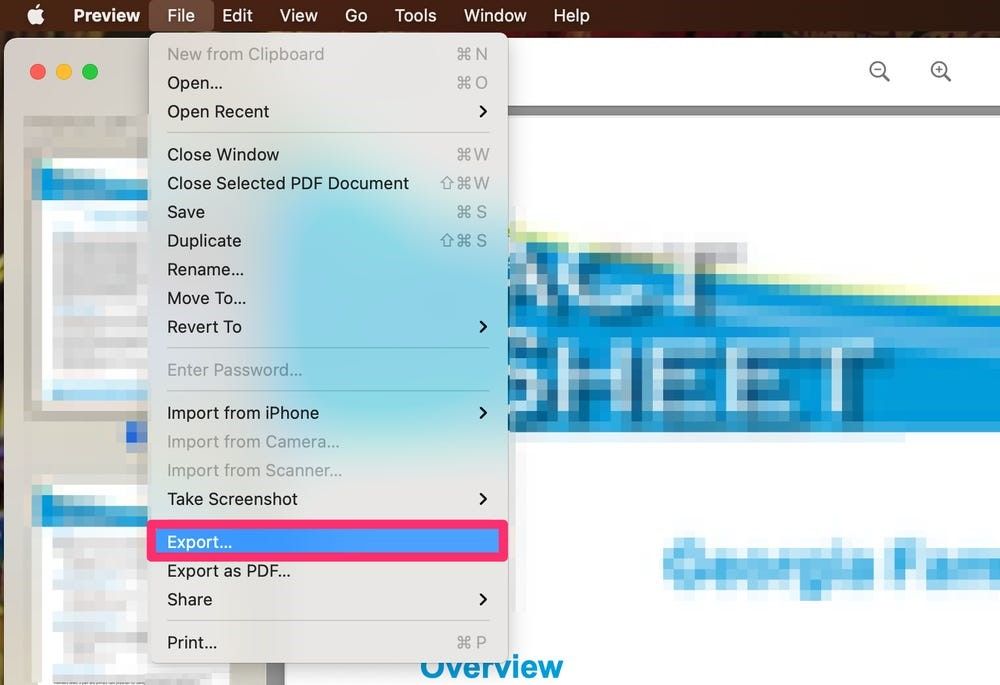
3. Select File and then click on Export.
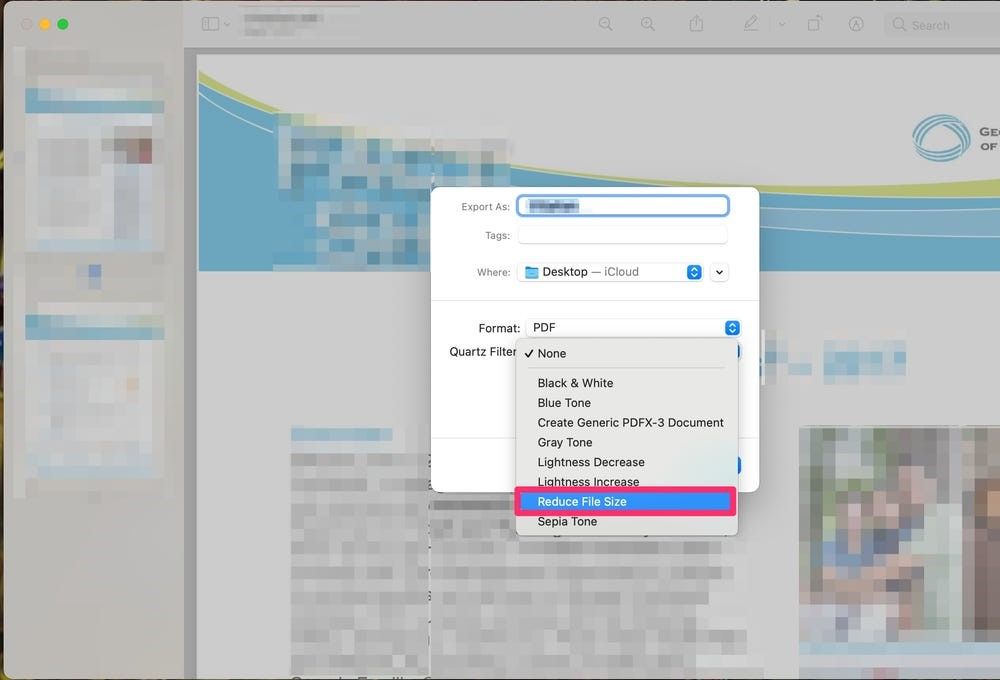
4. A pop-up window will appear. In this window, next to Quartz Filter, click on the dropdown menu and choose Reduce File Size.
5. Finally, click Save.
Quick Tip: To check the size of your newly compressed PDF, just right-click the file and select Get Info. This will show you the updated file size. Simple as that!
Method 2: How to Reduce PDF File Size on a Mac with Adobe Acrobat?
You don't need a paid subscription to Adobe Acrobat Pro to reduce the size of your PDFs. You can use Adobe's free online PDF compressor. Here's how:
1. Go to the Adobe PDF compression tool: Open your web browser and navigate to Adobe's online PDF compression tool. Adobe offers this tool for free, and it does a great job of reducing file sizes. Note that this tool will not work if the PDF is encrypted.

2. Upload your PDF: You can either drag and drop your PDF into the designated box or click Select a file to browse and select the PDF you want to compress.
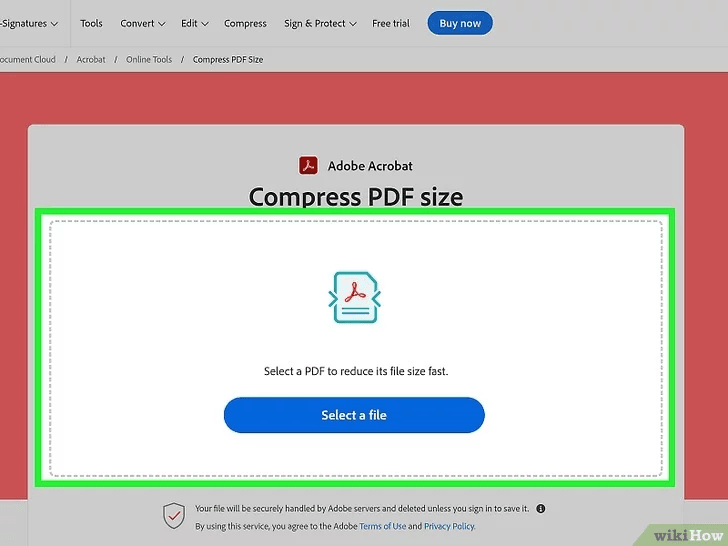
3. Choose your compression level: Adobe provides three options for compression:
- High: Results in the smallest file size with standard quality.
- Medium: Balances file size reduction and quality.
- Low: Slightly reduces the file size while maintaining higher quality.
If you're unsure which to choose, Medium compression is a good default.
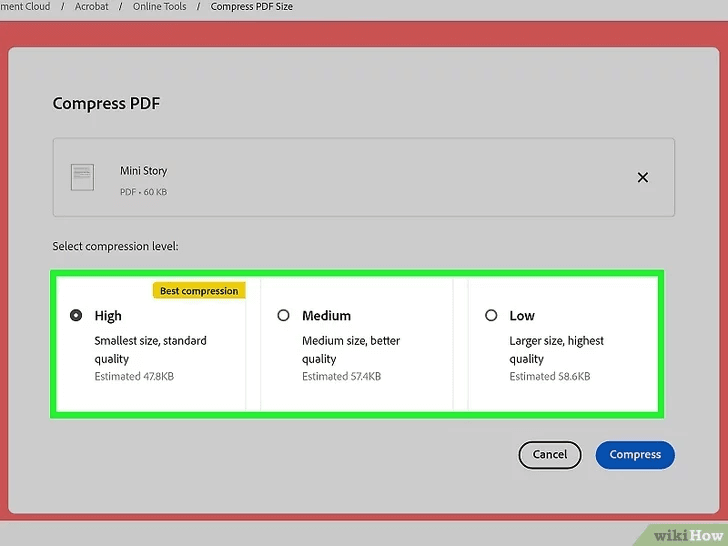
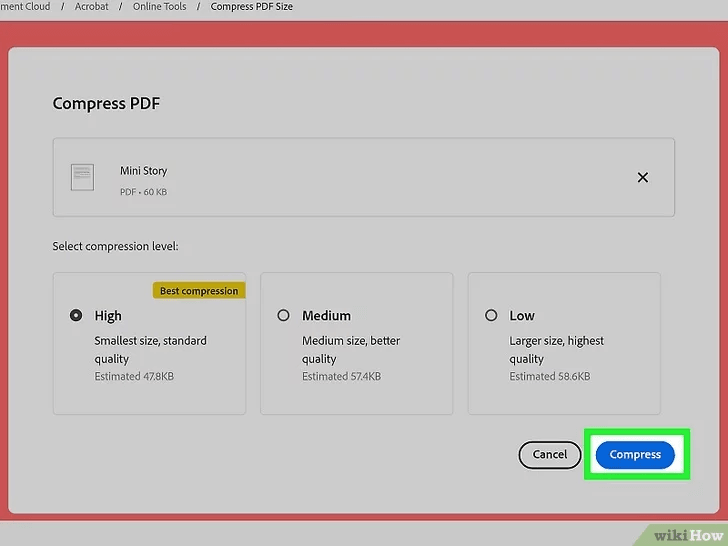
4. Click Compress: Adobe will then compress your PDF and generate a download link for the compressed file.
5. Download your compressed PDF: Click the Download button to save your newly compressed PDF to your computer.
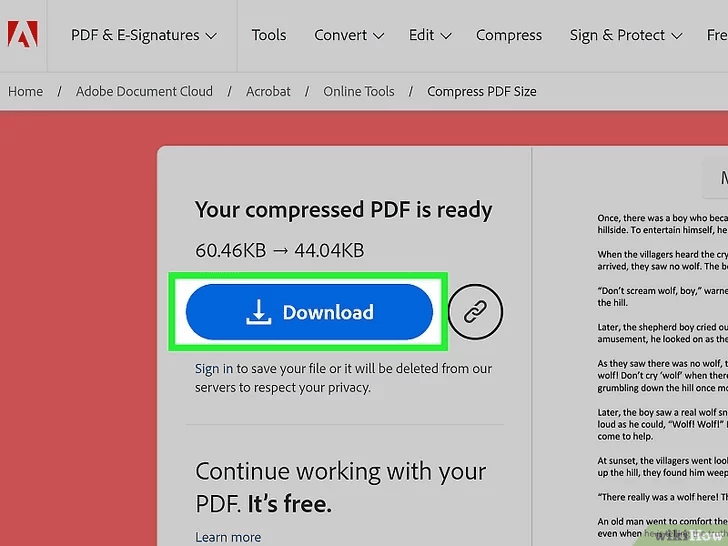
By following these steps, you can easily reduce the size of your PDF files using Adobe's free online compressor on your Mac.
Method 3: How to Reduce PDF File Size on a Mac Using Microsoft Word?
You can use Microsoft Word on your Mac to export documents as compressed PDF files. Here's how:
1. Open a Document in Microsoft Word: Start by opening an existing PDF in Word or create a new Word document that you want to save as a compressed PDF. Do note that when you open a PDF in Word, it might lose some of its original formatting.
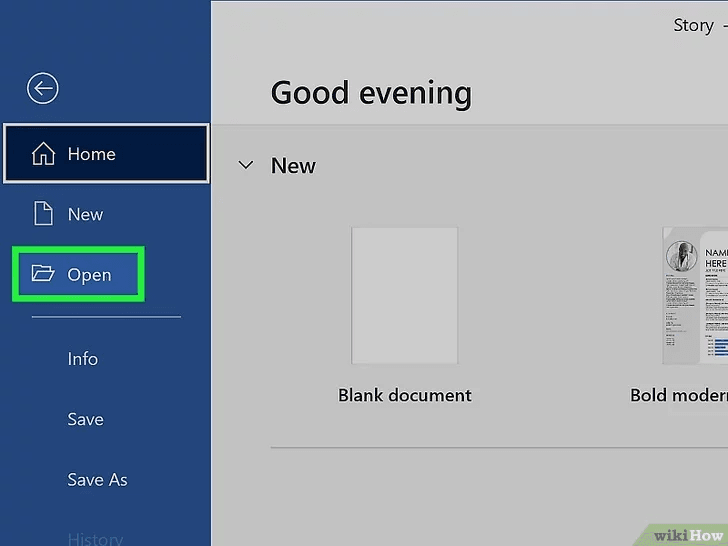
2. Click the File Menu: Navigate to the top-left corner of the window and click on the File menu.
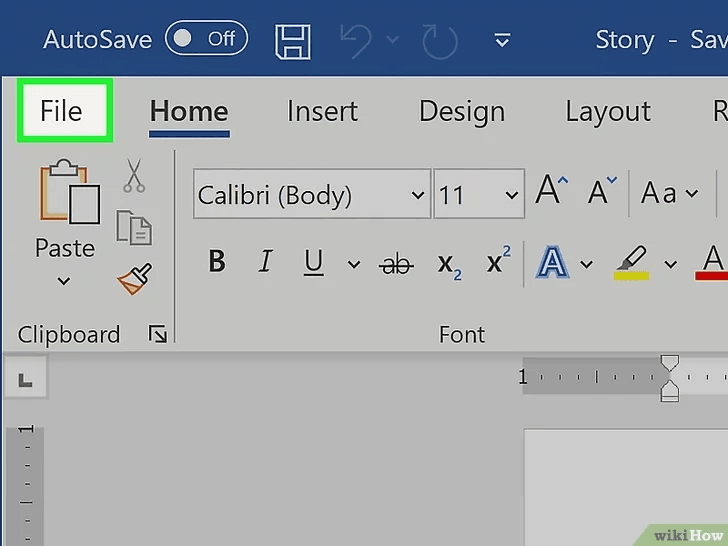
3. Click Save As: On a Mac, this option allows you to choose how and where you want to save your document.
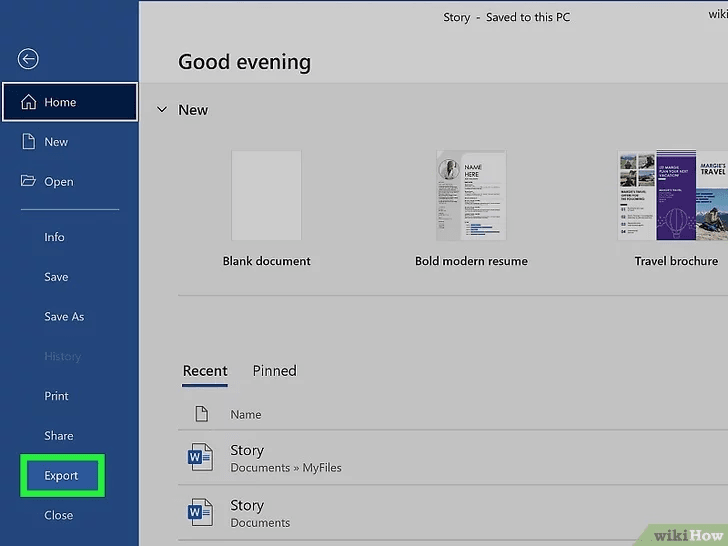
4. Select PDF as the File Format: At the bottom of the window, choose PDF from the available file formats.
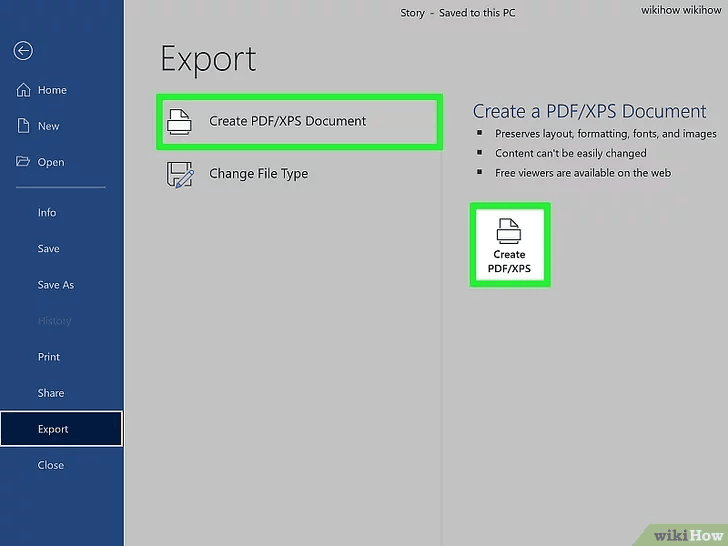
5. Select an Optimization Option: To compress the PDF to a smaller size, choose Best for electronic distribution and accessibility. This option helps in reducing the file size while maintaining quality suitable for electronic use.
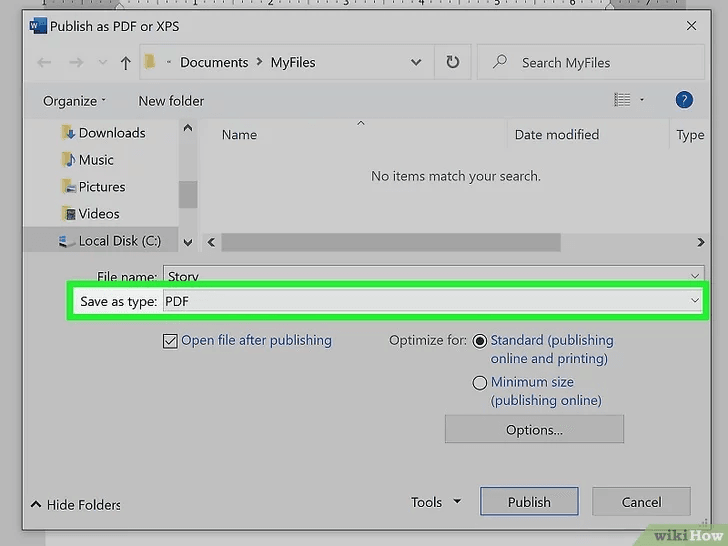
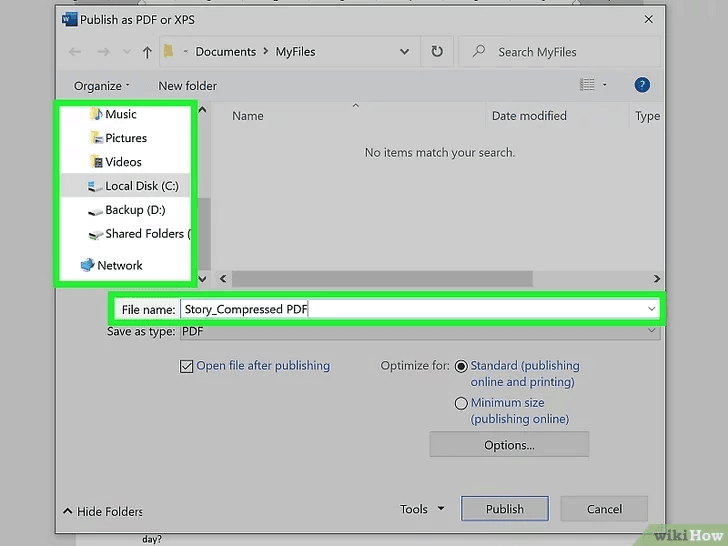
6. Name the PDF and Select a Folder: Provide a name for your PDF file and choose the folder where you want to save it. To overwrite the existing PDF, keep the same name and save it in the same location. Otherwise, you can select a different name and/or folder.
7. Click Export: This final step saves a compressed version of the PDF to the chosen location on your Mac.
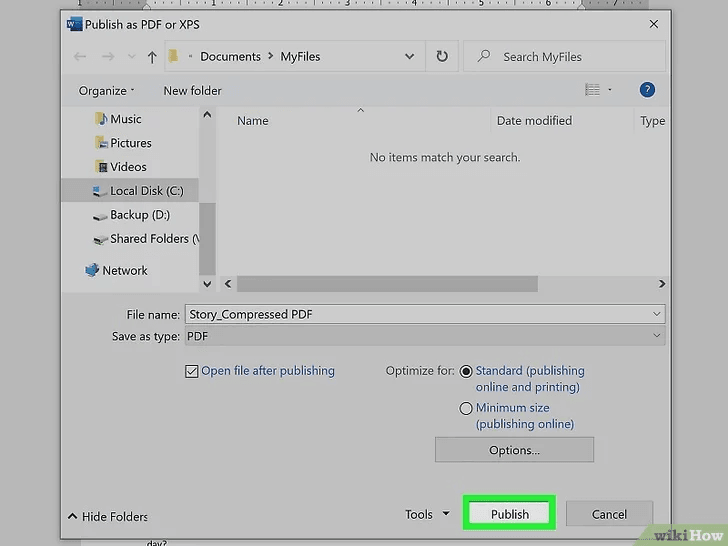
By following these steps, you can effectively reduce the size of your PDF files using Microsoft Word on your Mac.
Method 4: How to Easily Compress a PDF on Your Mac Using an Online PDF Compressor?
If you've ever found yourself needing to shrink the size of a PDF quickly, online PDF compressors are fantastic tools that are right at your fingertips in any web browser. Much like the Acrobat online compression tool, they are completely free and incredibly user-friendly. One of the standout features is its ability to handle up to 20 PDF files all at once (paid version), which is a real-time-saver. Plus, there's peace of mind since it automatically deletes your uploaded files within an hour, protecting your privacy.
To get started, open up your favorite web browser and head over to PDF Compressor.
- Hit the Upload Files button.
- Use Command-click to select multiple PDFs from your files that you wish to compress.
- Click Upload to kick off the compression process.
Once all your PDFs are conveniently compressed, you have the choice to download them all at once or individually. Just click Download All or select the specific files you need and click Download. It's as straightforward as that!
Method 5: How to Reduce the Size of a PDF on a Mac Using Automator?
Automator is a handy tool that Apple built right into your Mac to help automate those repetitive tasks. It's surprisingly effective for compressing PDFs without significantly losing quality. Here's how you can use it to shrink your PDFs:
- Open the Automator app on your Mac.
- Choose the Quick Action option and click Choose.
- In the "Workflow receives current" dropdown menu, select PDF files. In the "in" menu, pick Finder.
- In the Variables field, find and drag the Apply Quartz Filter to PDF document filter into the workflow area.
- You'll be asked whether you want to save the originals after conversion. Choose Add or Don't Add based on your preference.
- In the "Filter" dropdown menu, select Reduce File Size.
- Go to the File menu, select Save, and name your Quick Action filter.
- Close the Automator app and locate the PDF file you want to compress.
- Right-click the file to open the "Options" menu and look for Quick Actions.
- Choose the filter you just created.
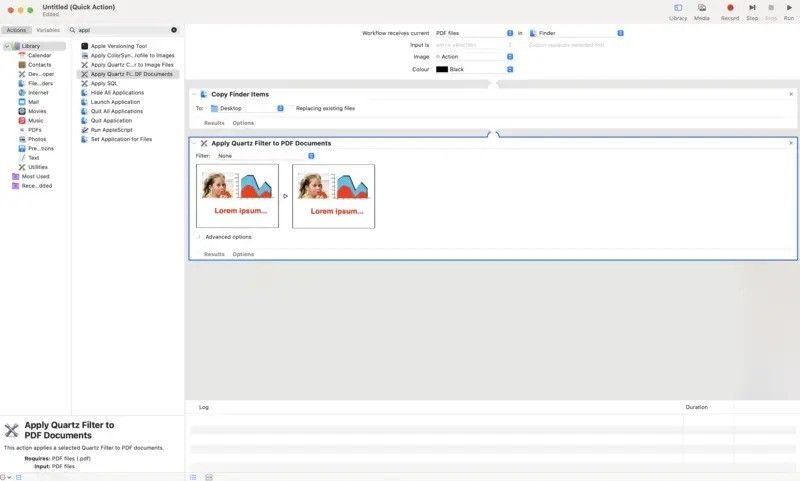
That's it! You've now learned an efficient way to make your PDFs smaller on Mac using Automator.
FAQs
Q: Can I use Microsoft Word to reduce PDF file size on both Mac and PC?
A: Yes, you can use Microsoft Word on both Mac and PC to reduce PDF file size. While the specific options and steps may vary slightly between the two platforms, the process of exporting a Word document as a compressed PDF is available on both.
Q: Will compressing a PDF in Microsoft Word compromise the quality of my document?
A: Compressing a PDF using Microsoft Word aims to reduce file size while maintaining a good balance between quality and accessibility. However, depending on the level of compression, there might be some minor quality loss. For general use like sharing or online submission, the quality remains sufficient.
Q: Can I compress an already existing PDF using Microsoft Word, or do I need to start with a Word document?
A: You can compress an already existing PDF by opening it in Microsoft Word and then exporting it as a compressed PDF. Be aware that opening a PDF in Word might alter some of its original formatting, so it's best used for documents where minor formatting changes are acceptable.
Q: Are there any limitations to using Microsoft Word for PDF compression compared to dedicated PDF tools?
A: While Microsoft Word provides a convenient and cost-effective way to compress PDF files, dedicated PDF compression tools may offer more advanced features, better quality control, and higher compression ratios. For most standard user needs, Microsoft Word's compression is sufficient and effective, but for more complex or sensitive documents, specialized tools could be beneficial.
Final Words
Managing the size of your PDF files is essential for efficient and seamless document handling. Leveraging Microsoft Word on your Mac provides a straightforward and effective solution for compressing these files. By following the outlined steps, you can easily reduce the size of any PDF, making it more manageable for sharing and storing without compromising its readability and quality.
Emphasizing this simple yet powerful technique can save you from the frustration of handling overly large files and ensure your documents are always ready for quick sharing and easy upload. The ability to compress PDFs using Microsoft Word taps into the versatility of software you probably already have at your disposal, avoiding the need for additional investment in specialized tools. Embrace this method to maintain professionally presented, optimized PDFs. This small adjustment in your workflow can significantly enhance your digital document management, making your daily tasks smoother and more efficient.

