Fillable PDF forms created from Word documents are an easy data collection skill. If you are preparing an application, a survey, or any document that requires user input. You can transform your Word document into an interactive PDF. It can enhance accessibility and professionalism in your tasks. Creating fillable PDFs allows users to enter data directly into designated fields. It makes the process simpler and more efficient for both the creator and the respondent. We will elaborate on two key procedures
- Converting your Word document into a fillable PDF using Microsoft Word itself
- Using Adobe Acrobat for additional functionalities
The built-in features in Word offer a simple approach. It is perfect for quick tasks and minimalistic forms. However, Adobe Acrobat provides advanced tools for creating highly customized and detailed forms. You will be equipped to handle any form-creation needs efficiently by mastering both methods.
Method 1: Create a Fillable form in Word
Before you can create fillable forms, you need to prepare your Word document.
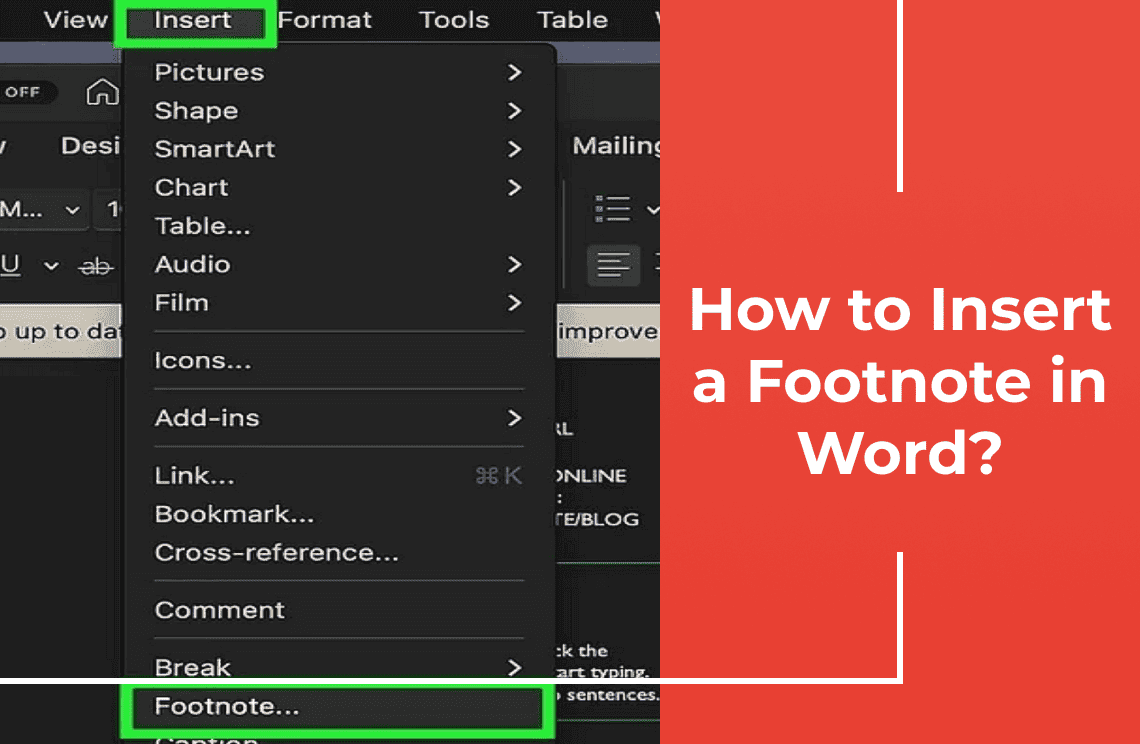
Step 1: Enable the Developer Tab in Word
Follow these steps to enable the Developer tab:
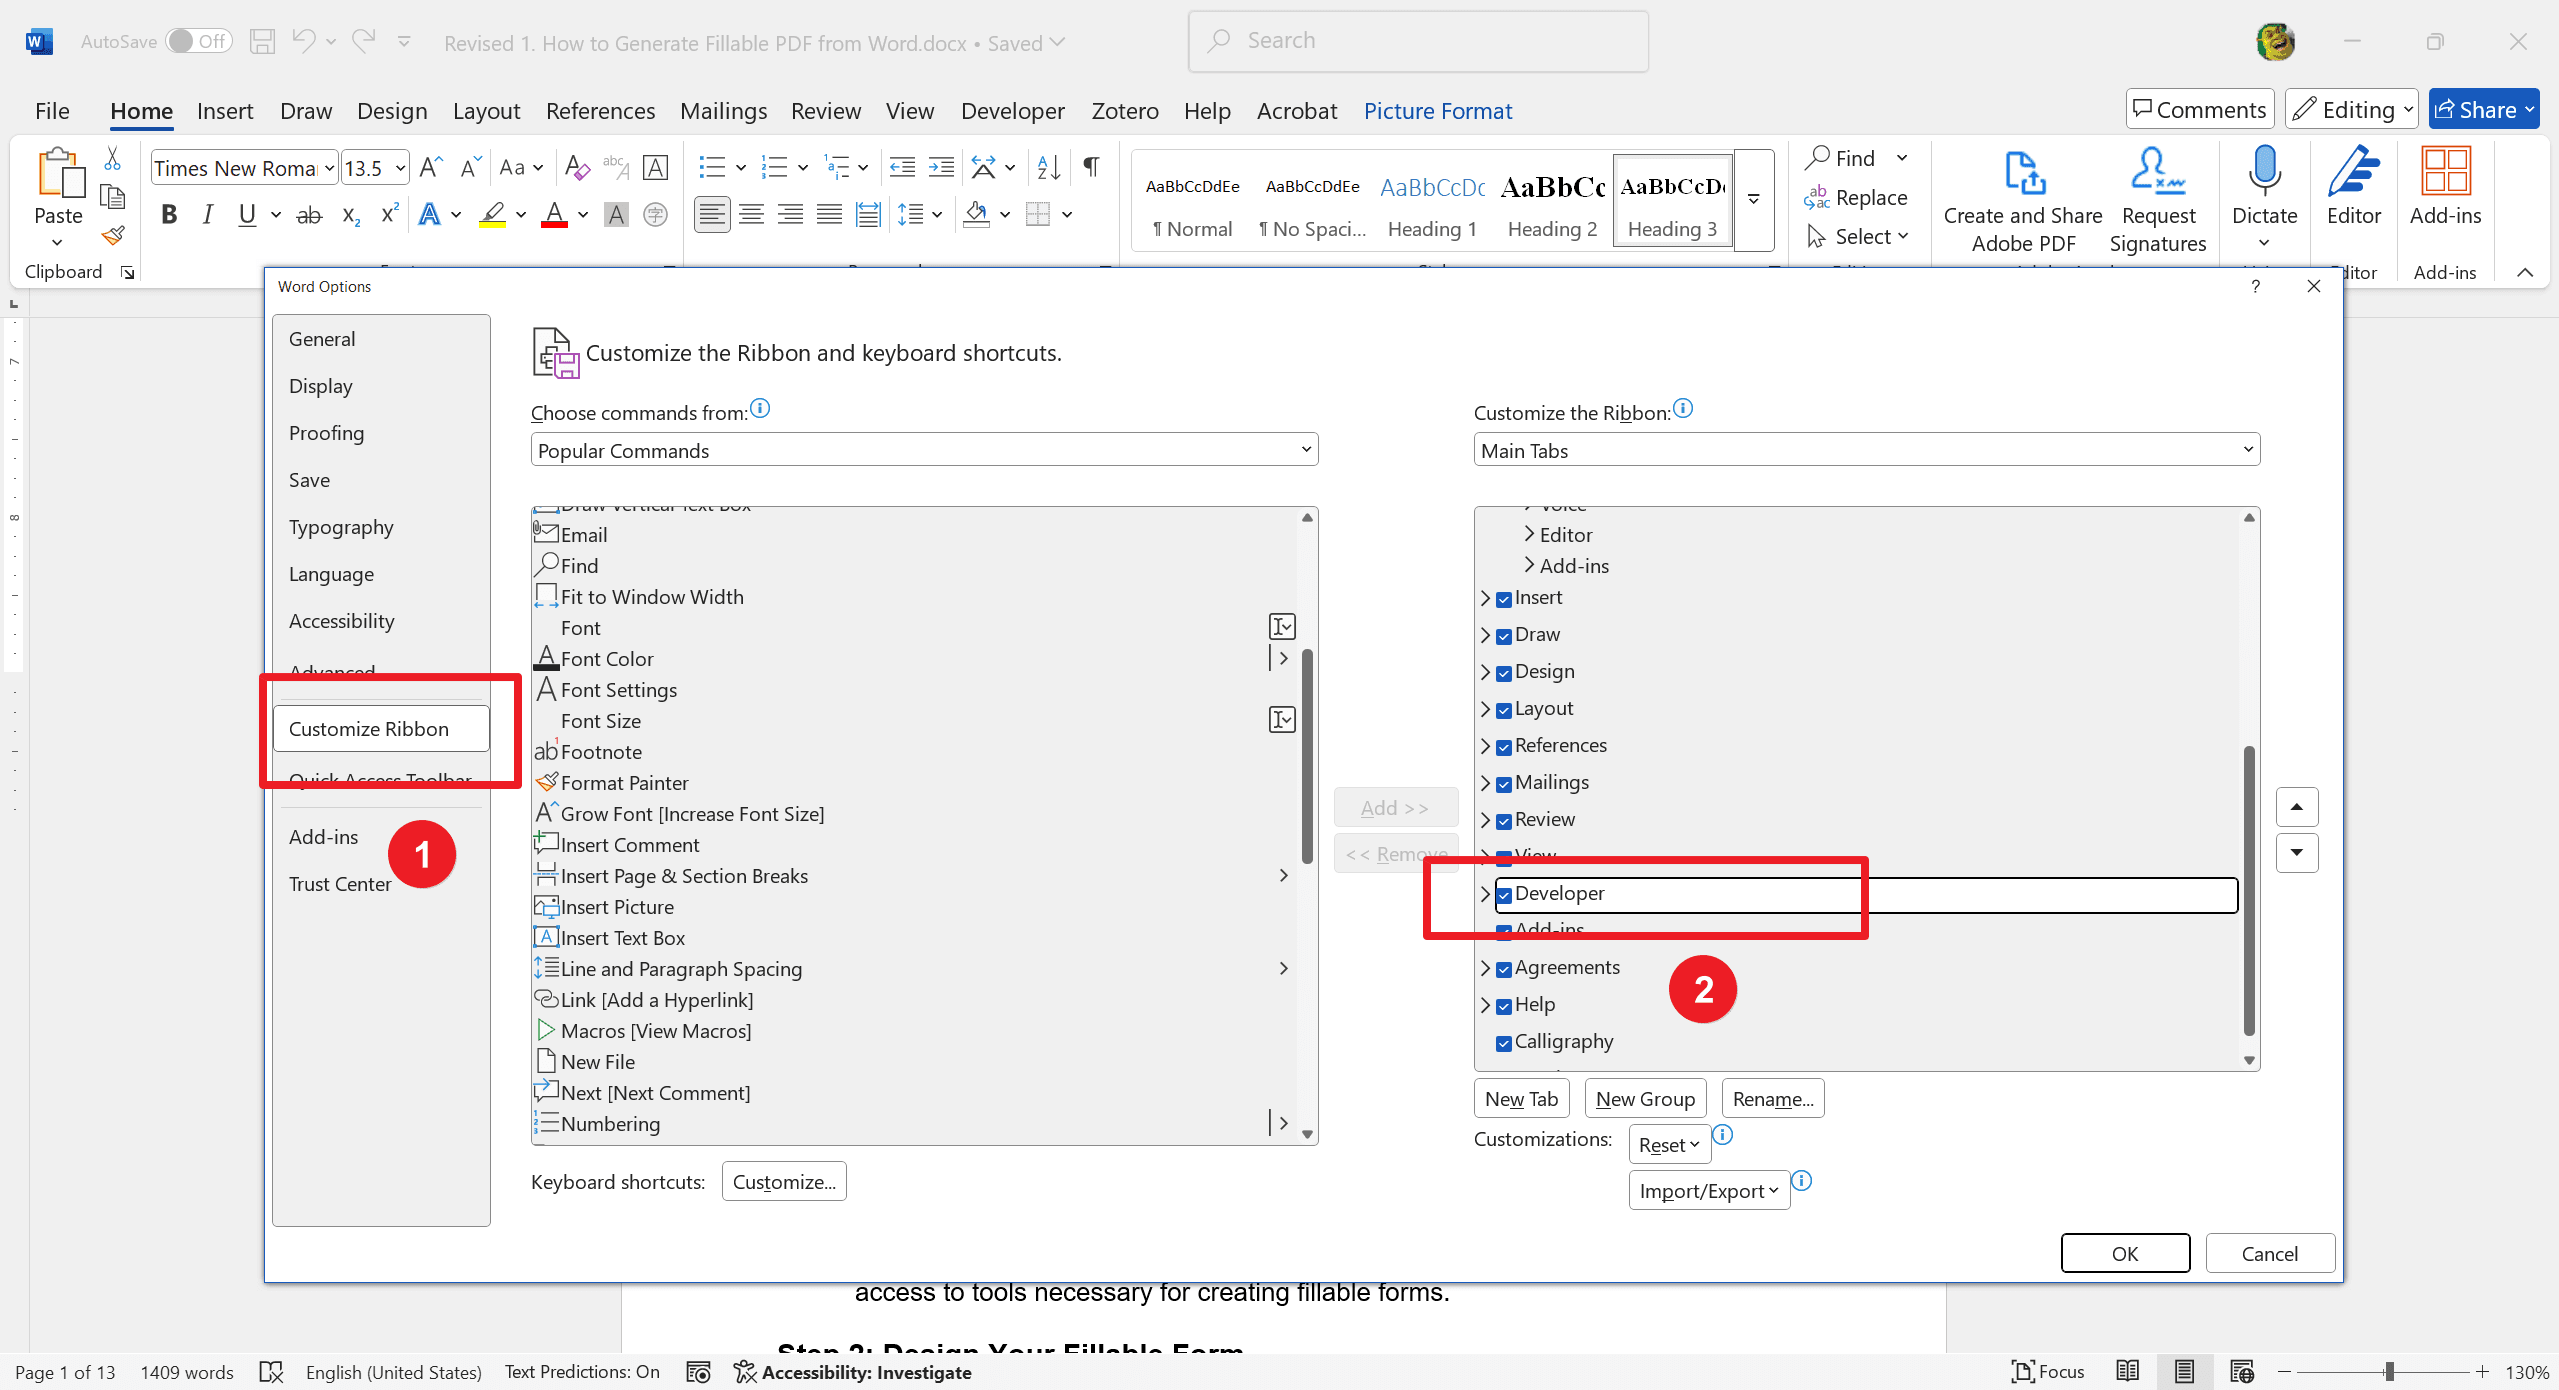
1. Open your Word application. And then, click on "File" in the top left corner and scroll down to find "Options". This will open up a dialog box where you can customize your Word settings.
2. In the Options dialog box, you’ll see a list of categories on the left. And then, click on "Customize Ribbon". This section allows you to add or remove tabs from your Word interface.
3. Look for the "Developer" option in the right-hand list of tabs. Simply check the box next to "Developer. Finally, click "OK". The Developer tab will now appear on your Word Ribbon, giving you access to tools necessary for creating fillable forms.
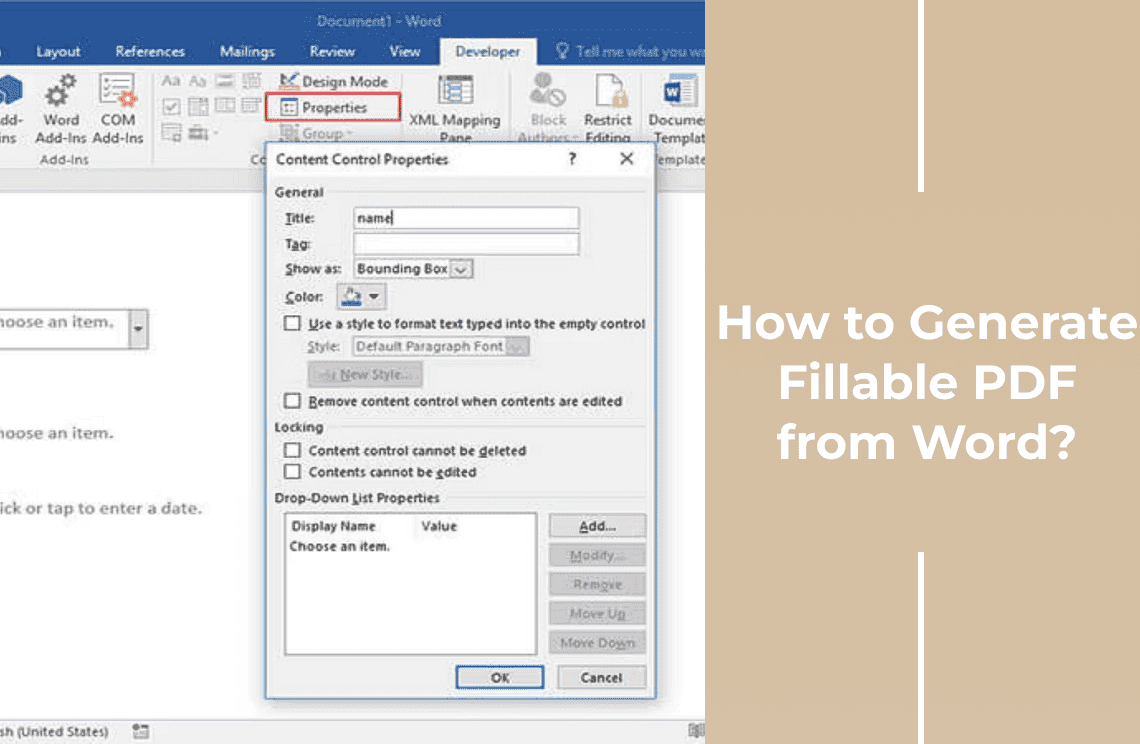
Step 2: Design Your Fillable Form
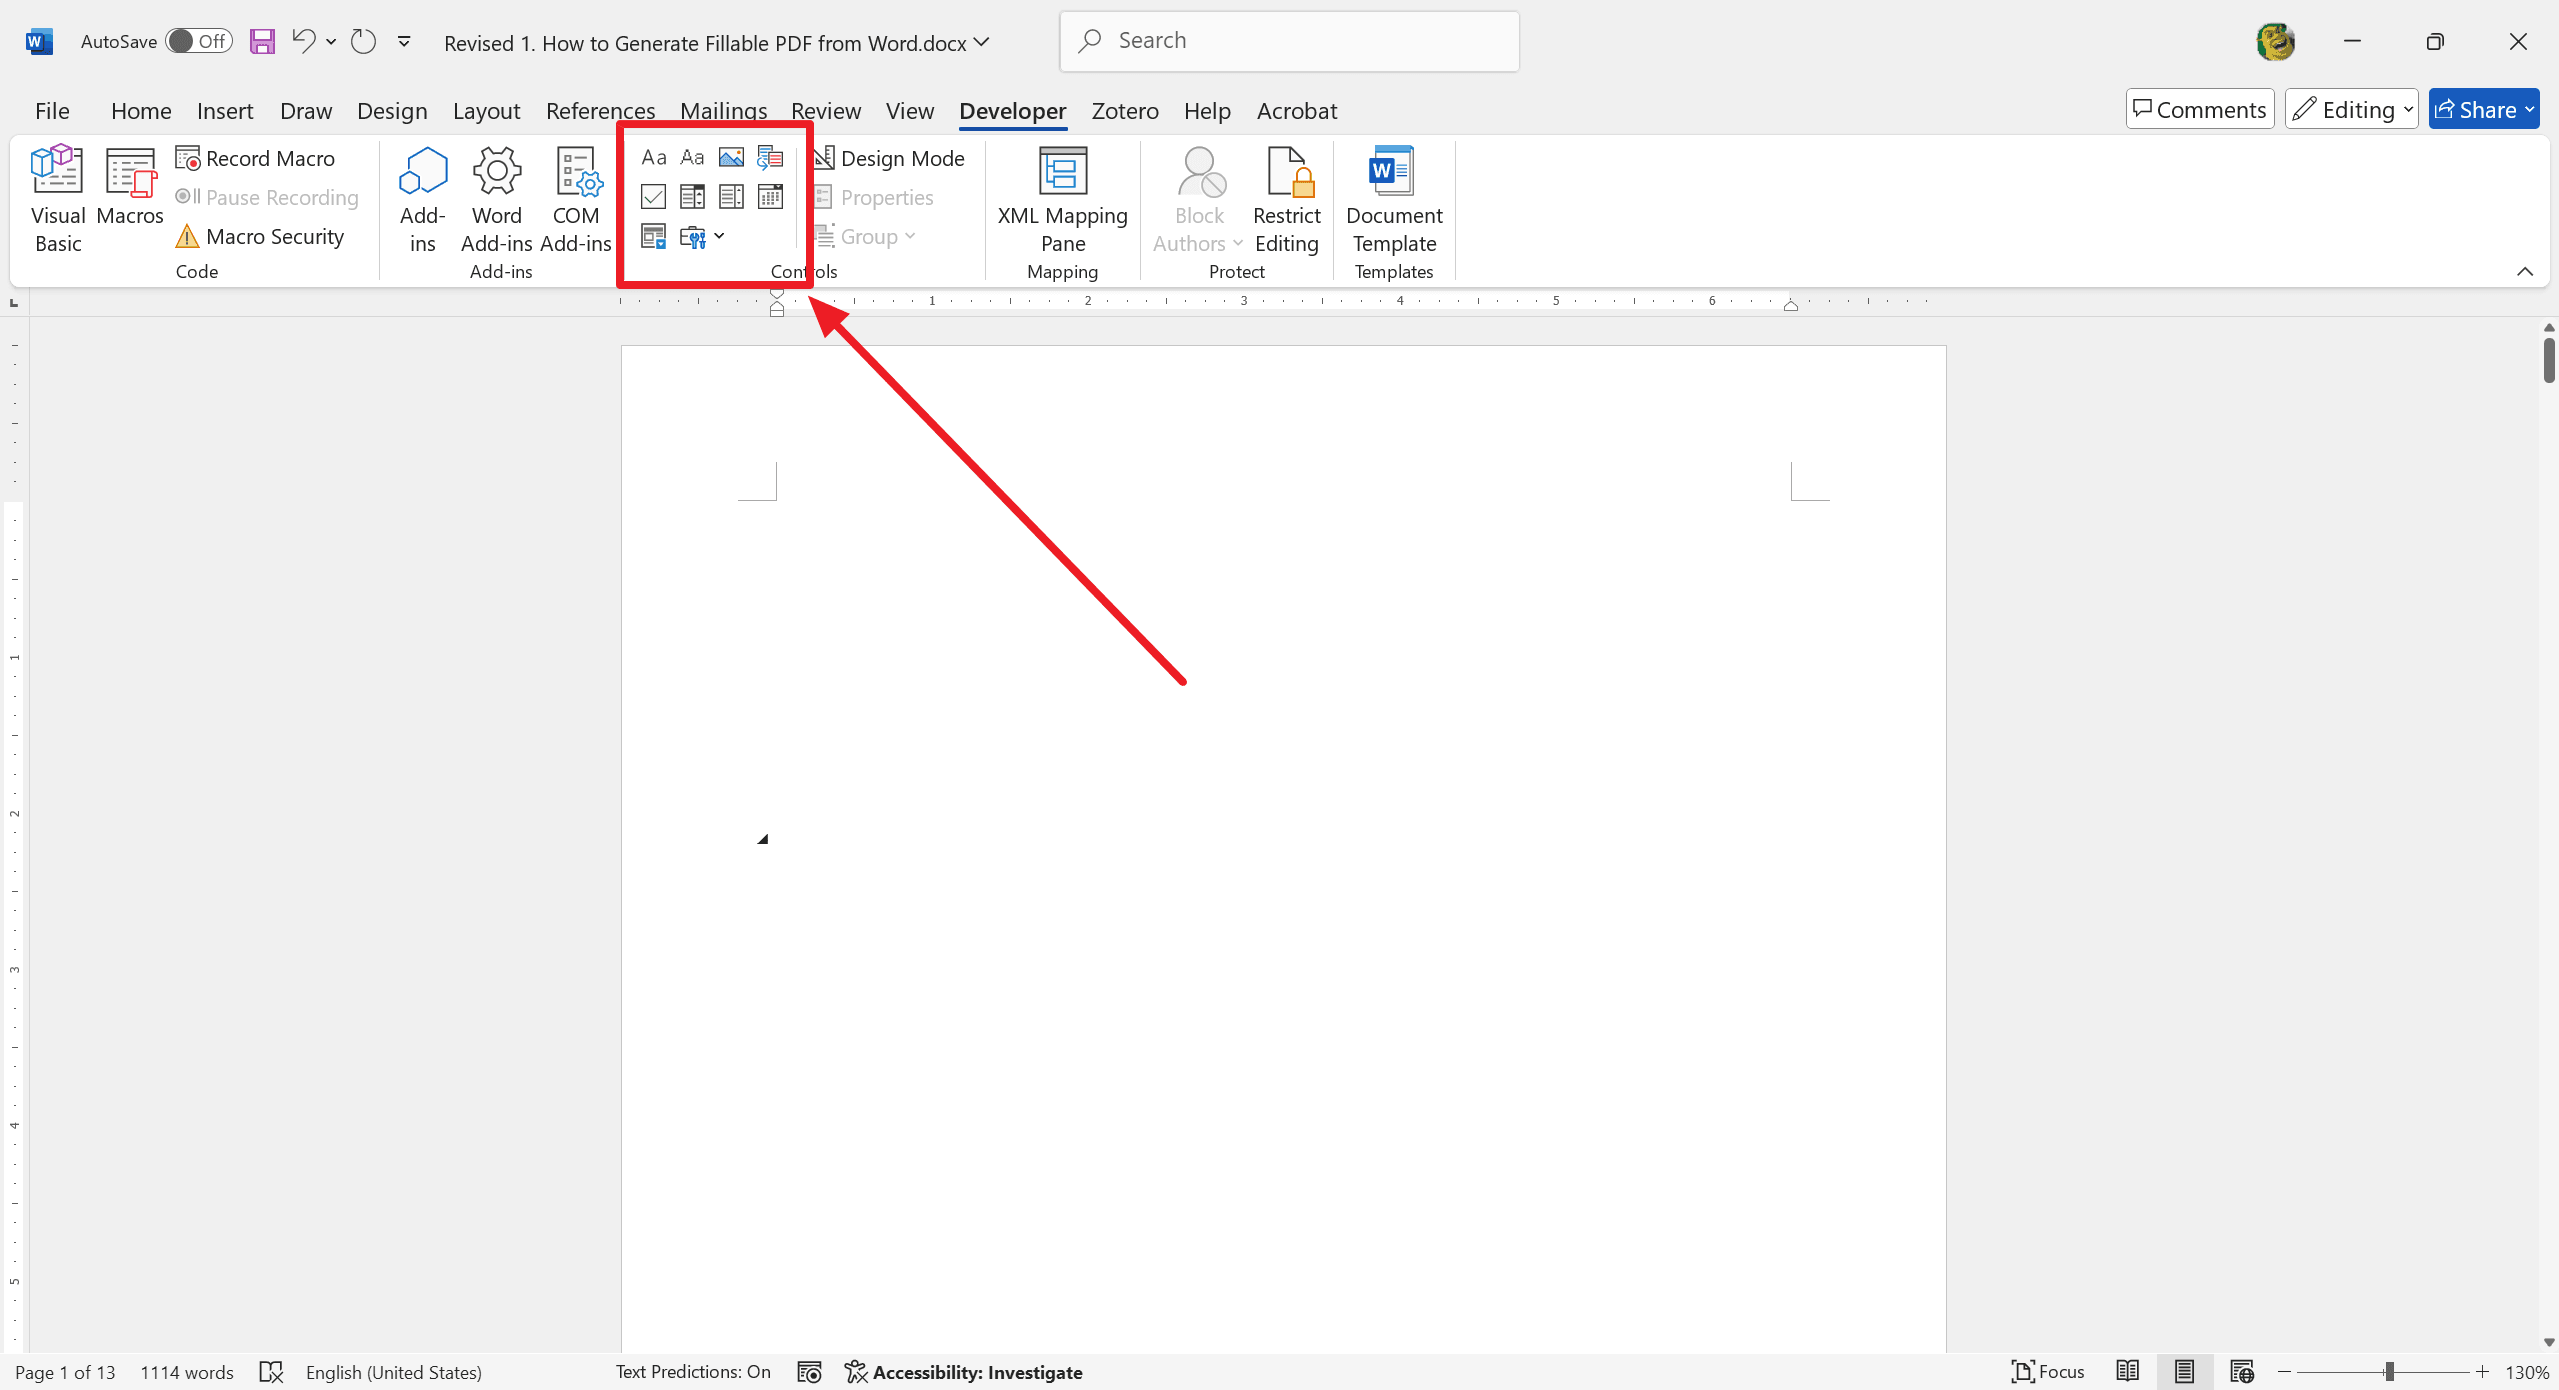
1. Click on the "Developer" tab now visible in your Word Ribbon. And then, click "Design Mode."
2. Insert text boxes for user input. Thereafter, add drop-down lists for selectable options.
3. Include checkboxes for multiple selections. Then, insert date pickers for date inputs.
Step 3: Customize Control Properties (E.G., Title, Tag, Color)
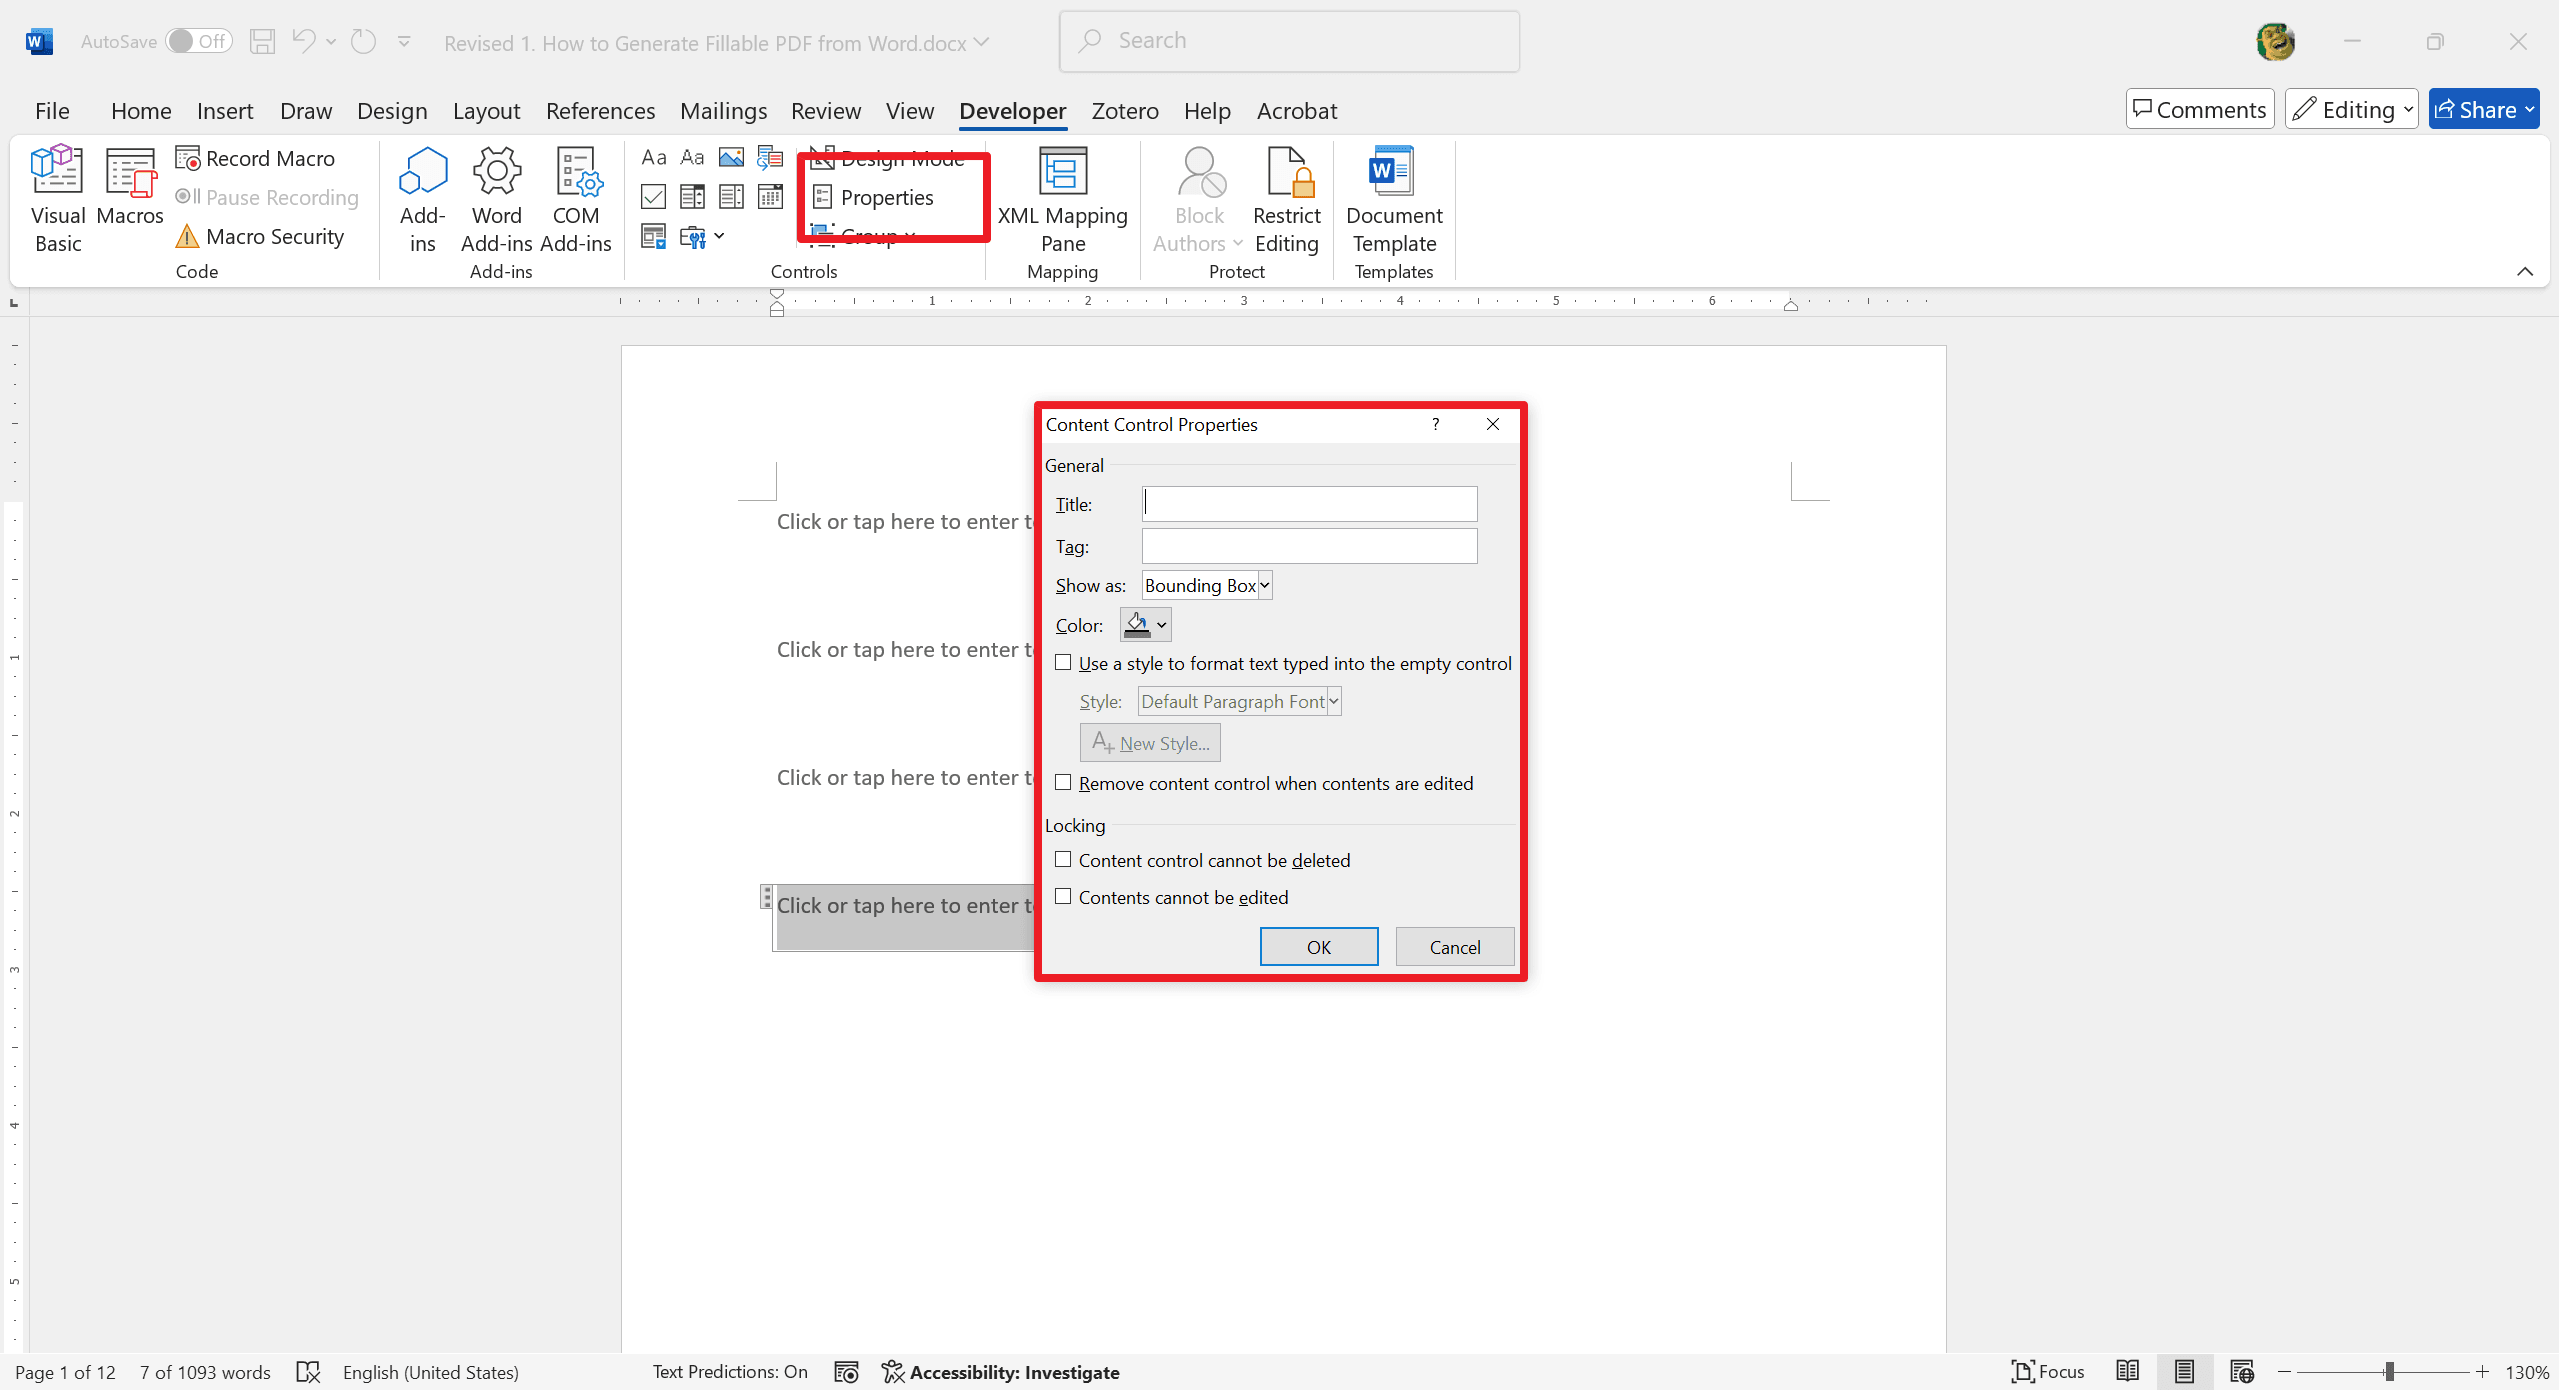
1. Right-click on any control to adjust properties such as title, tag, and color
2. Customize the form to your specific needs.
Step 4: Apply Protection to the Form
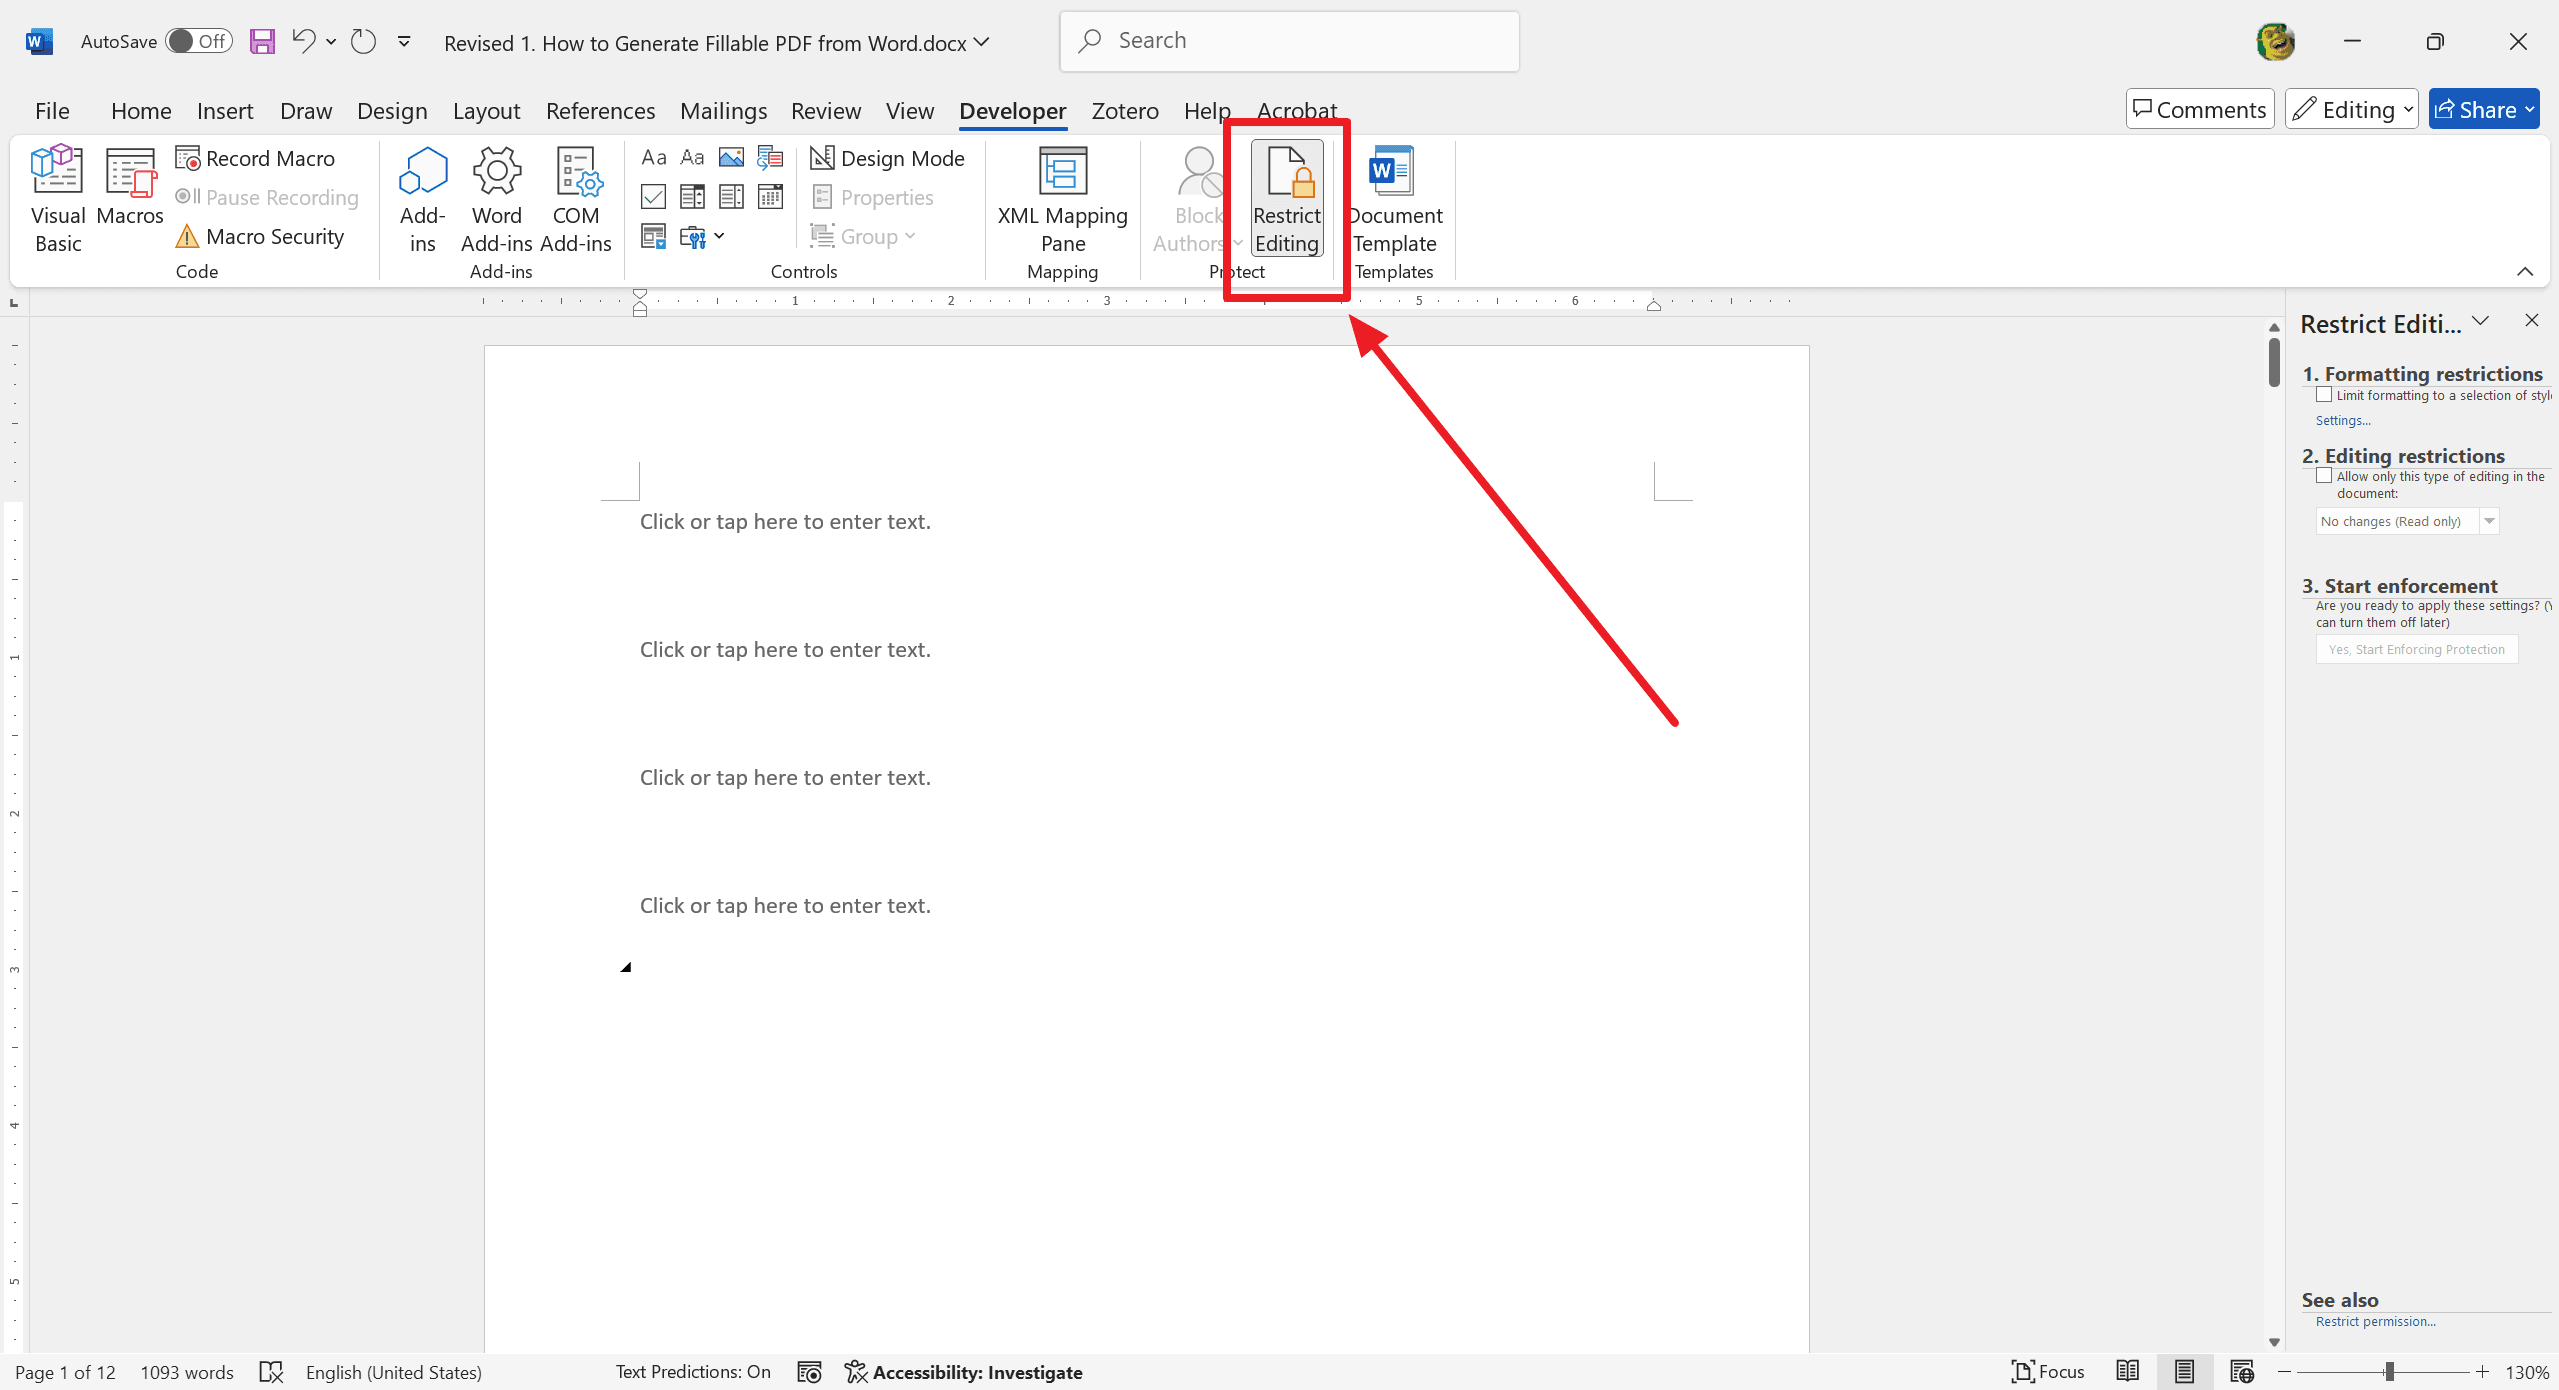
1. Highlight your entire form by clicking and dragging over the content. Go to the "Developer tab". And then, click on "Restrict Editing."
2. In the "Restrict Editing" pane, set your desired permissions.
3. Click "Yes, Start Enforcing Protection".
4. Set a password if needed to finalize and protect your form.
Method 2: Convert Word Document to Fillable PDF
You're familiar with creating fillable forms in Word. Now let's explore a different approach. It is essential to choose the PDF editor that's right for you before getting into how to create a fillable form in PDF format. Selecting the best tool will streamline the entire process. Let's begin!
Create Fillable PDF Documents using Adobe Acrobat
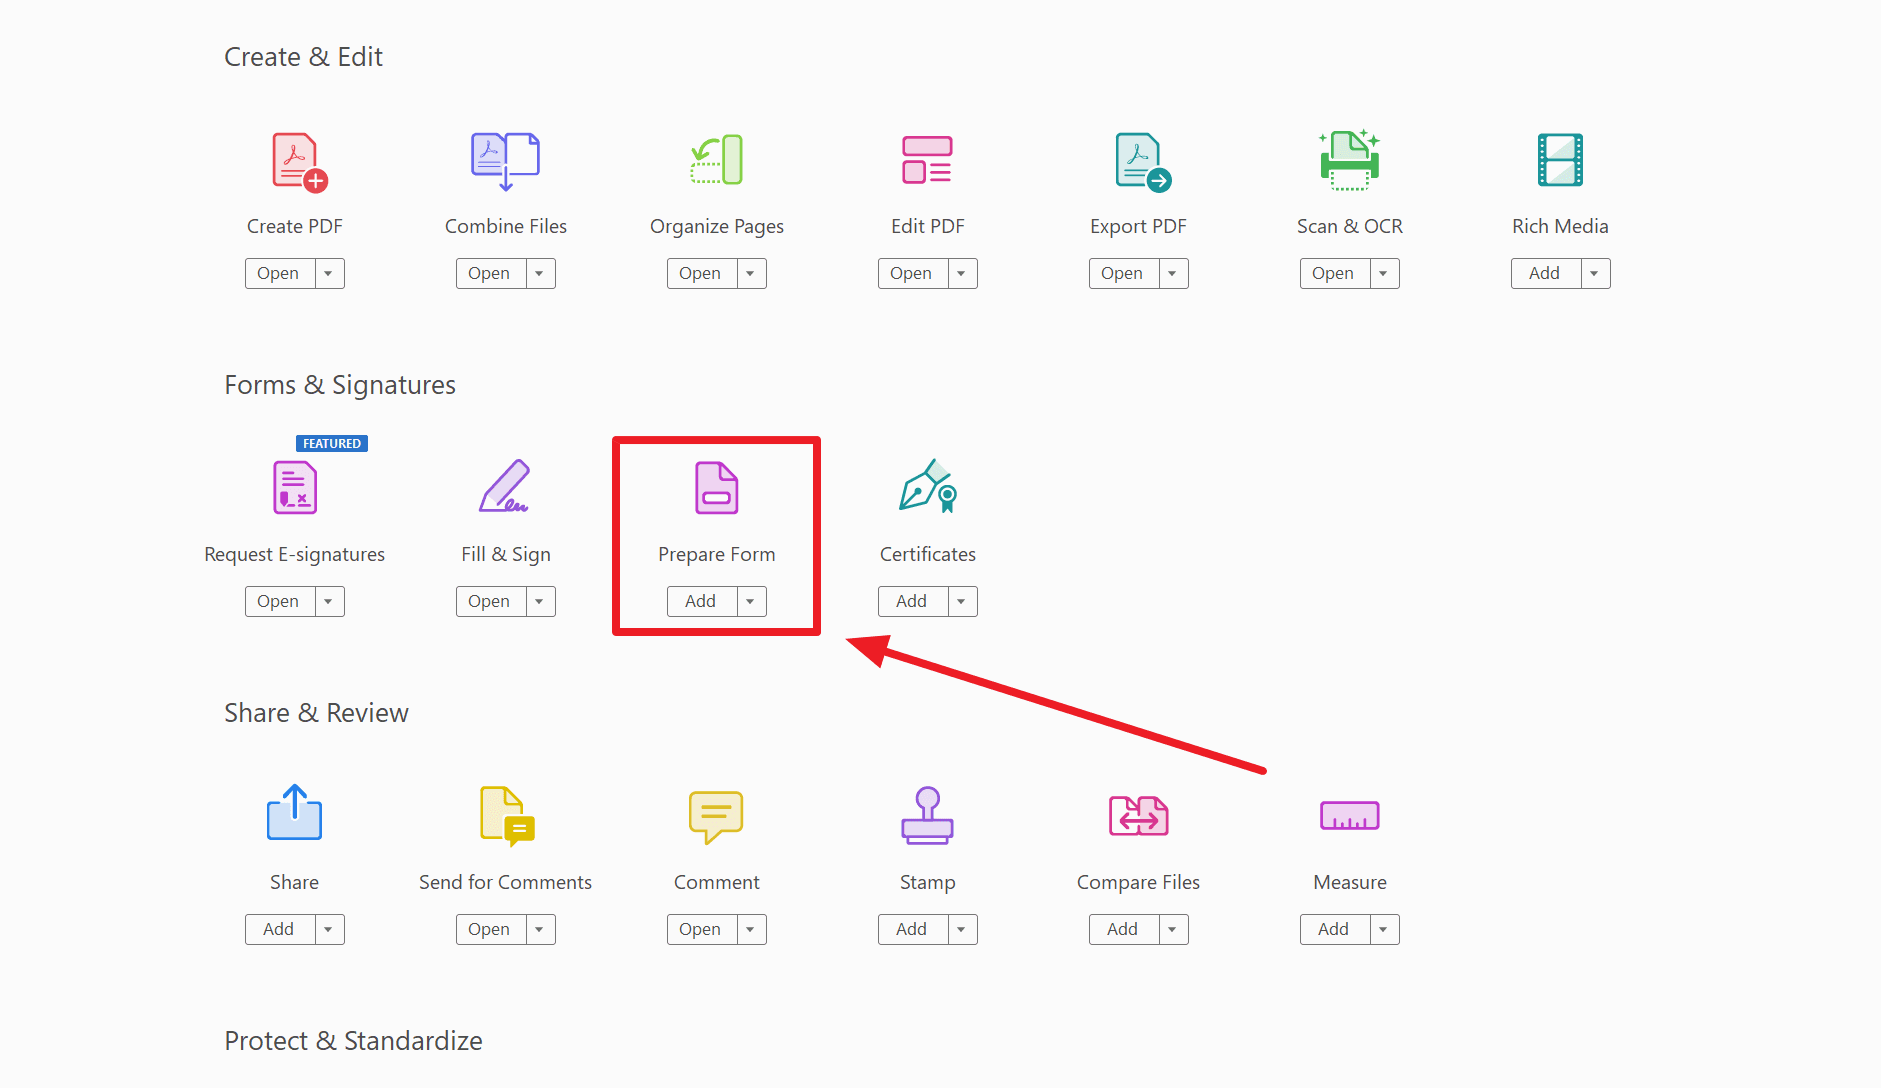
1. Launch Adobe Acrobat Pro DC on your computer. And, click on the Tools tab upper left on the welcome screen.
2. Go to the Tools page. And, scroll down and find the "Prepare Form" option.
3. You can also use the search bar at the top of the screen and type Prepare Form to locate the tool. Then, follow the on-screen instructions to choose a file for creating a fillable PDF.
Reminder: Tick the “This document requires signatures” checkbox. It will provide you on adding digital signature fields properly in the form.
4. A preview of your selected document will be displayed in the box.
Enabling and Adjusting Adobe’s Field Auto-Detection Option
Adobe’s field auto-detection option is on, identifying blank input and text fields to make them fillable. You can adjust these automatic selections if needed. We recommend keeping this automatic option active. However, you can turn it off by clicking the Change option and unchecking the “Automatically detect form fields” box on the Preferences screen.
1. Press the Start button when you are ready to continue.
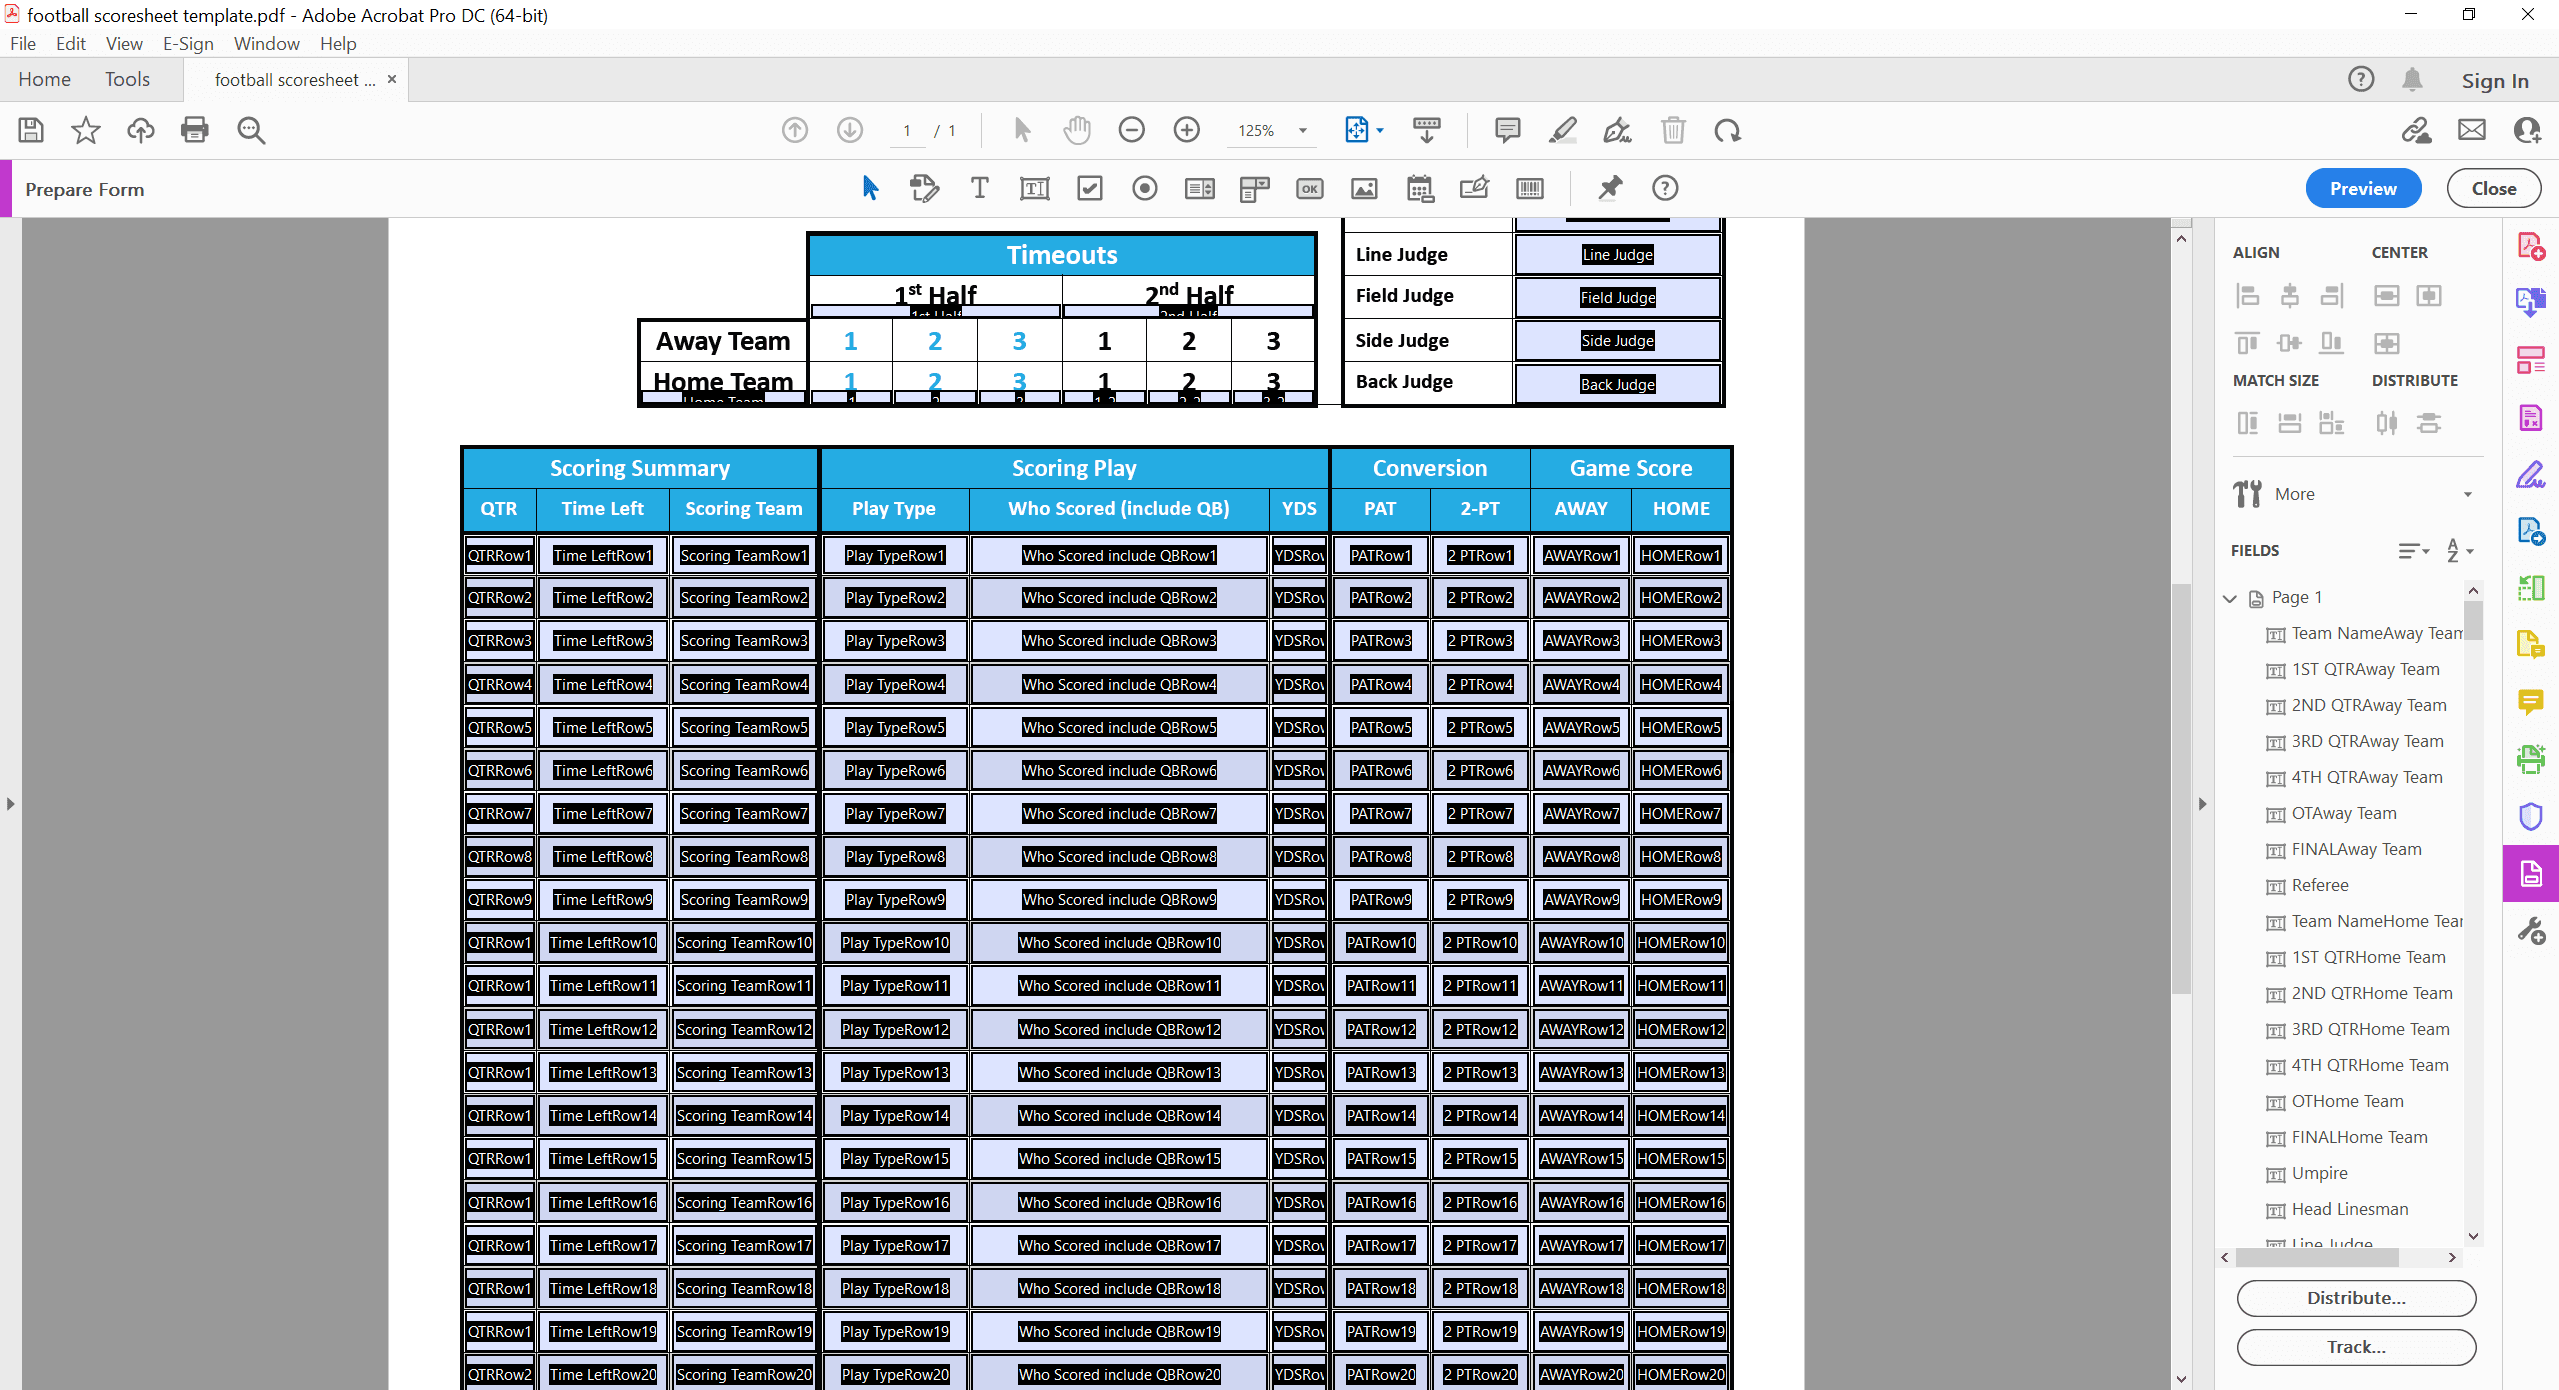
2. Your form will now appear on the screen.
Because Adobe’s auto field detection feature was enabled, several fields are already fillable.
These fields are indicated by a light blue box and label, highlighted in red in the screenshot below.
3. Entry fields are generally preset as text fields.
4. You have the option to change the field type to other formats.
5. Possible alternatives include drop-down menus or signature fields.
Adjusting Fillable Fields
1. Identify the fillable fields that align with the Fields section in the panel on the right.
2. Use the panel to make additional adjustments to these fields.
3. Modify the type of field as needed.
4. Adjust the order of the fields to suit your preference.
5. Change the size and placement of the fields according to your requirements.
Reminder: Each fillable field name on the PDF form must be unique. Only checkbox and radio button fields can share the same name. If you have multiple fields with duplicate names, you will encounter an error message.
The sequence of the fields is crucial as it dictates the order in which the form is completed. It is particularly important to maintain an organized flow for users filling out the form on tablets or mobile devices, which have smaller screens compared to a typical computer.
6. We used the automatic field detection option.
7. As a result, most of the fields are already in a logical order.
8. If you add any new fields or remove existing ones:
- Ensure you double-check the arrangement.
- Verify that the fields still follow a logical sequence.
Comparison Chart: Microsoft Words vs Adobe Acrobat
Feature | Creating Fillable PDFs Using Word | Creating Fillable PDFs Using Adobe Acrobat |
|---|---|---|
Ease of Use | Easy for basic forms | More features, may take time to learn |
Form Field Types | Basic types (text boxes, check boxes) | Many types (signatures, calculated fields) |
Cost | Part of Microsoft Office Suite | Requires a subscription or purchase |
Templates and Design Options | Basic templates available | Wide variety of templates and customization |
Collaboration Tools | Simple collaboration with shared documents | Advanced collaboration features |
Integration | Works well with other Microsoft apps | Works well with Adobe apps and others |
Security Features | Basic protection options | Advanced security settings |
Automation and Scripting | Basic automation | Advanced scripting with JavaScript |
Accessibility Features | Basic options | Advanced accessibility tools |
Support and Resources | Many tutorials and guides available | Extensive help resources and community support |
Final Thoughts
Generating fillable PDFs from Word documents is crucial for creating professional and efficient forms. It enhances user experience and data collection. You can streamline tasks such as surveys, applications, and contracts by converting Word documents into fillable PDFs. It makes them more accessible and easier to manage. PDF tools like Adobe Acrobat can significantly simplify this process. It provides an intuitive way to add interactive elements to your document. These methods empower individuals and organizations to design quality and functional documents that meet modern standards for digital collaboration. Embrace these techniques to ensure your forms are both user-friendly and professional. It ultimately improves your workflow and data management competencies.
Moreover, for those seeking to optimize their document management and processing skills, it is highly recommended to consult How-to & Tips Articles | PDF Agile and Microsoft Word Tips and Tricks | PDF Agile. These resources offer in-depth insights and practical guidance on Microsoft Word and PDF, enabling users to harness the full potential of this ubiquitous tool. Access these valuable articles at PDF Agile for comprehensive support and advanced techniques.