Adding signatures to Word documents is crucial for verifying authenticity, providing consent, and presenting a professional image. Whether you're signing a contract, formal letter, or business proposal, knowing how to insert a signature in Word can enhance your document's credibility. Digital signatures offer the convenience of electronic verification, while handwritten signatures give a personal touch. This guide will walk you through the steps to insert a signature in a Word document, catering to both types of signatures. Understanding these methods ensures your documents are both secure and professional.
Types of Signatures in Word
You can add two primary types of signatures in Word documents: digital and handwritten.
Digital Signatures
Digital signatures use cryptographic methods to provide an electronic version of your unique signature. They enhance document security, ensuring the authenticity and integrity of your files. Digital signatures are ideal for official documents that require a higher level of verification.
Handwritten Signatures

Handwritten signatures involve scanning or photographing a written signature and inserting the image into your Word document. These signatures add a personal touch and are suitable for informal agreements, personal letters, or documents where a traditional look is preferred.
How to Insert a Digital Signature in Word?
Step 1: Click Where You Want to Add Your Signature
To insert a digital signature in Word, click where you want the signature. To maintain professionalism and clarity, choose a location at the end of the document, such as beneath your closing line or at the bottom of the page. This placement mirrors traditional document signing practices.
Step 2: Find the Signature Line Option Under the Insert Tab

Navigate to the Insert tab on the Word ribbon. In the Text group, click on Signature Line. This option allows you to create a placeholder for a digital signature. By selecting Microsoft Office Signature Line, you can customize details like the signer's name and title, which enhances document clarity and formality.
Step 3: Input Your Information in the Pop-Up Window
In the pop-up window, you can input details such as your name, title, email address, and phone number. This information personalizes the signature line. Word allows you to draw your signature using a mouse or trackpad, allowing for a personalized touch that mimics a handwritten signature.
Step 4: Finalize Your Signature
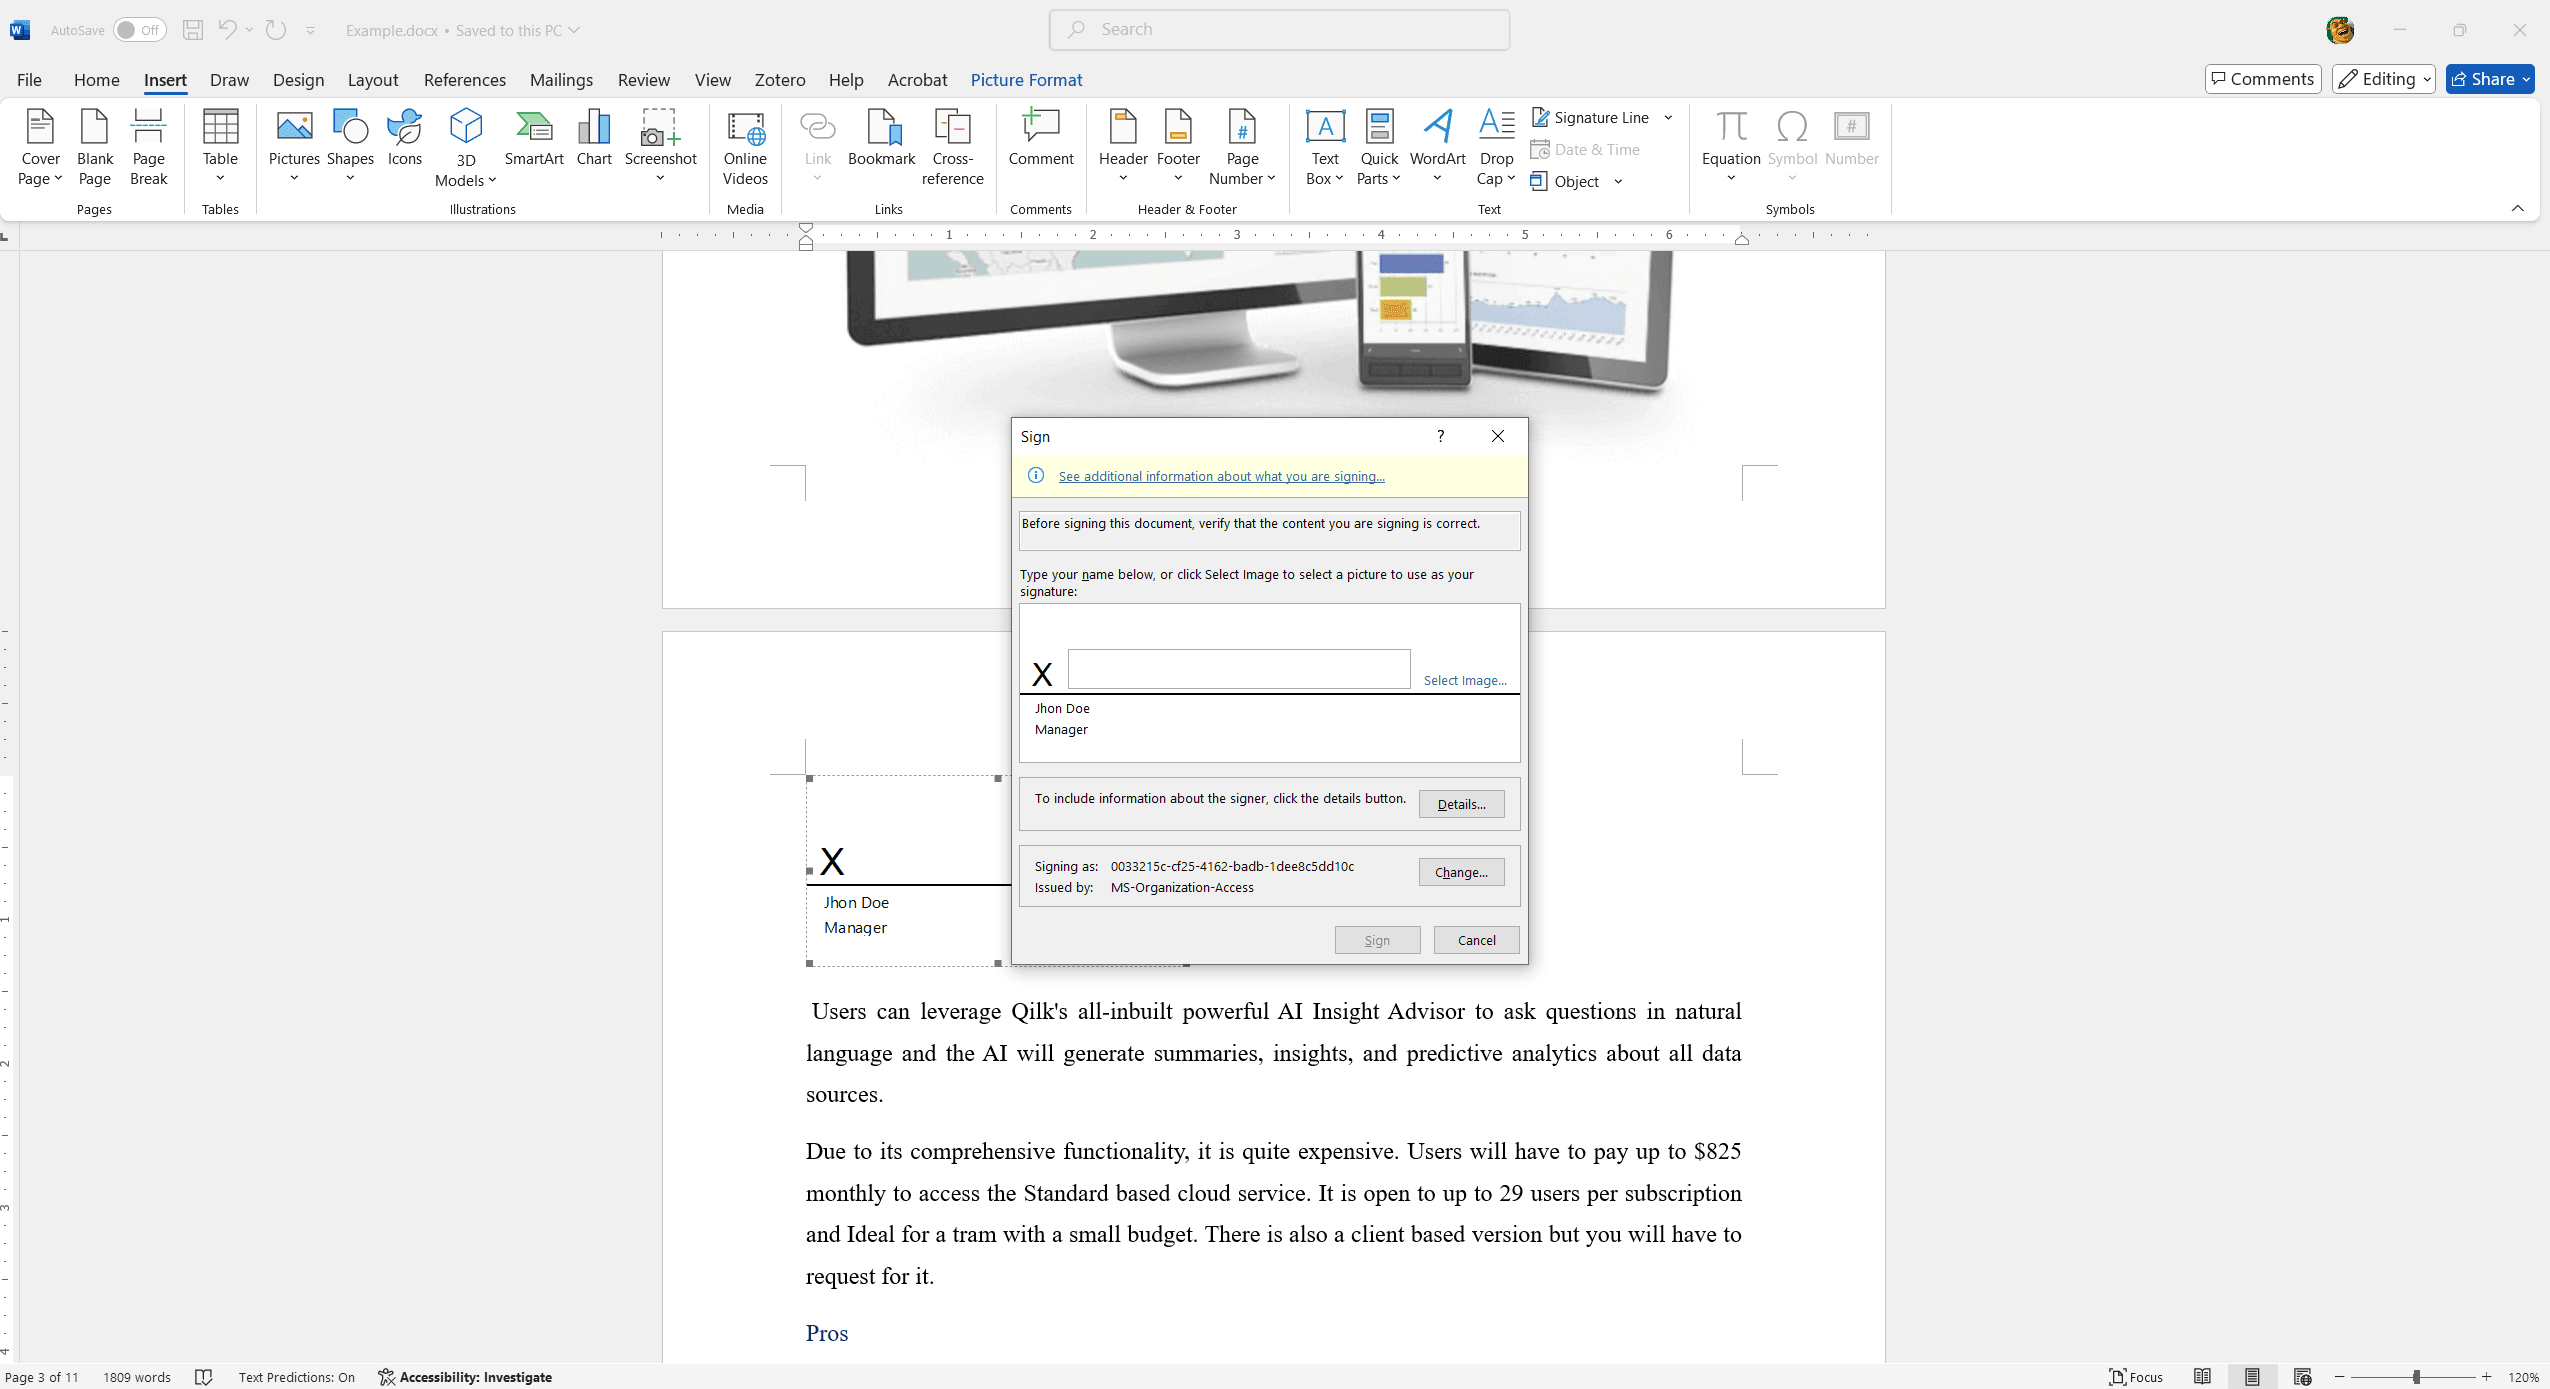
To finalize your digital signature:
- Click OK after entering your details. The signature line will appear in your document.
- Save the document to secure your digital signature.
- For future use, consider saving your signature in a secure location or as an auto-text entry in Word for easy access.
How to Insert a Handwritten Signature in Word?
Step 1: Write and Take a Photo of Your Signature

Write your signature on clean, white paper. Use black ink for contrast. Take a high-resolution photo in good lighting, ensuring the signature is clear and centered. Crop the image to focus on the signature.
Step 2: Save the Photo to Your Computer
Transfer the photo to your computer via Bluetooth, email, or a USB cable. Alternatively, scan the signature using a scanner. Save the image in a standard format like JPEG or PNG for easy access.
Step 3: Crop the Image
Open your photo with an image editor. Select the crop tool and adjust the cropping frame to outline only your signature. Save the cropped image to ensure only the signature appears and it is ready for insertion in Word.
Step 4: Save the Photo as a New File
Open the photo using an image editor like Paint or Photoshop. Use the crop tool to select only the signature area, eliminating unnecessary background. Save the cropped image to maintain focus on the signature.
Step 5: Click the Insert Tab in Word
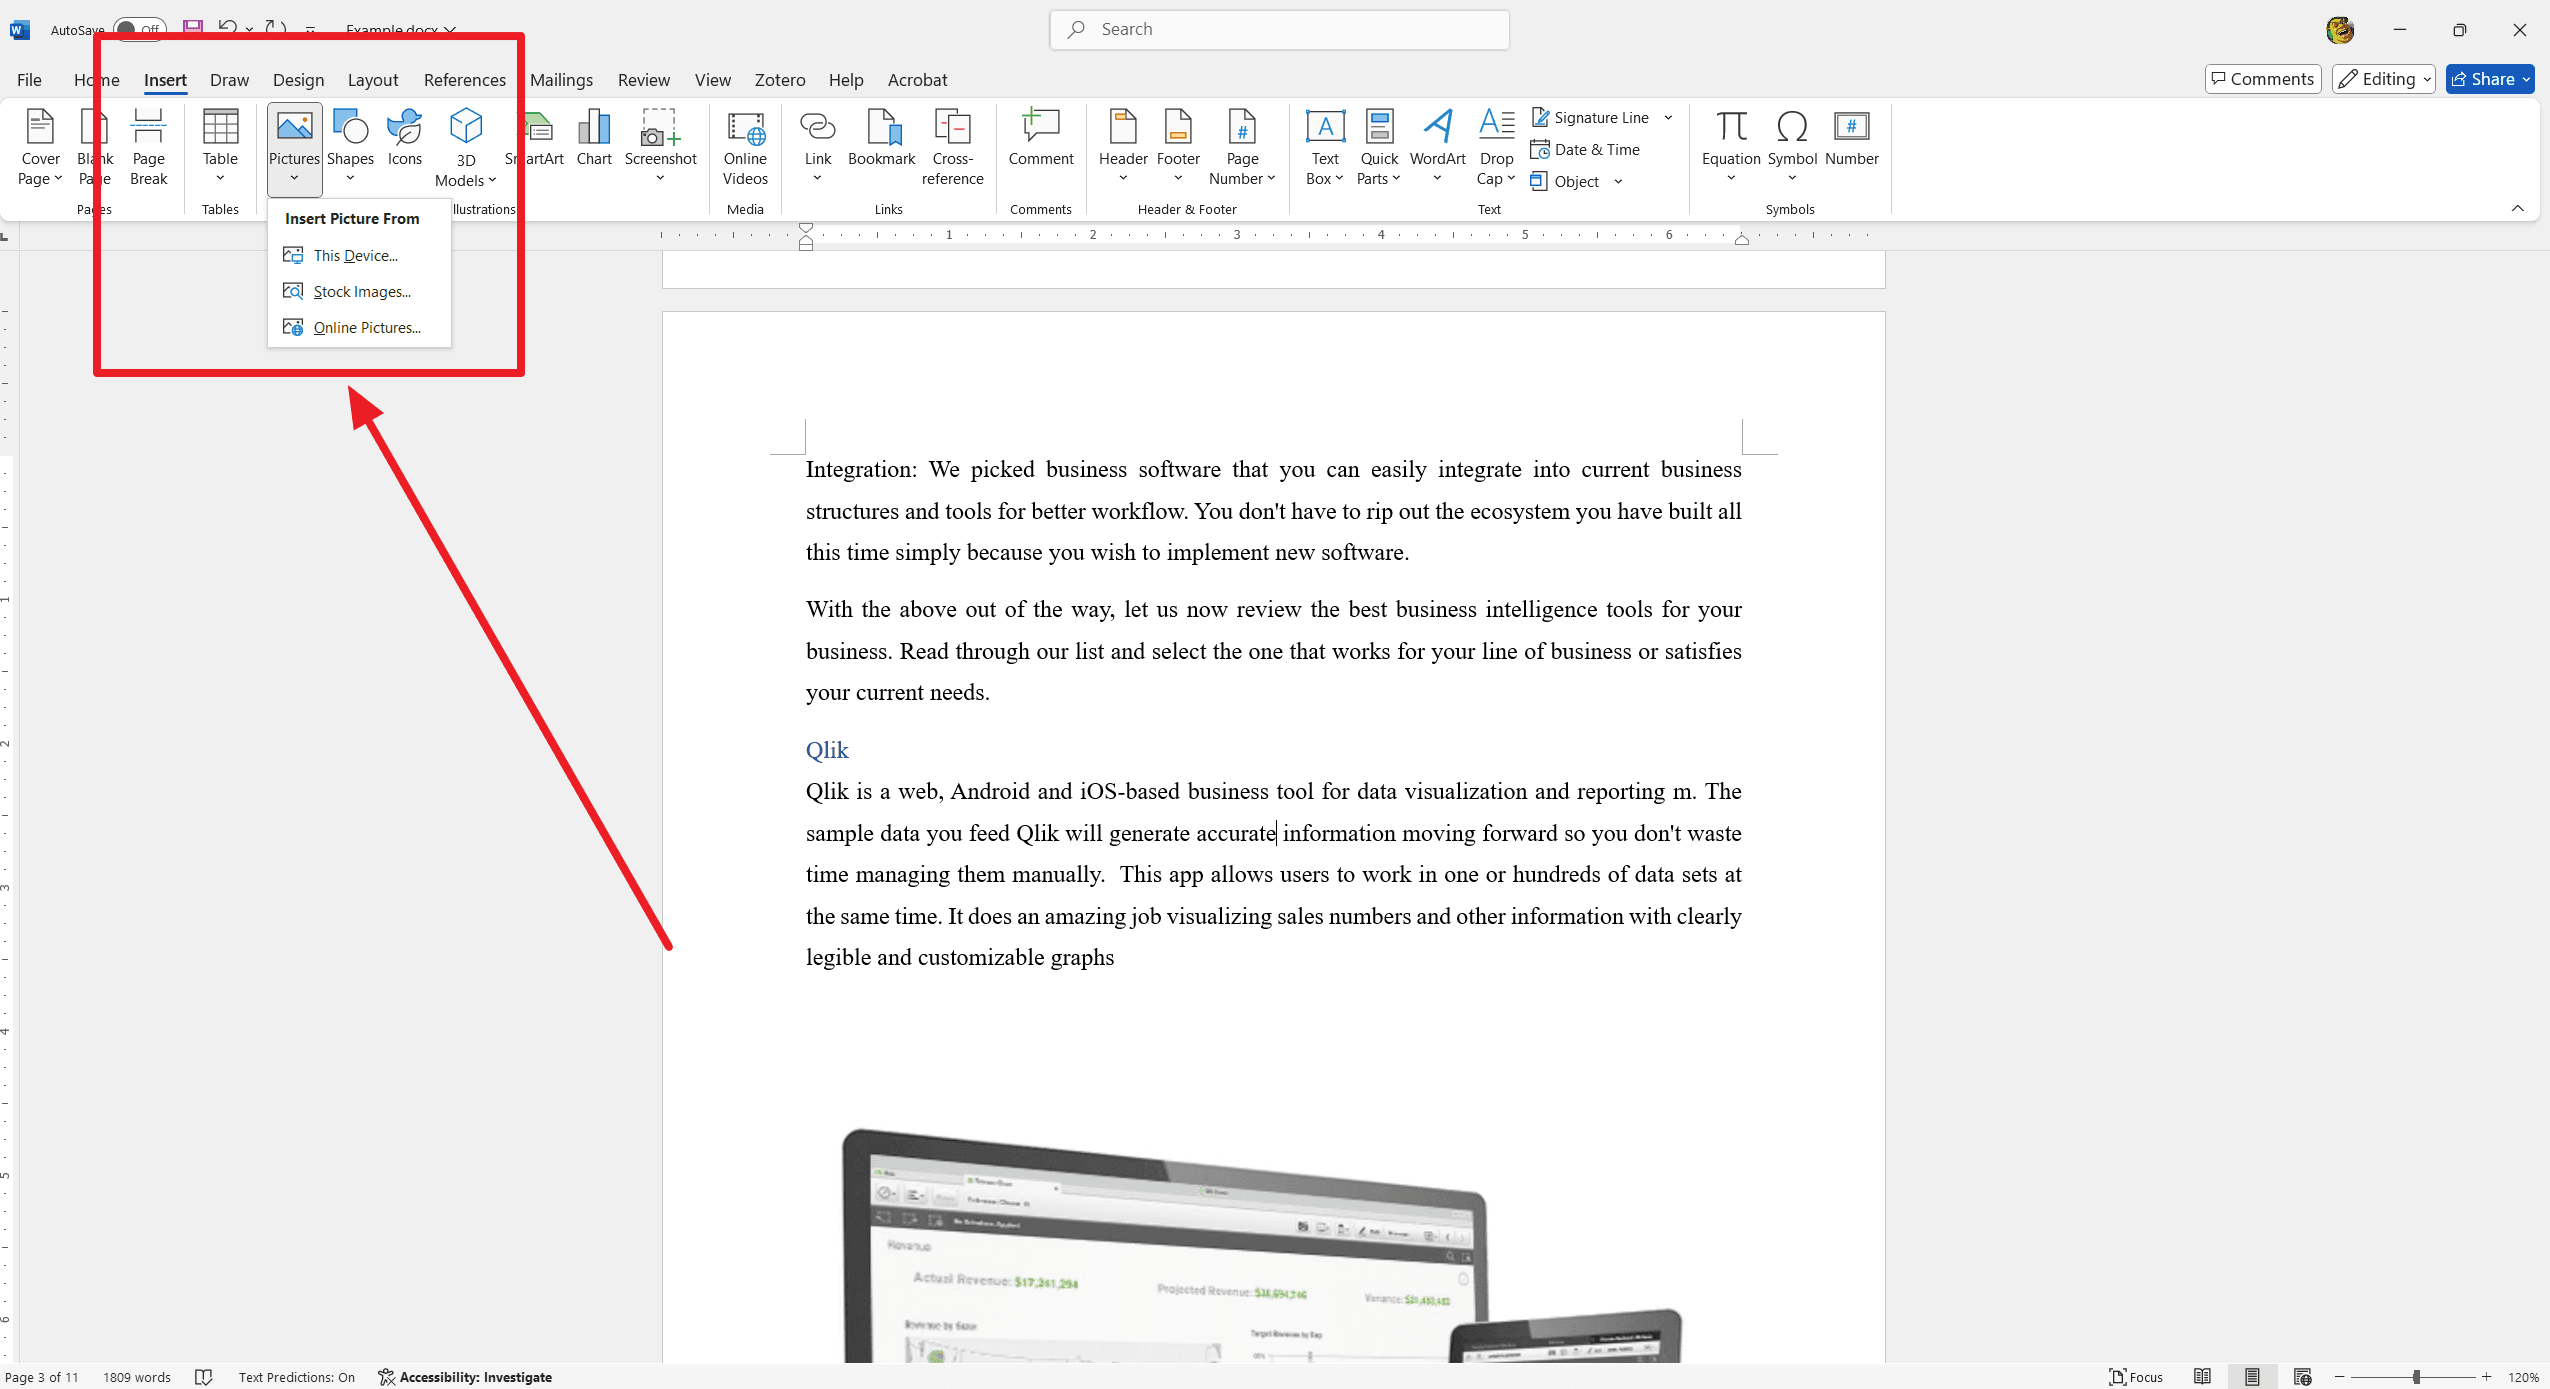
Place the cursor at the desired location in your Word document. Then, navigate to the Insert tab at the top of the ribbon. This tab will allow you to add your cropped signature image to the document.
Step 6: Choose and Position Your Photo on the Document

In the Insert tab, select Pictures to insert your cropped signature. Click and drag the photo to position it accurately. Use the corner handles to resize the image for a proper fit.
Why Insert a Signature in Word?
Inserting a digital signature in Word offers convenience and efficiency, reducing the need for printing, signing, and scanning documents. It streamlines workflows for professional letters, contracts, and business emails. Digital signatures ensure authenticity and expedite approval processes, enhancing overall productivity and environmental sustainability by minimizing paper use. This modern approach is essential for remote and hybrid work environments.
Conclusion
In conclusion, mastering how to insert a signature in Word can significantly enhance the professionalism of your documents. You ensure your documents are polished and credible by following the steps outlined—cropping your signature image, navigating the Insert tab, and positioning your photo. This technique is precious for various use cases, such as professional letters, business emails, and contracts. Embrace these methods to add a touch of authenticity and sophistication to your work. Incorporating digital signatures streamlines your workflow and supports a more efficient and environmentally friendly approach.

