While working in MS Excel, we are often required to adjust the structure of your worksheet. Whether it is necessary to add new data, remove chronic information, or reorganize your layout, insert, remove, move forward, and master techniques to hide rows and columns. This guide offers a comprehensive observation of these fundamental skills, which empowers you to manage your Excel data efficiently. We will cover:
- Adding rows and columns
- Removing rows and columns
- Moving rows and columns
- Hiding and Unhiding Rows and Columns
How to Insert Rows?
1. Select the row heading positioned below the desired insertion point. Select row 5 to insert a row between rows 4 and 5 For instance.
2. Go to the Home tab on the Excel ribbon.
3. Click the Insert key.
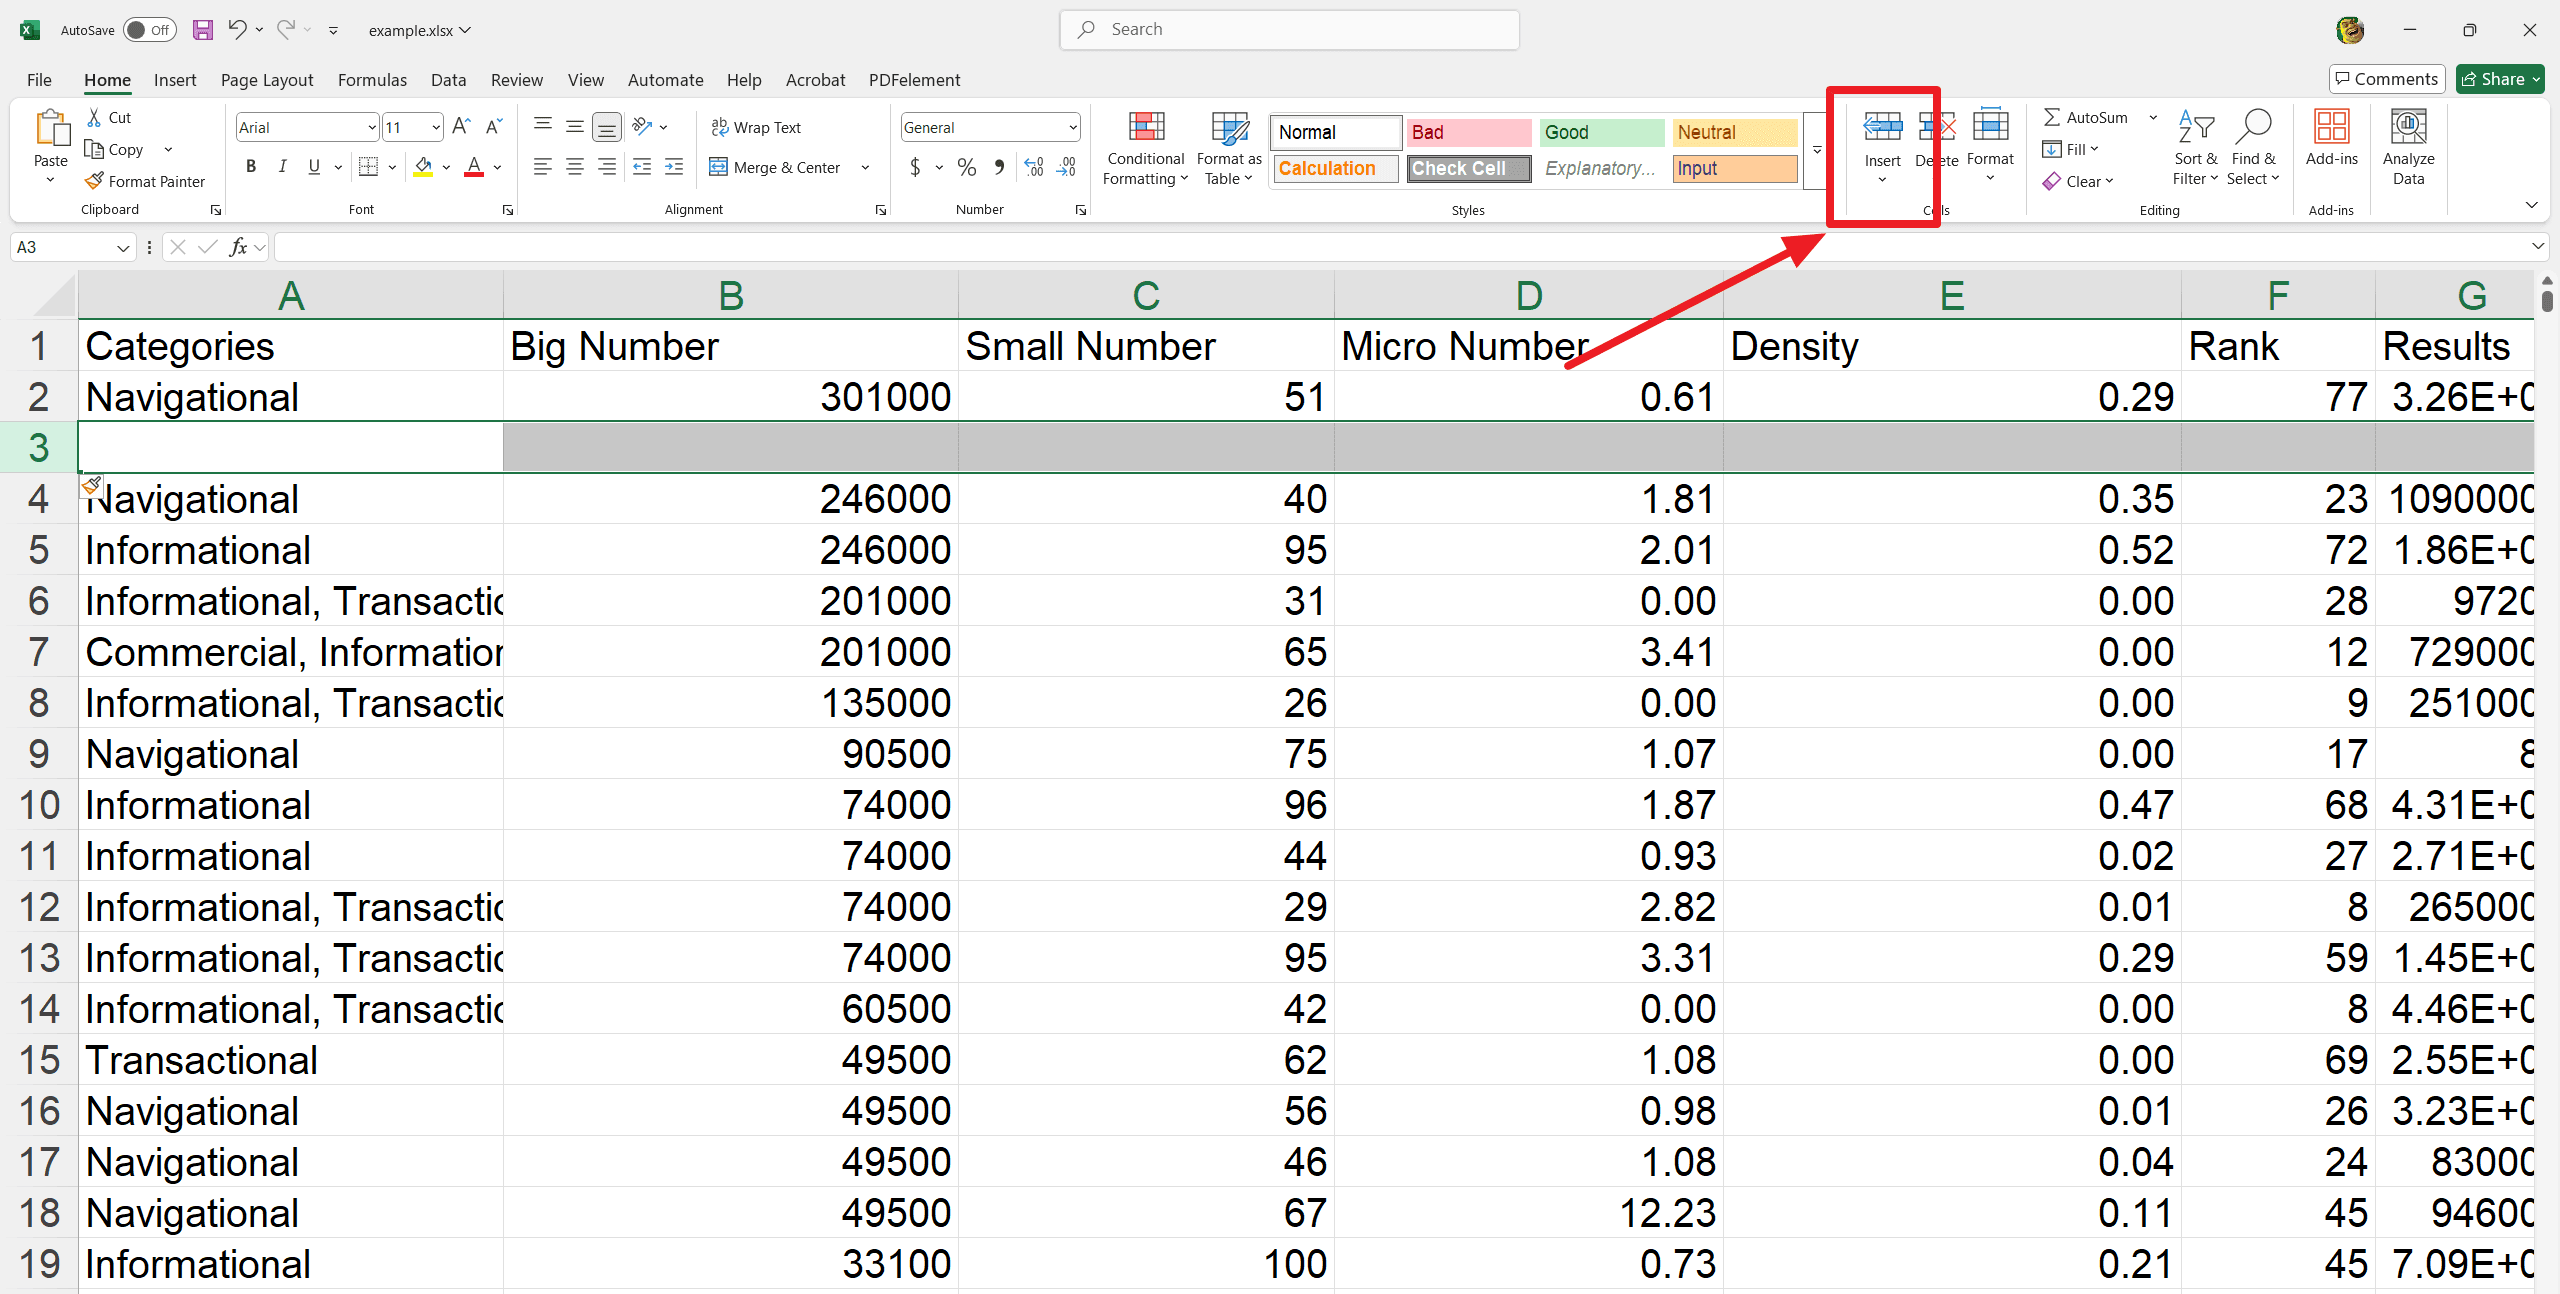
4. Here, a new row will be inserted above the selected one.
5. A paintbrush icon will appear adjacent to the inserted cells while inserting rows, columns or cells. This icon provides formatting options. By default, Excel applies the formatting of the above row to the row. Hover the icon and click the dropdown arrow to reach additional forming options.
How to Insert Columns?
1. Choose the column heading located on the right side of the desired insertion point. For example, select column E to insert a column between columns D and E.
2. Click on the Home tab on the Excel ribbon and click the Insert key.
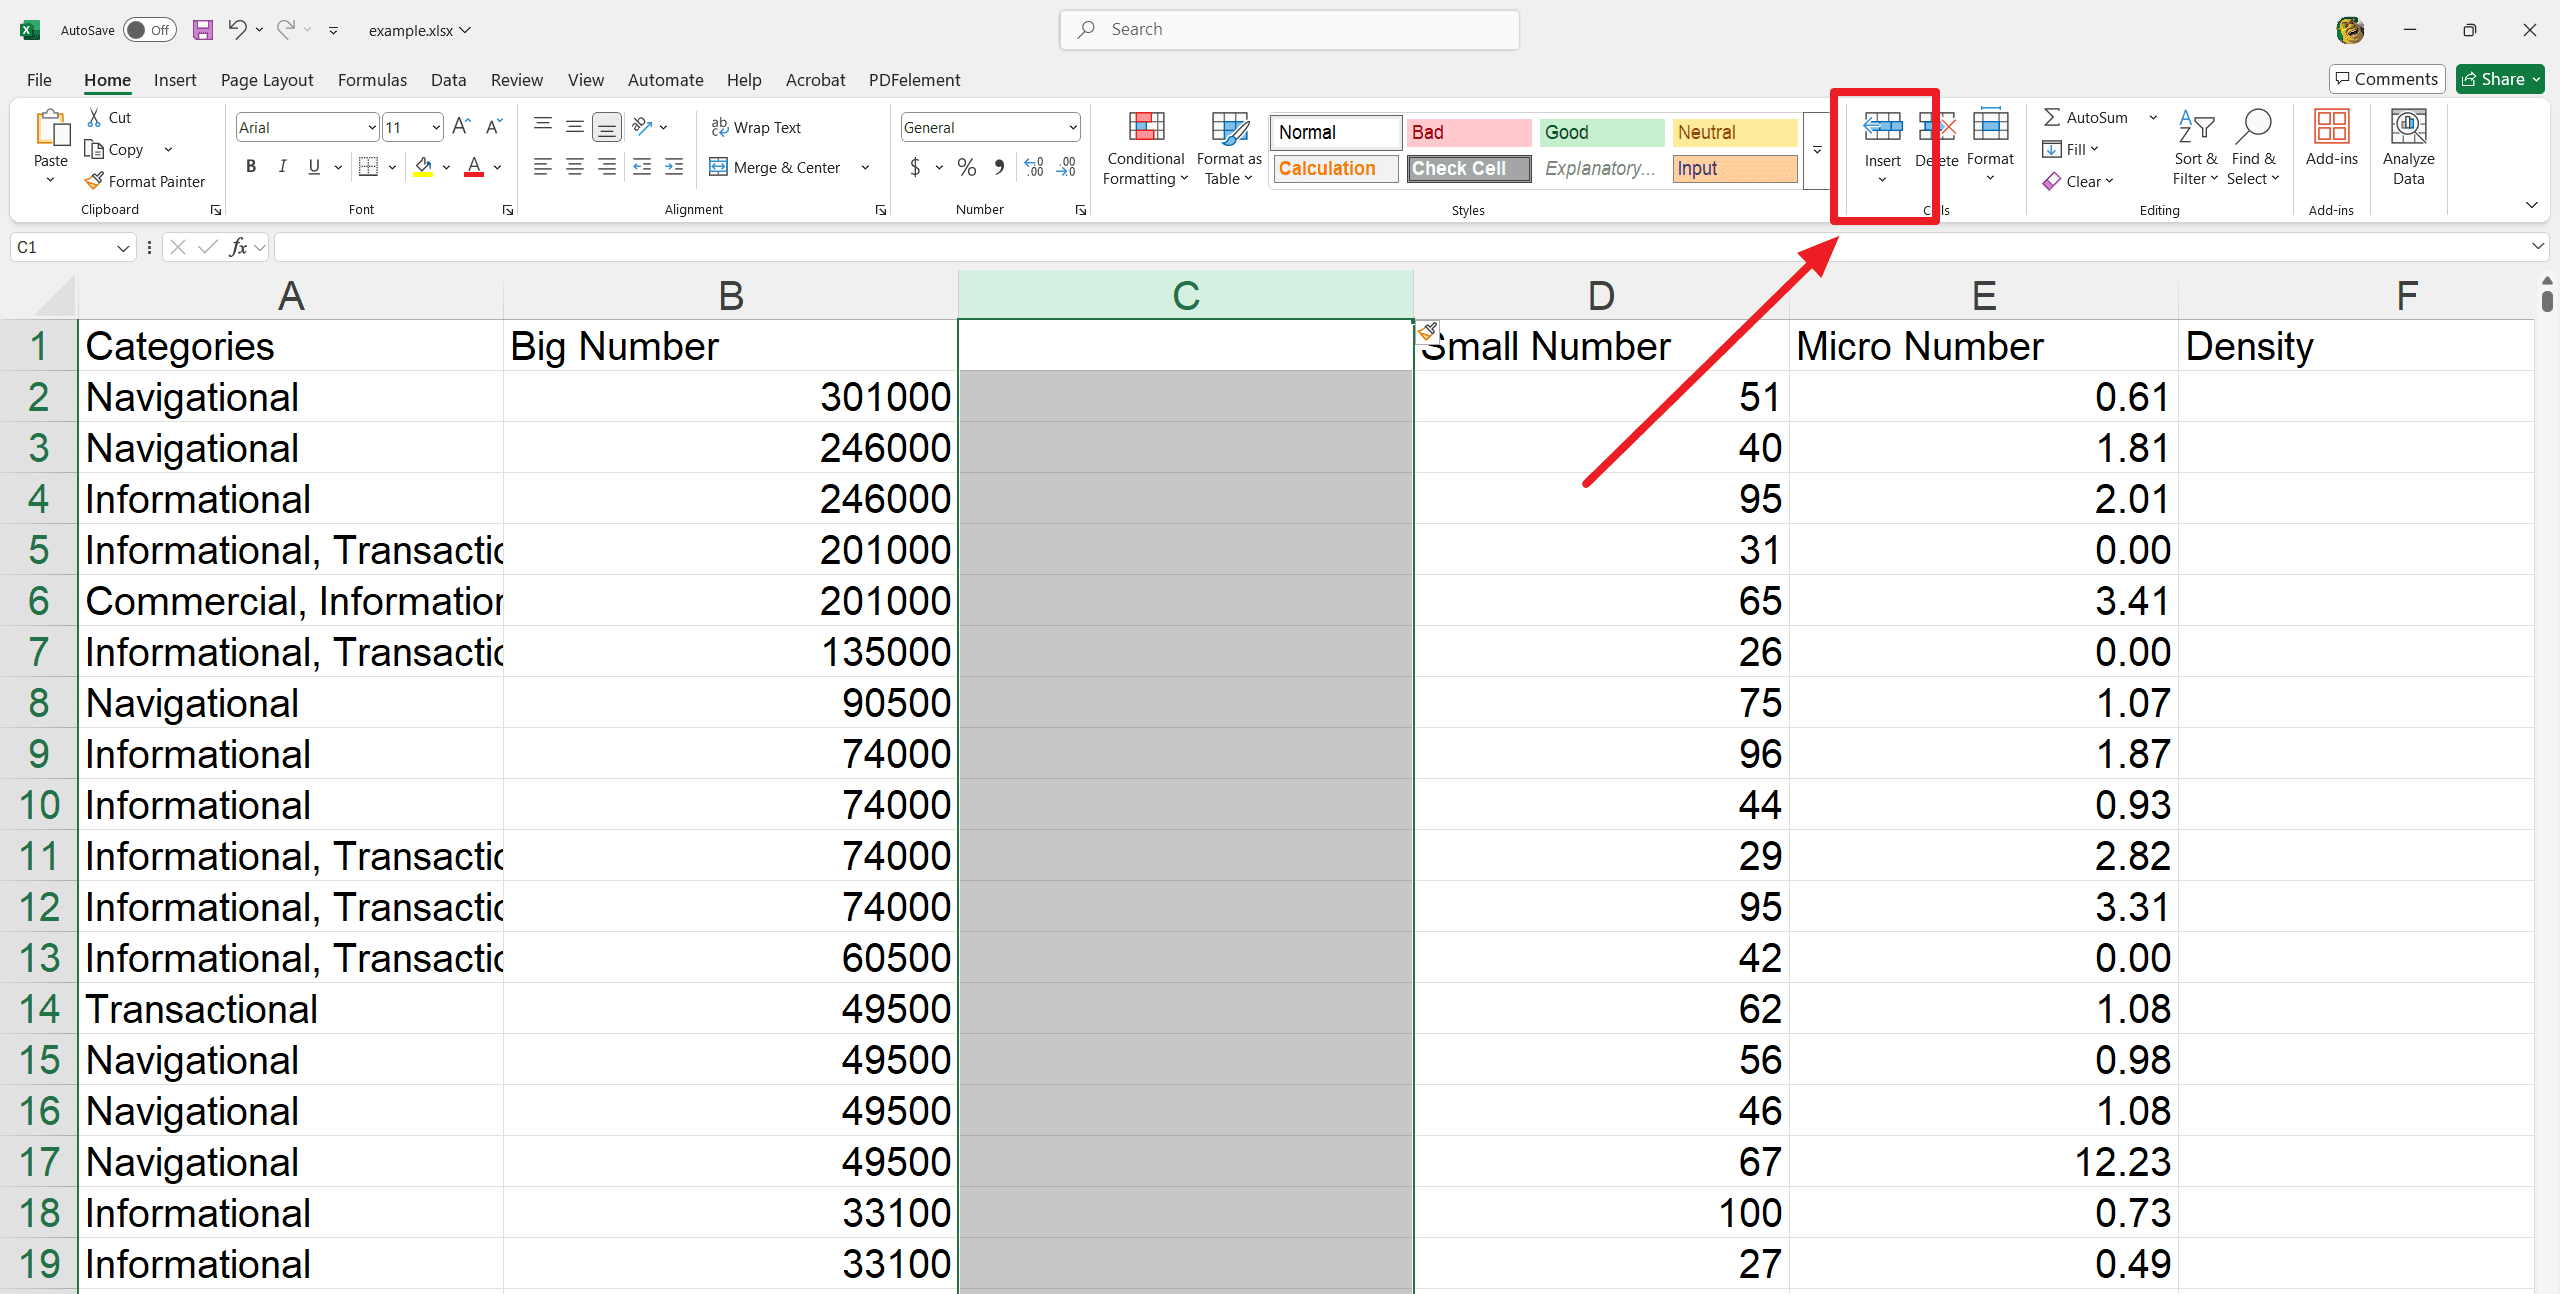
3. Here a new column will be inserted on the left side.
4. Select entire row or column by clicking on the respective heading while inserting rows or columns.
5. The insert command will insert a new cell instead of a line or column by selecting only one cell.
6. Tap on the Home tab on the Excel ribbon.
To Delete a Row or Column:
1. Select the removed line or column. Then, click on the Delete option.
2. It will remove the selected row or column and shift accordingly adjacent rows or columns. Now, the row shifts.
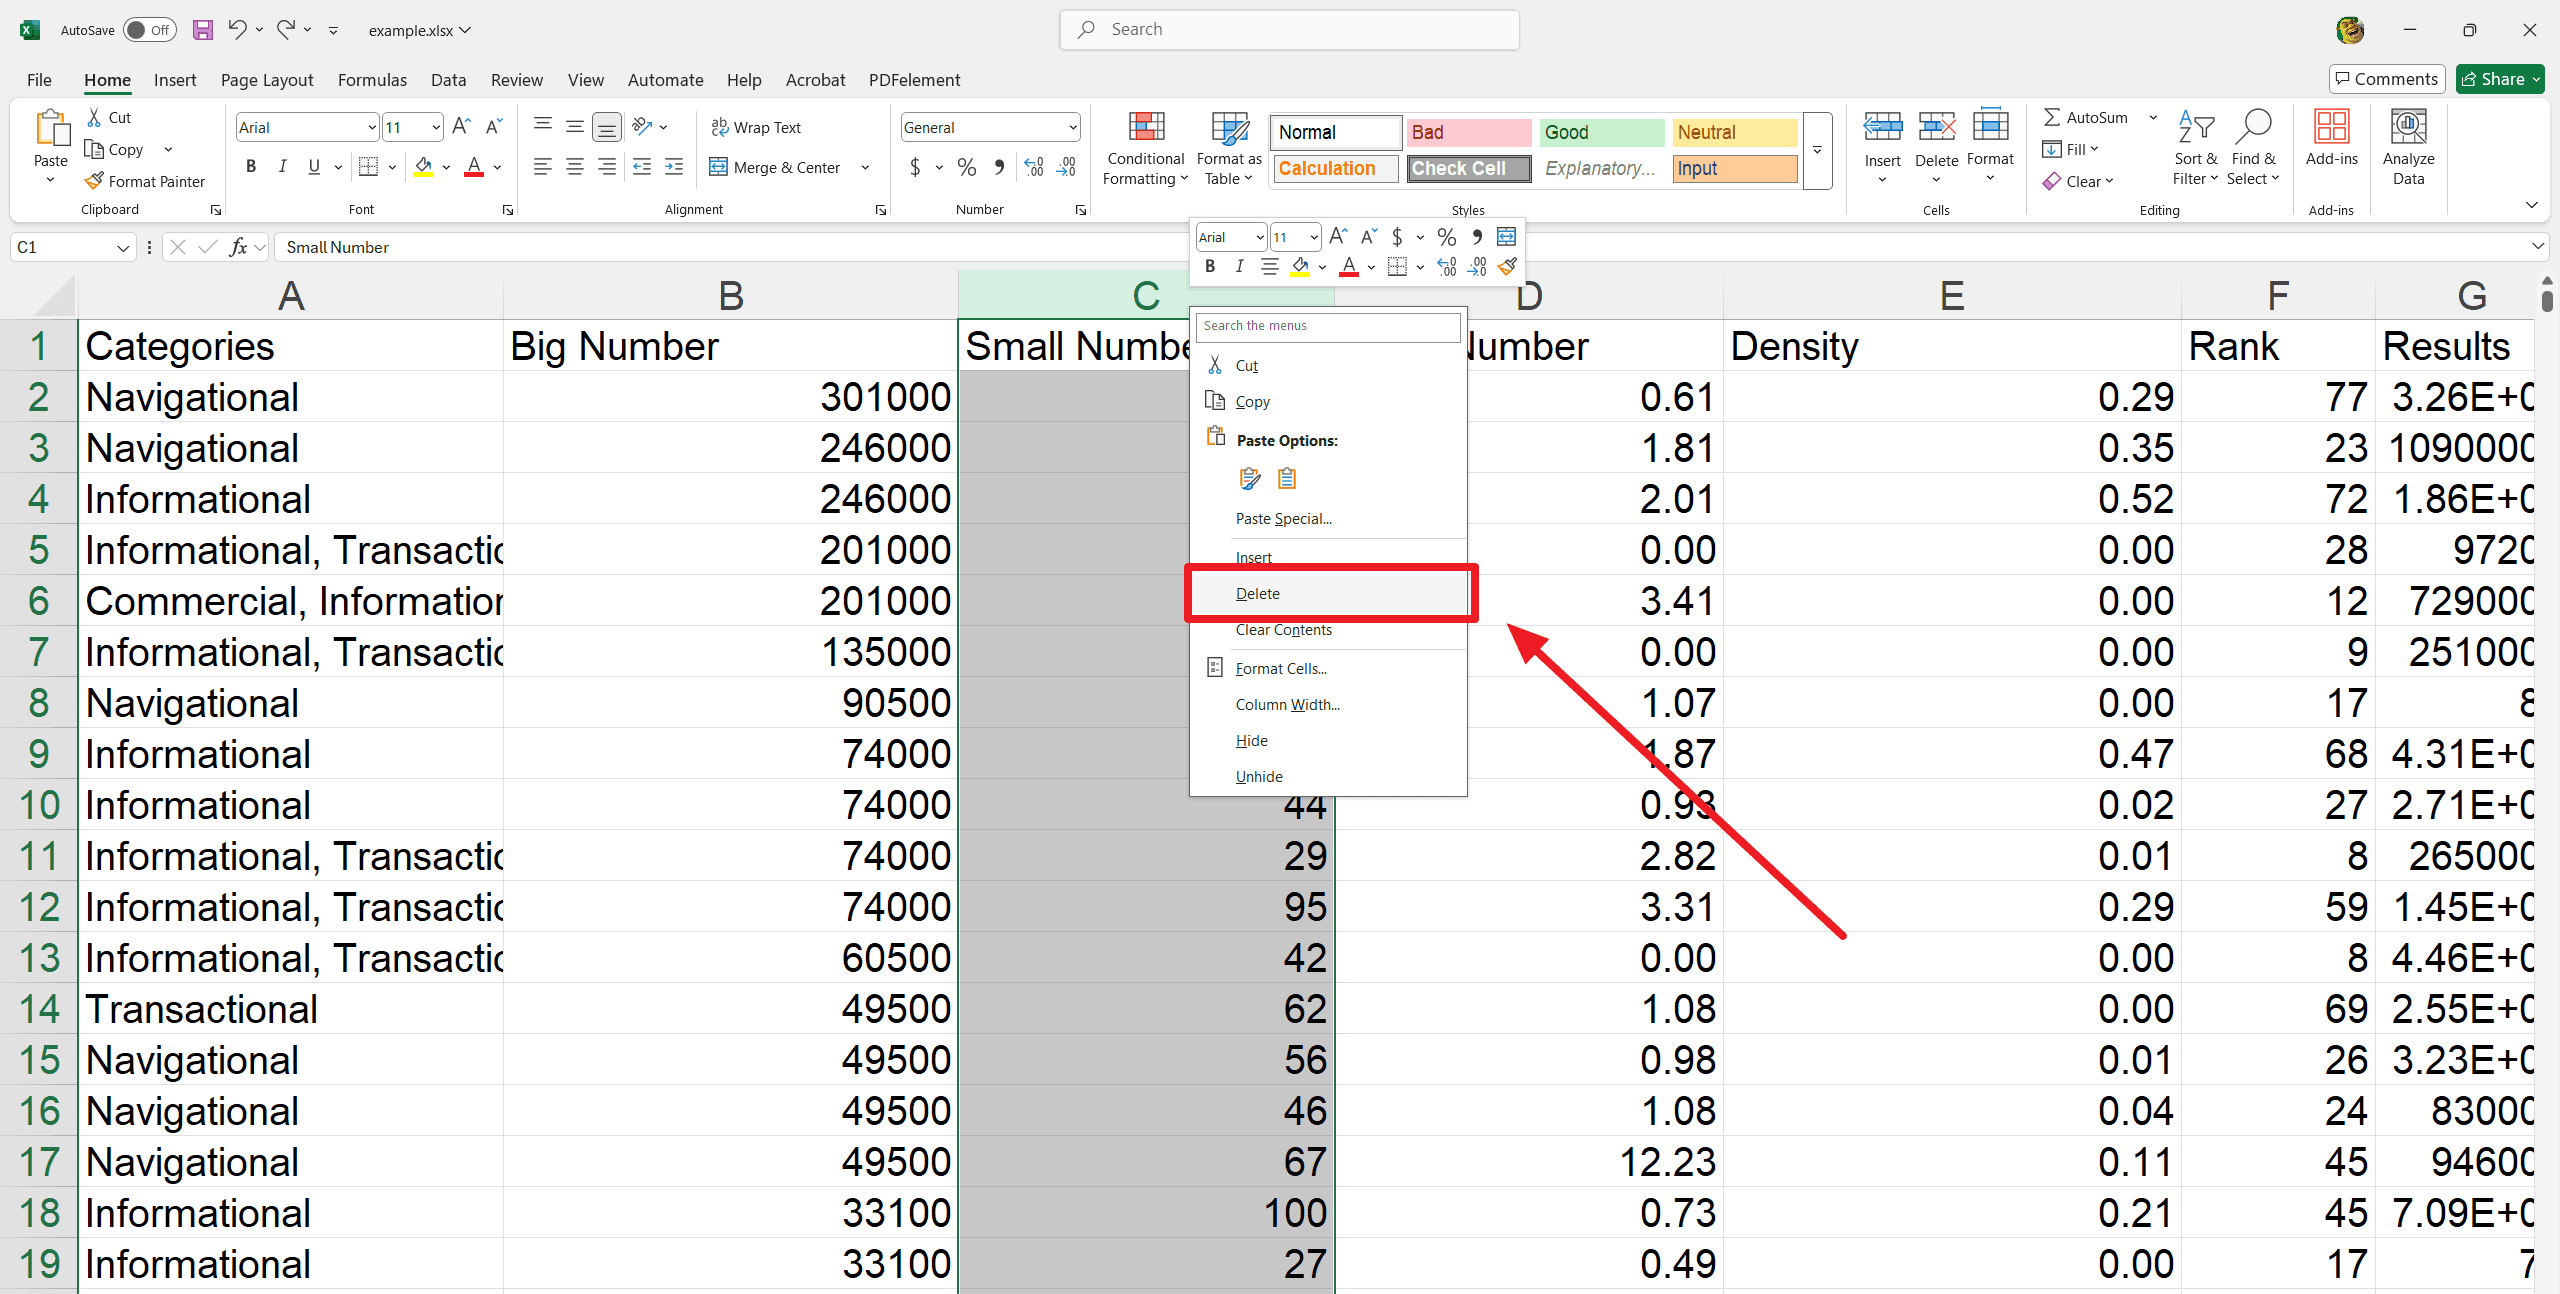
3. Select the line or column title to move.. Distinguish between removing a line or column and cleaning its text.
4. Right-click the row or column heading and choose Clear Content from the dropdown menu. It will remove the material without moving adjacent cells
How to Move a Row or Column?
1. Go to the Home tab on the Excel ribbon. Click the Cut command or press the keyboard keys Ctrl+X.
2. Choose the line or column title to the right of the desired destination. Click on the Home tab on the Excel ribbon.
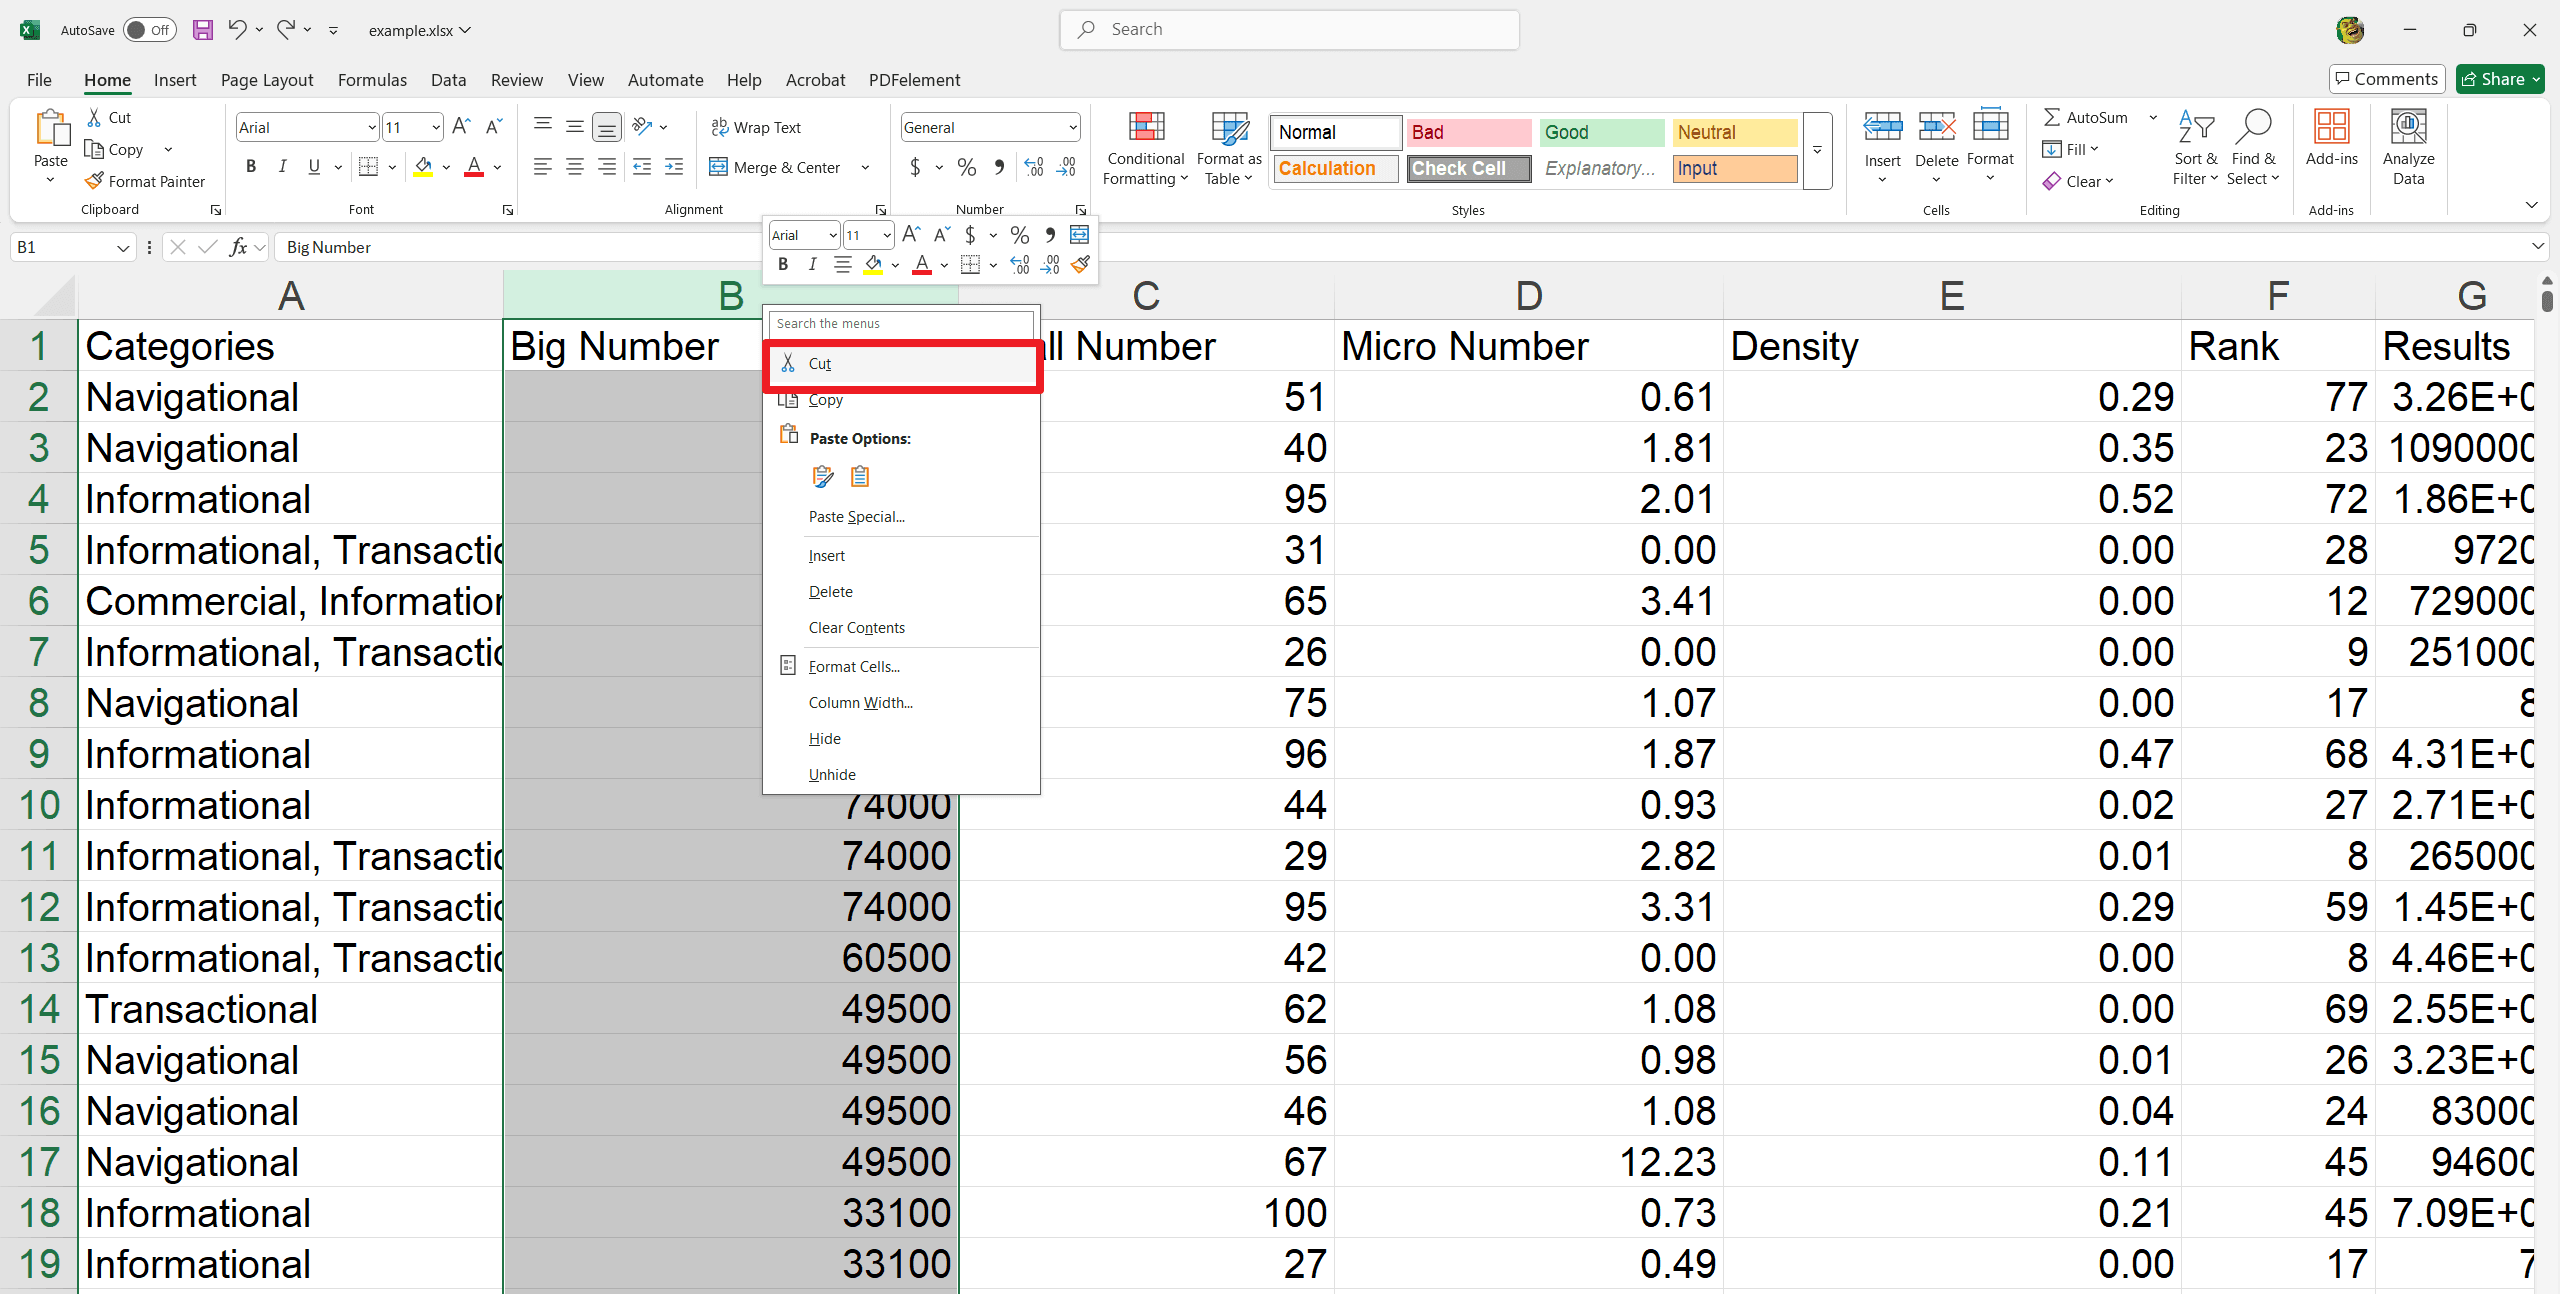
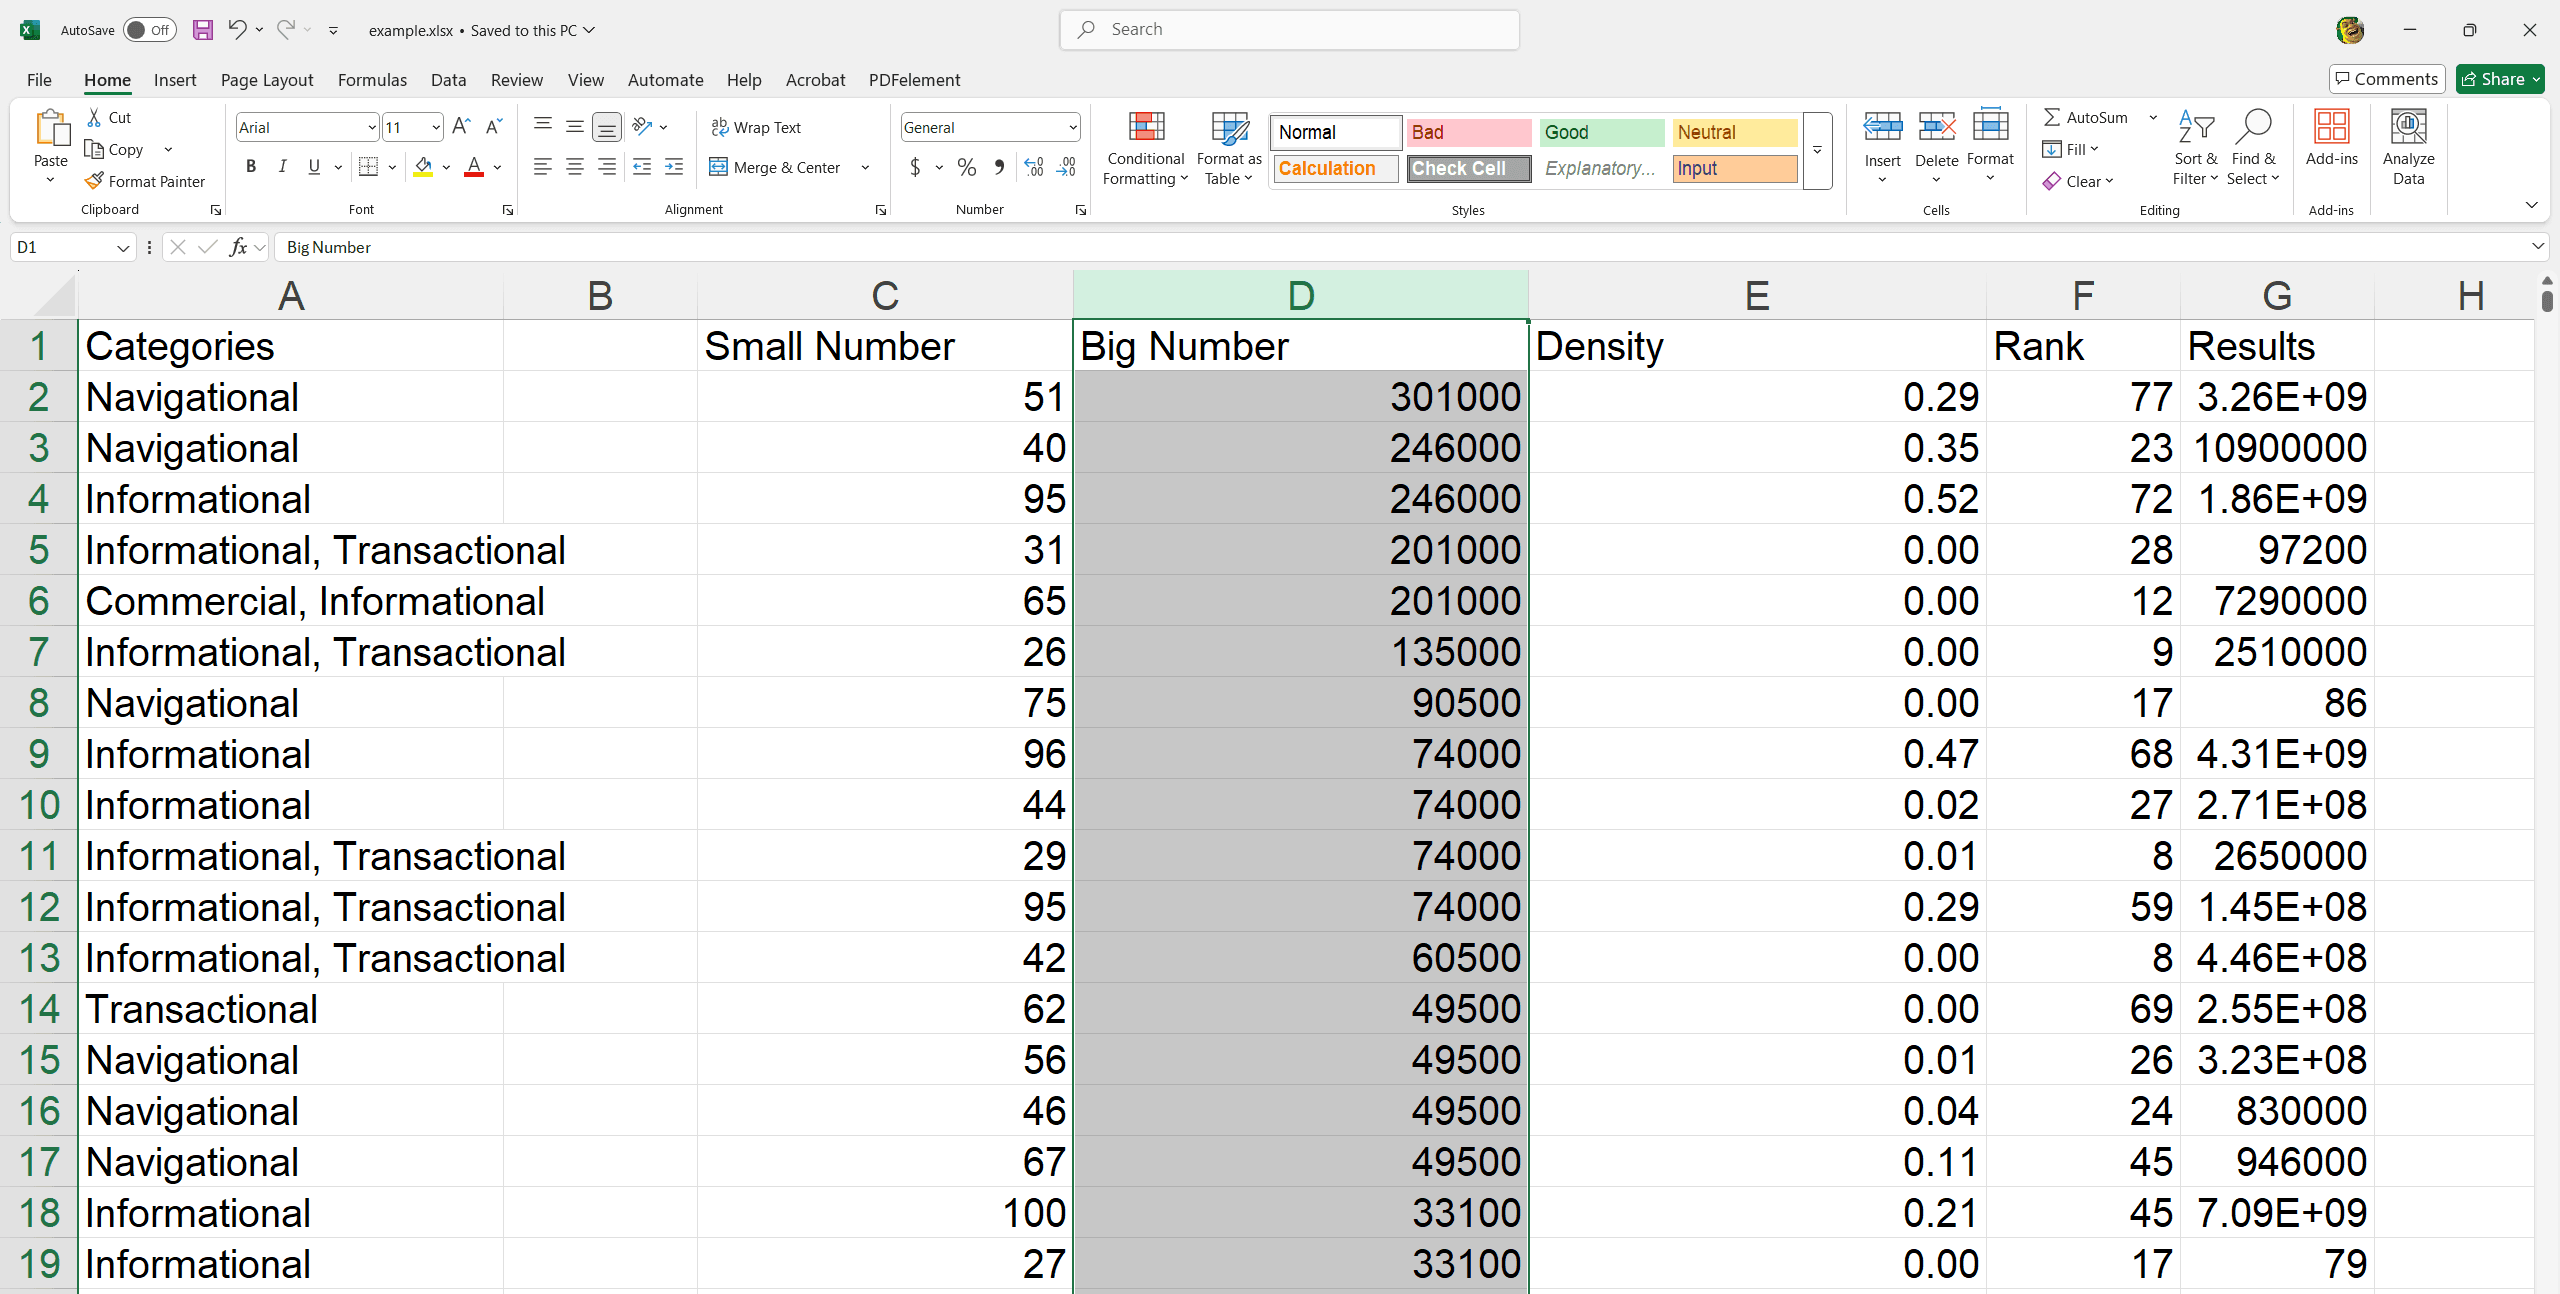
3. Tap on the Insert command. Now choose Put the cut cells from the dropdown menu.
4. It will take the selected row or column to the specified location. Now adjacent rows or columns will be shifted likely.
5. Use the cut and insert commands from the dropdown menu by clicking the mouse and selecting the desired command.
How to Hide and Unhide a Row or Column?
1. Select hidden rows or columns. Right-click on the mouse and choose "hide" from the formatting menu.
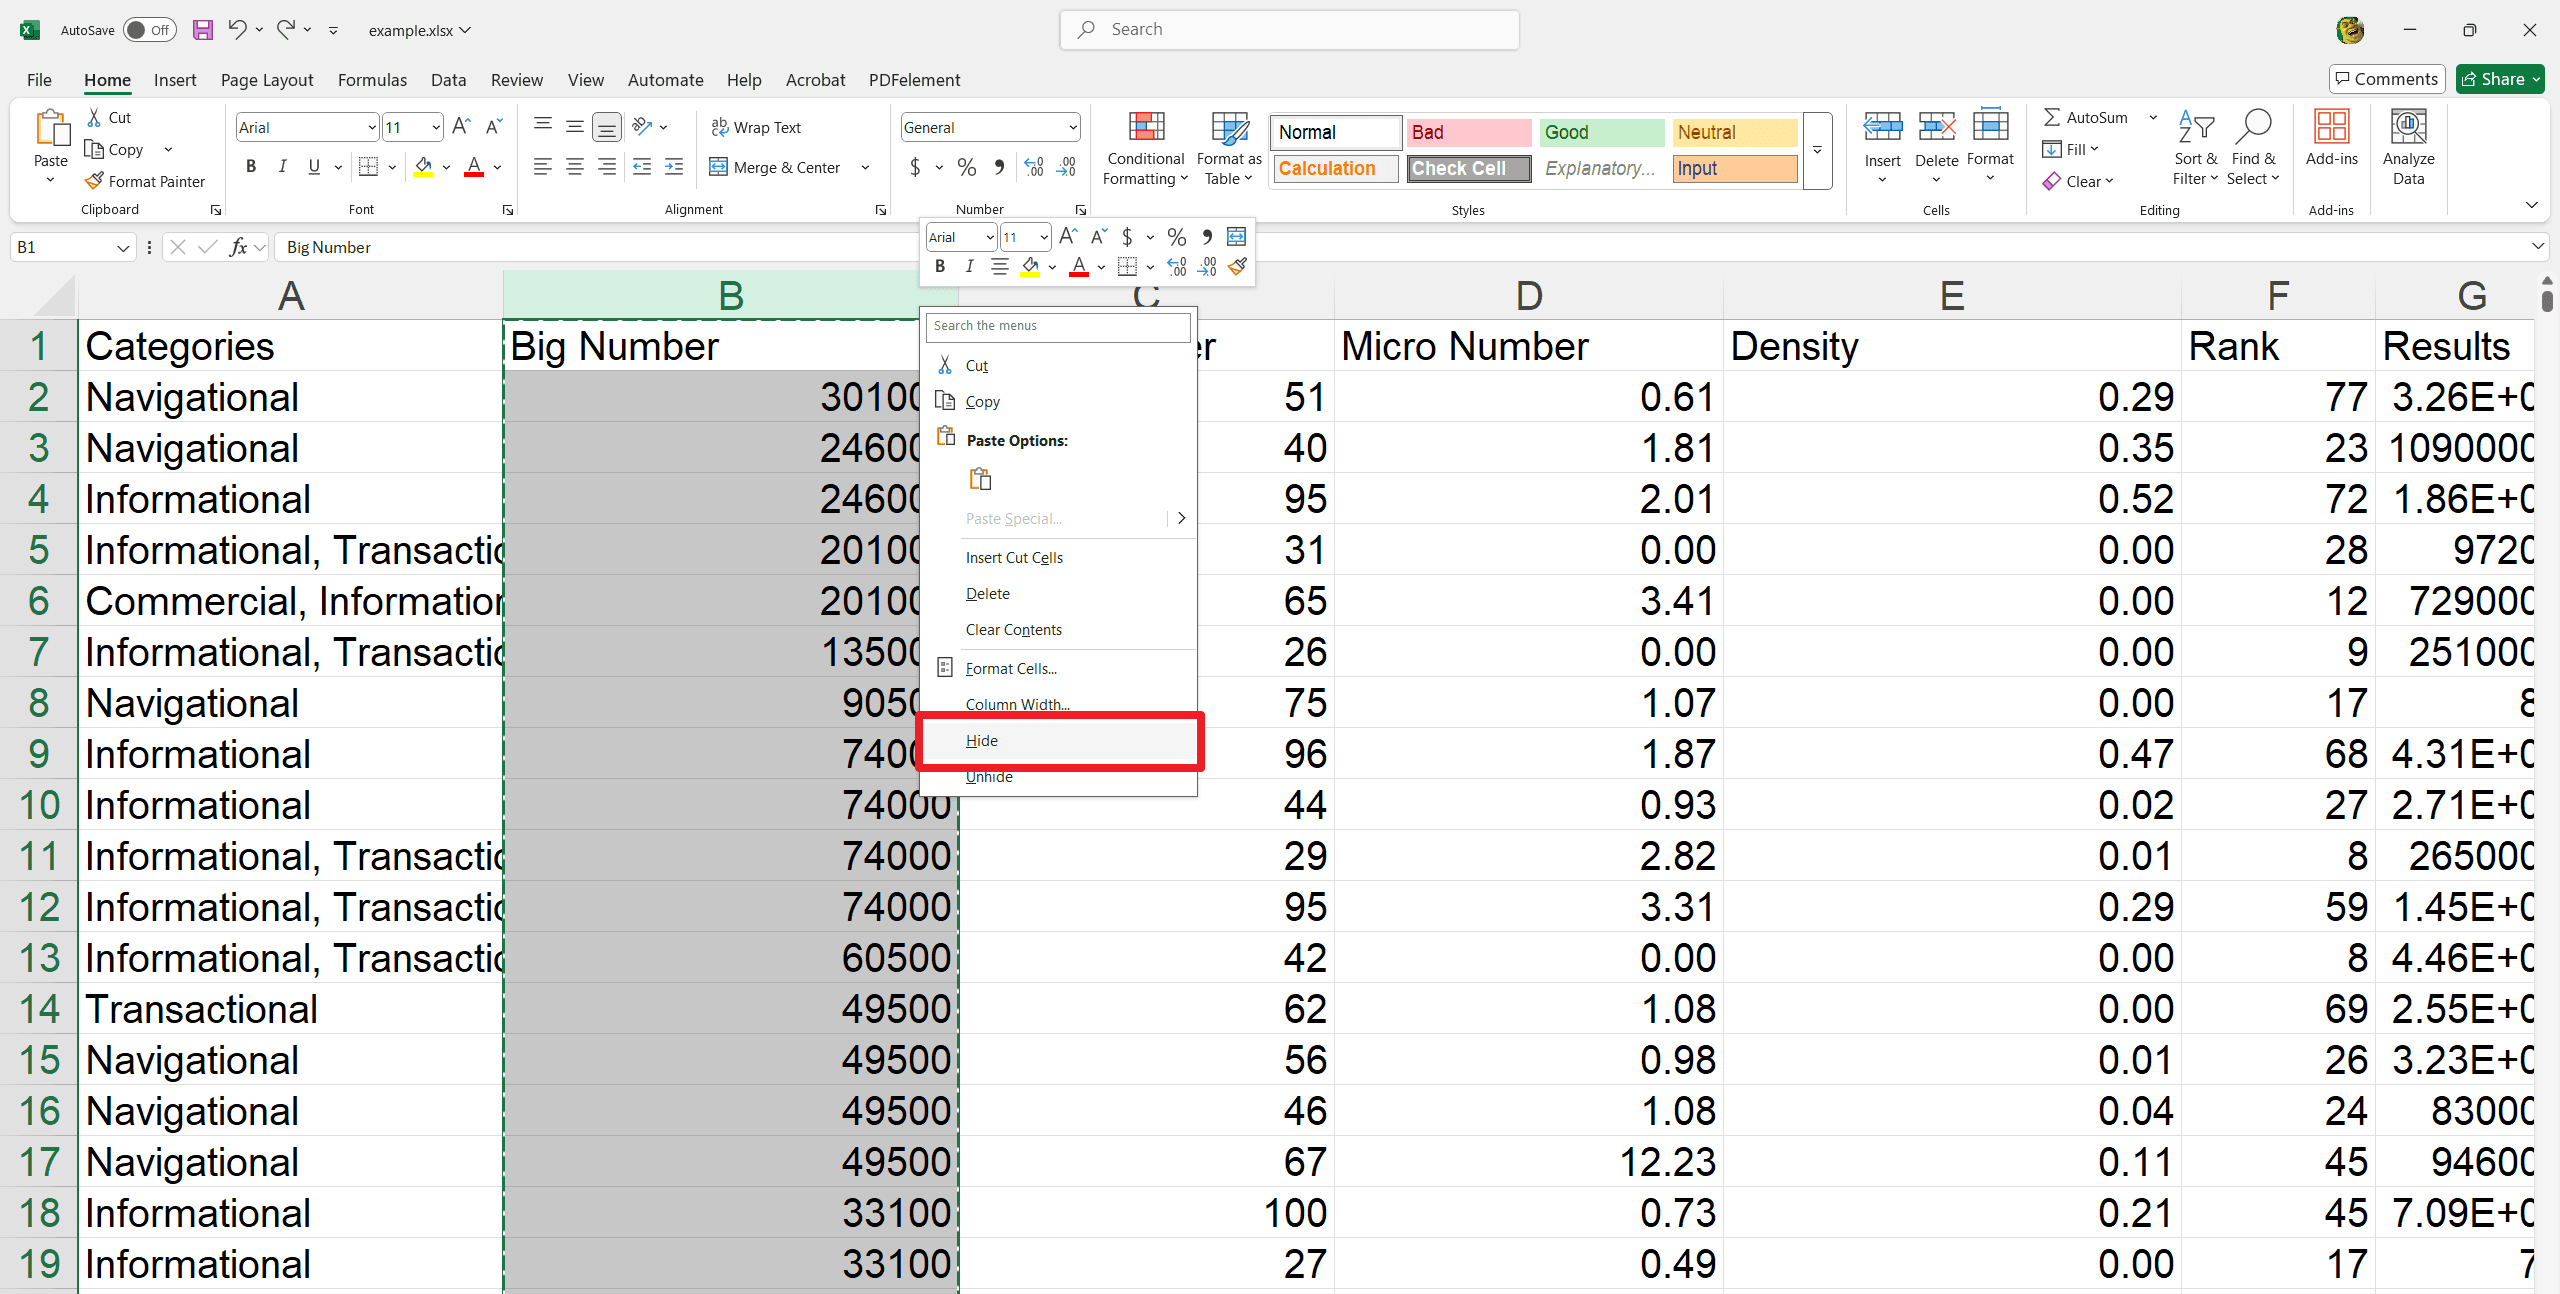
2. The selected columns will be hidden. A green column line will indicate the location of the hidden columns.
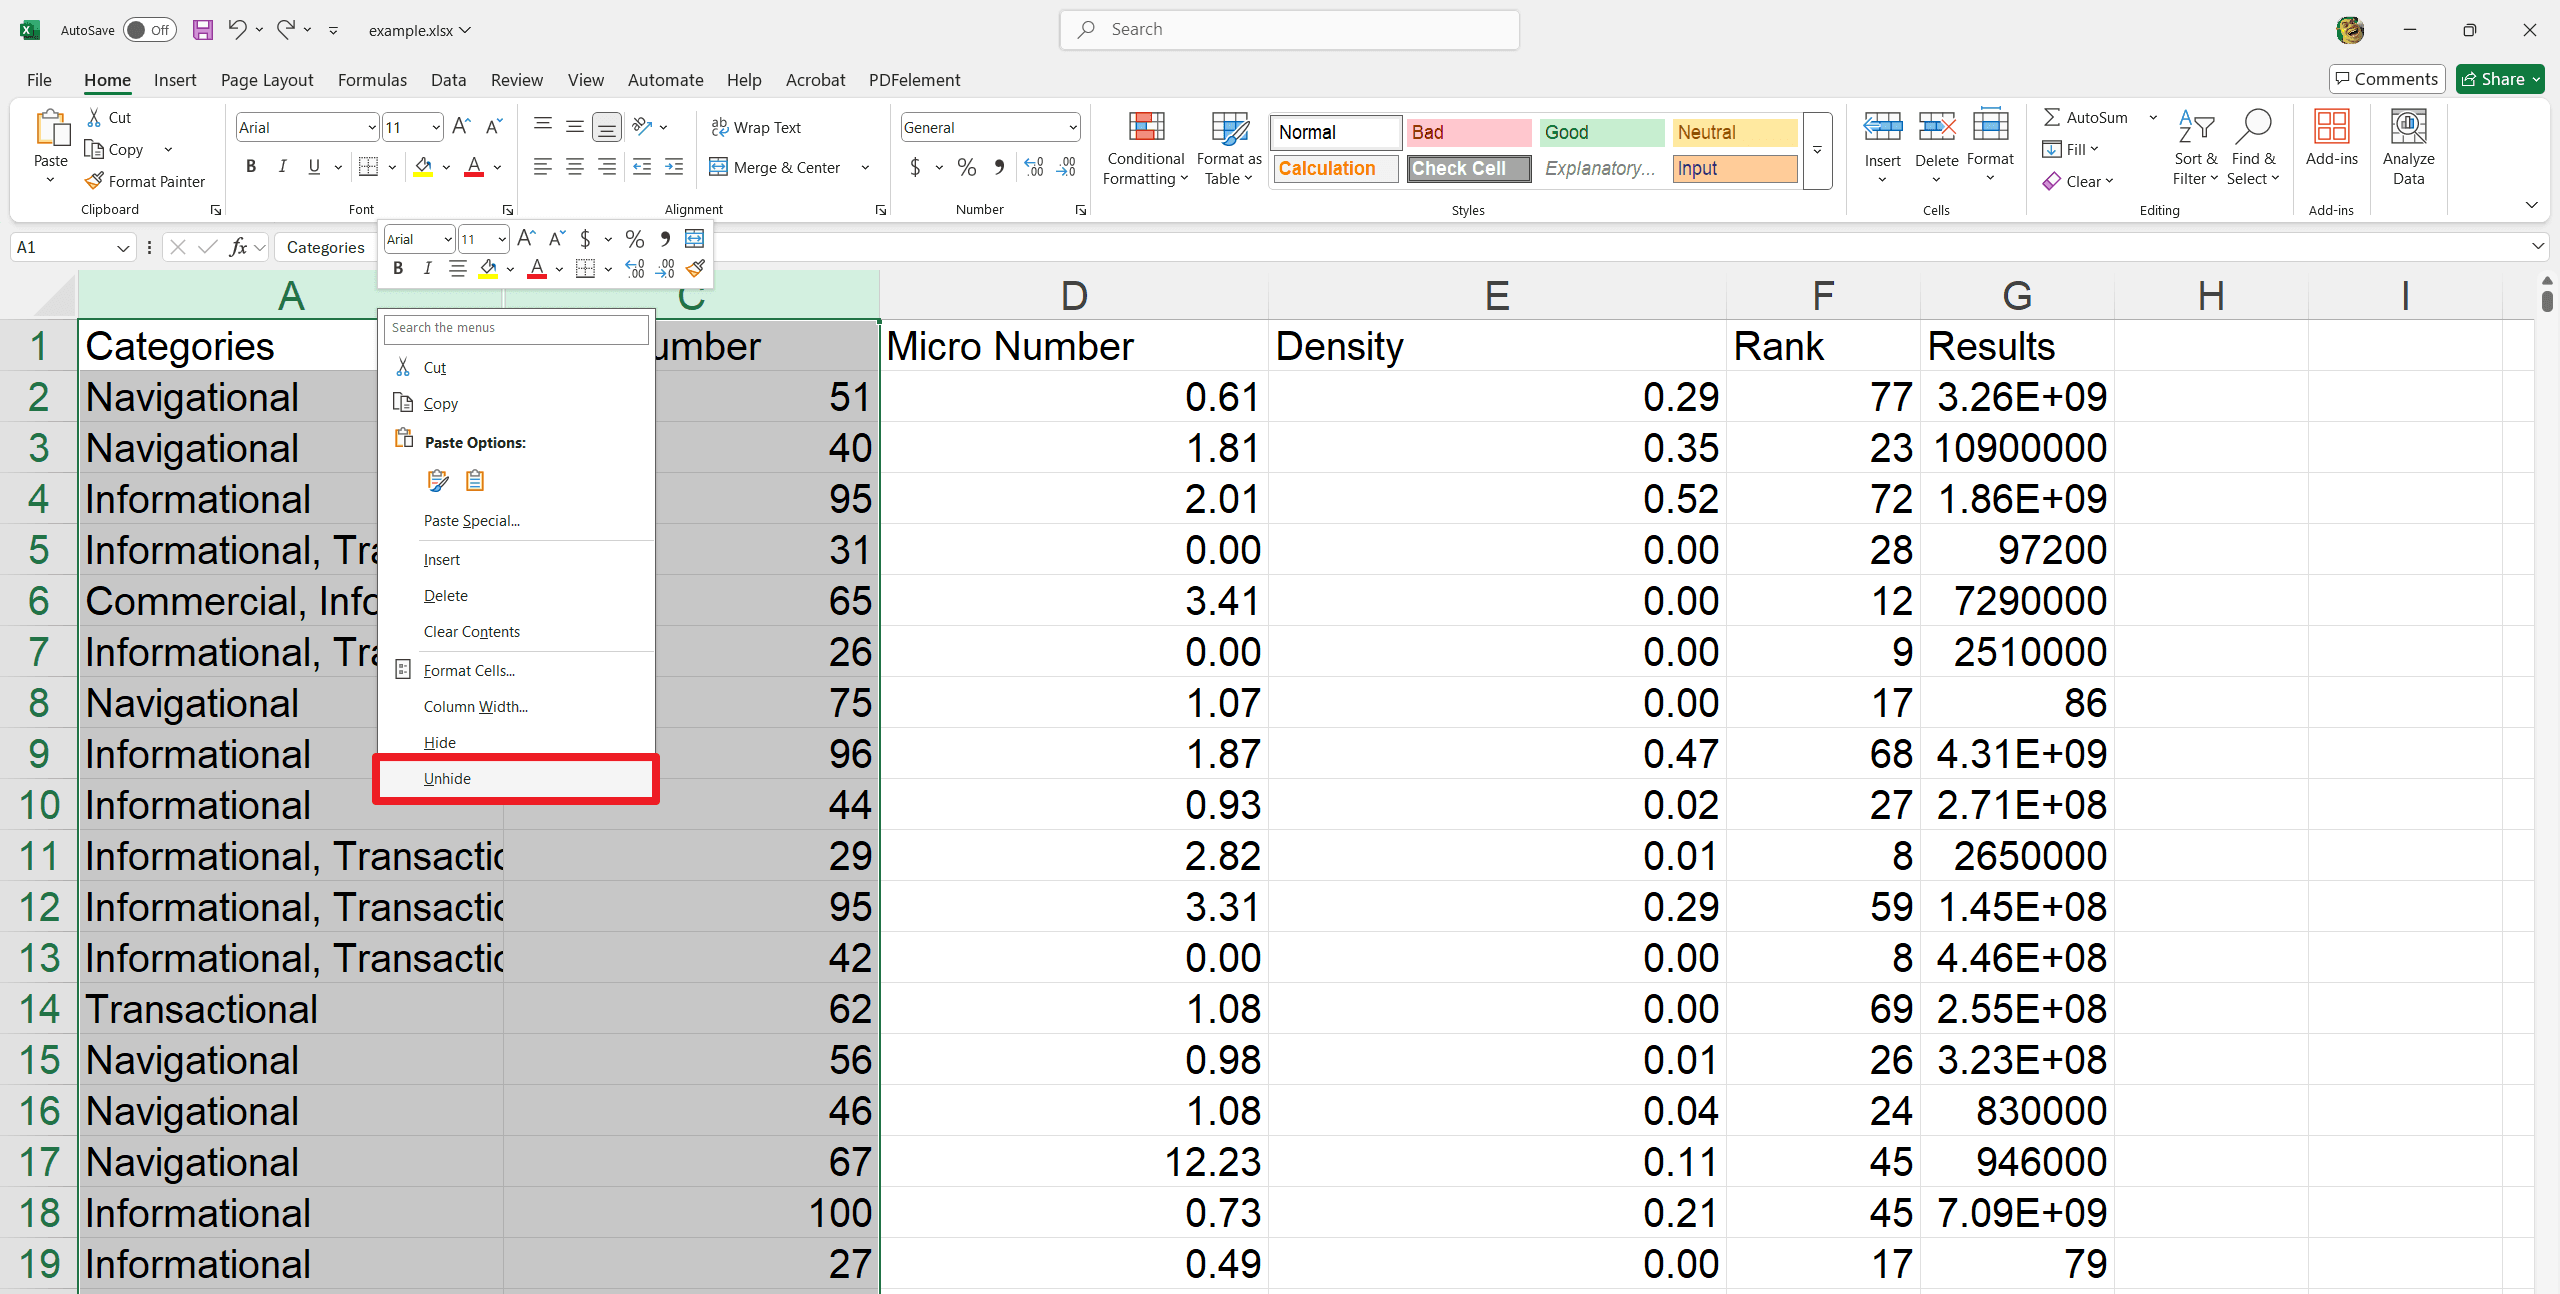
3. To unhide the columns, select the columns positioned on either side of the hidden columns. Right-click the mouse and select "Unhide" from the formatting menu.
4. The hidden columns will reappear.
FAQs:
Q: What is the difference between removing a line/column and cleaning its content?
Removing a line/column removes the entire row/column, which moves the adjacent rows/columns. The clearing material removes data within the row/column, but the row/column lives in place.
Q: Can I put several rows or columns at once?
Select several row or column headings before clicking the "Insert" command. The number of inserted rows/columns will match the selected titles.
Q: What happens to sources when I remove or transfer rows/columns?
- Excel attempts to adjust formulas to reflect the changes.
- However, reviewing formulas after deleting or moving rows/columns is essential to ensure accuracy.
Q: Can I customize the formatting of inserted rows or columns?
- Yes, use the paintbrush icon after inserting it to choose formatting options.
- You can choose to format, like the source or destination, or clear the formatting.
Q: How can I hide many non-collectors or columns?
- Select the first row/column, then place the CTRL key (Windows) or command key (MAC) down and select others.
- Right click again and select Hide.
Q: If I hide a column, will it affect formulas using data in that column?
- Yes, if a formula directly refers to a cell that is now hidden, that formula will be affected.
- Data is not removed by hiding a column, but it may change how it is used in your workbook.
Last word
Excel is an important skill for anyone working with data who is effectively managing rows and columns. Mastery of these techniques can streamline your workflow, improve data accuracy, and create more organized and visual spreadsheets. Remember, practice makes the right. Take time to apply these methods to your data, and you will soon find yourself navigating Excel more confidently. In short, now you can do:
- Insert rows and columns confidently and delete.
- Rearrange your data with ease by moving rows and columns.
- Utilize hiding and unhiding to focus on specific data sets.
- Understand the difference between deleting and clearing cell contents.
- Improve the overall structure of your spreadsheets."
If you want to learn more about PDF tutorials and Excel Tips, please check How-to & Tips | PDF Agile and Excel Tips | PDF Agile.


