Have you ever wrestled with text that won't behave in your Excel spreadsheets? You are not alone! Whether you are working with cell boundaries or sentences flowing on paragraphs, which look like jumbal dirt, Excel has tricked some Nifty to his sleeve. We will dive into the world of 'rap text' and 'justification,' showing you how to subdue those uncontrolled words and make your spreadsheet polished and professional. Let's start.
What Does "Wrap Text" Mean in Excel?
Okay, so you have found this wall of text in Excel cell, and it's just ... going everywhere. It is as if your words decided to take a beautiful path on the cell boundaries. Sound familiar? This is where "wrap text" comes to the rescue.
Example: See the Difference?
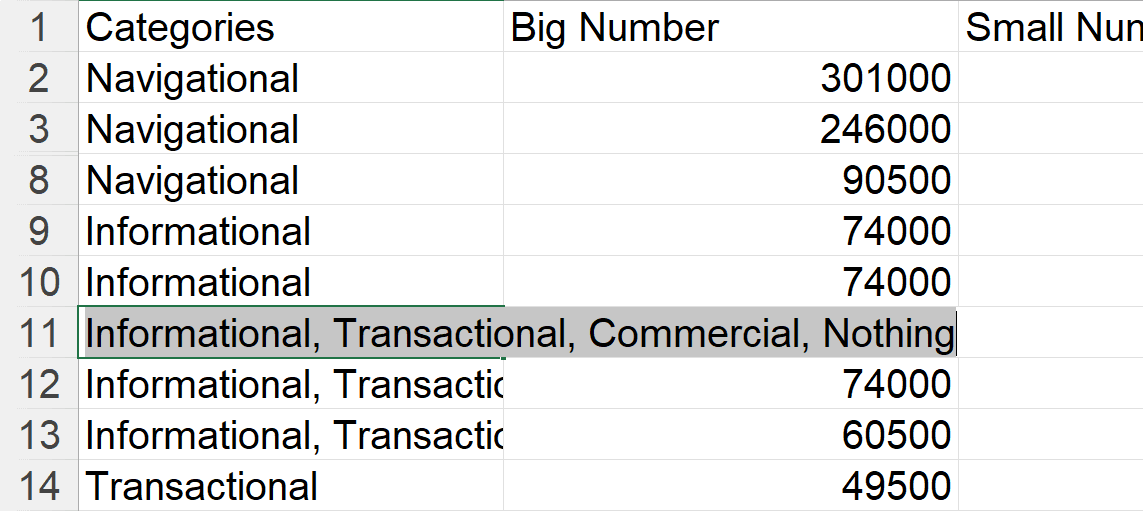
Imagine You have found a cell with a punishment running like a fugitive train.
This is a mess, isn't it?
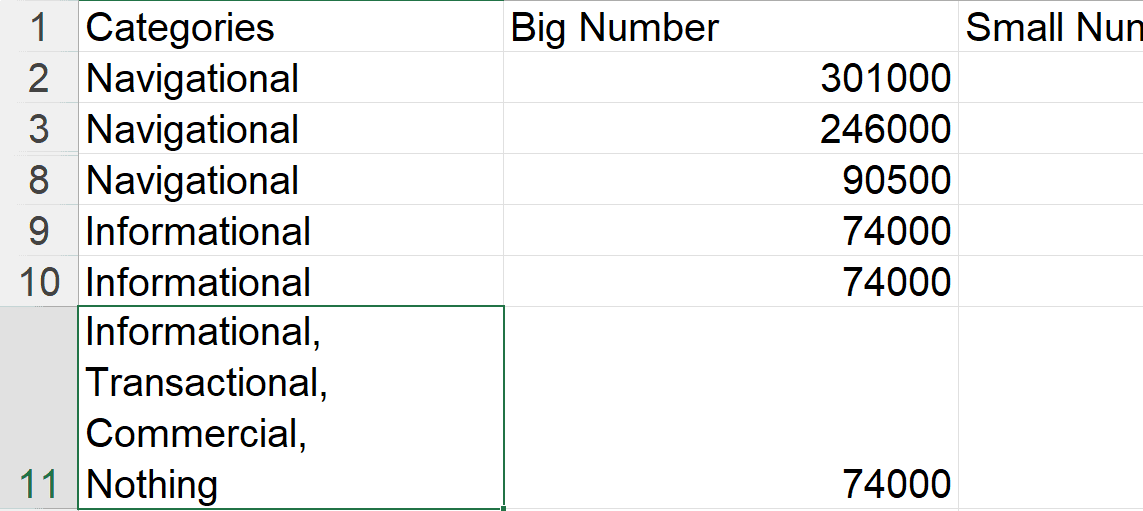
This picture is the same sentence, but it is neatly arranged in some lines, all within the same cell.
Much better!
How to Wrap Text Automatically?
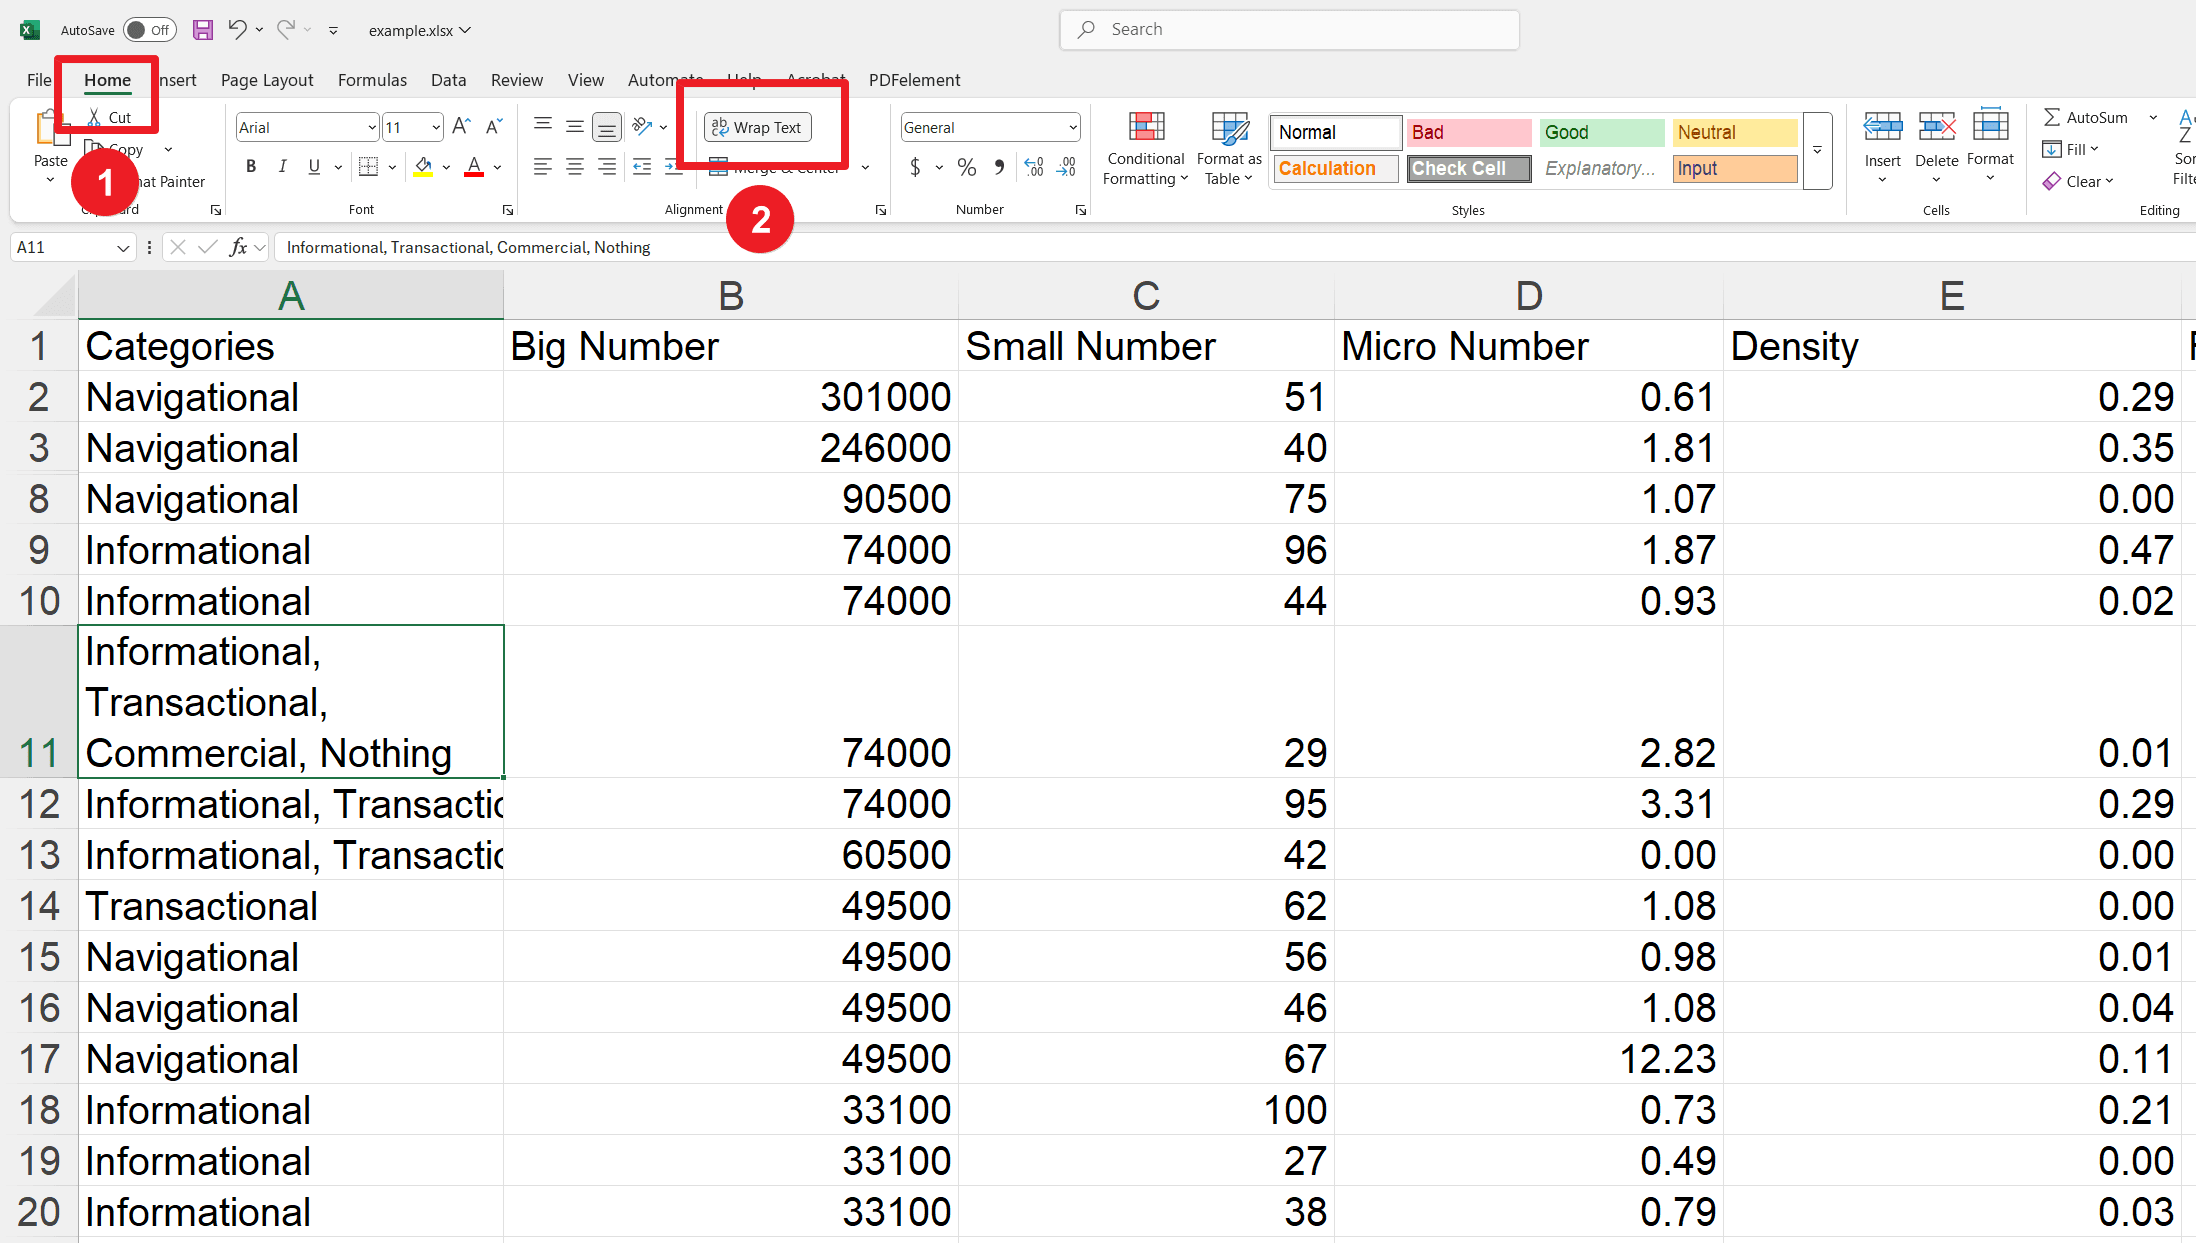
Here's how to make Excel do the wrapping for you:
1. Pick Your Cell(s): Click on the cell causing trouble, or if you've got a bunch of cells misbehaving, click and drag to select them all.
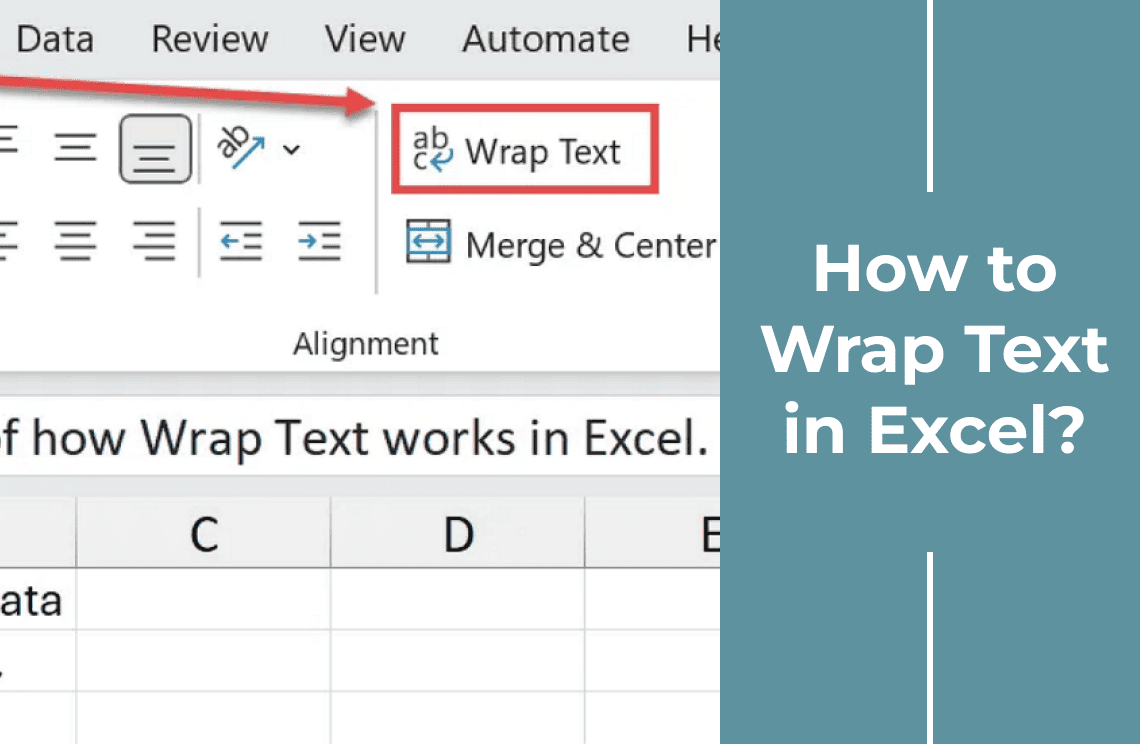
2. Find the Magic Button: Head to the "Home" tab on the ribbon at the top of your screen. Then, look for the "Alignment" section. You'll see a button that says "Wrap Text." Give it a click!
How to Add a Line Break Manually?
So, the automatic "Wrap Text" is pretty handy, right? But sometimes, you're a bit of a control freak (in a good way!), and you want to decide exactly where the line breaks happen. I get it!
Luckily, Excel lets you do just that. It's like telling your text, "You go here, and you go there!"
Here's the Super Simple Way to Do It:
1. Get Into Editing Mode: First, you need to get inside the cell. You can do this by double-clicking on it. Or, if you're a keyboard shortcut fan, select the cell and press the F2 key.
2. Point and Click: Now, use your mouse to click exactly where you want the new line to start. Imagine you're placing a little marker where the break should happen.
3. The Magic Combo: Here's the secret ingredient: Press Alt + Enter on your keyboard. Boom! A new line appears right where you wanted it.
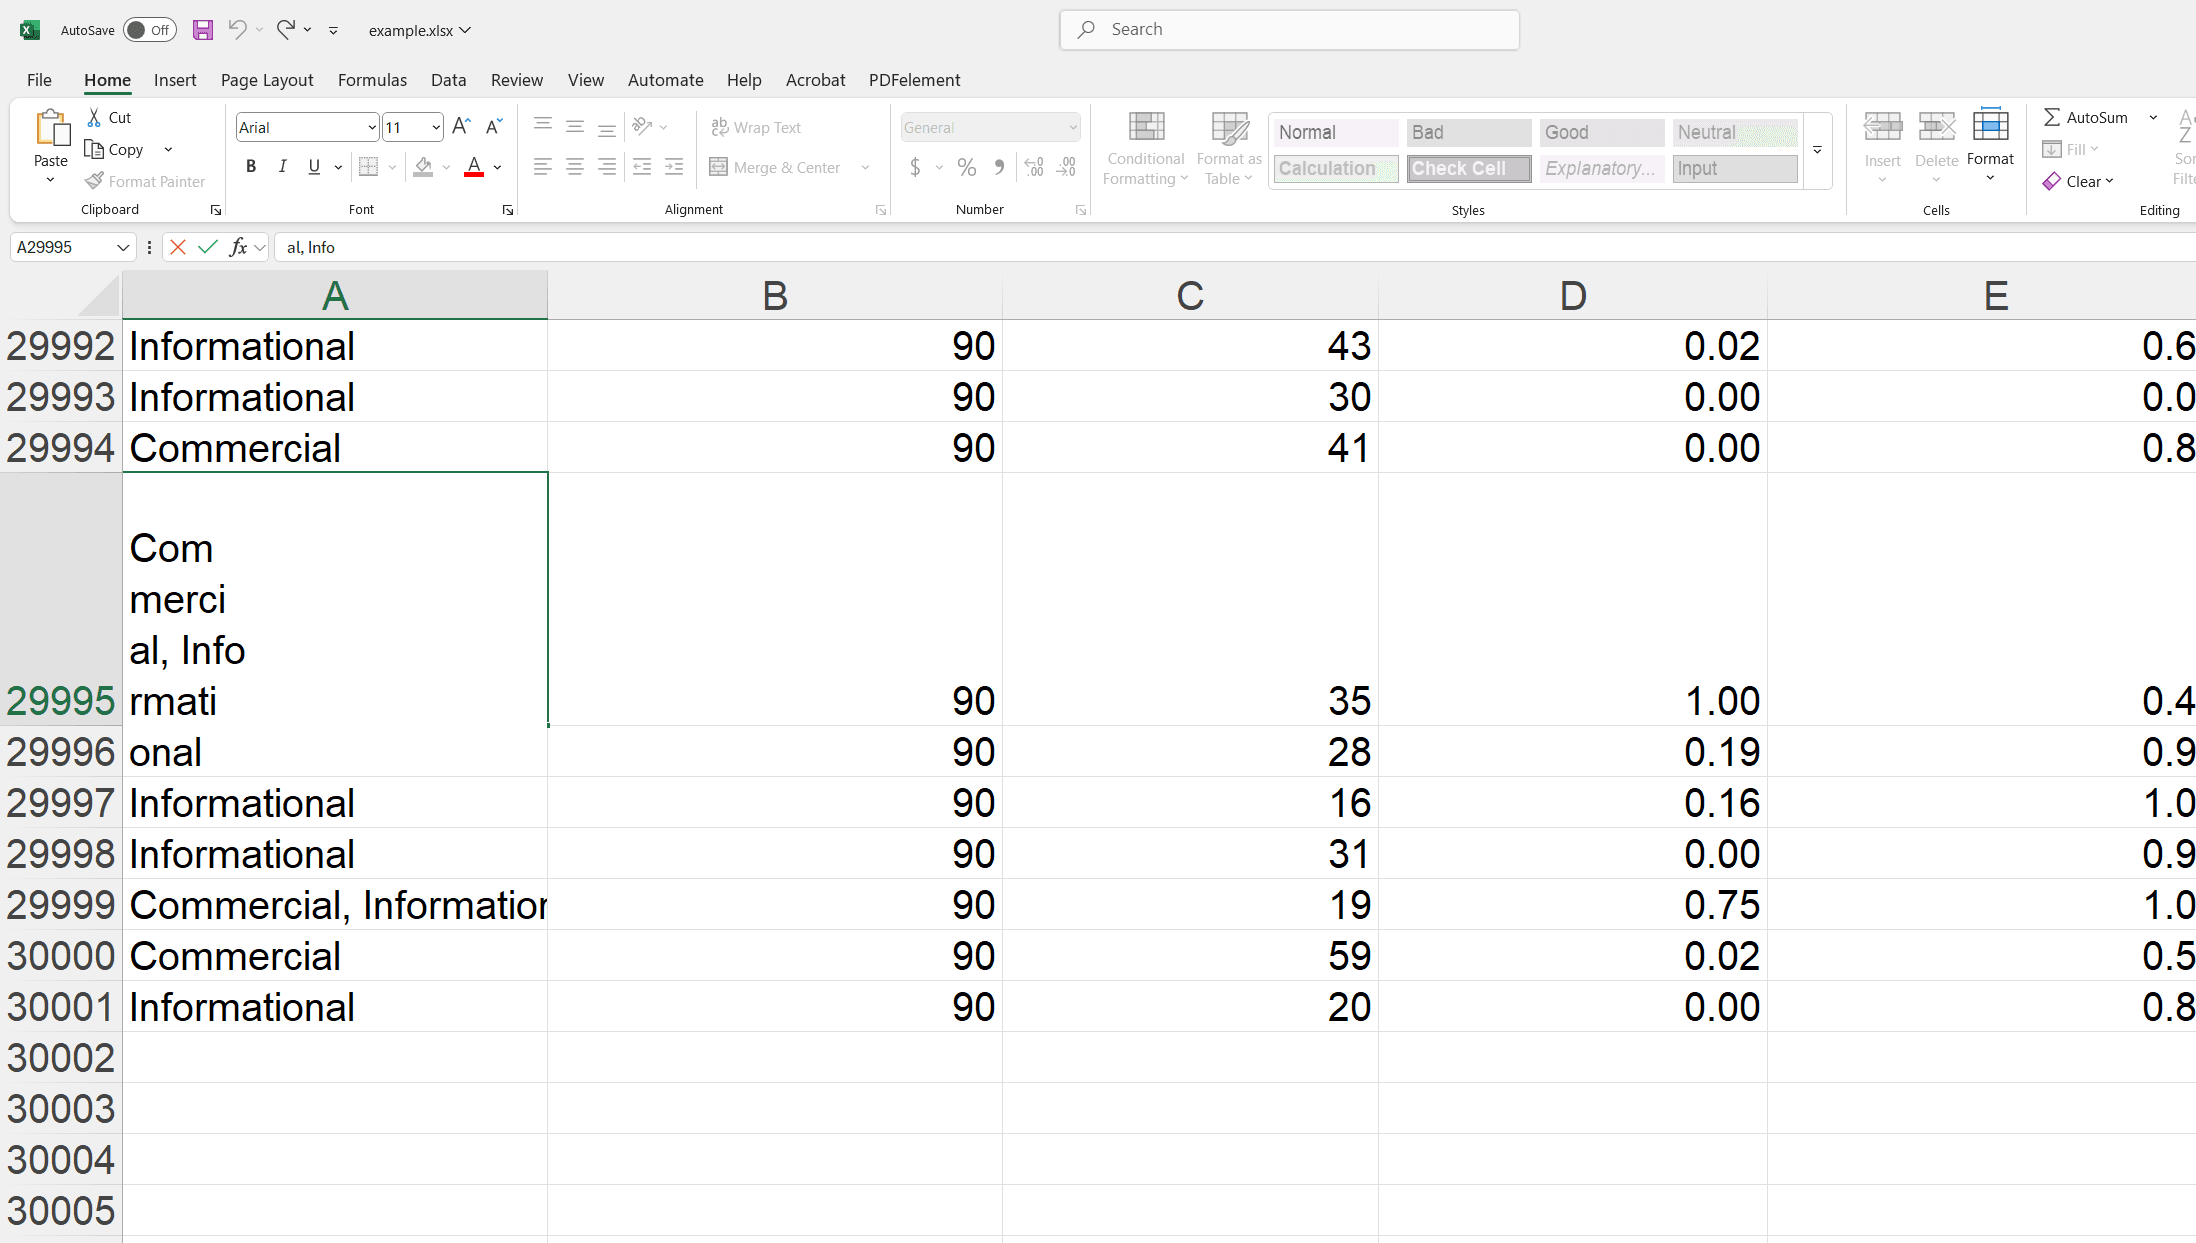
Let's See It in Action:
Imagine you've got the sentence "Excel is easy to use" in a cell, but you want "to use" to be on a separate line.
1. You'd double-click the cell (or press F2).
2. Then, you'd click your cursor right before "to use."
3. Finally, you press Alt + Enter.

And just like that, "to use" jumps down to a new line, keeping things neat. It's like you're the boss of your text!
How to Justify Text Inside a Single Excel Cell?
Ever notice how sometimes text in Excel looks a little… uneven? Like it's leaning to one side or has weird gaps? That's where justifying text comes in. It's like giving your words a little makeover, making them line up perfectly inside the cell.
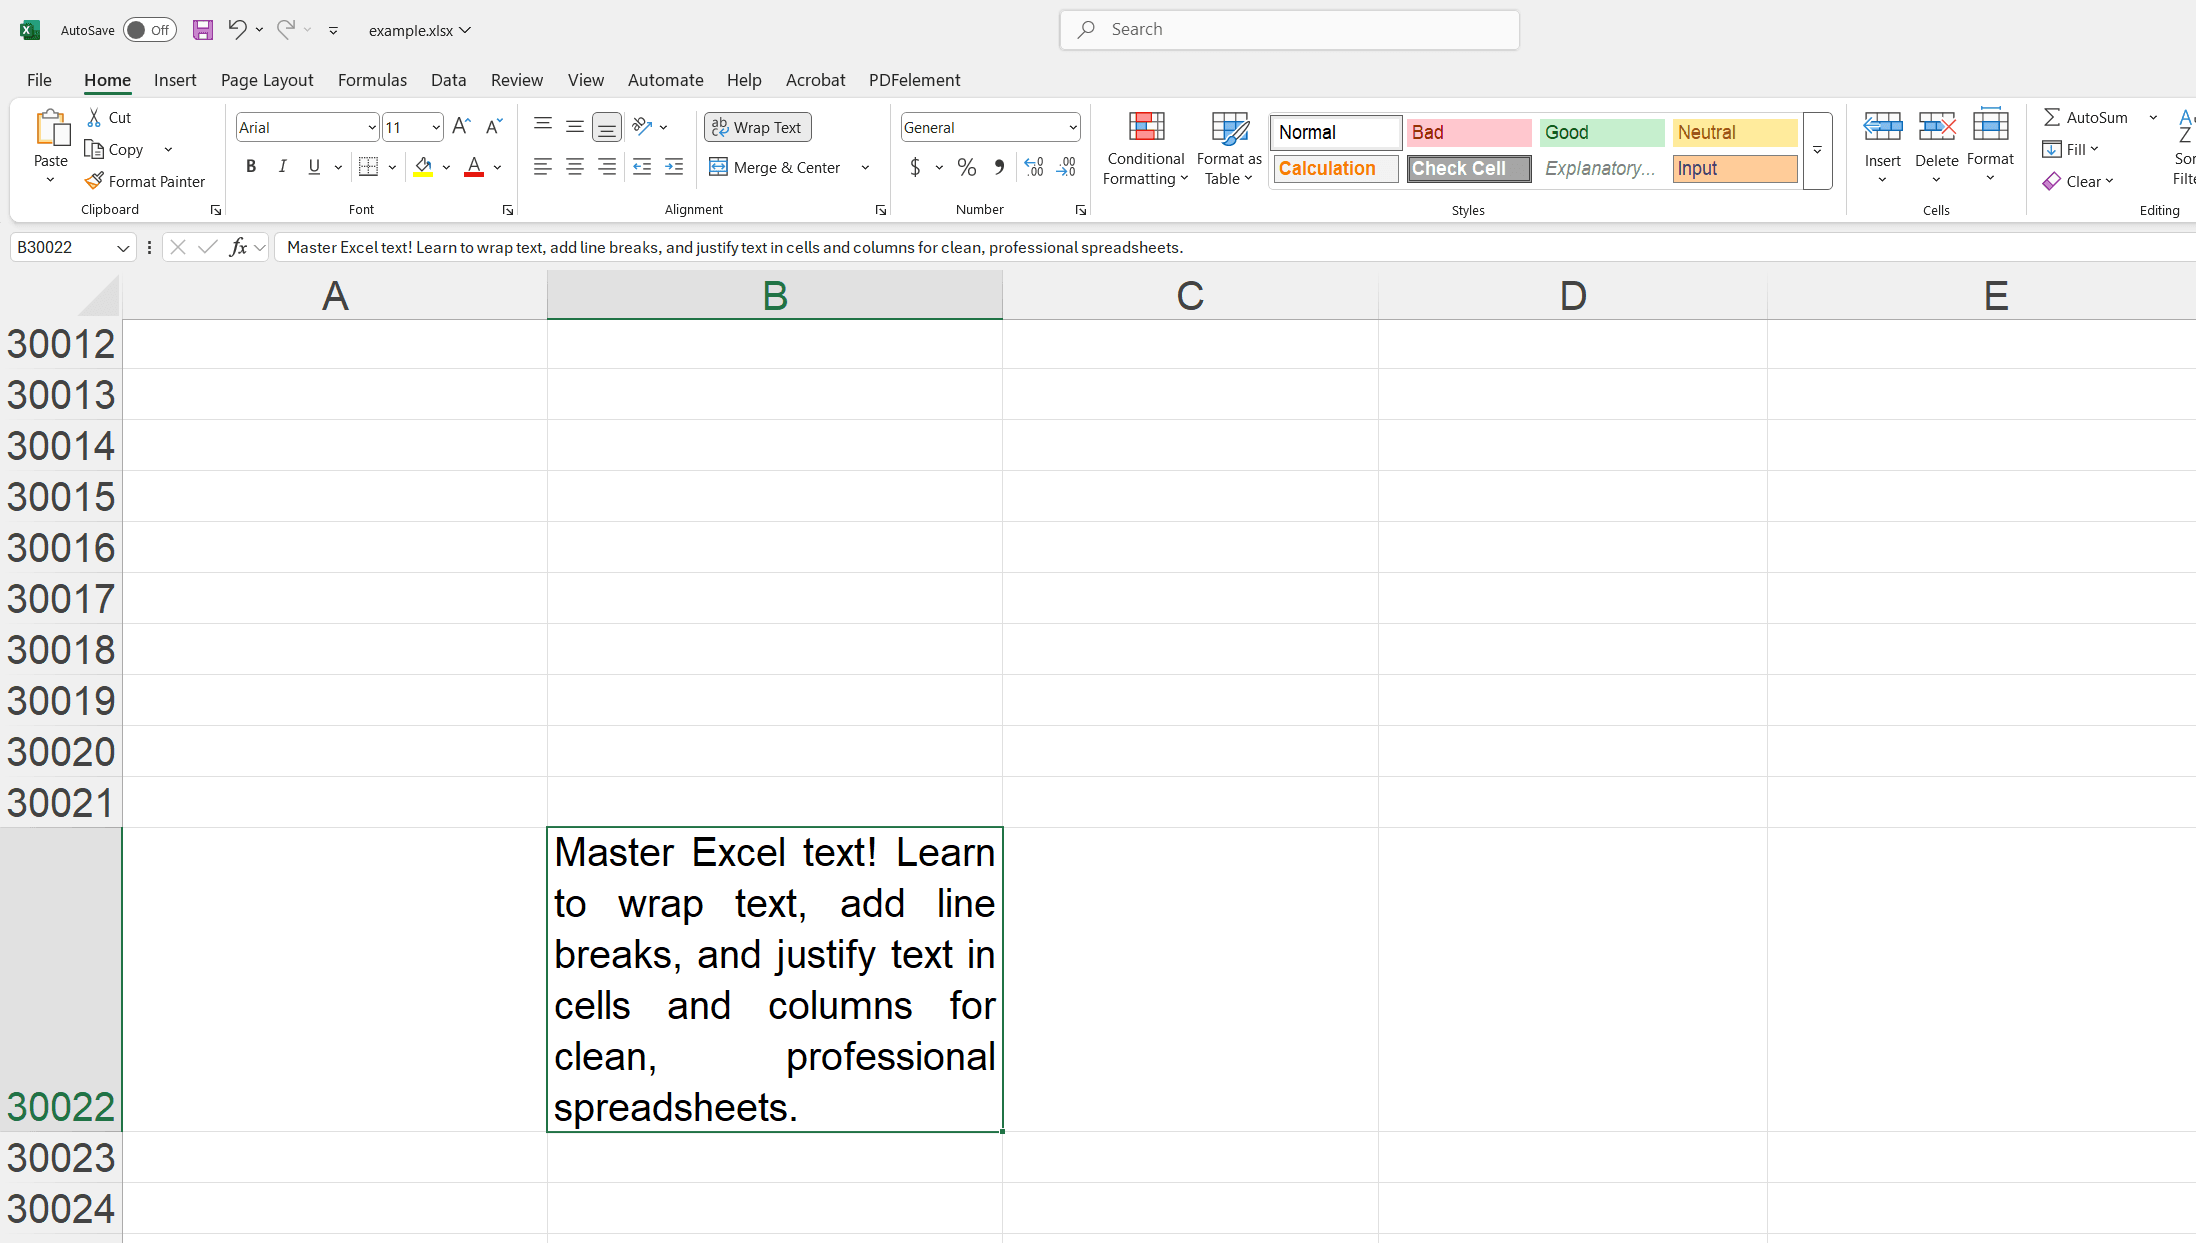
Justifying text in Excel spreads your words evenly, so each line's first and last words hug the edges of the cell. It's all about creating that clean, polished, "I know what I'm doing" look for your spreadsheets.
Let's Get Your Text Looking Its Best: A Simple Guide
1. Pick Your Target Cell: Start by clicking on the cell that contains the text you want to justify. It's as simple as that!
2. Open the "Format Cells" Magic Box: You can right-click on the cell and choose "Format Cells" from the menu. Or, if you're a keyboard shortcut whiz, select the cell and press Ctrl + 1. Either way, the "Format Cells" dialog box will pop up.
3. Find the Justify Setting: Inside the "Format Cells" box, click on the "Alignment" tab. Then, look for the "Horizontal" drop-down menu. Click it, and you'll see a bunch of options. Choose “Justify.”
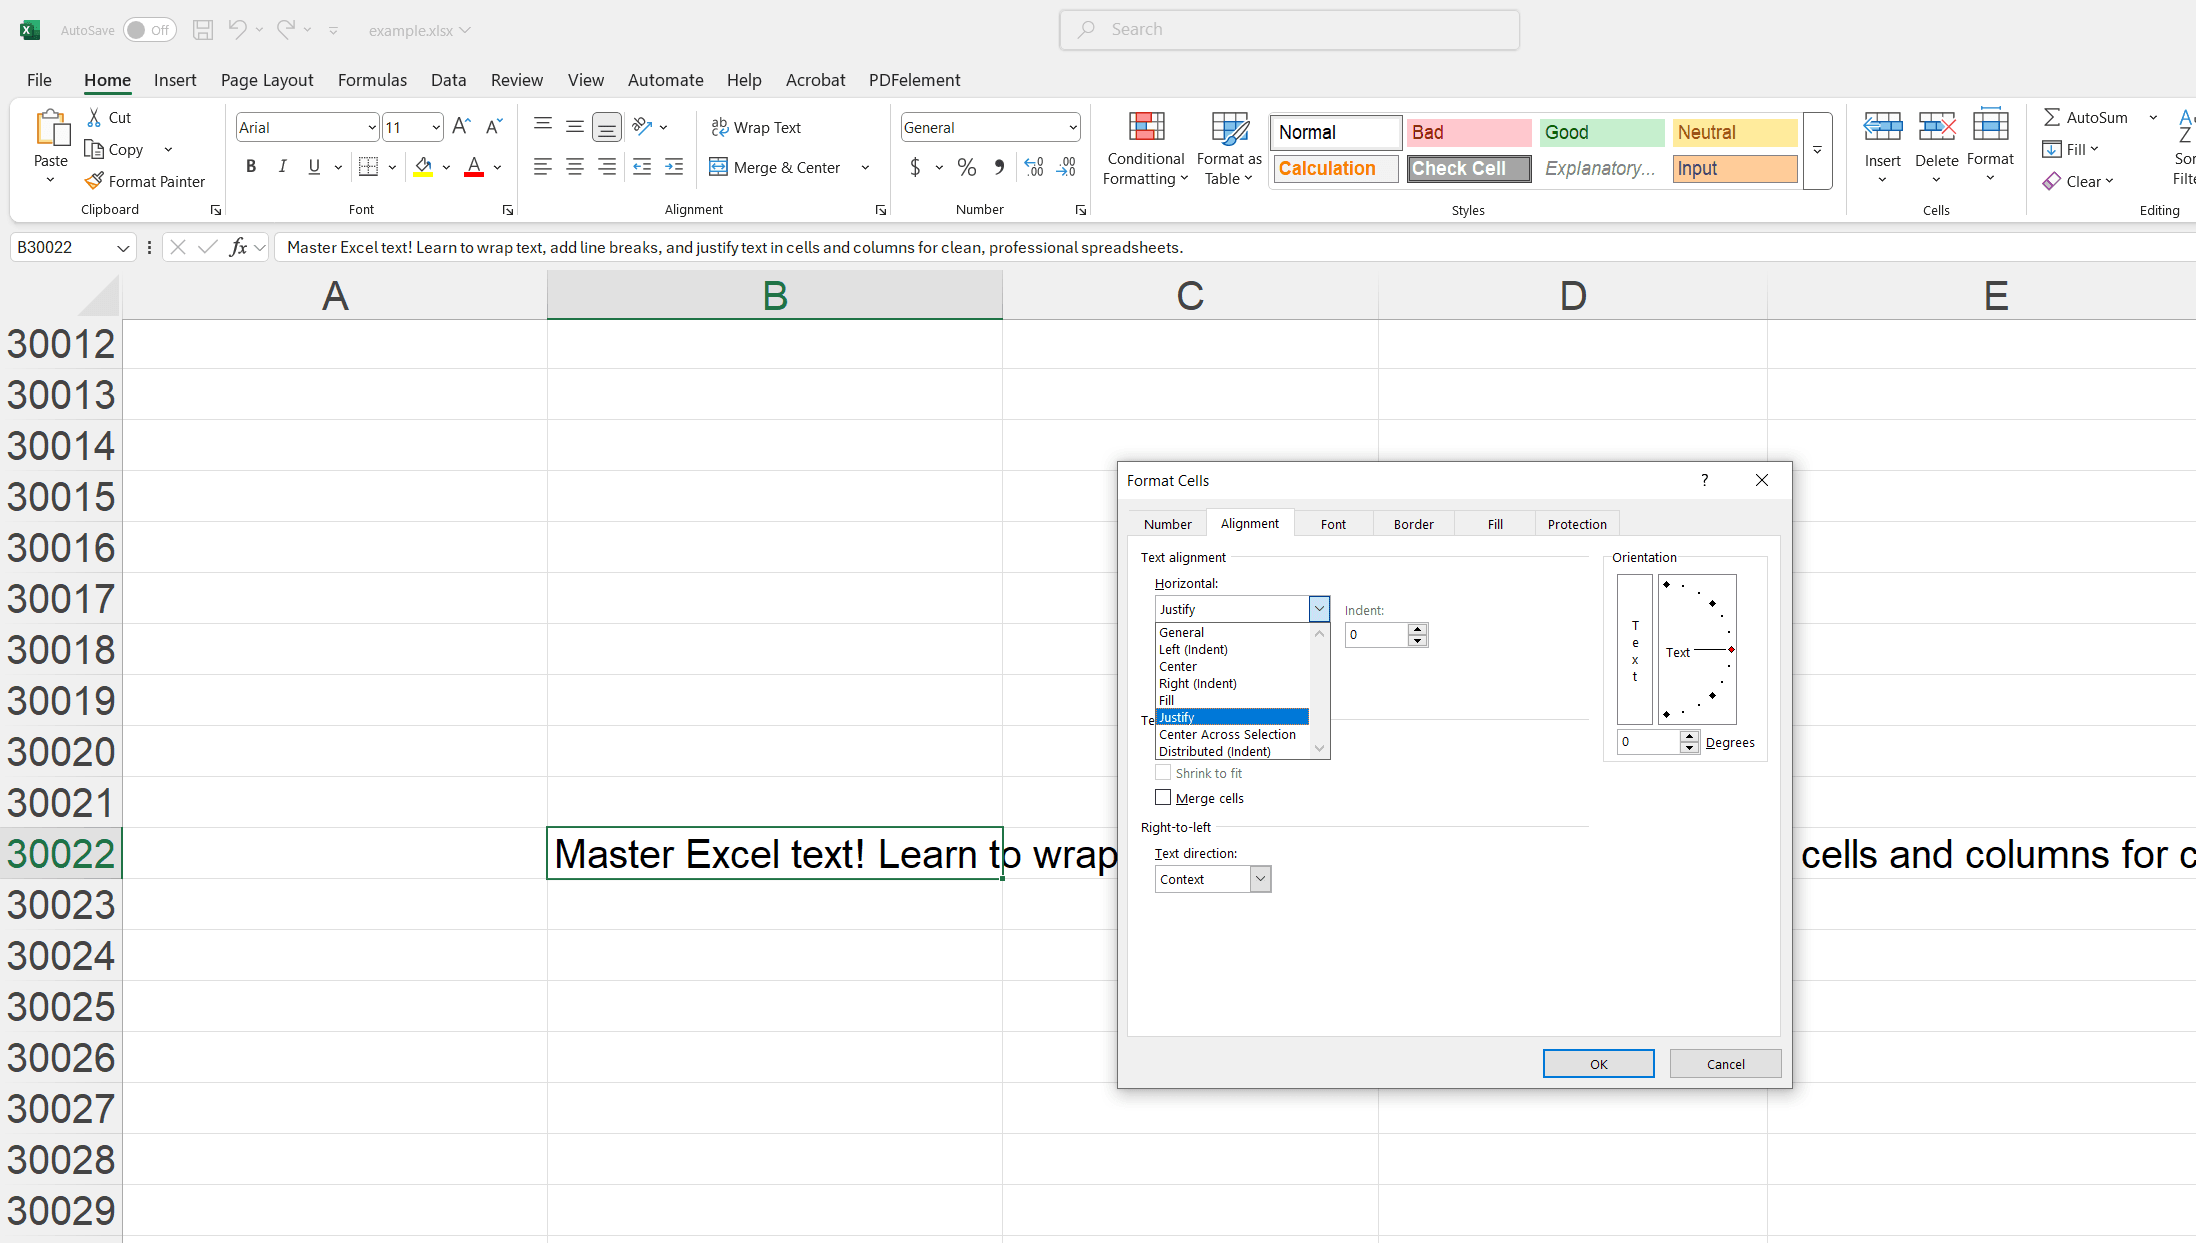
4. Seal the Deal: Click "OK" at the bottom of the "Format Cells" box. And just like that, your text will be evenly spaced and perfectly aligned within the cell. Now, your spreadsheet has an additional touch of professionalism. It is all in the details, isn't it?
How to Justify Text Across Multiple Columns in Excel?
Okay, so you have found a large part of the text and want it to fit well in some columns as if it is telling a story on a page. You do not want all this in a cell, isn't it? It is here that Excel's "Phil Jestify" is useful. It is a little helpful that magically spreads your words equally.
Originally, it takes your long paragraphs, breaks them into small pieces, and arranges them neatly across the rows within your chosen columns. This report, newspaper, or document is perfect where you want to flow the text smoothly.
A Simple How-To-Do
Imagine that you want to spread your text into columns through F. Here's how to make it happen:
1. Pick Your Playground: Start by selecting the area where you want your text to live. Highlight the cells where you want the text to spread, including the columns and rows. For example, if you want to use columns A to F and have space for a few rows, you might select A1:F5. This gives Excel the space it needs to work its magic.
2. Find the "Fill Justify" Button: Go to the "Home" tab on the ribbon at the top of your screen. Then, look for the "Editing" group. You'll see a button that says "Fill." Click it, and a drop-down menu will appear. From that menu, choose “Justify.”
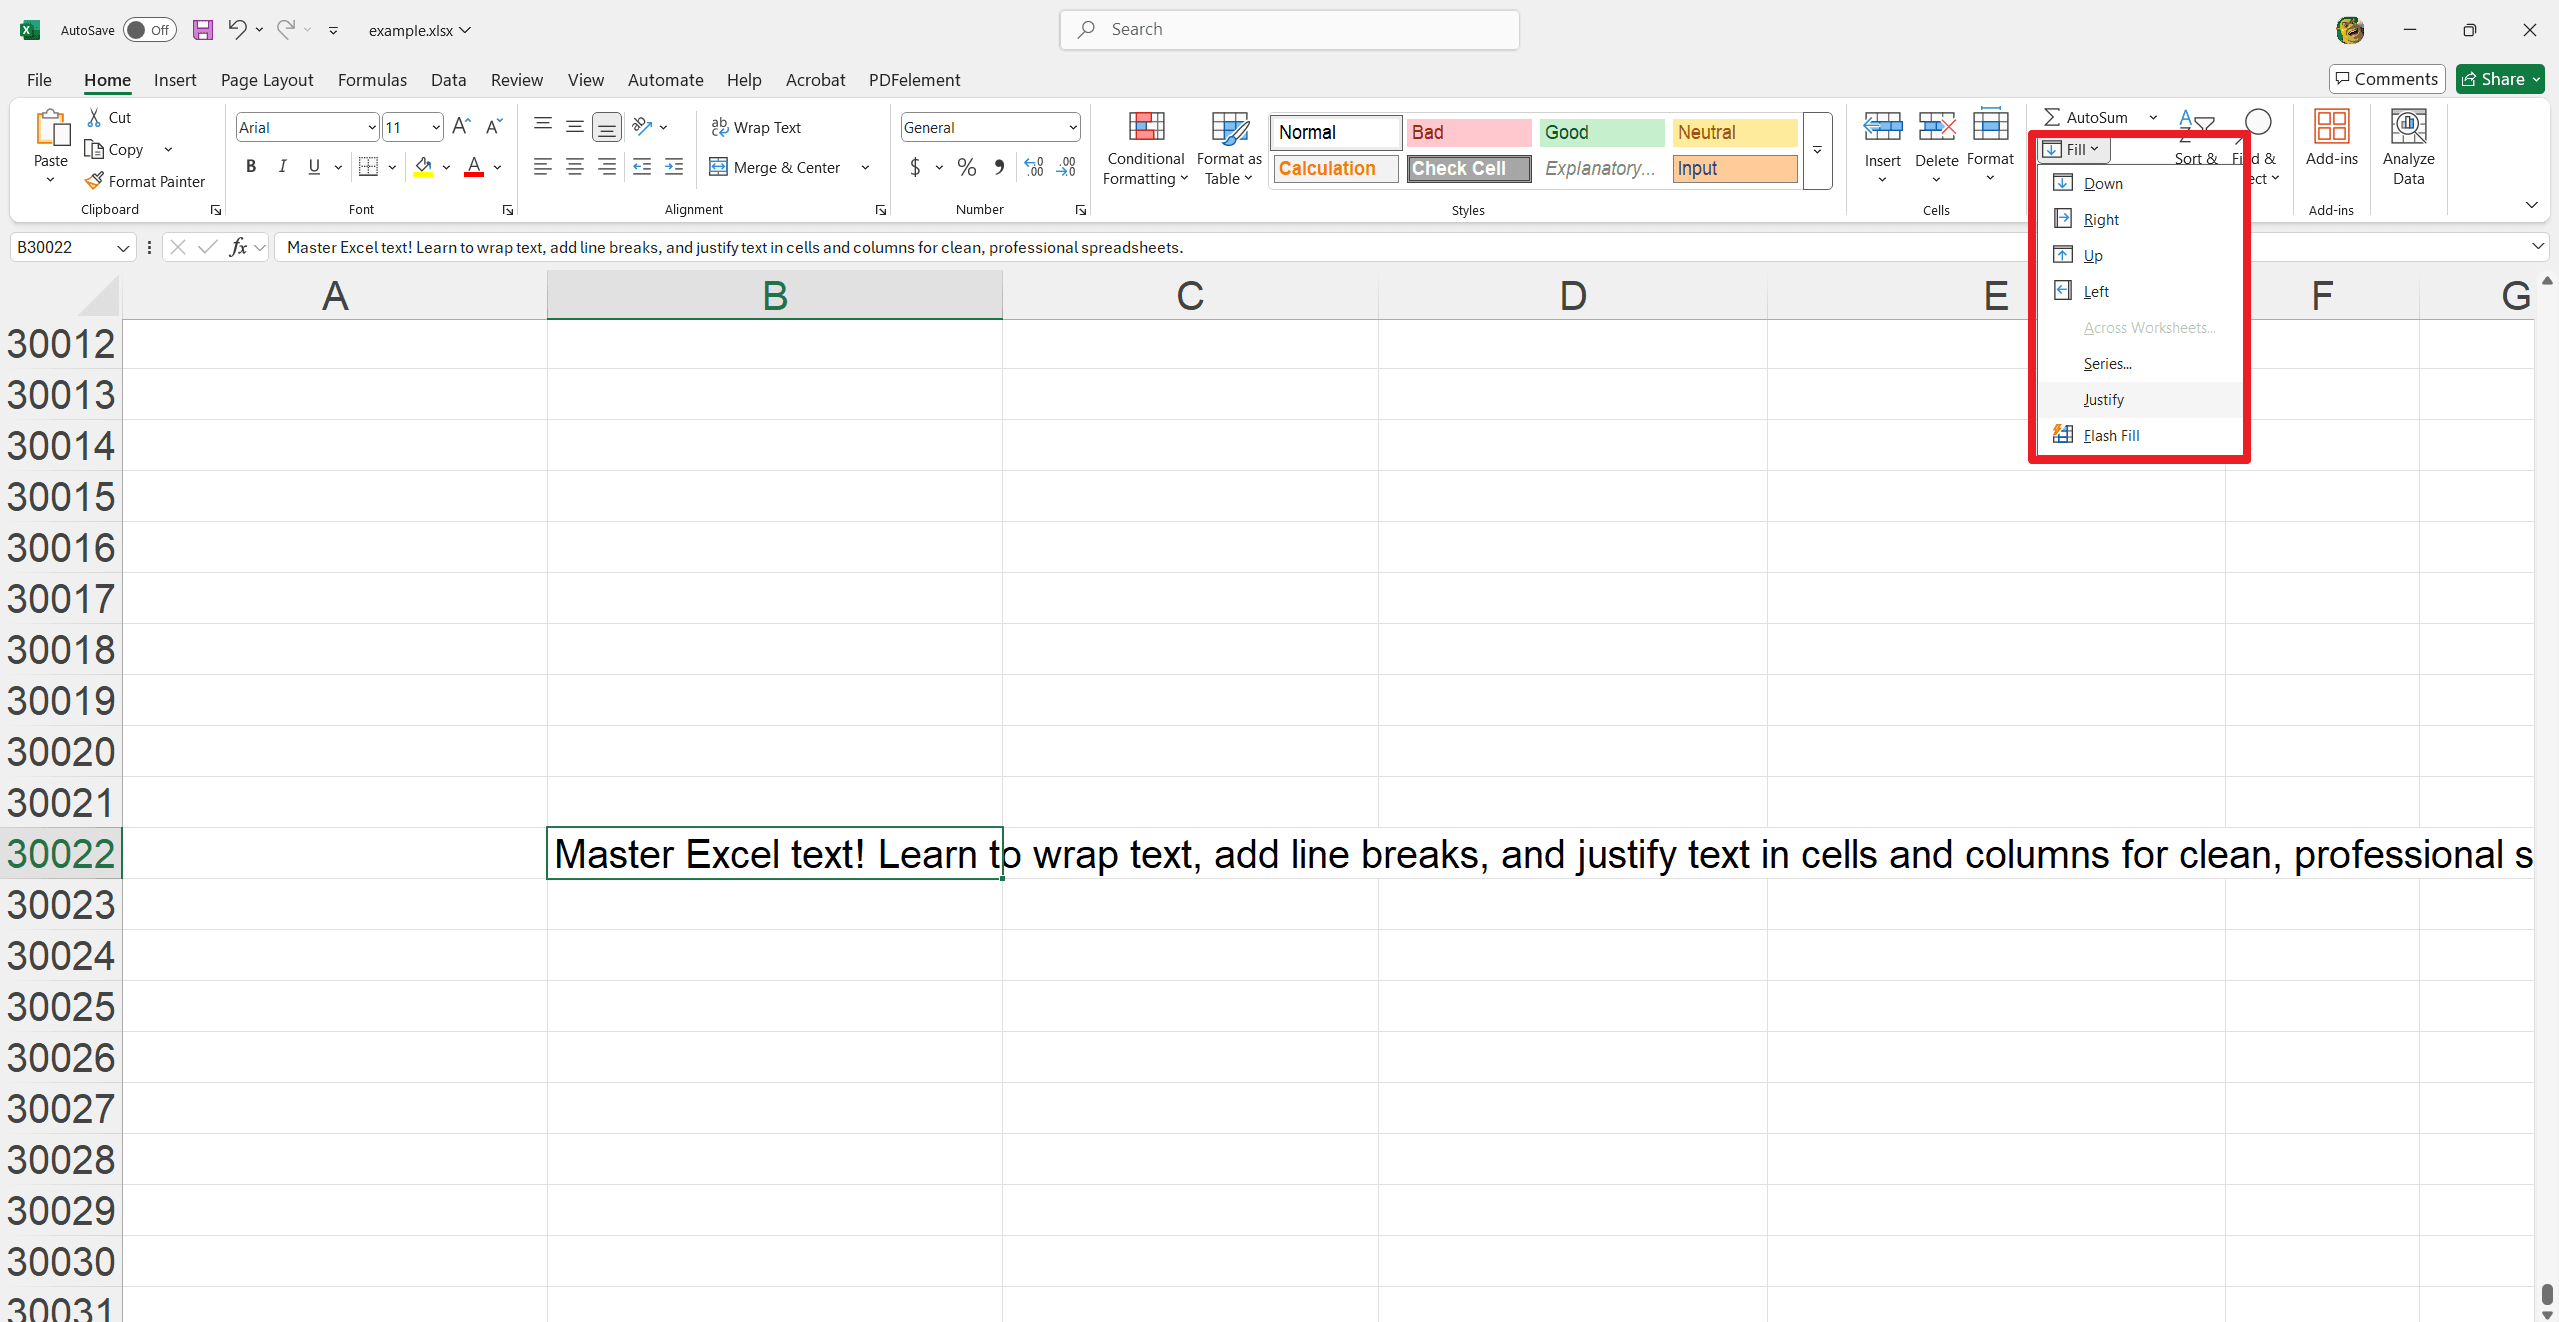
3. Check Out the Results: Excel will work its magic, breaking your text into smaller pieces and arranging them neatly across the rows within your selected columns. It's like watching your text organize itself!
Your text flows beautifully in your spreadsheet, which makes it easier to read and understand. It is all about making your information the best!
Last Words
And there you have it! With these simple techniques, you can now handle the text in Excel like a supporter. Whether the texts fit the cells neatly inside the cells or justify it for a clean, professional form, these skills will make your spreadsheet more user-friendly. Do not be afraid to use it and find out what best works for you. Now, create beautifully organized spreadsheets that are a pleasure to read! Remember, some formatting can lead a long way to shine your data. And hey, don't stop here! Dive into even more awesome tips at Excel Tips and discover a treasure trove of tricks at How-To and Tips. Keep on Excel-ing and happy spreadsheet adventures!

