Ever started reading a document and felt instantly put off by cramped text and irregular spacing? The secret to a polished, professional-looking Word document often lies in its margins. Margins are more than just blank spaces; they're the silent heroes that enhance readability and aesthetics. I've personally experienced the transformation that well-adjusted margins can bring to a piece of writing. In this guide, I'm excited to share with you my step-by-step process for adjusting margins in Word. Whether you're crafting a business report, a school assignment, or a creative project, mastering this simple yet powerful tool will elevate your document to a whole new level. Let's dive in and explore how to perfect your page setup!

How to Change Margins in Word on Desktop?
Step 1. Using Margin Presets
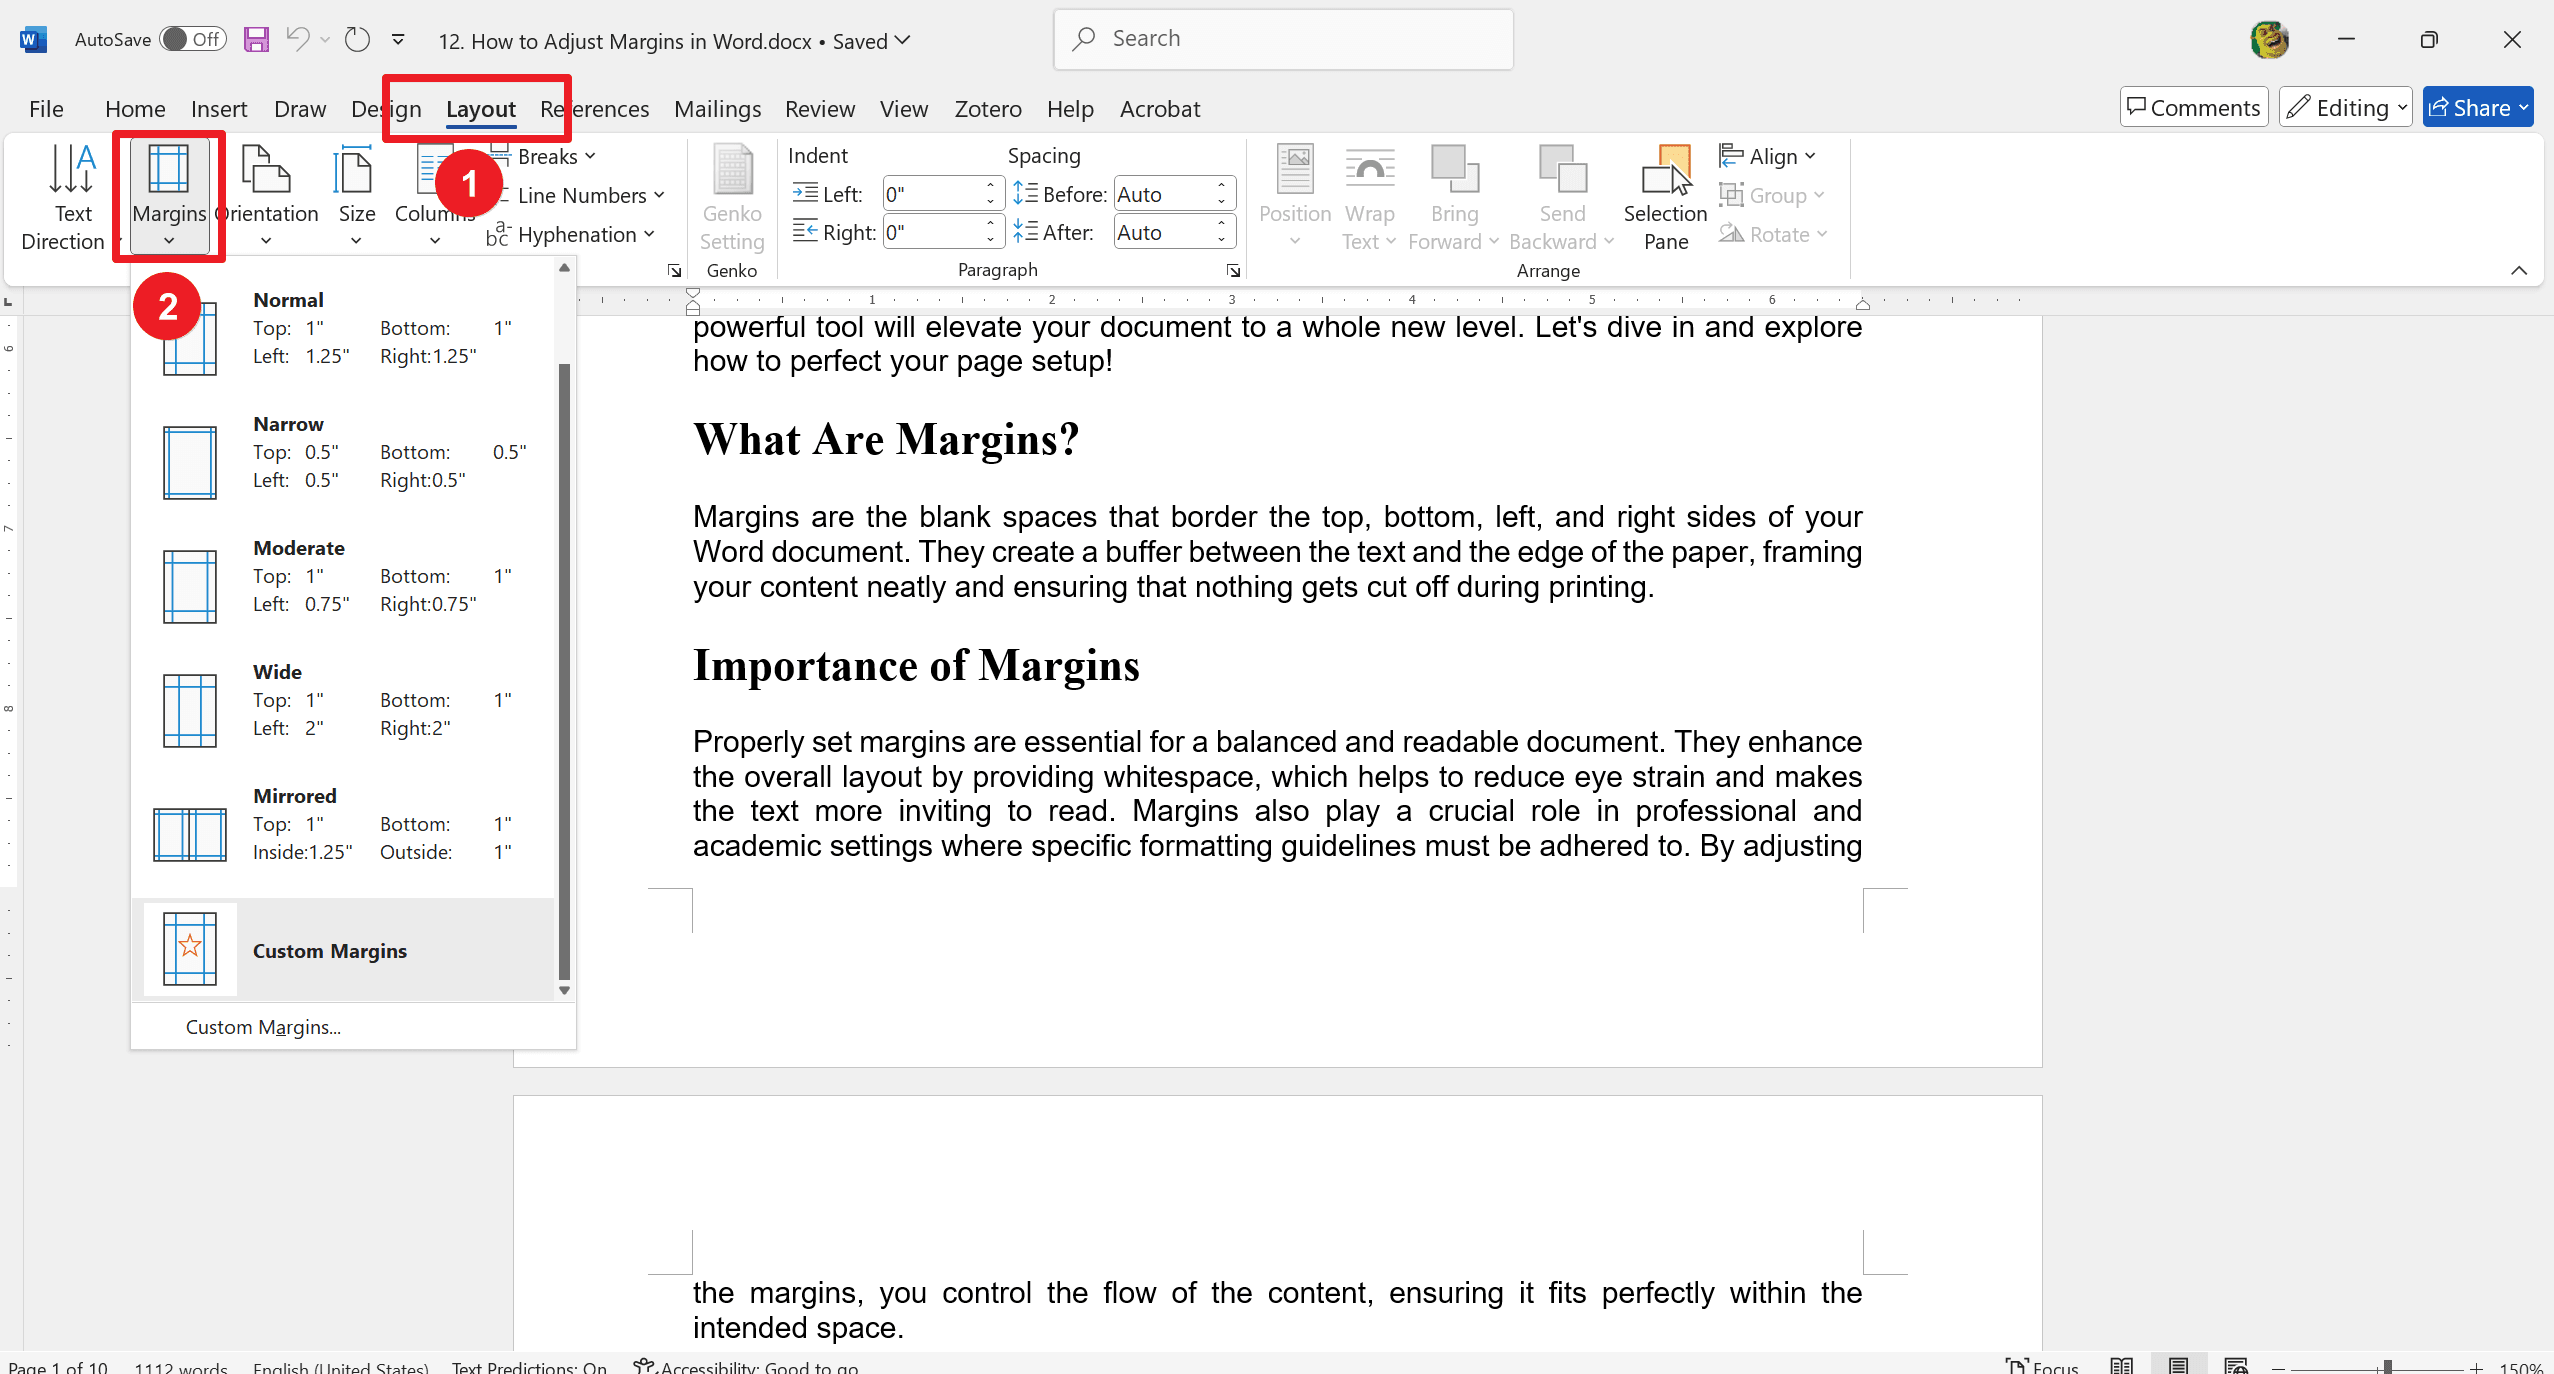
Open your Word document. And then, navigate to the "Layout" tab in the top menu. Click on “Margins.” Thereafter, choose from predefined margin presets such as Normal, Narrow, and Moderate.
Step 2. Customizing Margins
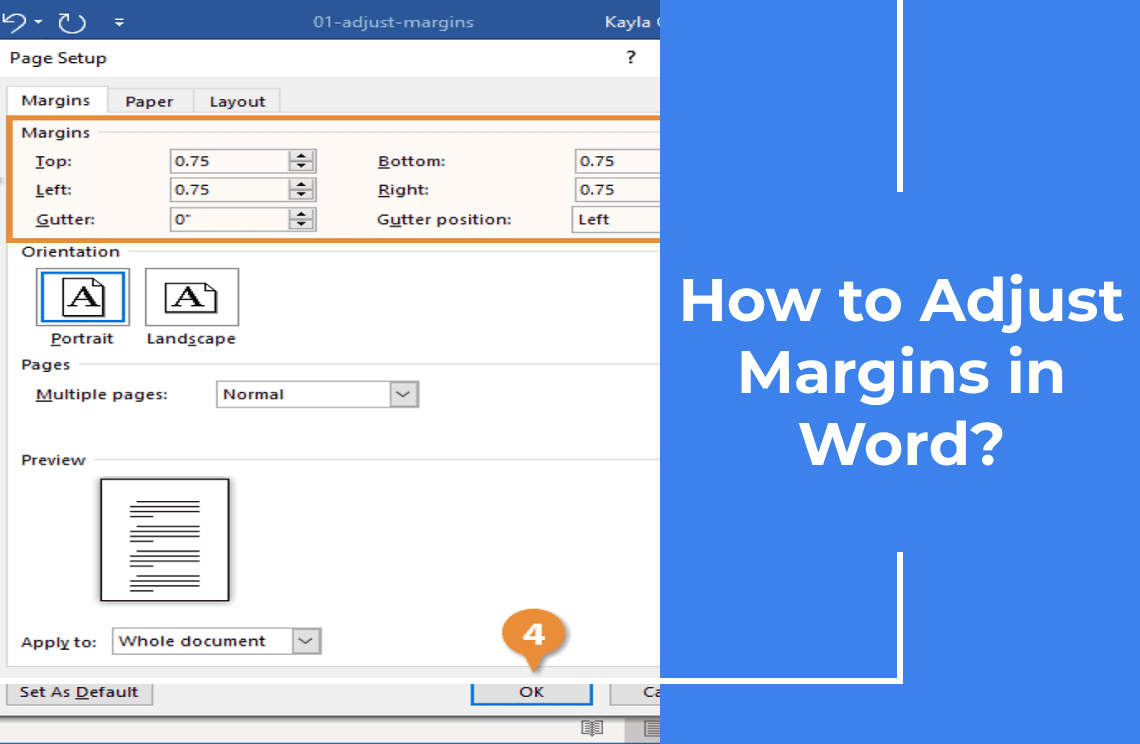
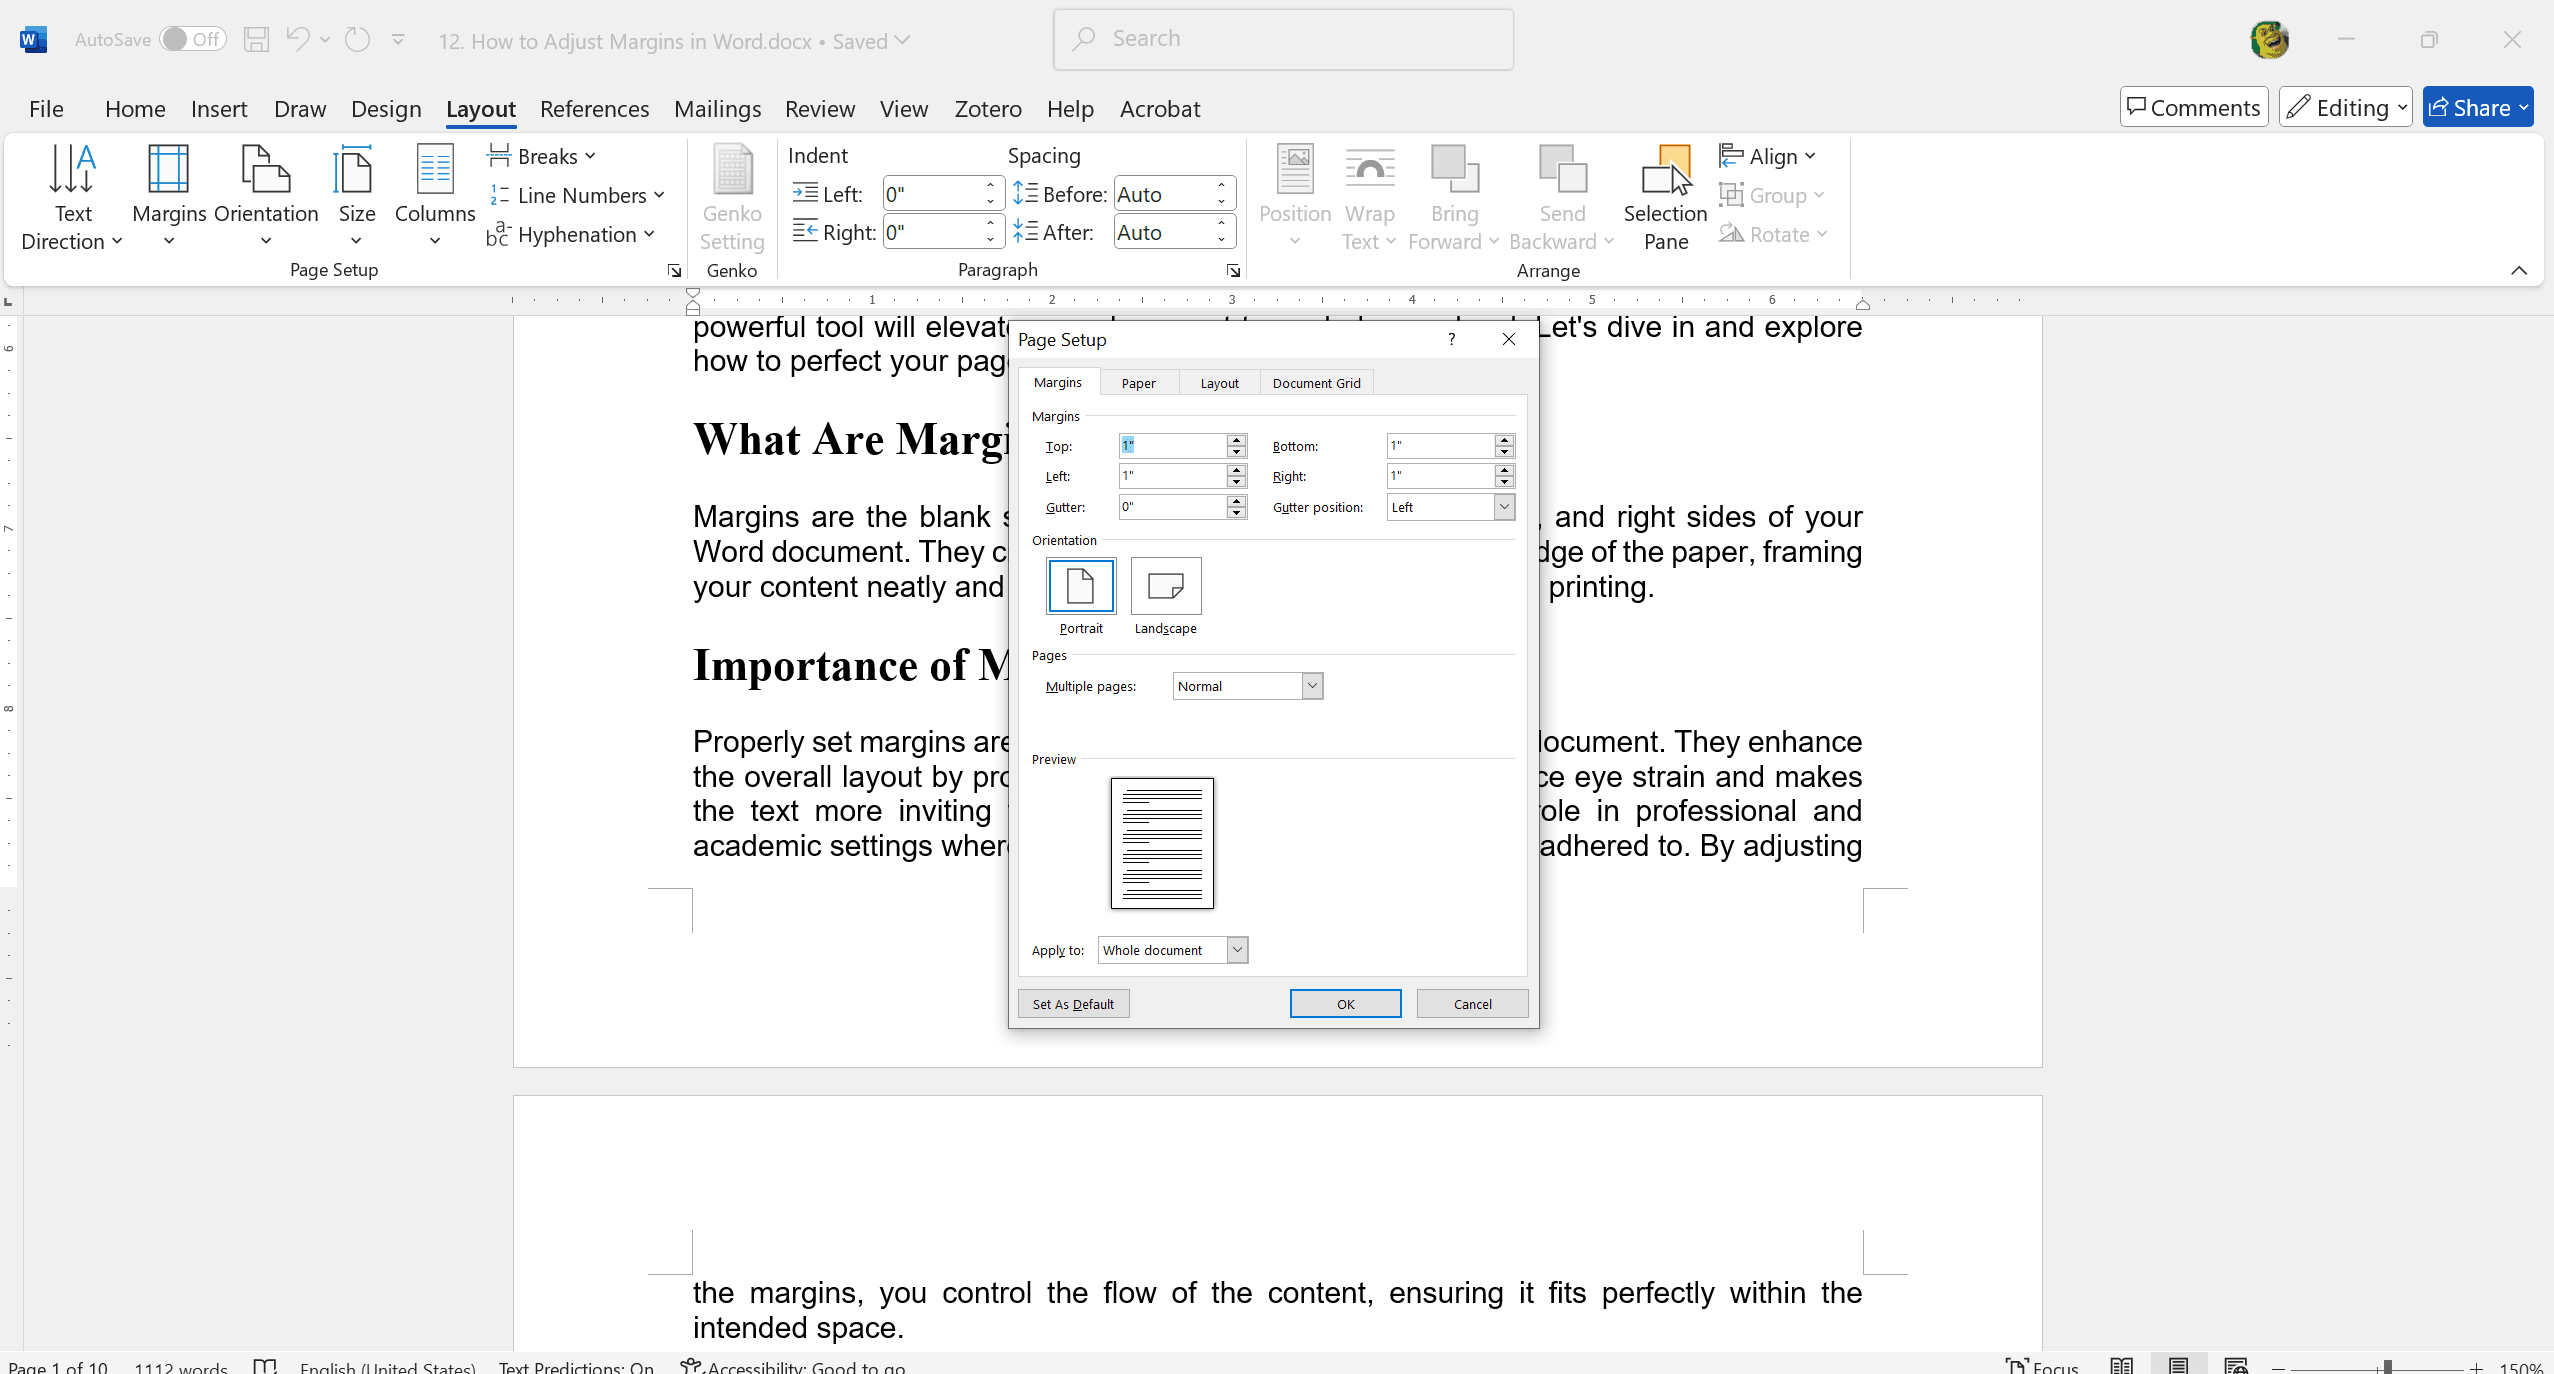
Select "Custom Margins…" at the bottom of the drop-down menu. Enter specific values for Top, Bottom, Left, and Right margins to suit your needs.
Step 3. Applying Changes
Confirm the changes by clicking “OK.” Observe the immediate update of your document reflecting the new margin settings. By following these straightforward steps, you can easily adjust your document’s layout, ensuring it appears clean and professional.
How to Adjust Margins in Word on Mobile?
Step 1. Navigate to Layout Settings
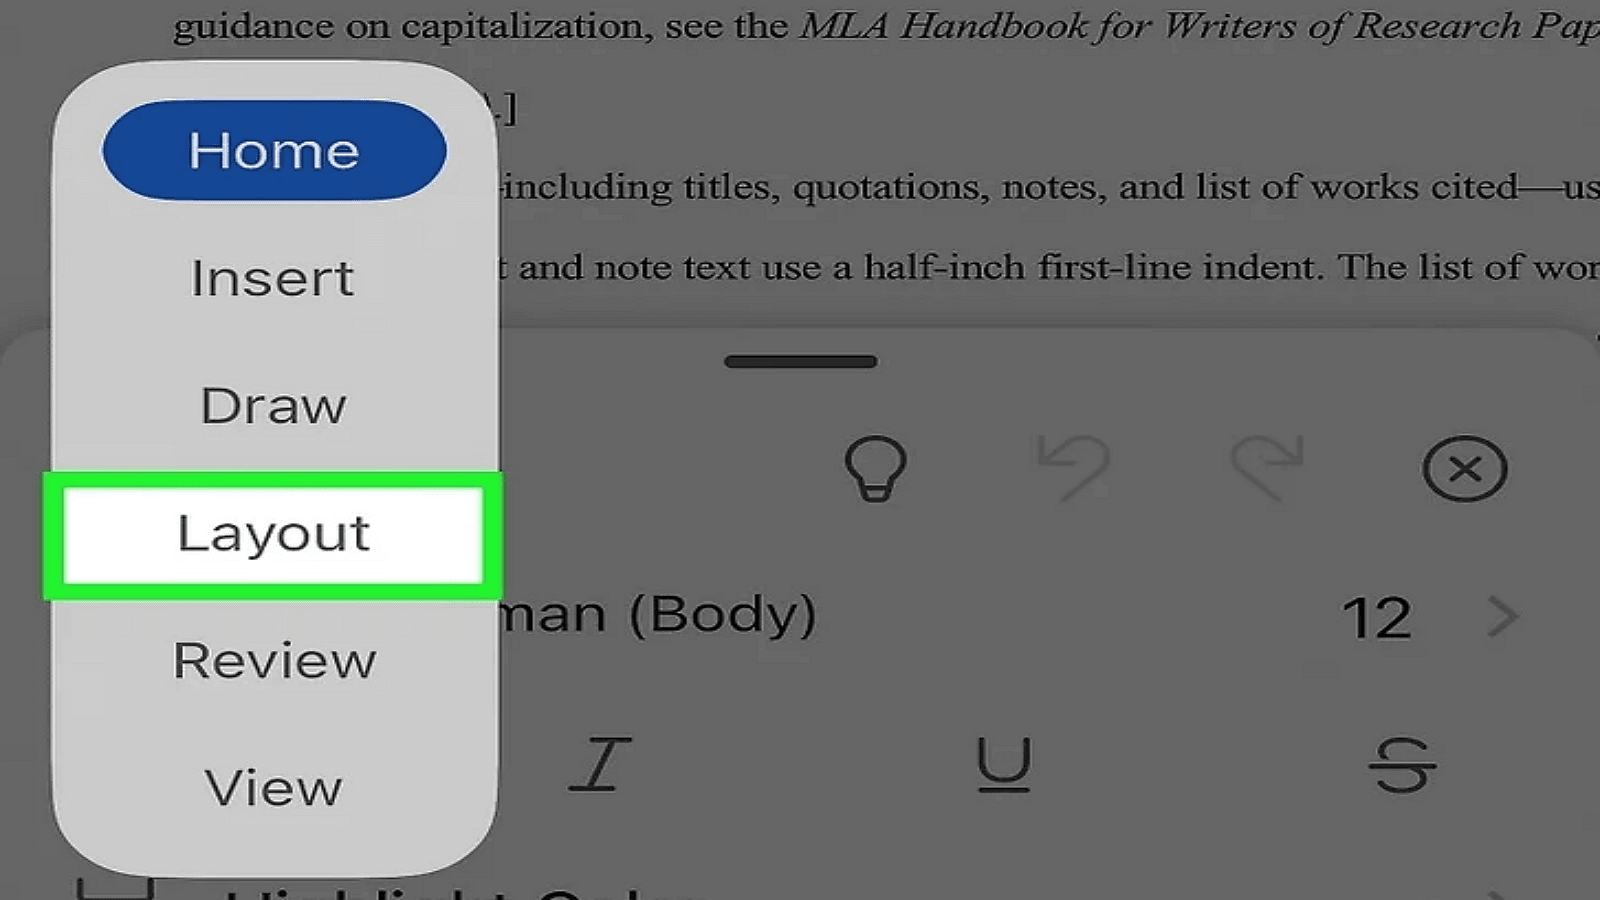
Open your Word document on your mobile device. Tap on the "•••" menu (often located in the top or bottom corner), which will reveal additional options.
After accessing the menu, switch to the "Home" tab. Within the Home tab, tap on "Layout" to bring up the layout settings, where you can adjust margins among other options.
Step 2. Using Preset Options
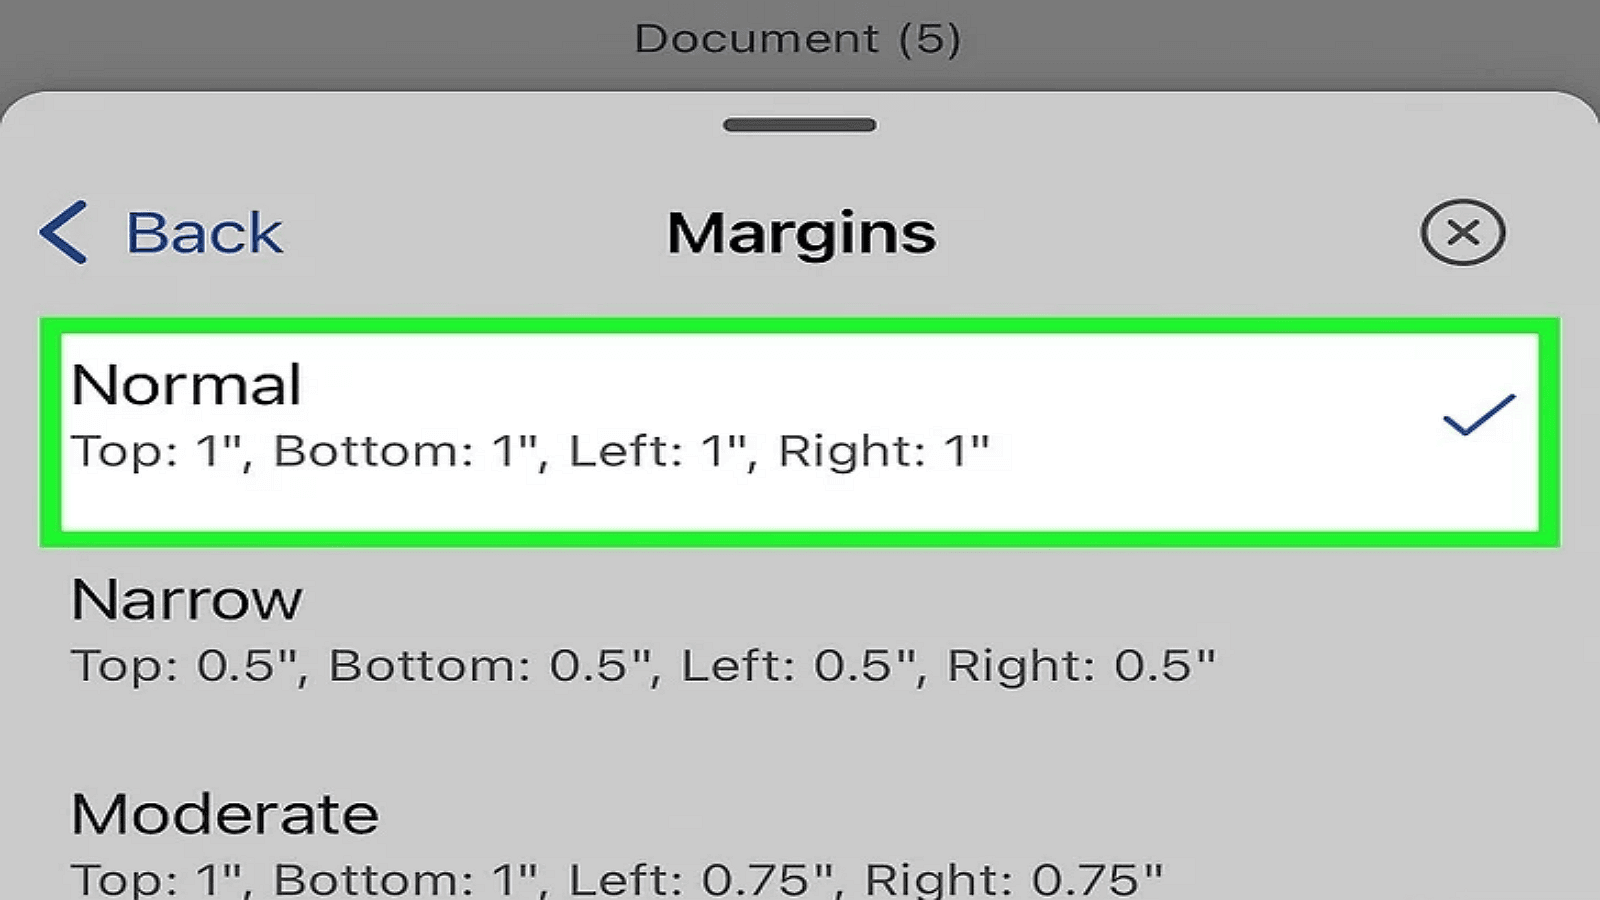
In the Layout settings, choose “Margins.” You will see a list of margin presets such as Normal, Narrow, and Wide. Select a margin preset that best suits your needs for a quick adjustment.
Step 3. Setting Custom Margins
If the preset options don’t meet your requirements, select “Custom Margins.” A new screen will appear, allowing you to enter specific values for the Top, Bottom, Left, and Right margins. After entering your desired values, tap "Done" to apply the changes.
By following these steps, you can easily adjust the margins of your Word document on a mobile device, ensuring your content is formatted exactly how you want it. This flexibility can be particularly useful when you're on the go and need to make quick edits to your documents.
Tips for Adjusting Margins Effectively
Consider the Content's Needs
- If your document has a lot of text, narrower margins can help fit more content on each page.
- For visually appealing documents, such as brochures or presentations, wider margins provide more breathing space and improve readability.
Maintain Consistency
- Use consistent margin settings across similar documents (e.g., all reports or assignments) to maintain a uniform look and feel.
- Consistency helps in establishing a professional and cohesive brand or academic identity.
Adjusting margins thoughtfully ensures your documents are both functional and aesthetically pleasing.
Common Issues and Troubleshooting
Margins Not Saving
- Check document settings: Ensure you've saved the changes properly and that the document is not set to a read-only mode.
- Template issues: Verify if the document is based on a template that overrides your custom settings. Modify the template if necessary.
Content Shifting
- Investigate content layout: Adjust the document's layout settings to ensure content is properly aligned within the new margins.
- Alignment issues: Check for objects like images or tables that may need repositioning to fit within the updated margins.
Addressing these common issues can help maintain the intended format and layout of your document.
For Further Reading
In this guide, I've explored the significance of customizing margins for both professional and academic documents. We discussed scenarios where default margins may fall short, offering tips for effectively adjusting margins by considering content needs and maintaining consistency across similar documents. Additionally, we addressed common issues such as margins not saving and content shifting, providing troubleshooting steps to ensure your documents maintain their intended format.
As you work on your documents, I encourage you to experiment with different margin settings. This can help you discover what best enhances readability and presentation, aligning with your specific requirements and preferences. By fine-tuning your margins, you can create documents that are both functional and visually appealing.