Strikethrough formatting is an essential feature in document editing that serves various purposes. It is particularly useful for editing drafts, allowing writers to show deletions without removing text entirely. This function also helps in marking revisions, making it easier to track changes and comments. Furthermore, strikethrough can be used for task management, such as crossing out completed to-do list items. Mastering this feature in Google Docs can significantly enhance your editing efficiency and organization.
Brief Overview
In Google Docs, there are two primary methods to apply strikethrough formatting to your text. The first method involves using the menu, where you can navigate through the toolbar to find and select the strikethrough option. The second method is faster, utilizing keyboard shortcuts to quickly cross out text. By learning both approaches, you can choose the one that best fits your workflow and improve your efficiency when editing documents.
Method 1 - Using the Menu
Step 1: Highlight Your Text
To begin, you need to highlight the text that you want to cross out. You can do this by clicking and holding the left mouse button at the start of the text, then dragging the cursor to the end of the text, and finally releasing the mouse button. The selected text should now be highlighted.

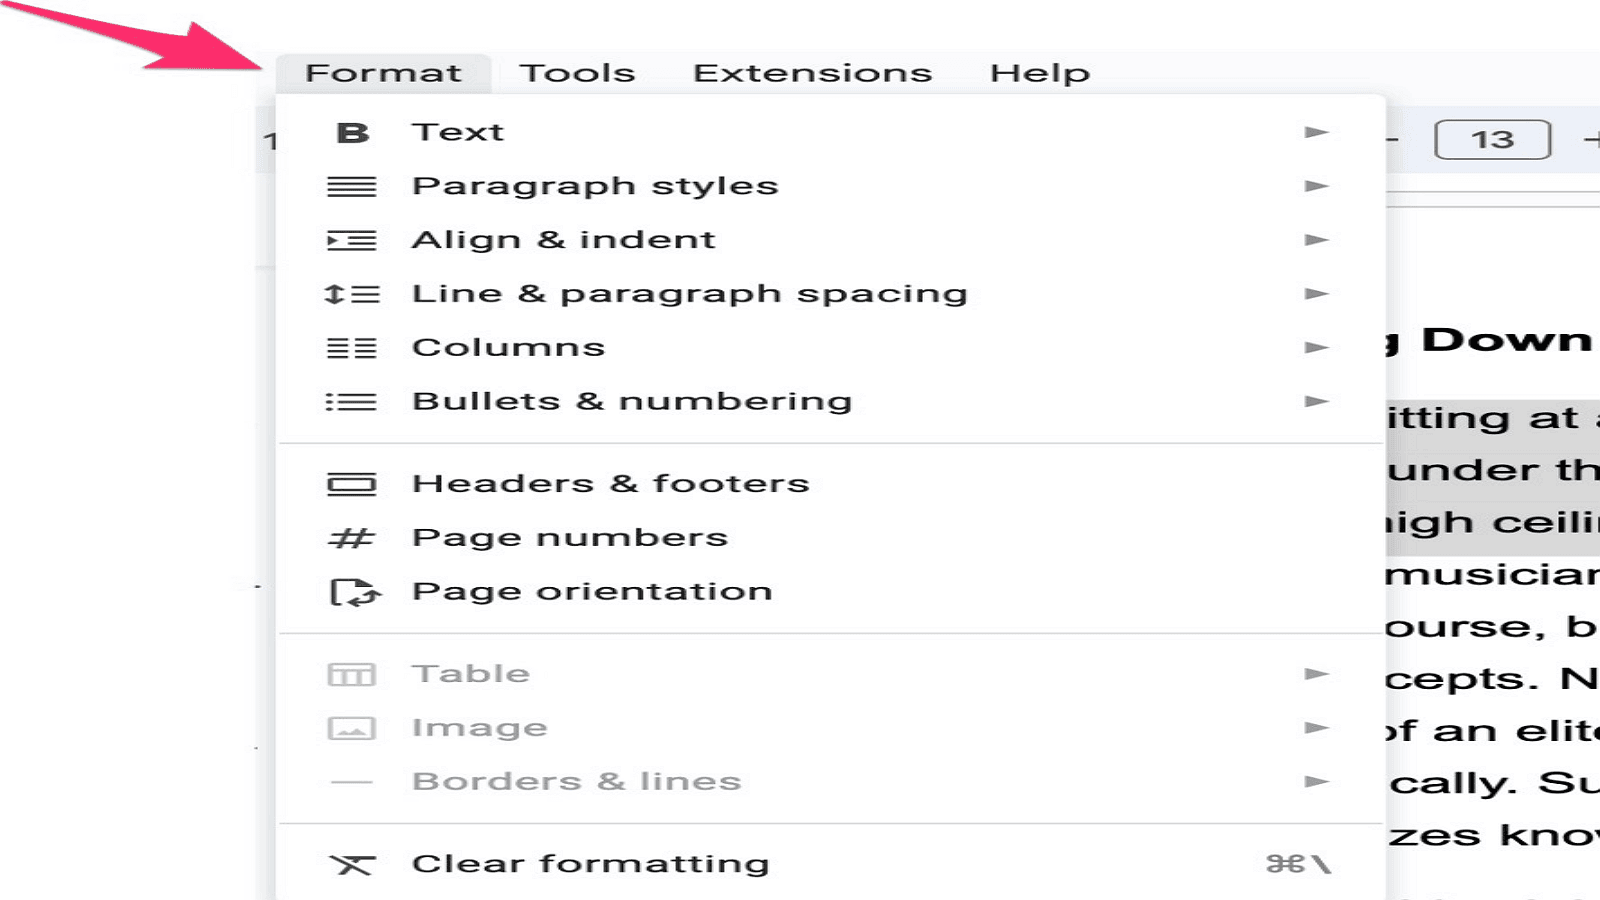
Step 2: Open the Format Menu
Next, navigate to the toolbar at the top of your Google Docs window. Look for the "Format" option and click on it. This will open a drop-down menu with various formatting options.
Step 3: Navigate to Text Options
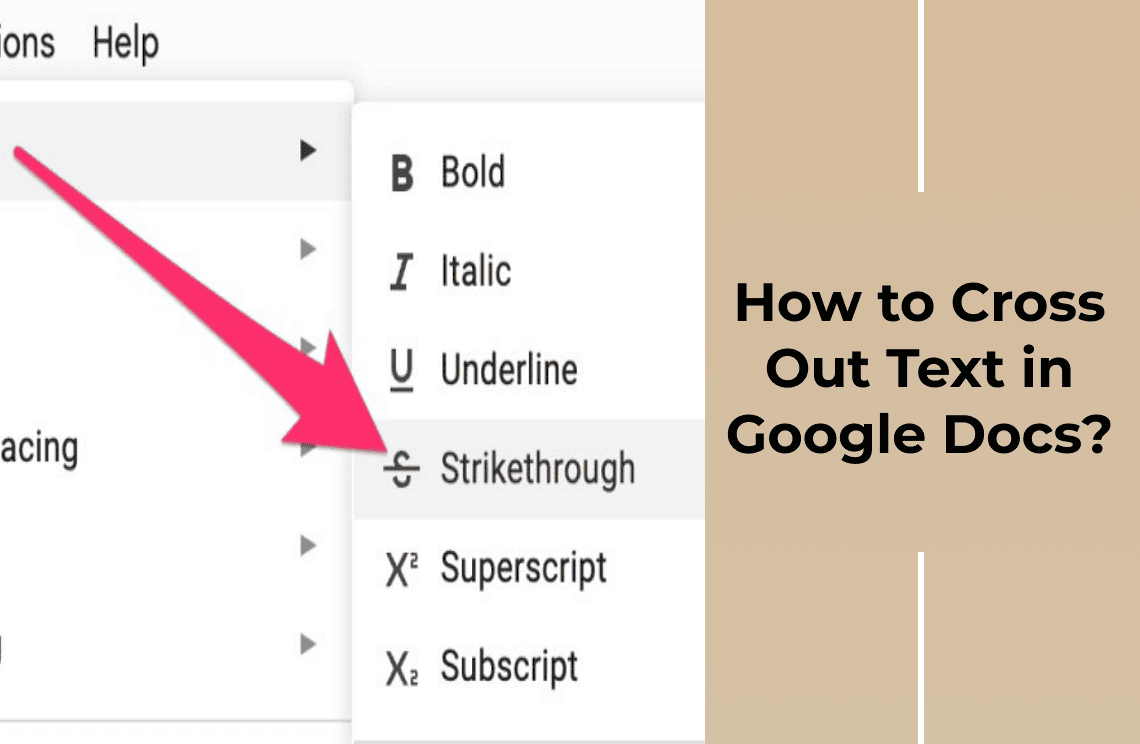
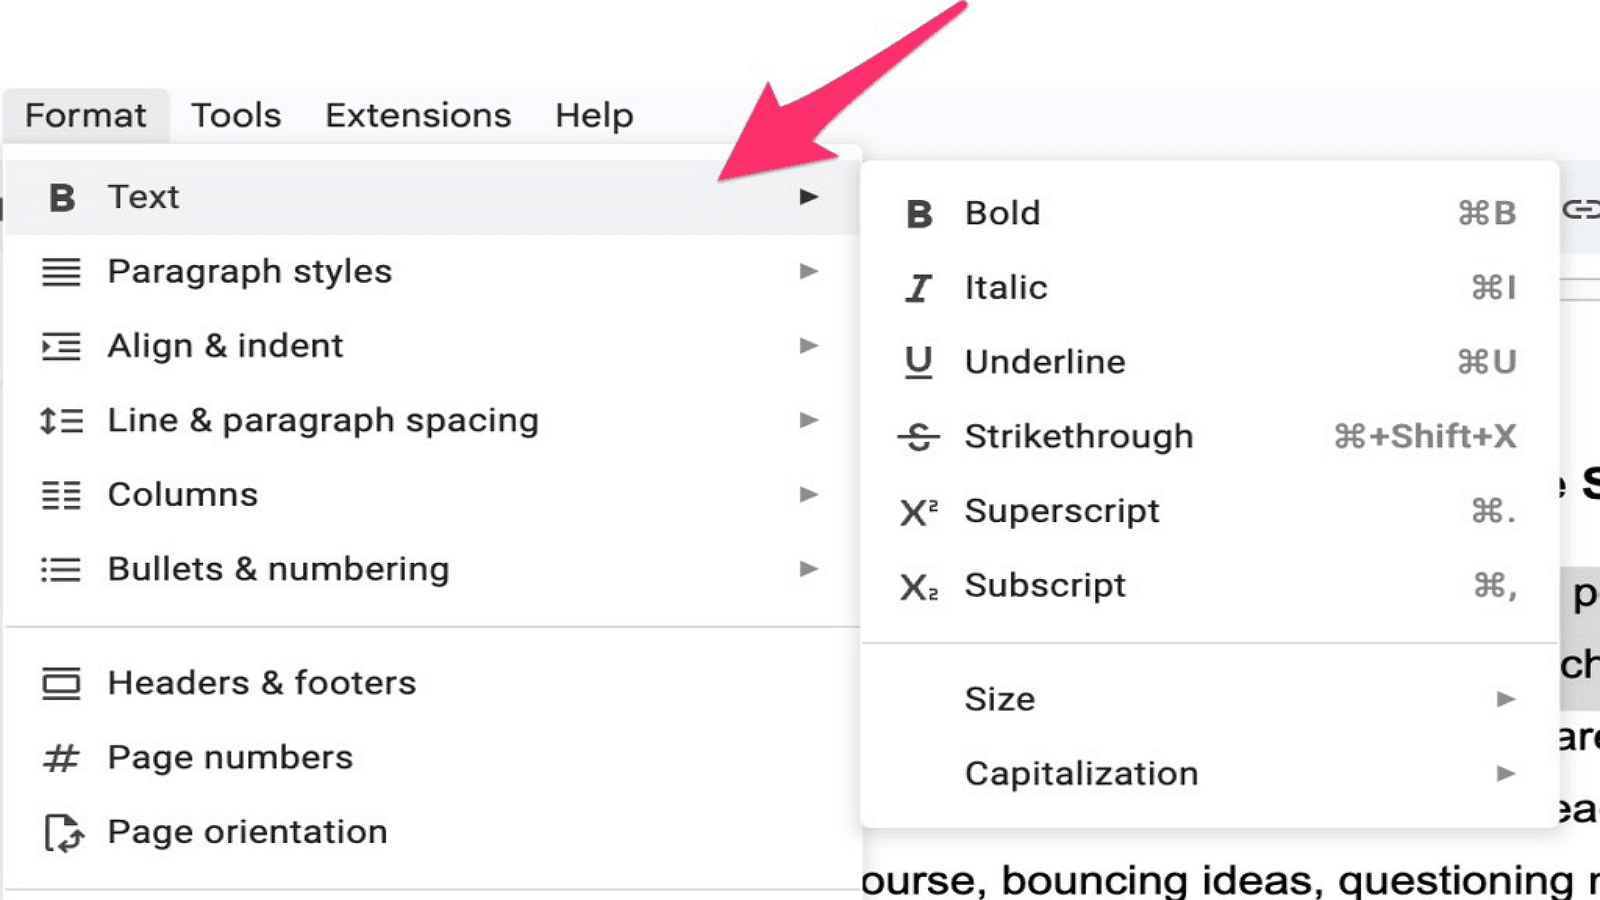
In the drop-down menu that appears, hover your cursor over the "Text" option. This will reveal another sub-menu with additional text formatting choices.
Step 4: Select Strikethrough
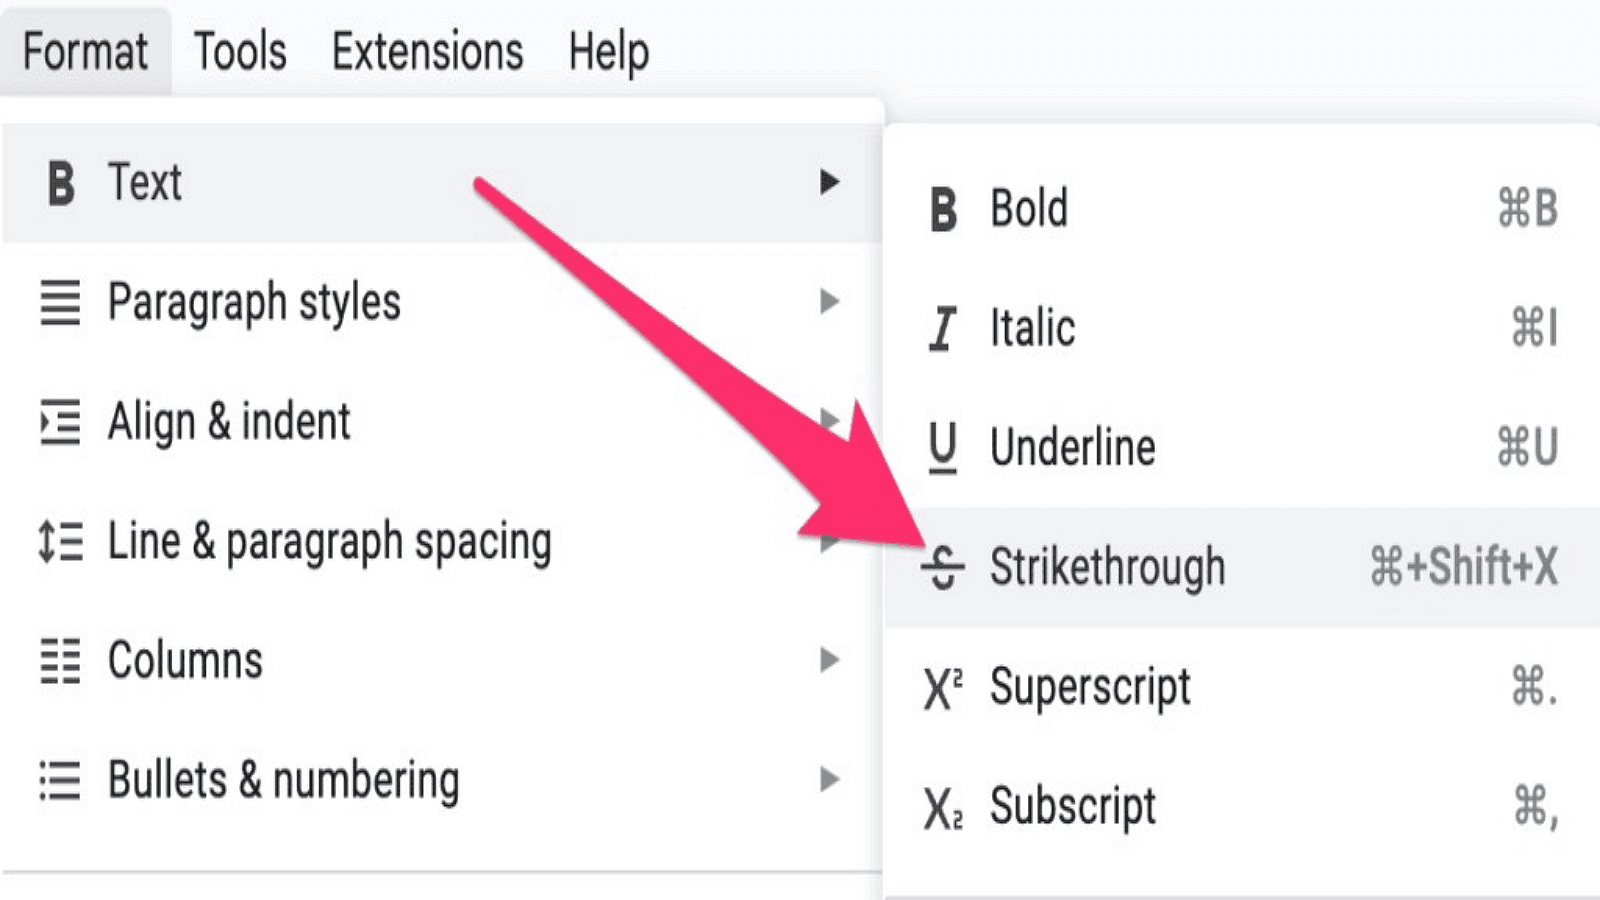
From the sub-menu, find and click on the "Strikethrough" option. This action will immediately apply the strikethrough effect to your highlighted text.
Result
Once the strikethrough option is selected, you’ll see that your chosen text is now crossed out with a horizontal line running through it. This visual change indicates that the text has been successfully formatted with the strikethrough effect, making it clear which parts of the document have been marked as revised or completed.

Method 2 - Using Keyboard Shortcuts
Step 1: Highlight Your Text
Begin by selecting the text you wish to apply strikethrough formatting to. Click and hold the left mouse button at the start of the desired text, drag the cursor to the end of the section, and release the button. The text should now be highlighted, indicating it is ready for formatting.

Step 2: Use the Shortcut Keys
For a more efficient and quicker method, you can use keyboard shortcuts to apply the strikethrough. The shortcut keys differ depending on your operating system:
- Windows: Press Alt + Shift + 5.
- Mac: Press Command + Shift + X.
Ensure your cursor is still on the highlighted text when you perform this action to avoid any confusion.
Step 3: Instant Strikethrough
Upon pressing the correct shortcut keys, you'll instantly notice that the highlighted text becomes crossed out with a horizontal line running through its center. This immediate visual change confirms that the strikethrough formatting has been successfully applied. Using keyboard shortcuts not only streamlines the editing process but also allows you to quickly manage and visually organize your document, making it easier to navigate through revisions and updates.

Additional Tips and Tricks
Undo the Strikethrough
If you need to reverse the strikethrough effect, you can use the same keyboard shortcut you used to apply it:
- Windows: Alt + Shift + 5
- Mac: Command + Shift + X
Alternatively, you can undo the last action by pressing Ctrl + Z on Windows or Command + Z on Mac. This will revert your text to its previous state, removing any formatting you applied.
Strikethrough on Mobile
Applying strikethrough in the Google Docs mobile app is straightforward:
1. Open your document in the Google Docs app.
2. Highlight the text you wish to format.
3. Tap the “Format” button (represented by the letter “A” with small horizontal lines) at the top of the screen.
4. Tap the “Strikethrough” option from the formatting tools that appear.
This will immediately apply the strikethrough effect to the selected text.
Voice Commands for Strikethrough
If you prefer using voice commands, Google Docs offers voice typing features that can streamline your editing process. Here’s how to use voice commands for strikethrough:
1. Highlight the text you want to format.
2. Ensure your microphone is enabled and voice typing is activated (Tools > Voice typing).
3. Say, “Format, Text, Strikethrough.”
Google Docs will apply the strikethrough effect to the highlighted text based on your voice command, making the formatting process hands-free and efficient.
These additional tips and tricks enhance your proficiency and flexibility in managing text formatting in Google Docs, whether on desktop, mobile, or by using voice commands.
For Further Reading
In summary, we've explored two primary methods for applying strikethrough in Google Docs: using the built-in menu options and utilizing keyboard shortcuts. These techniques make formatting quicker and more efficient. We encourage you to practice both methods to become proficient in applying strikethrough, enhancing your document editing skills. Whether you're on a desktop, using a mobile device, or employing voice commands, mastering these tools will significantly improve your workflow.
Additionally, explore other formatting features available in Google Docs. I strongly recommend you to watch various tutorials offered by PDF Agile Google Docs Blogs. Happy editing!

