A hanging indent is a formatting style where the first line of a paragraph aligns with the left margin, while subsequent lines are indented. This format is particularly useful in documents like bibliographies, references, or citations, where it enhances readability and organization. By clearly distinguishing each entry, it allows readers to easily navigate and locate specific information. Hanging indents are commonly used in academic writing, research papers, and professional reports, making them an essential skill for anyone looking to present their work neatly and accurately. In this guide, we will provide a straightforward, step-by-step approach to creating a hanging indent on Google Docs, ensuring that you can apply this formatting technique with ease and confidence. Whether you're a student, researcher, or professional, mastering hanging indents will help you produce more polished and organized documents.
Understanding Hanging Indents
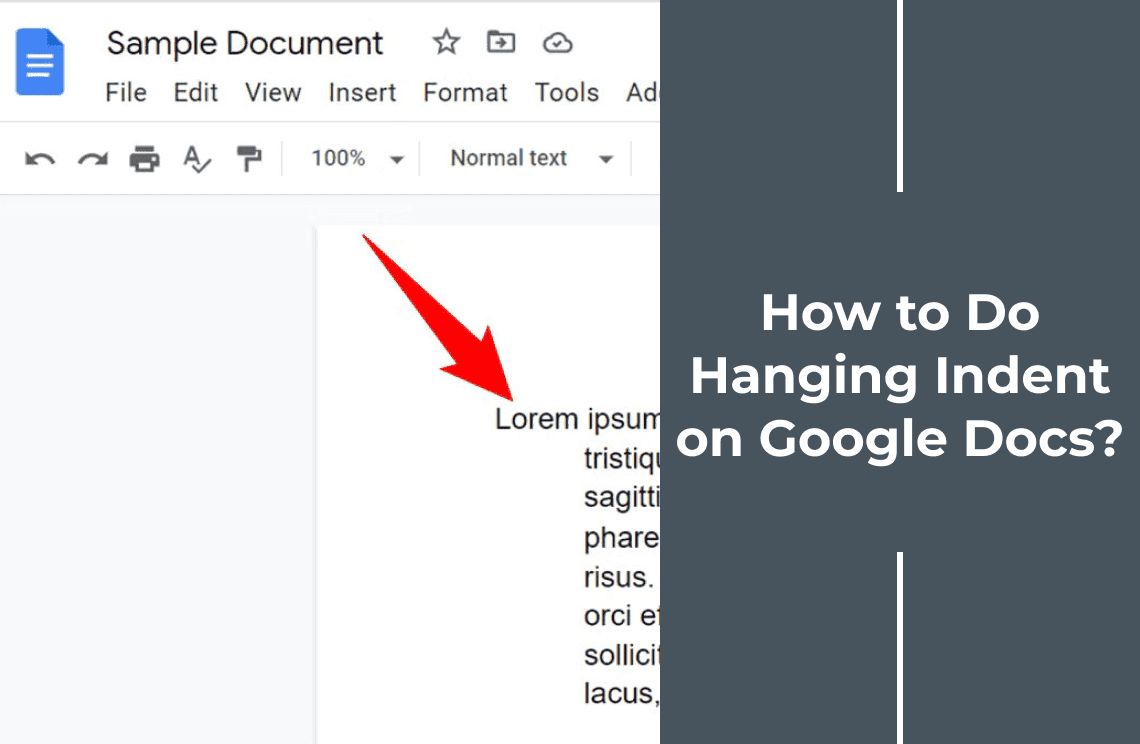
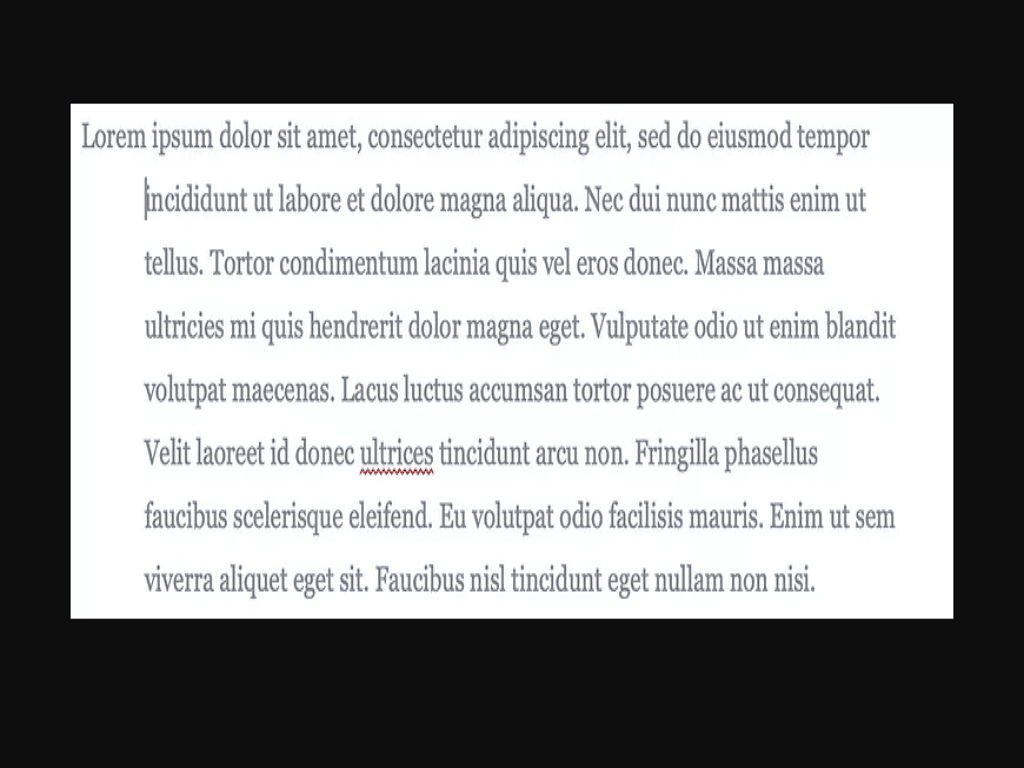
A hanging indent, also known as a second-line indent, is a paragraph formatting style where the first line starts at the standard margin, and all subsequent lines are indented inward. Essentially, this means the first line 'hangs' out to the left, while the rest of the paragraph is uniformly indented.
Situations Where a Hanging Indent is Typically Used
Hanging indents are especially useful in the following contexts:
- Bibliographies: To list sources in a readable and organized manner.
- References/Citations: Commonly used in APA, MLA, and Chicago style formats for academic and research papers.
- Works Cited Lists: To provide clear distinction and easy location of each entry.
- Legal Documents: To structure multiple points or references clearly.
Visual Example of a Hanging Indent for Clarity
Here's a basic illustration of a hanging indent:
First Line of Paragraph Subsequent line of the same paragraph Subsequent line of the same paragraph |
In the above example, the first line stays at the left margin while the subsequent lines are indented, demonstrating a hanging indent. Using this format helps visually separate entries, making your document more organized and reader-friendly.
How to Do a Hanging Indent on Google Docs?
A hanging indent on Google Docs is a formatting technique where the first line of a paragraph aligns with the left margin, and subsequent lines are indented. This style is particularly useful for organizing bibliographies, references, and citations, enhancing readability and providing a cleaner, more professional appearance to your documents.
Step 1: Open Your Document
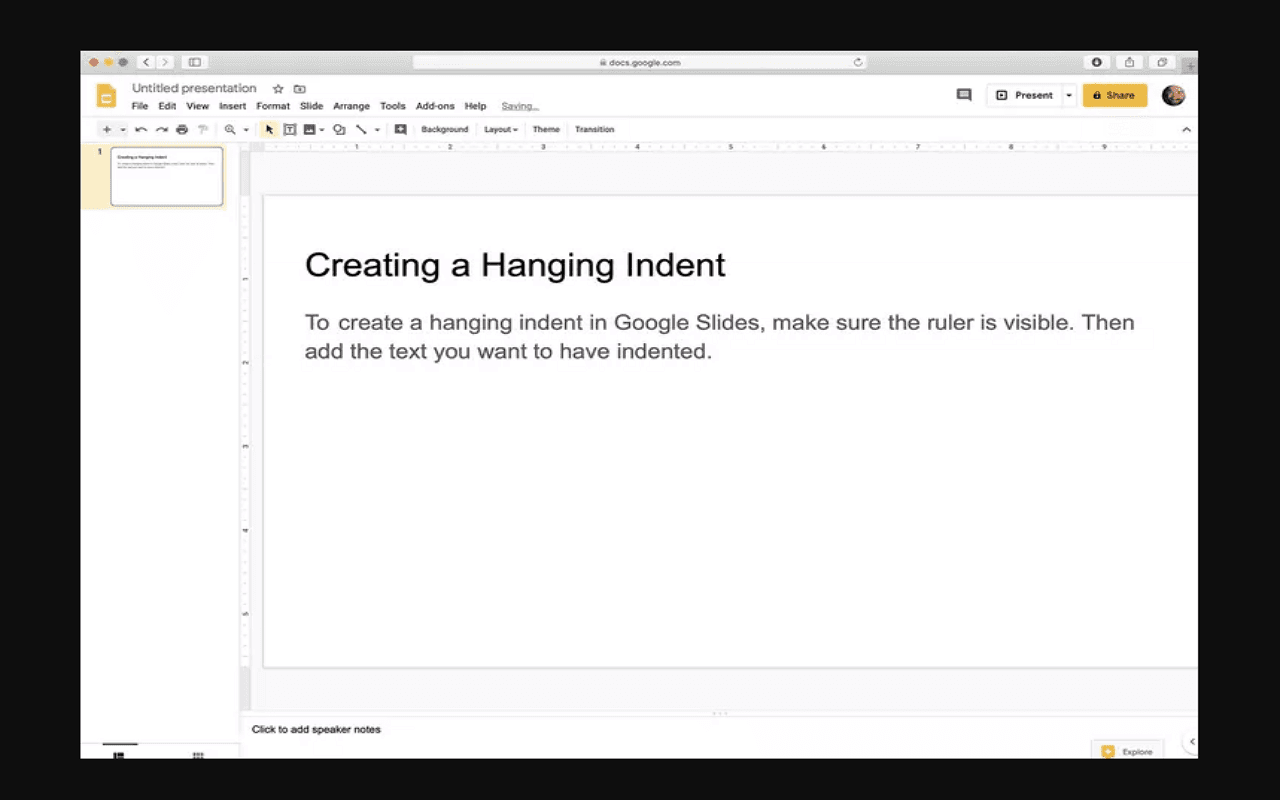
Begin by opening Google Docs and navigating to the document you wish to edit. Ensure you have the text ready where the hanging indent will be applied. This initial step sets the stage for making formatting adjustments and helps to organize your references, bibliographies, or citations effectively.
Step 2: Highlight the Text
Click and drag your cursor to highlight the paragraph(s) you want to format with a hanging indent. Ensuring the correct text is selected is crucial for applying the indent consistently, which enhances the organization and readability of your document.
Step 3: Access the Ruler
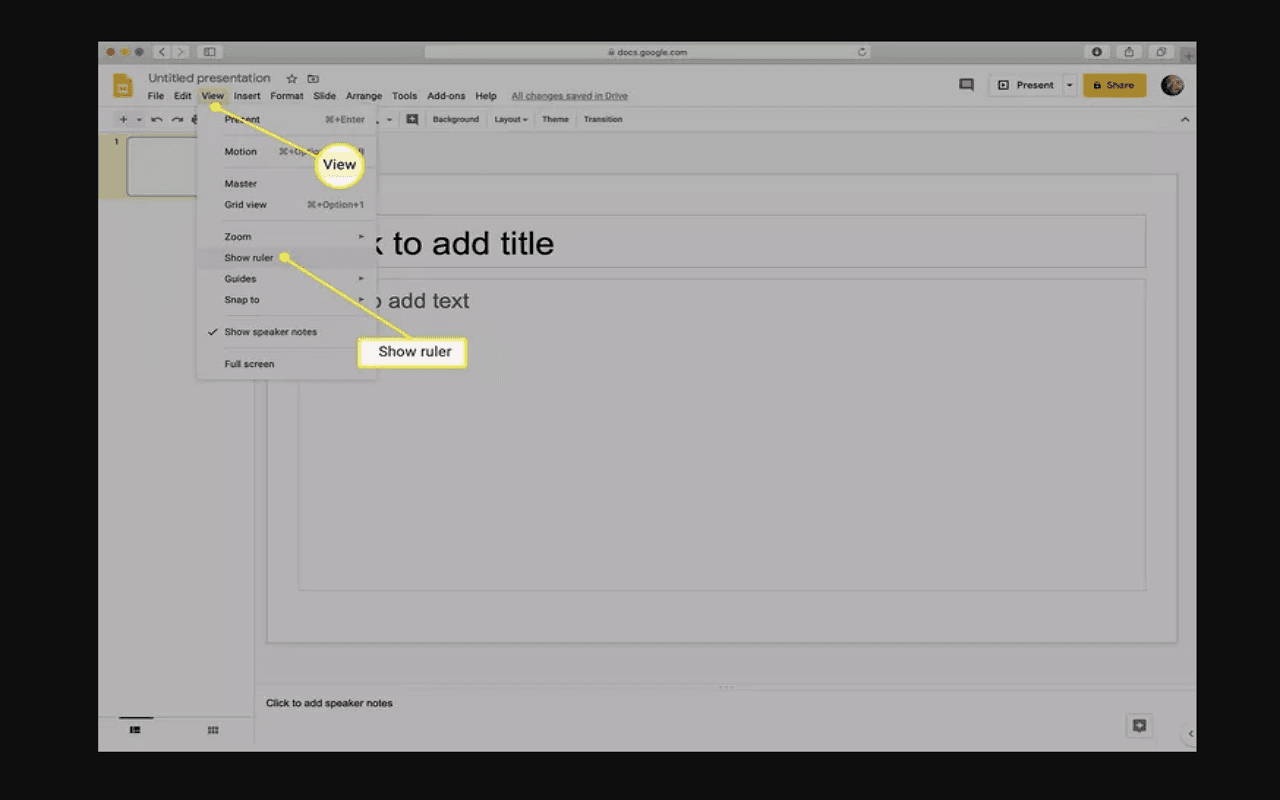
To ensure the ruler is visible, go to "View" in the menu bar and select "Show ruler." The ruler is essential for creating precise indents. It allows you to visually adjust margin settings and apply a hanging indent by manipulating the indent markers for better document formatting.
Step 4: Adjust the Ruler
Click and drag the left indent marker (the triangle) on the ruler to the right to create the hanging indent. Then, move the top marker (the rectangle) back to the original left margin.
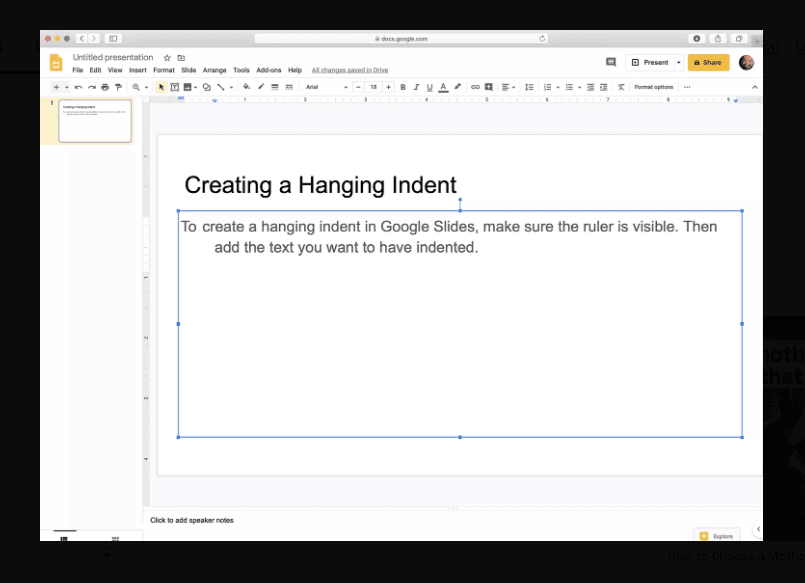
This will ensure only the first line remains at the margin while the rest of the paragraph is indented.
Step 5: Review Your Changes
Review the paragraph to ensure the hanging indent is correctly applied. If it doesn't appear right, adjust the indent markers on the ruler for precision. Fine-tune by dragging the left indent and first-line markers until the desired formatting is achieved, ensuring consistent indentation throughout the document.
Additional Tips for Using Hanging Indents on Google Docs
Keyboard Shortcuts
- Place your cursor at the beginning of the paragraph and press Ctrl + A (or Cmd + A on Mac) to highlight the text.
- Press Ctrl + \ (or Cmd + \ on Mac) followed by pressing Tab to create a hanging indent.
Using the "Format" Menu
- Highlight the desired paragraph(s).
- Go to the "Format" menu at the top.
- Select "Align & indent," then choose "Indentation options."
- In the dialog box, set the "Special indent" drop-down to "Hanging" and specify the indentation length.
Common Issues and Resolutions
- Uneven Indentations: Ensure that the top triangle (first-line indent) and bottom triangle (hanging indent) markers on the ruler are correctly positioned.
- First Line Not Aligning Properly: Make sure there are no hidden spaces or tabs causing misalignment by enabling the "Show document outline" feature and checking the formatting symbols.
- Manual Adjustments: If the indents still look off, you can manually adjust the markers on the ruler for precise control over the formatting.
Conclusion
Mastering the use of hanging indents is crucial for creating professionally formatted documents. Whether you are preparing a research paper, crafting a bibliography, or designing a formatted report, hanging indents enhance readability and present a polished, organized appearance. Utilizing keyboard shortcuts or the "Format" menu in Google Docs enables you to achieve this with ease and efficiency.
Addressing common issues and understanding the tools available, such as ruler markers and indentation options, ensures that your documents meet high standards of presentation. By honing this skill, you elevate the quality of your work, making it more accessible and visually appealing to your audience.
Embrace the importance of meticulous formatting, as it reflects your attention to detail and commitment to excellence. A well-formatted document not only communicates your ideas effectively but also leaves a lasting impression of professionalism and care.

