Editing PDFs on a Mac might seem daunting at first, but it doesn't have to be. Whether you need to make quick adjustments or handle more intricate edits, there are efficient tools at your disposal. In this article, we'll take you through two effortless methods to edit your PDFs on a Mac. First, we'll show you how to use the built-in Preview app, a handy tool that comes free with your macOS. Then, we'll delve into Adobe Acrobat, the industry-standard software renowned for its comprehensive suite of PDF editing features. By the end of this guide, you'll feel confident and equipped to tweak your PDFs with ease, no matter your editing needs. Let's get started!
Method 1: Using Mac's Built-in Preview App
Mac users! Did you know you've got a fantastic tool for editing PDFs built right into your computer? It's called Preview, and it's more than just an image viewer – it's also packed with features that make PDF editing super easy and efficient.
Here's how you can get started with Preview:
1. Open Preview from Quick Look: You can start by selecting Preview from the Quick Look window.
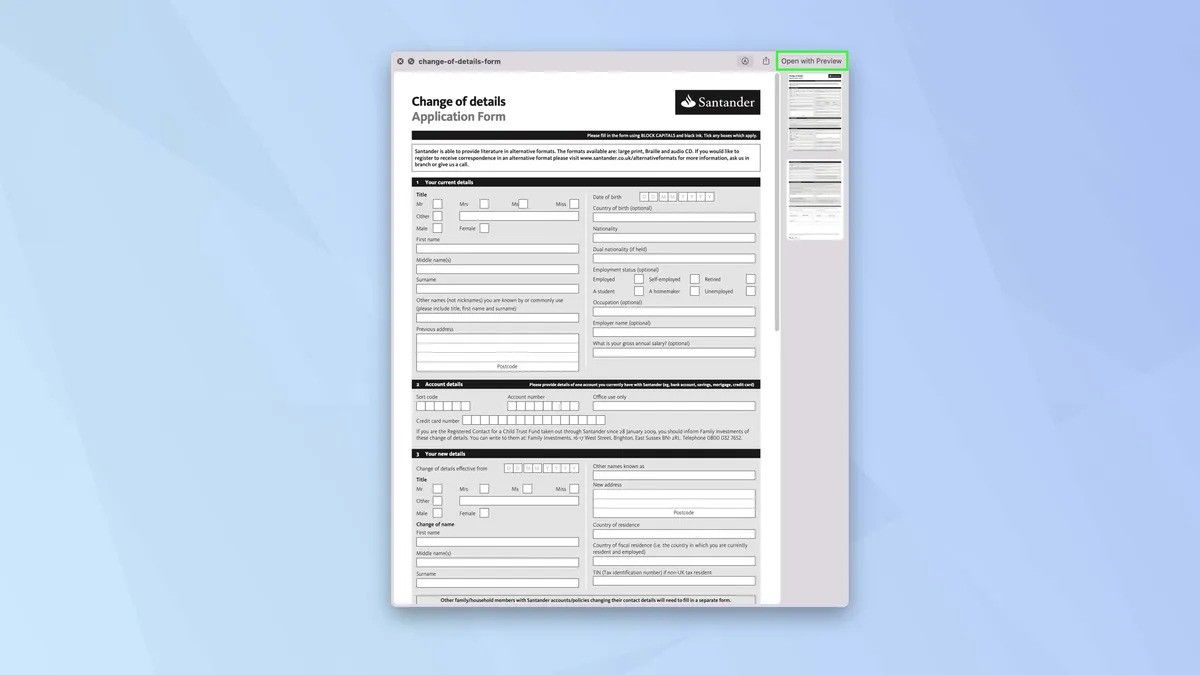
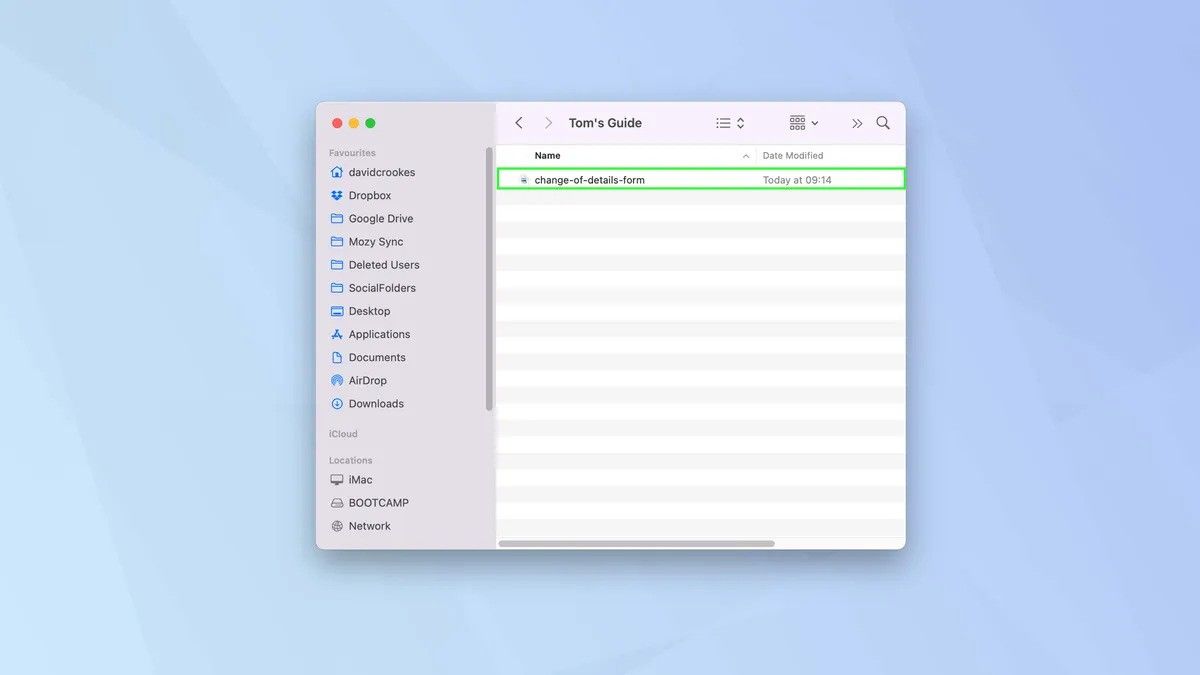
2. Double-Click to Open: Find the PDF you want to edit and simply double-click it. By default, this should open in Preview unless you've got another PDF viewer set up as your default.
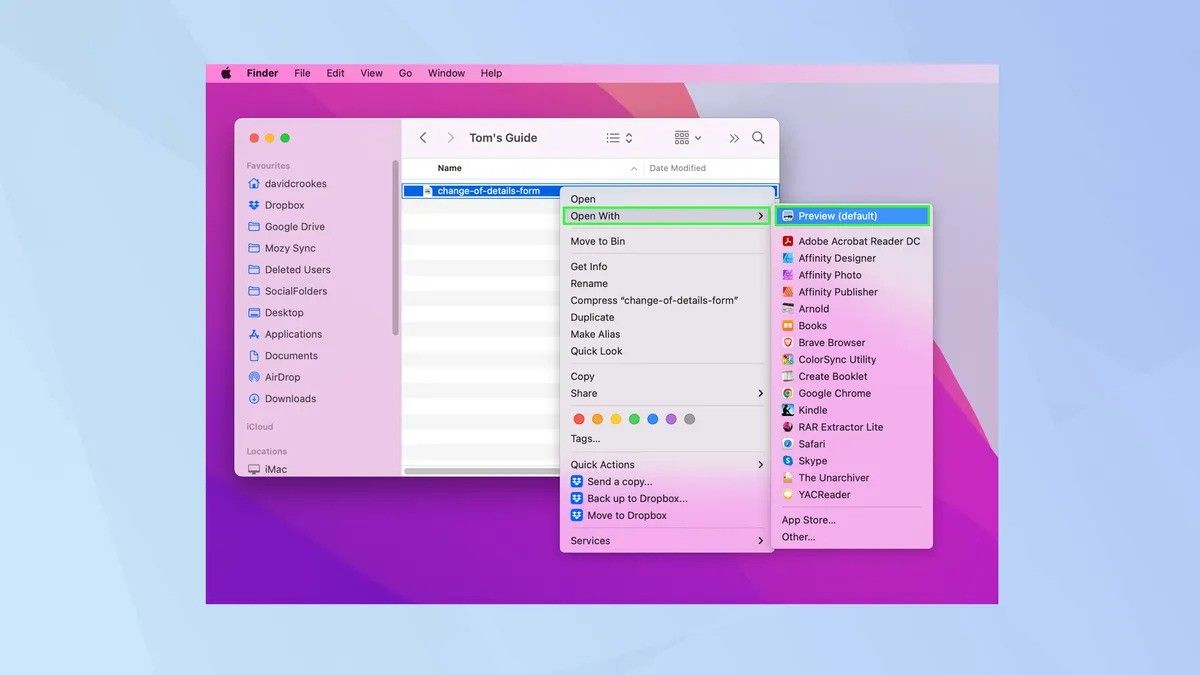
3. Right-Click Option: If Preview doesn't open automatically, just right-click on the PDF, then go to Open With > Preview.
4. Start Editing: Once your PDF is open in Preview, click the pencil icon to reveal a bar full of editing tools. Now you're ready to tweak your PDF to perfection!
![]()
Adding Text to a PDF on Mac
If you need to add text to a PDF on your Mac, Preview is the perfect tool for the job! It's especially useful for filling out forms—no need to print, fill out by hand and scan back in. Here's how to do it:
1. Grab the Text Tool: Click the Text tool, which looks like an "A" inside a box. Alternatively, you can go to Tools > Annotate > Text in Preview.
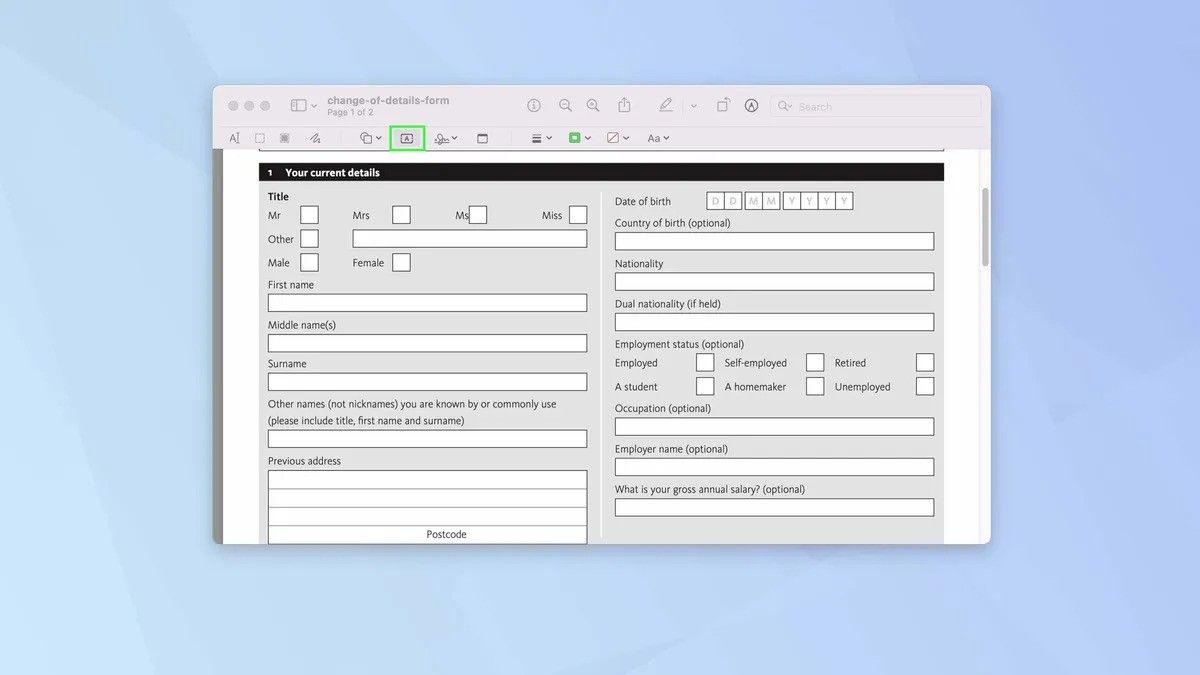
2. Text Appears: You'll see the word "Text" appear on your screen.
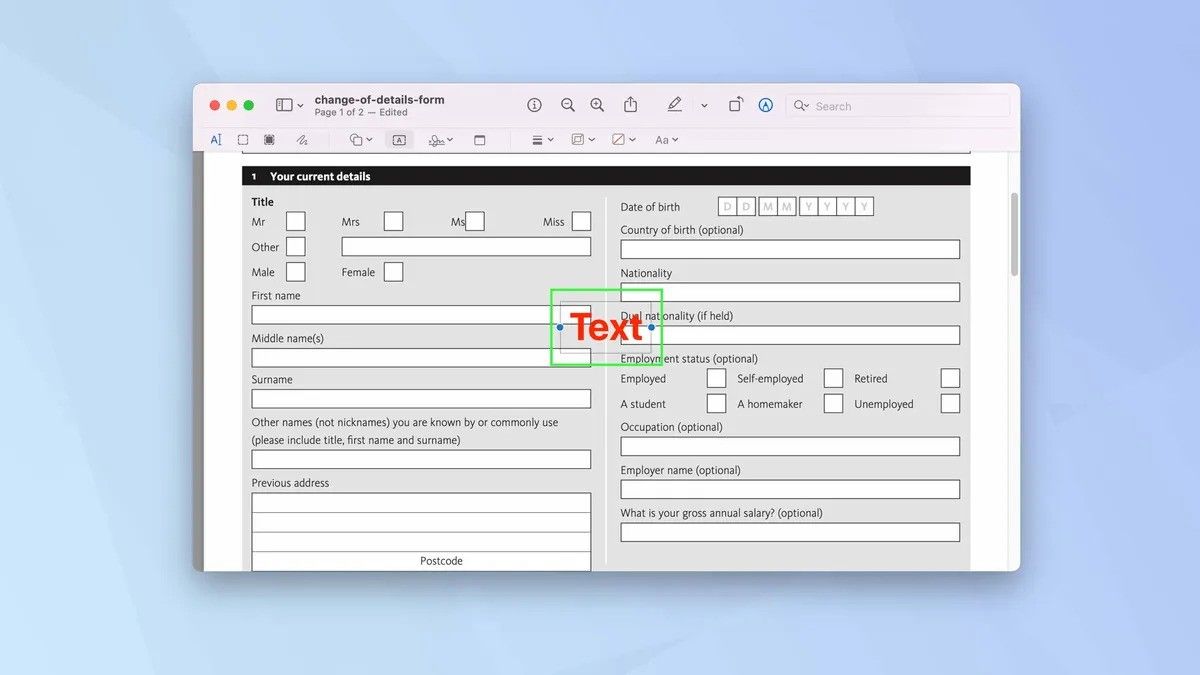
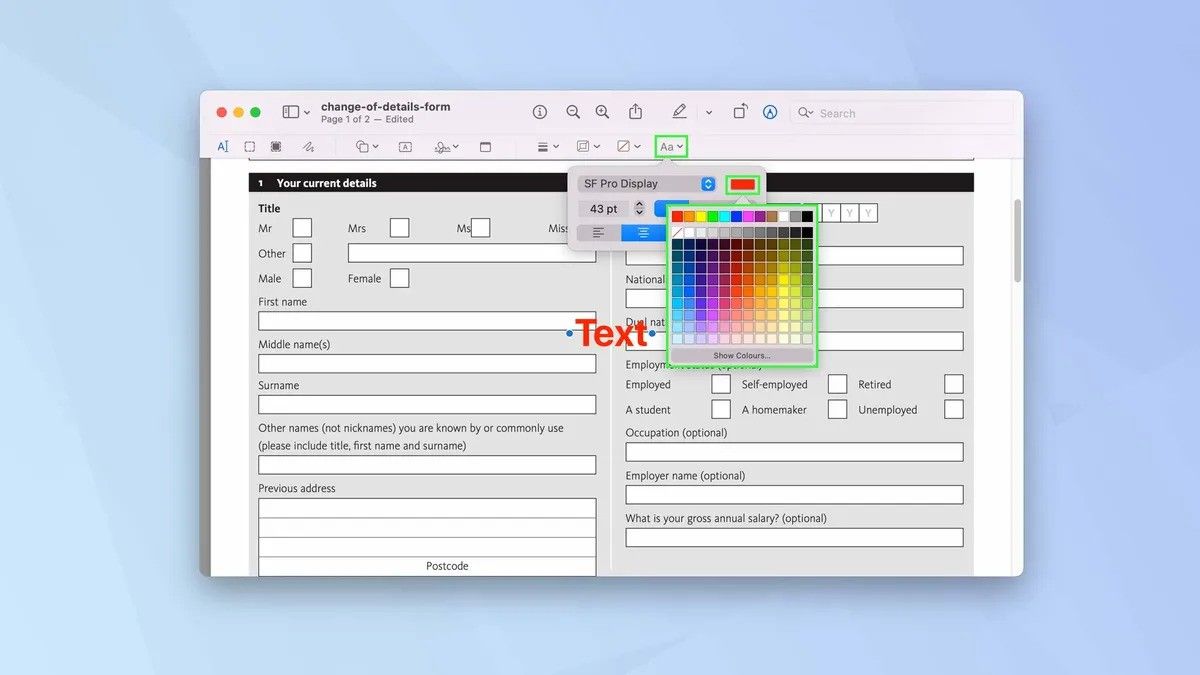
3. Change the Color: By default, the text might be red. You can change this by clicking the Aa icon and selecting a different color from the color box.
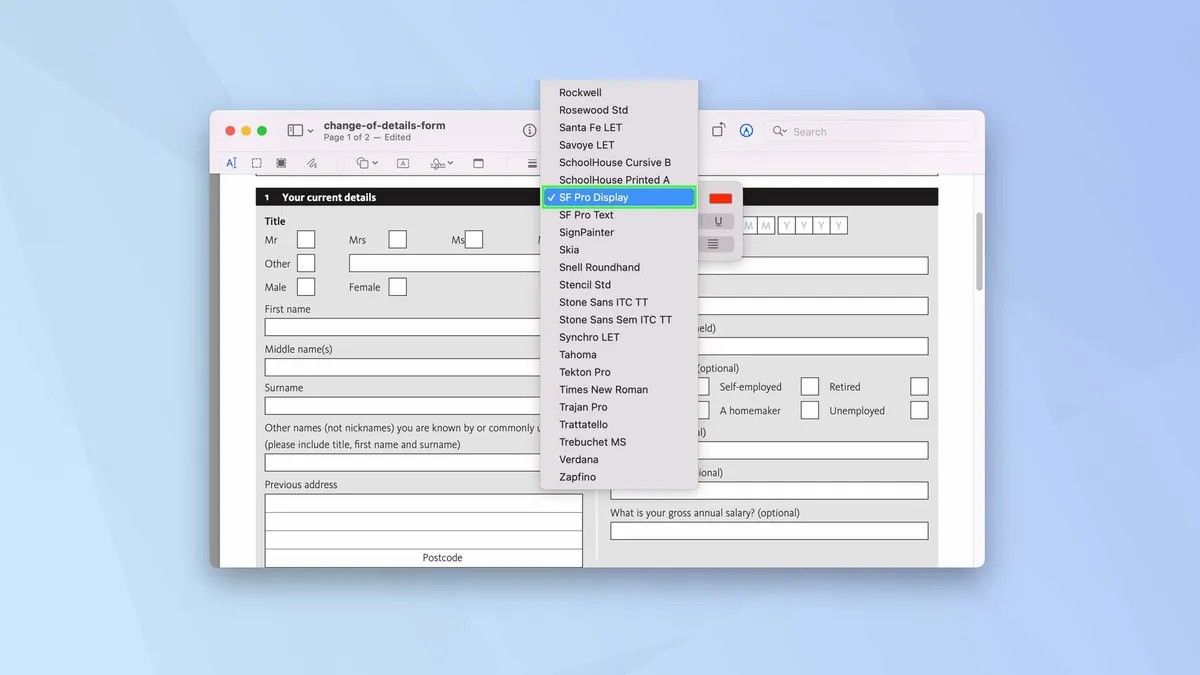
4. Adjust the Font: Want a different font? Click Aa again and use the dropdown font menu to choose the one you like.
5. Resize Text: In the same Aa menu, adjust the text size by clicking the up and down arrows next to the number box (or enter a specific number).
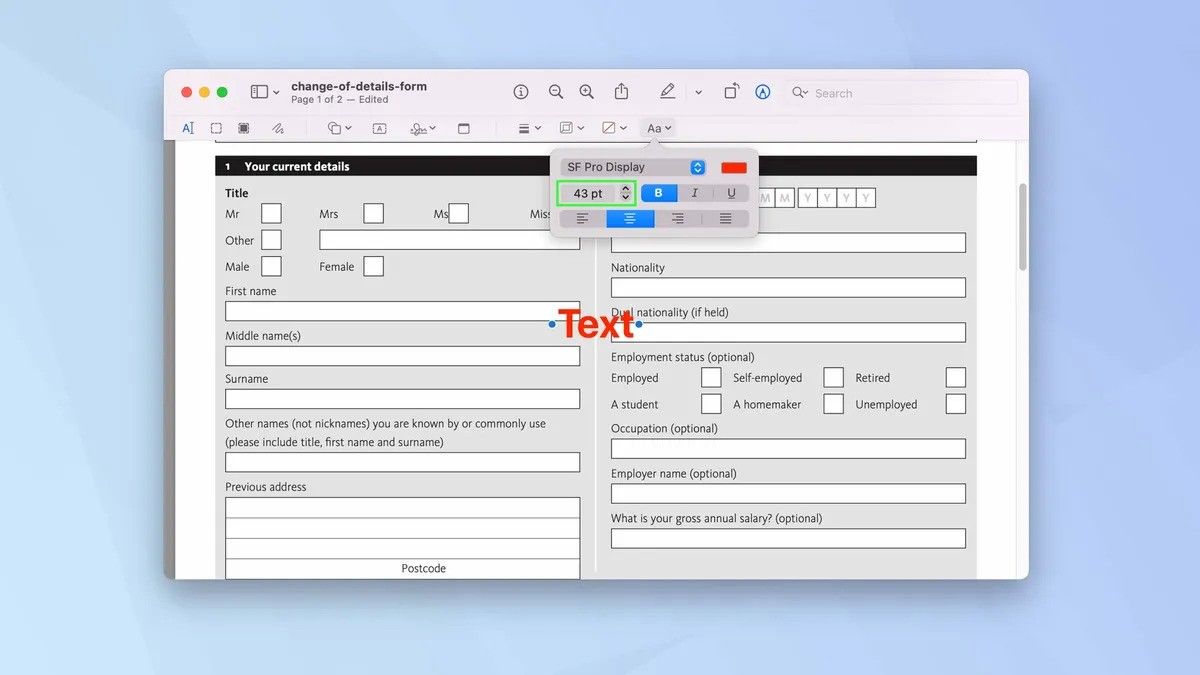
6. Style Your Text: You can bold, italicize, or underline your text by clicking B, I, or U.
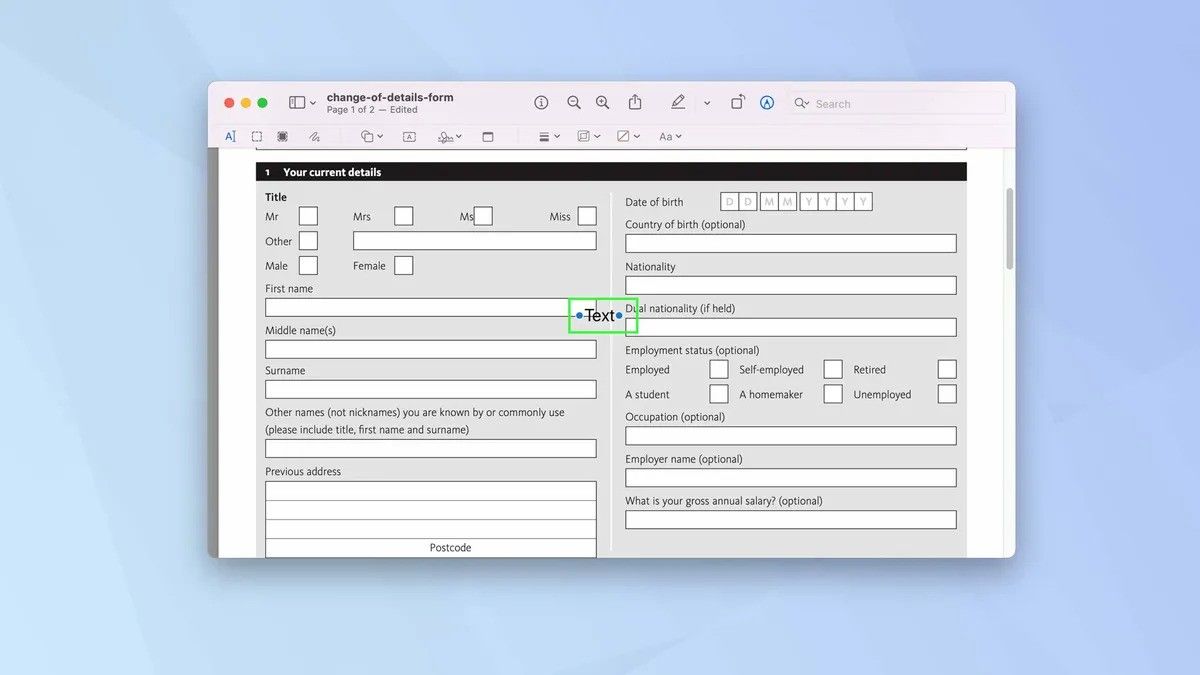
7. Move the Text Box: Click inside the text box (your cursor will turn into a hand) and move it to where you want it on the PDF.
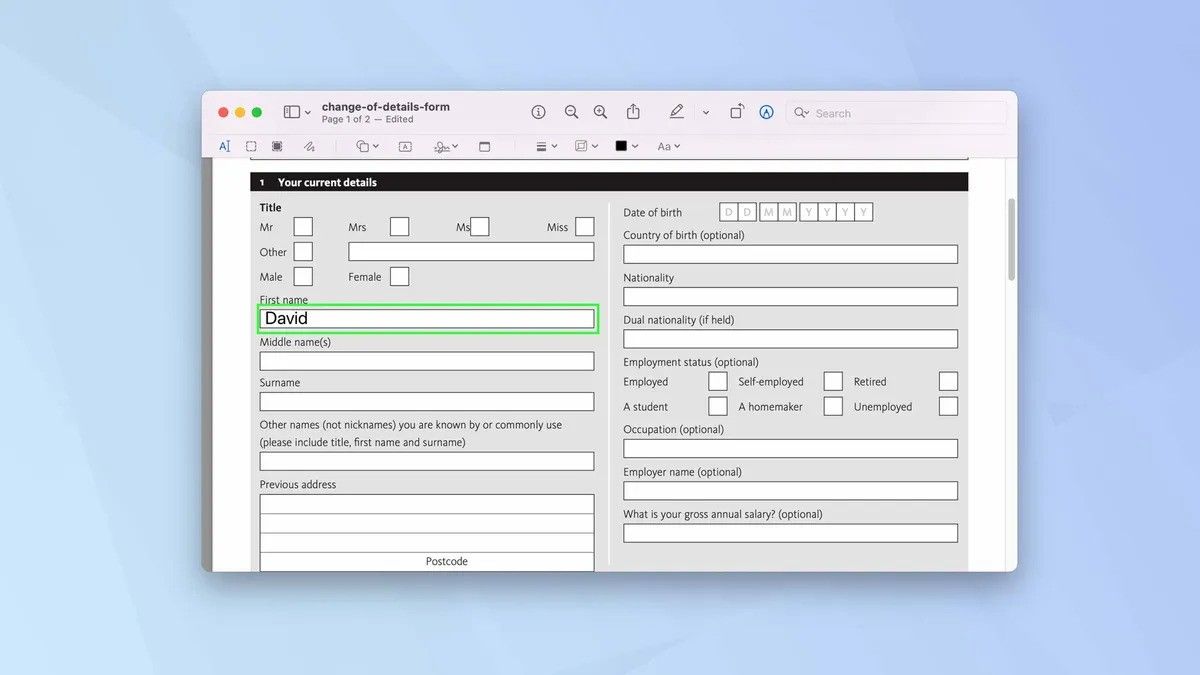
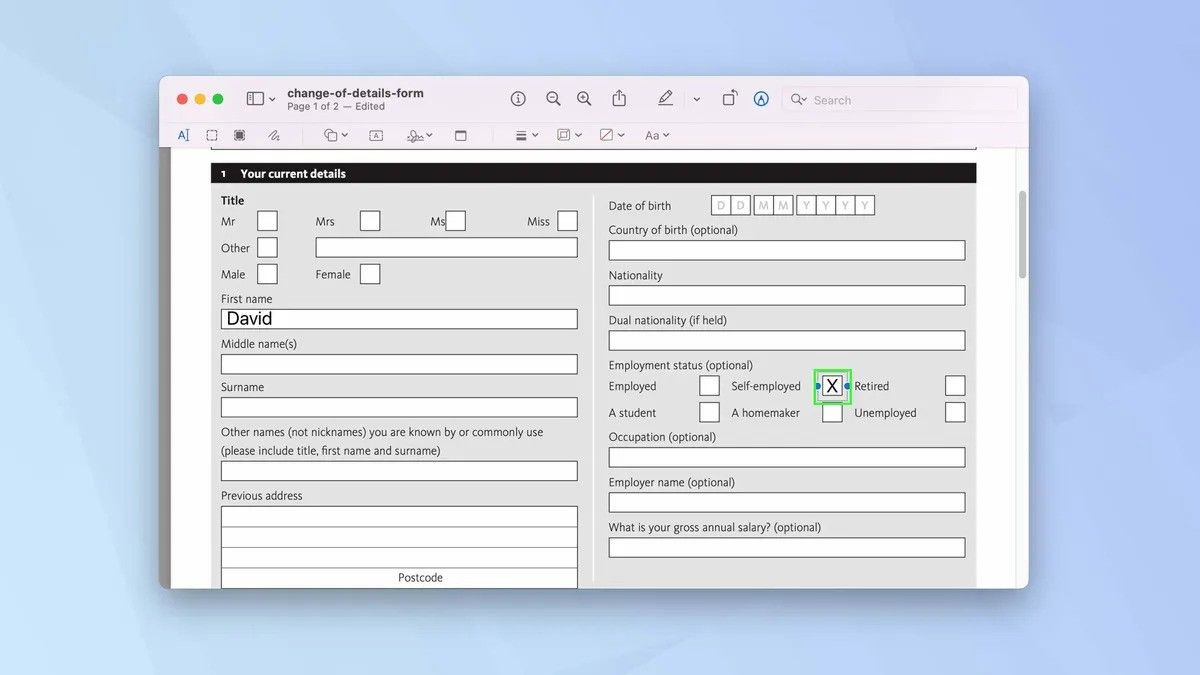
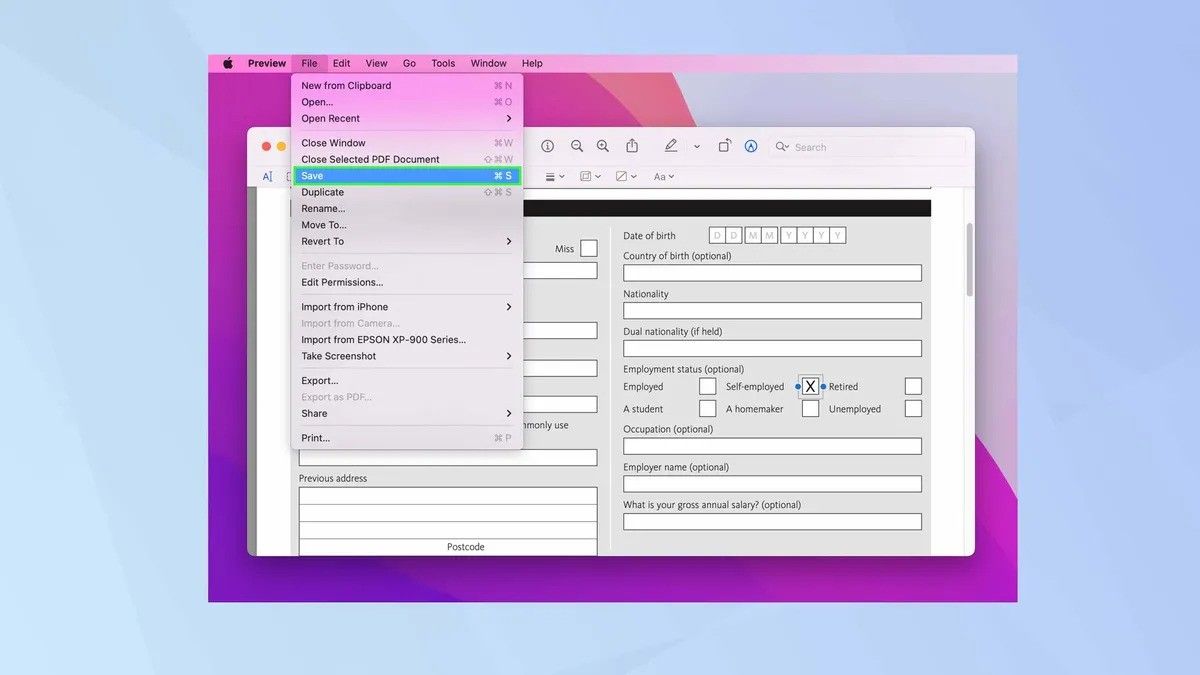
8. Mark Boxes: Use an "X" to mark checkboxes. Keep clicking the Text tool to add more text as needed.
9. Save Your Work: When you're done, simply click File > Save in Preview.
Adding Shapes to a PDF on a Mac
Highlighting areas or drawing attention to specific sections on a PDF can be crucial, and adding shapes is an easy way to do just that using Preview on your Mac. Here's how to add shapes:
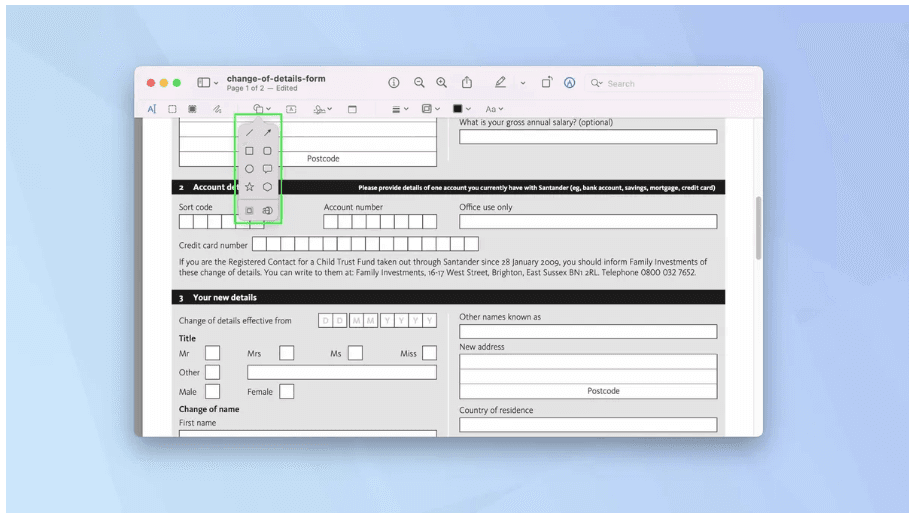
1. Select the Shapes Icon: Click the Shapes icon in the toolbar.
![]()
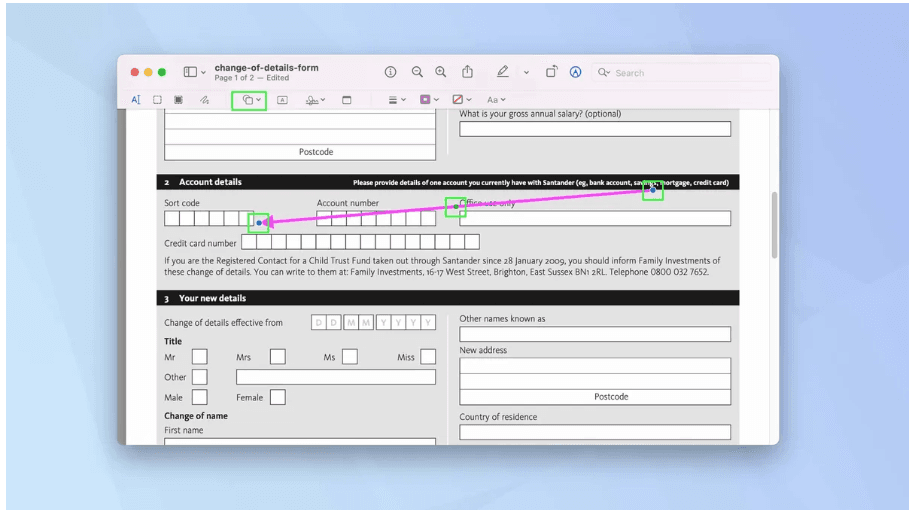
2. Choose a Shape: From the dropdown menu, select a shape such as a square, rounded-corner square, circle, speech bubble, star, or hexagon. You'll also find options for a line and an arrow. Once selected, the shape will appear on the screen.
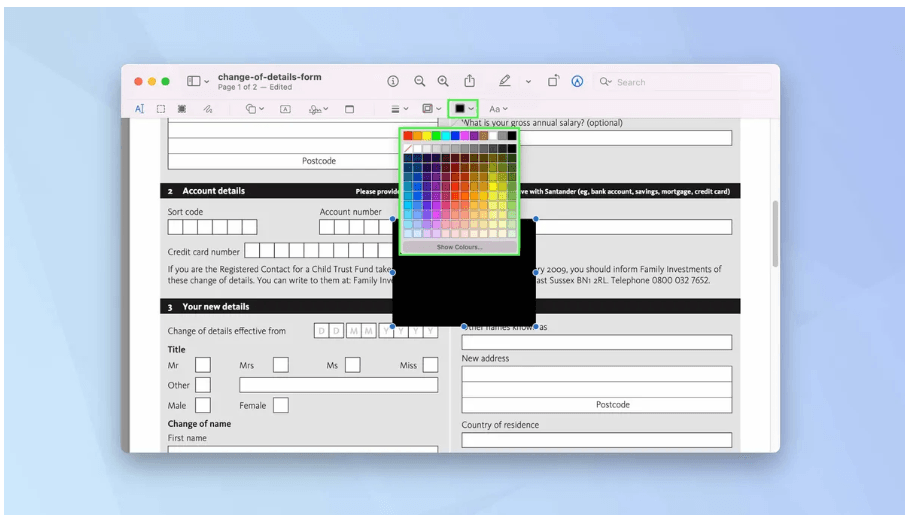
3. Change Shape Color: Use the color tool to modify the fill color of the shape.
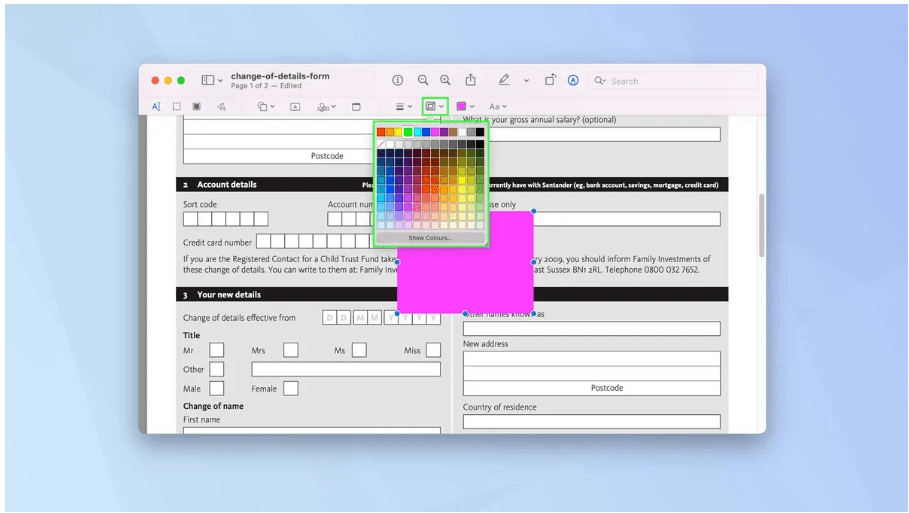
4. Adjust Border Color: Click the outline color tool to change the border color of the shape.
5. Move and Resize Shapes: Drag the shape around the PDF to position it where needed. For arrows, click the dots at either end to lengthen or shorten. Adjust the arrow's direction by dragging the dot next to the arrowhead, and create a bendy arrow by dragging the dot in the center.
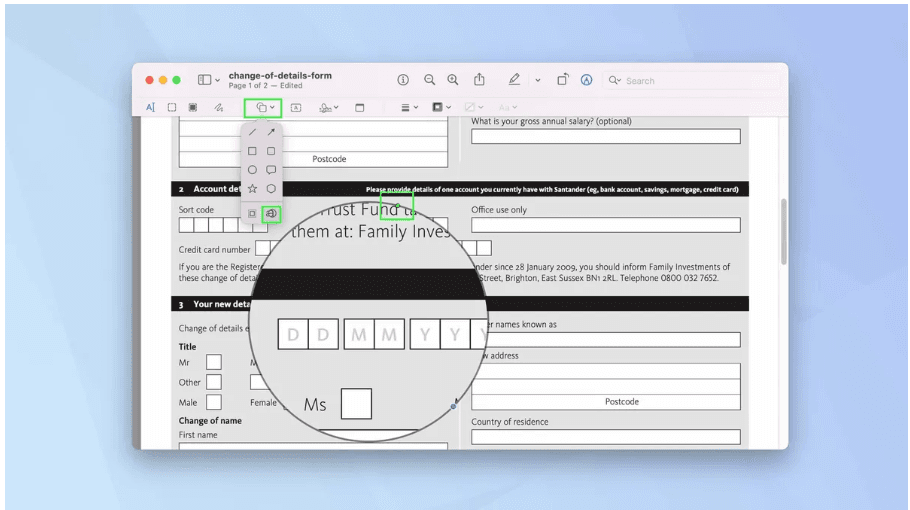
6. Use the Magnifying Option: In the Shapes menu, select the magnifying option to enlarge any text beneath it. A green dot allows you to adjust the level of magnification, making it perfect for drawing attention to specific sections.
Adding a Signature to a PDF on a Mac
Signing a PDF form using Preview on your Mac is straightforward, and you can even store a signature for future use. Here's how to add your signature:
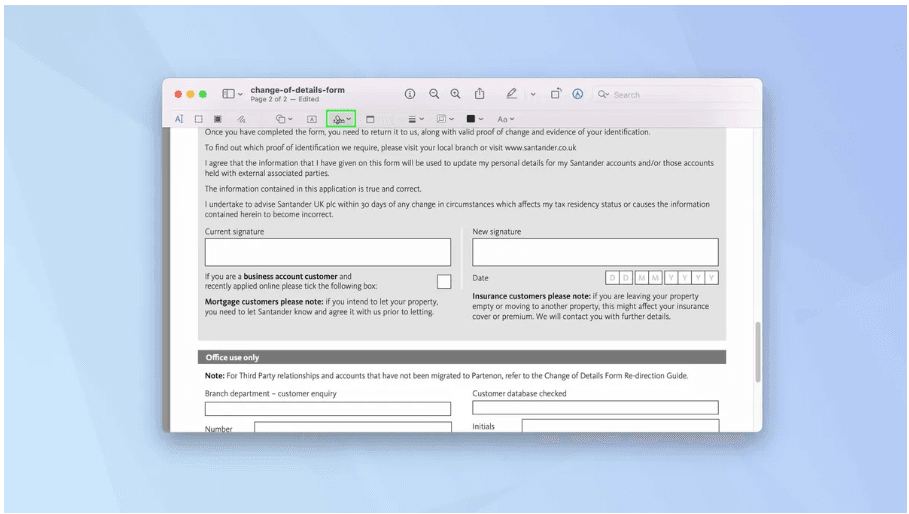
1. Open the Signature Tool: When you're ready to sign, click the signature icon in the toolbar.
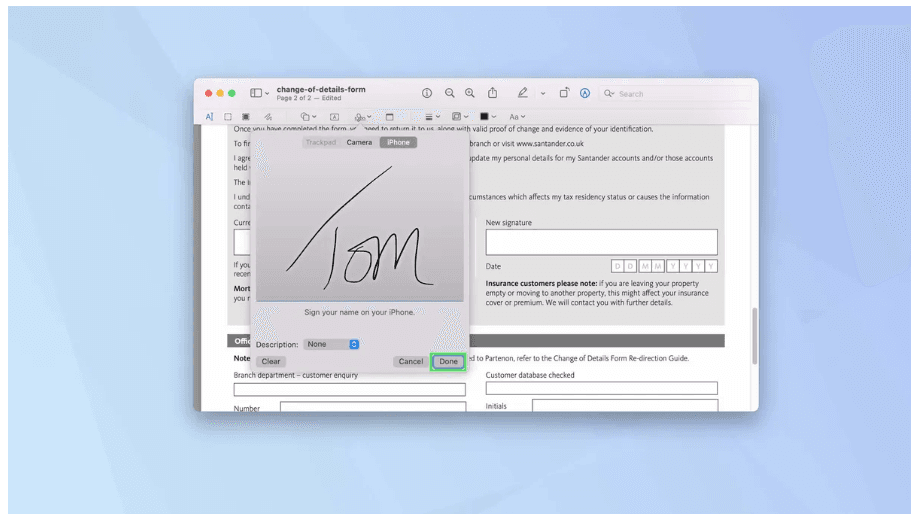
2. Choose a Method to Create Your Signature. You have three options:
- Trackpad: Click Trackpad and use your finger or a stylus to write your signature on your Mac's trackpad.
- Camera: Click Camera, sign your name on a piece of paper, and hold it in front of your Mac's camera to scan it.
- iPhone or iPad: Click iPhone or iPad. If your iPhone or iPad is signed into the same account as your Mac, you'll be prompted to use either device's screen to write your signature.
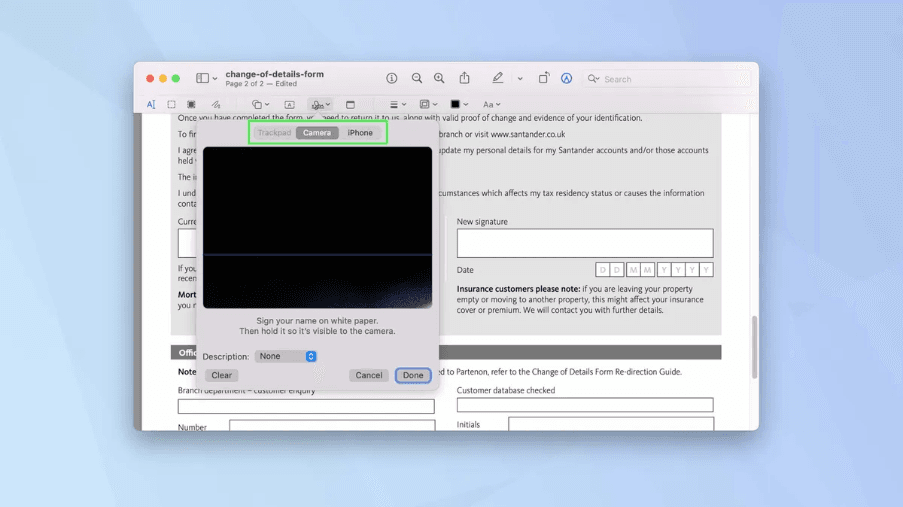
3. Save or Clear Your Signature: When you've finished, select Done to save your signature. You can also click Clear to start over.
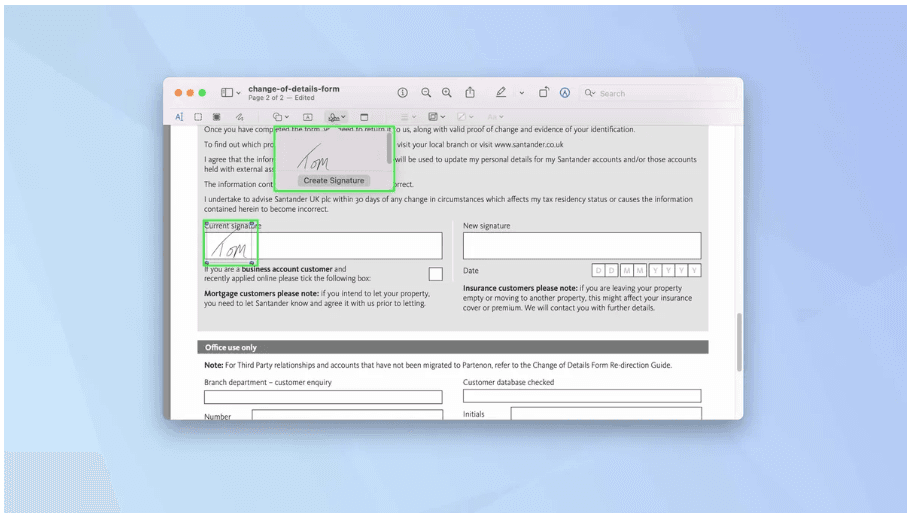
4. Add and Position the Signature: Click the Signature icon to select your saved signature and drag it into the desired position on the PDF. If you want to add more signatures, you can click Create Signature to add additional ones (for example, if you have different signatures for different purposes).
Rearranging Pages of a PDF on a Mac
To change the order of pages within a PDF document, you can use Preview. Here's how to do it:
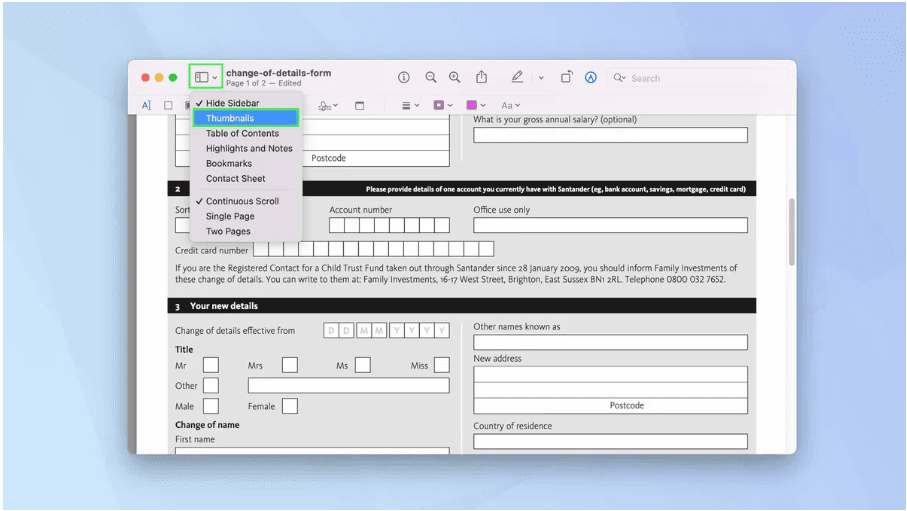
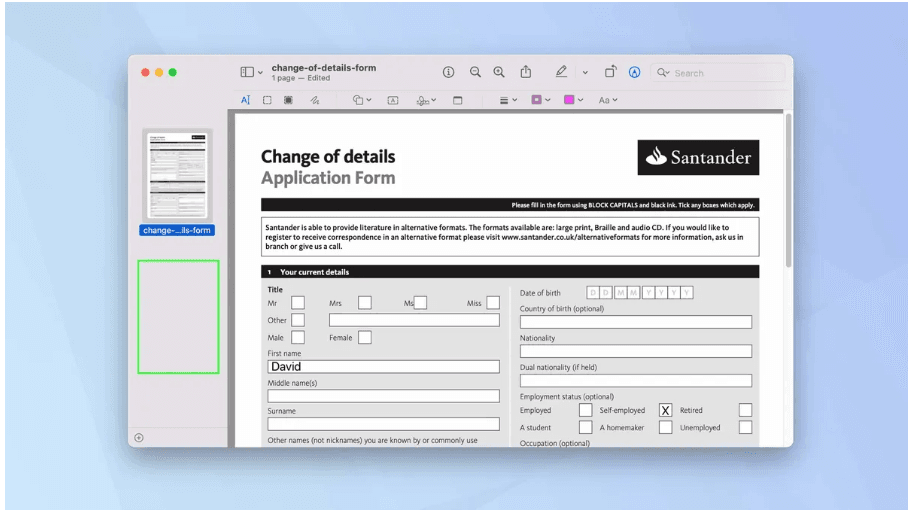
1. Open Thumbnails View: Click the View Menu icon located next to the PDF document's name and select Thumbnails.
2. Reorder Pages: The pages of the PDF will be displayed as thumbnails on the left side of the Preview window. To rearrange them, simply click and drag a thumbnail up or down to your desired position.
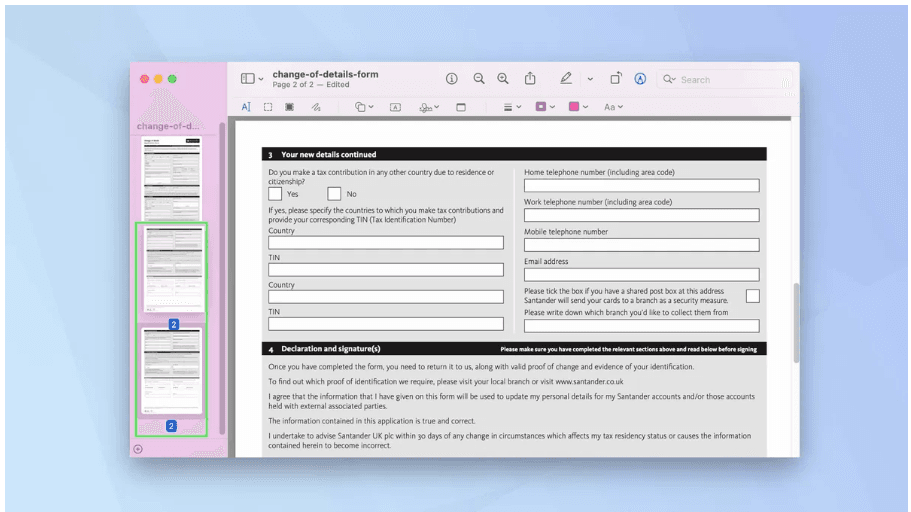
3. Delete a Page: If you wish to remove a page, click on its thumbnail and press Delete on your keyboard.
Method 2: Using Adobe Acrobat
Adobe Acrobat is the gold standard when it comes to PDF editing, offering an extensive suite of tools designed to handle even the most complex editing tasks. Here's how you can use it:
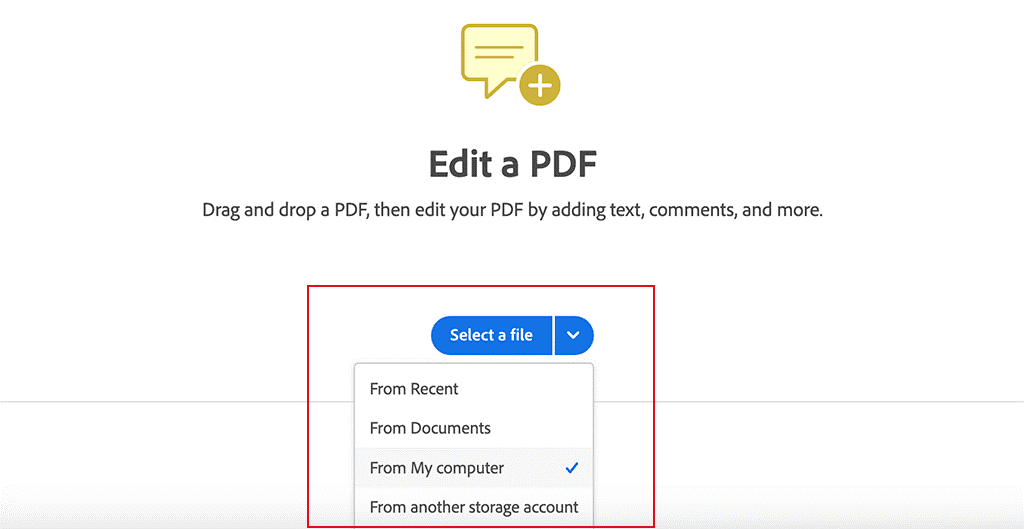
1. Choose the PDF File: You can import a PDF into Acrobat Online by simply dragging the file into the appropriate browser tab. This allows you to open documents from your device's storage, cloud platforms, Google Drive, and more.
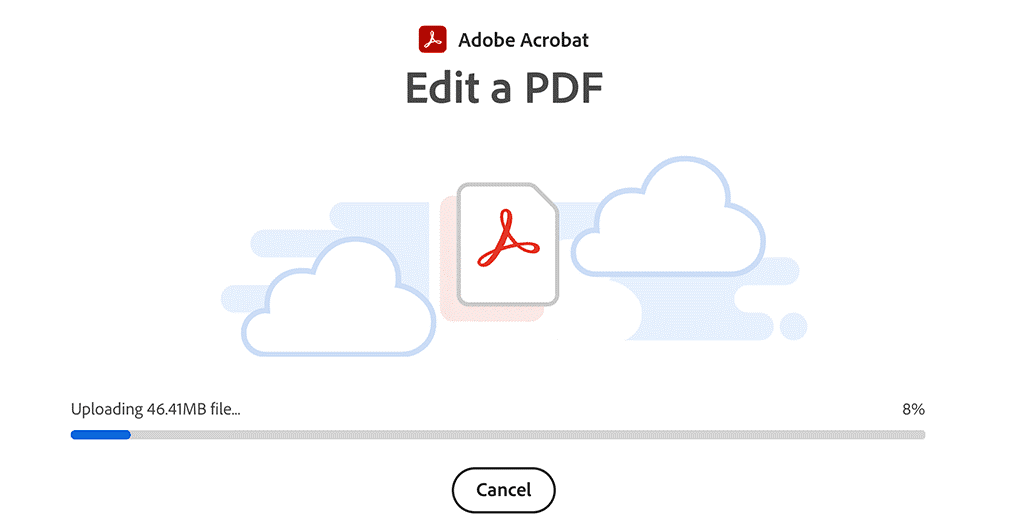
2. Upload the Document: Wait for the file to upload. The upload time depends on the size of the file and your internet connection speed. In my case, it only took 5 seconds for my file to open.
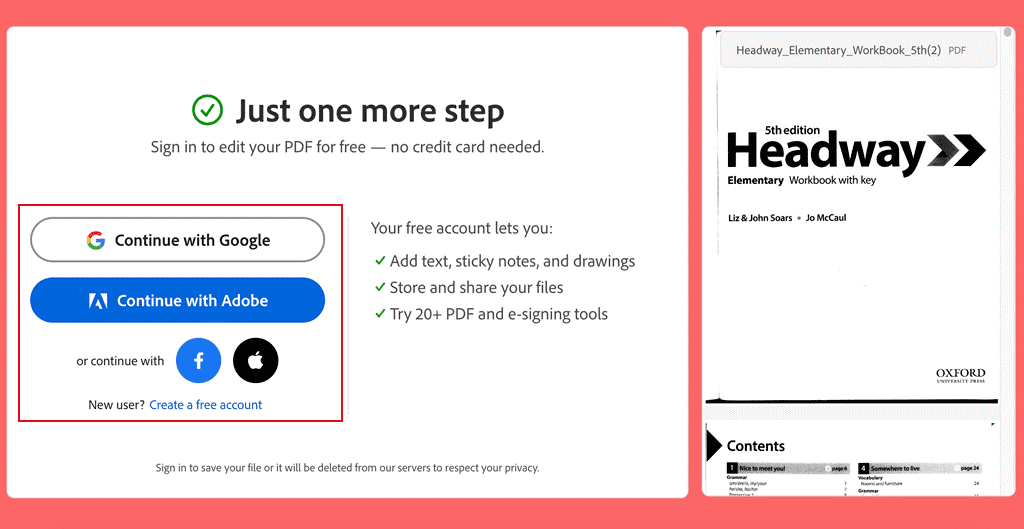
3. Sign In with Your Adobe Login: Once the PDF is uploaded, log into your Adobe account to take advantage of features like adding text, highlighting, drawing, and more.
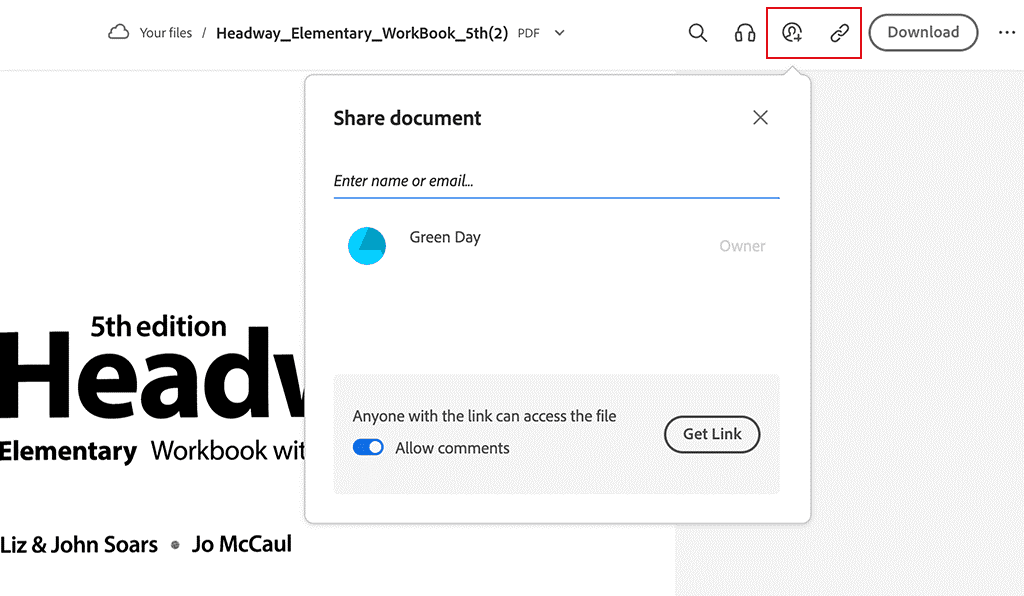
4. Share the Document: At this stage, Acrobat Online allows you to click on the Share menu to send the PDF to other users via email or URL.
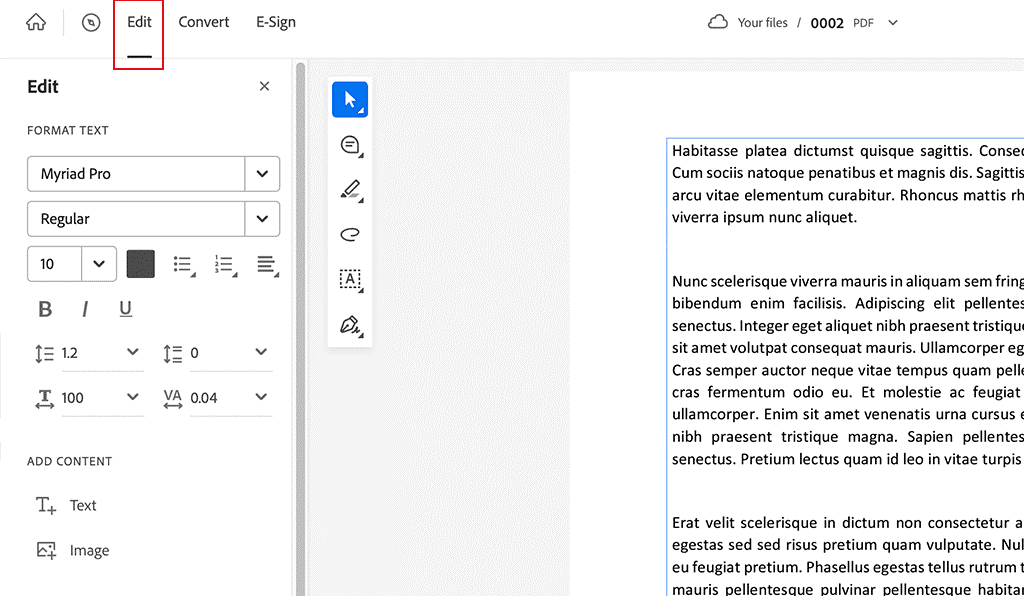
5. Choose the Editing Options: Click on the Edit window. Here, you'll be greeted by features that allow you to highlight, underscore, strikethrough, and write text. You'll also find tools for creating sticky notes and drawing.
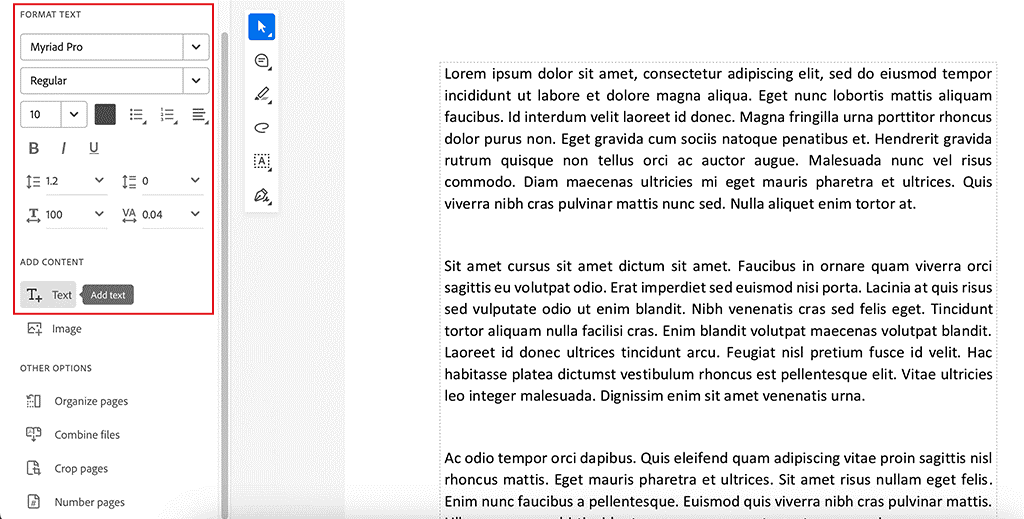
6. Set the Text Formatting Parameters:
- Adjust the size and font of the added text, as well as numerous other parameters.
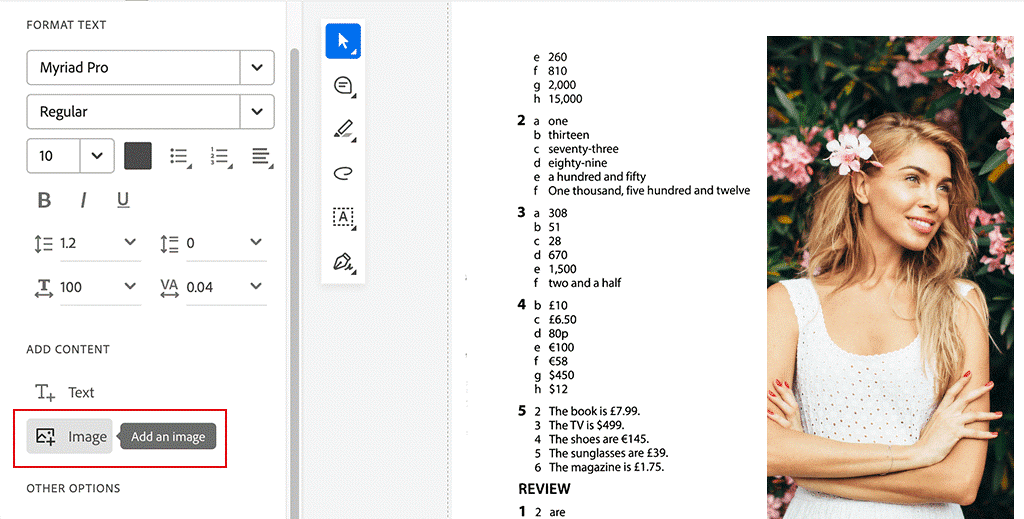
- Alternatively, you can add an image to your document.
7. Sort Pages:
- Acrobat Online has tools for organizing the pages of your document.
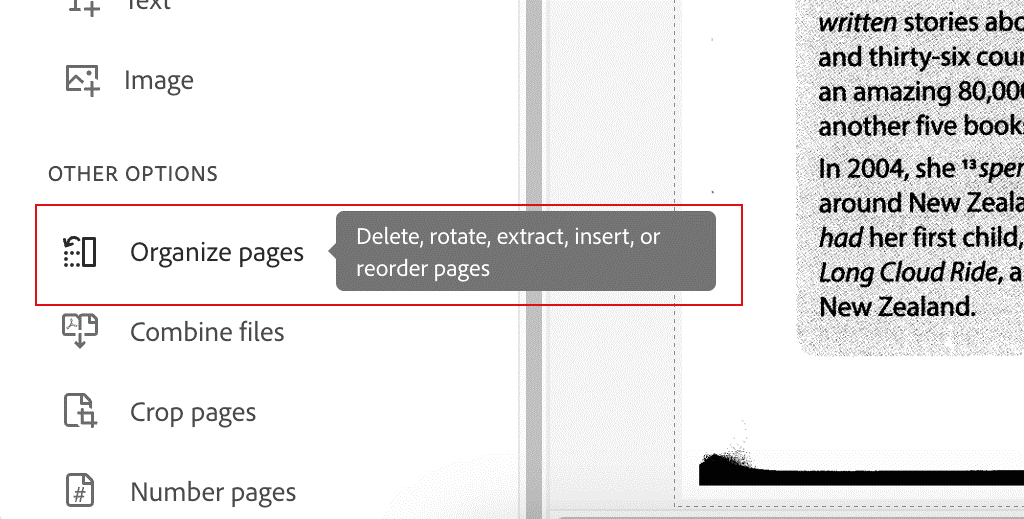
- You can add, remove, and rearrange PDF pages in Adobe Acrobat as you see fit.
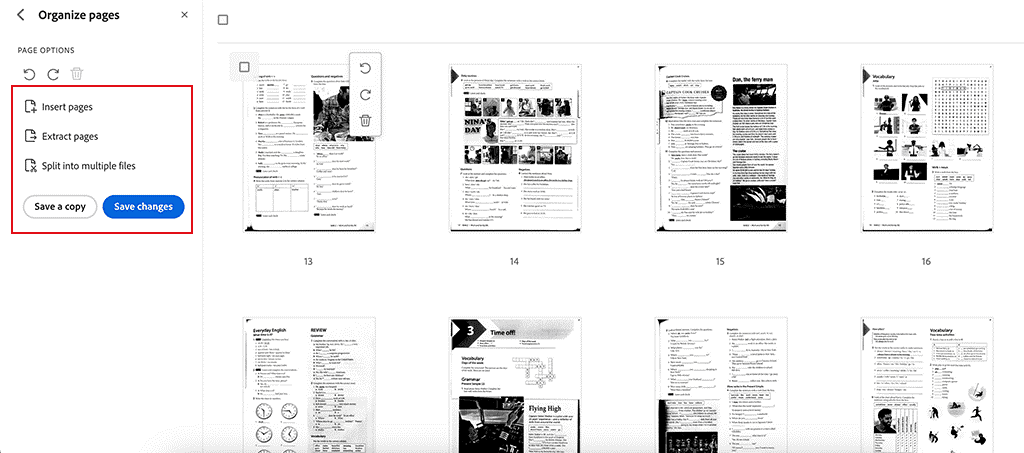
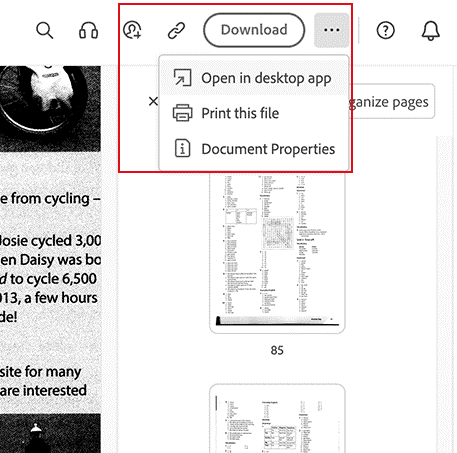
8. Save the File: Save the PDF after making all the necessary changes. You can also share the file if needed.
Final Words
Editing PDFs on your Mac is easier than you might think. With the built-in Preview app and the powerful Adobe Acrobat, you've got two fantastic tools to help you handle any PDF editing needs without breaking a sweat. Whether you're making quick tweaks with Preview or diving into more advanced edits with Adobe Acrobat, these methods make sure your documents are always polished and professional.
By knowing when to use each tool, you can boost your productivity and get your editing done efficiently. So, go ahead and give these methods a try—your PDF editing tasks are about to get a whole lot simpler!

