Google Docs is a versatile tool for creating and editing documents online. One of its features is the ability to insert text boxes, which can help organize and highlight important content. Text boxes can help emphasize specific sections, add quotes, or create visual interest. This blog will cover the different methods to insert a text box in Google Docs, including using the Drawing tool, tables, and third-party add-ons. Stay tuned for a step-by-step guide to enhance your documents!
Why Use a Text Box in Google Docs?
Text boxes are invaluable for enhancing the layout of your Google Docs. They allow you to emphasize important information, isolate content, and create visually appealing documents. Some common reasons to use text boxes include highlighting key points, adding callouts, or organizing information more effectively.
Examples of scenarios where text boxes are beneficial include:
- Creating sidebars for additional context or notes.
- Making standout quotes or statistics.
- Designing newsletter-style layouts.
- Organizing complex information in teaching materials or reports.
Text boxes can make your documents more readable and engaging for your audience.
Methods to Insert a Text Box
Inserting a text box in Google Docs can be accomplished through several methods, each offering unique advantages. Let us introduce you to the various techniques available and briefly overview each.
Using the Drawing Tool
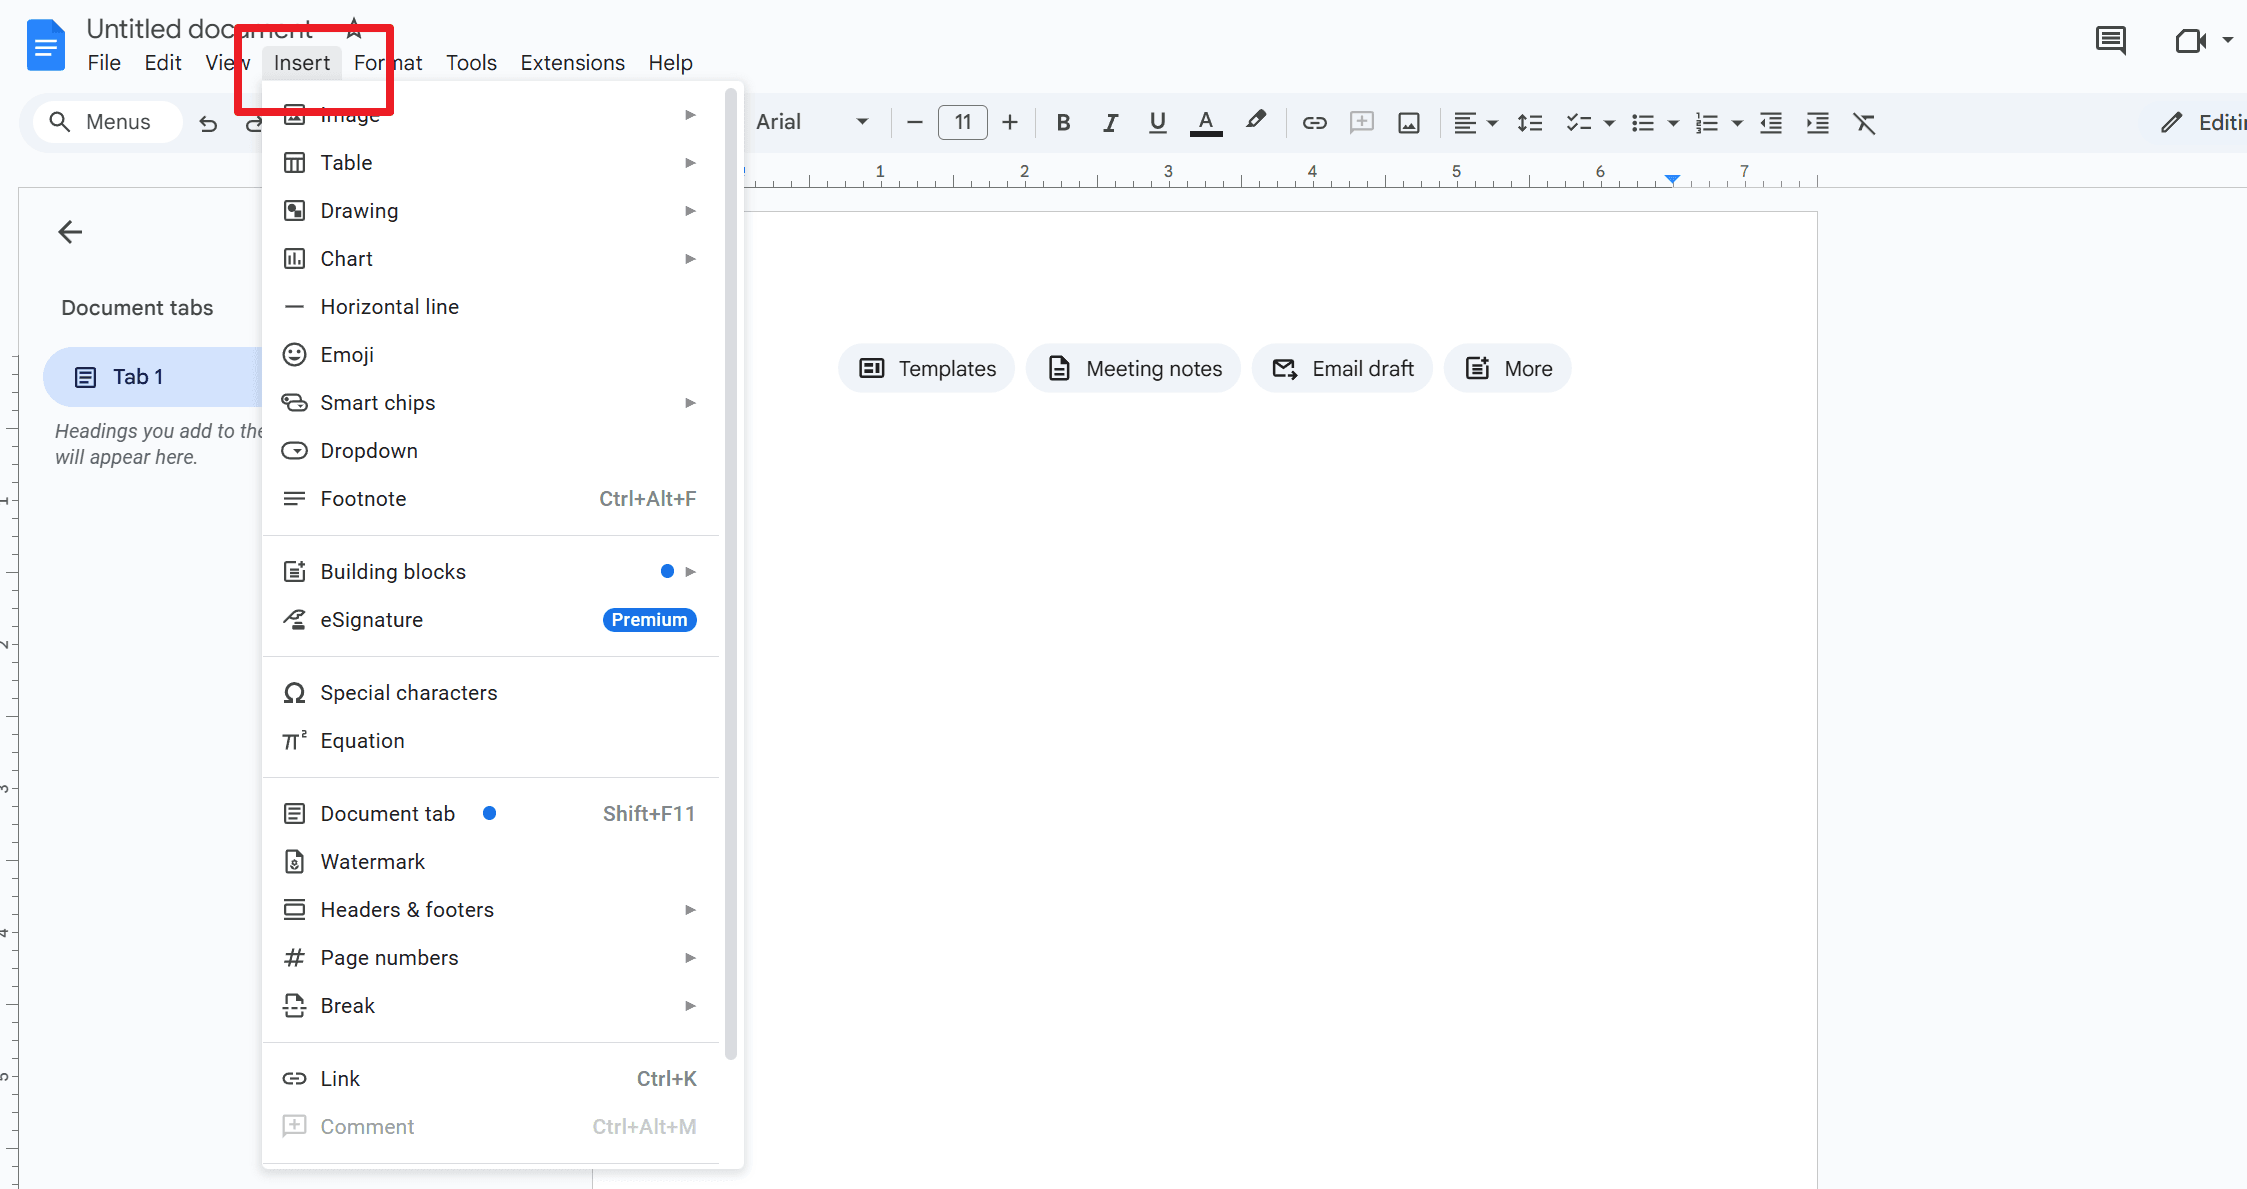
1. Go to the "Insert" Menu
- Open your document in Google Docs and click on the "Insert" menu at the top of the screen.
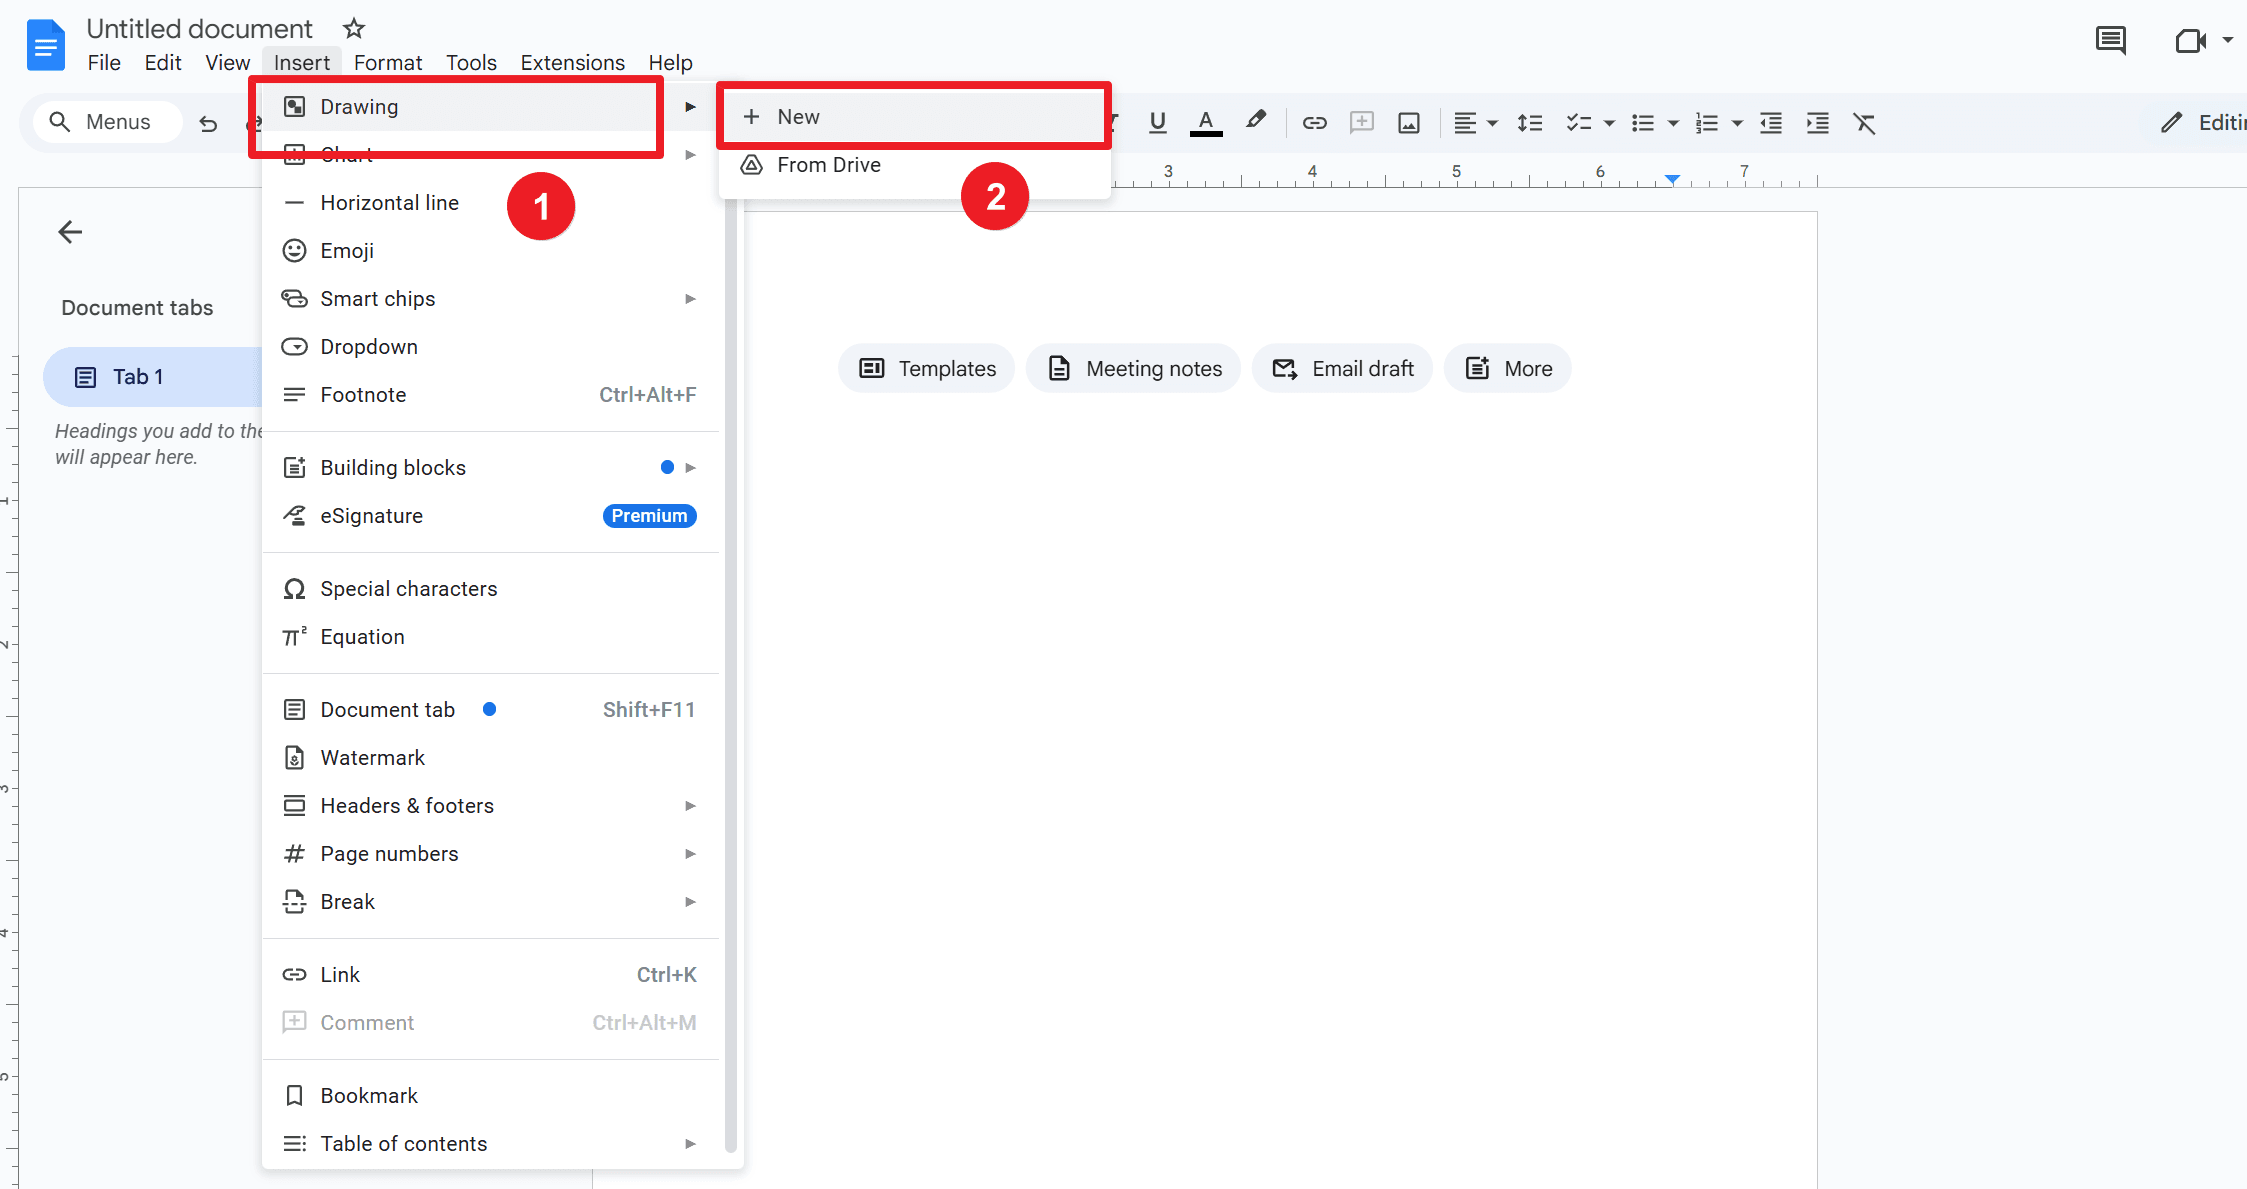
2. Select "Drawing" and Then “+ New”
- From the drop-down menu, hover over "Drawing" and click “+ New.”
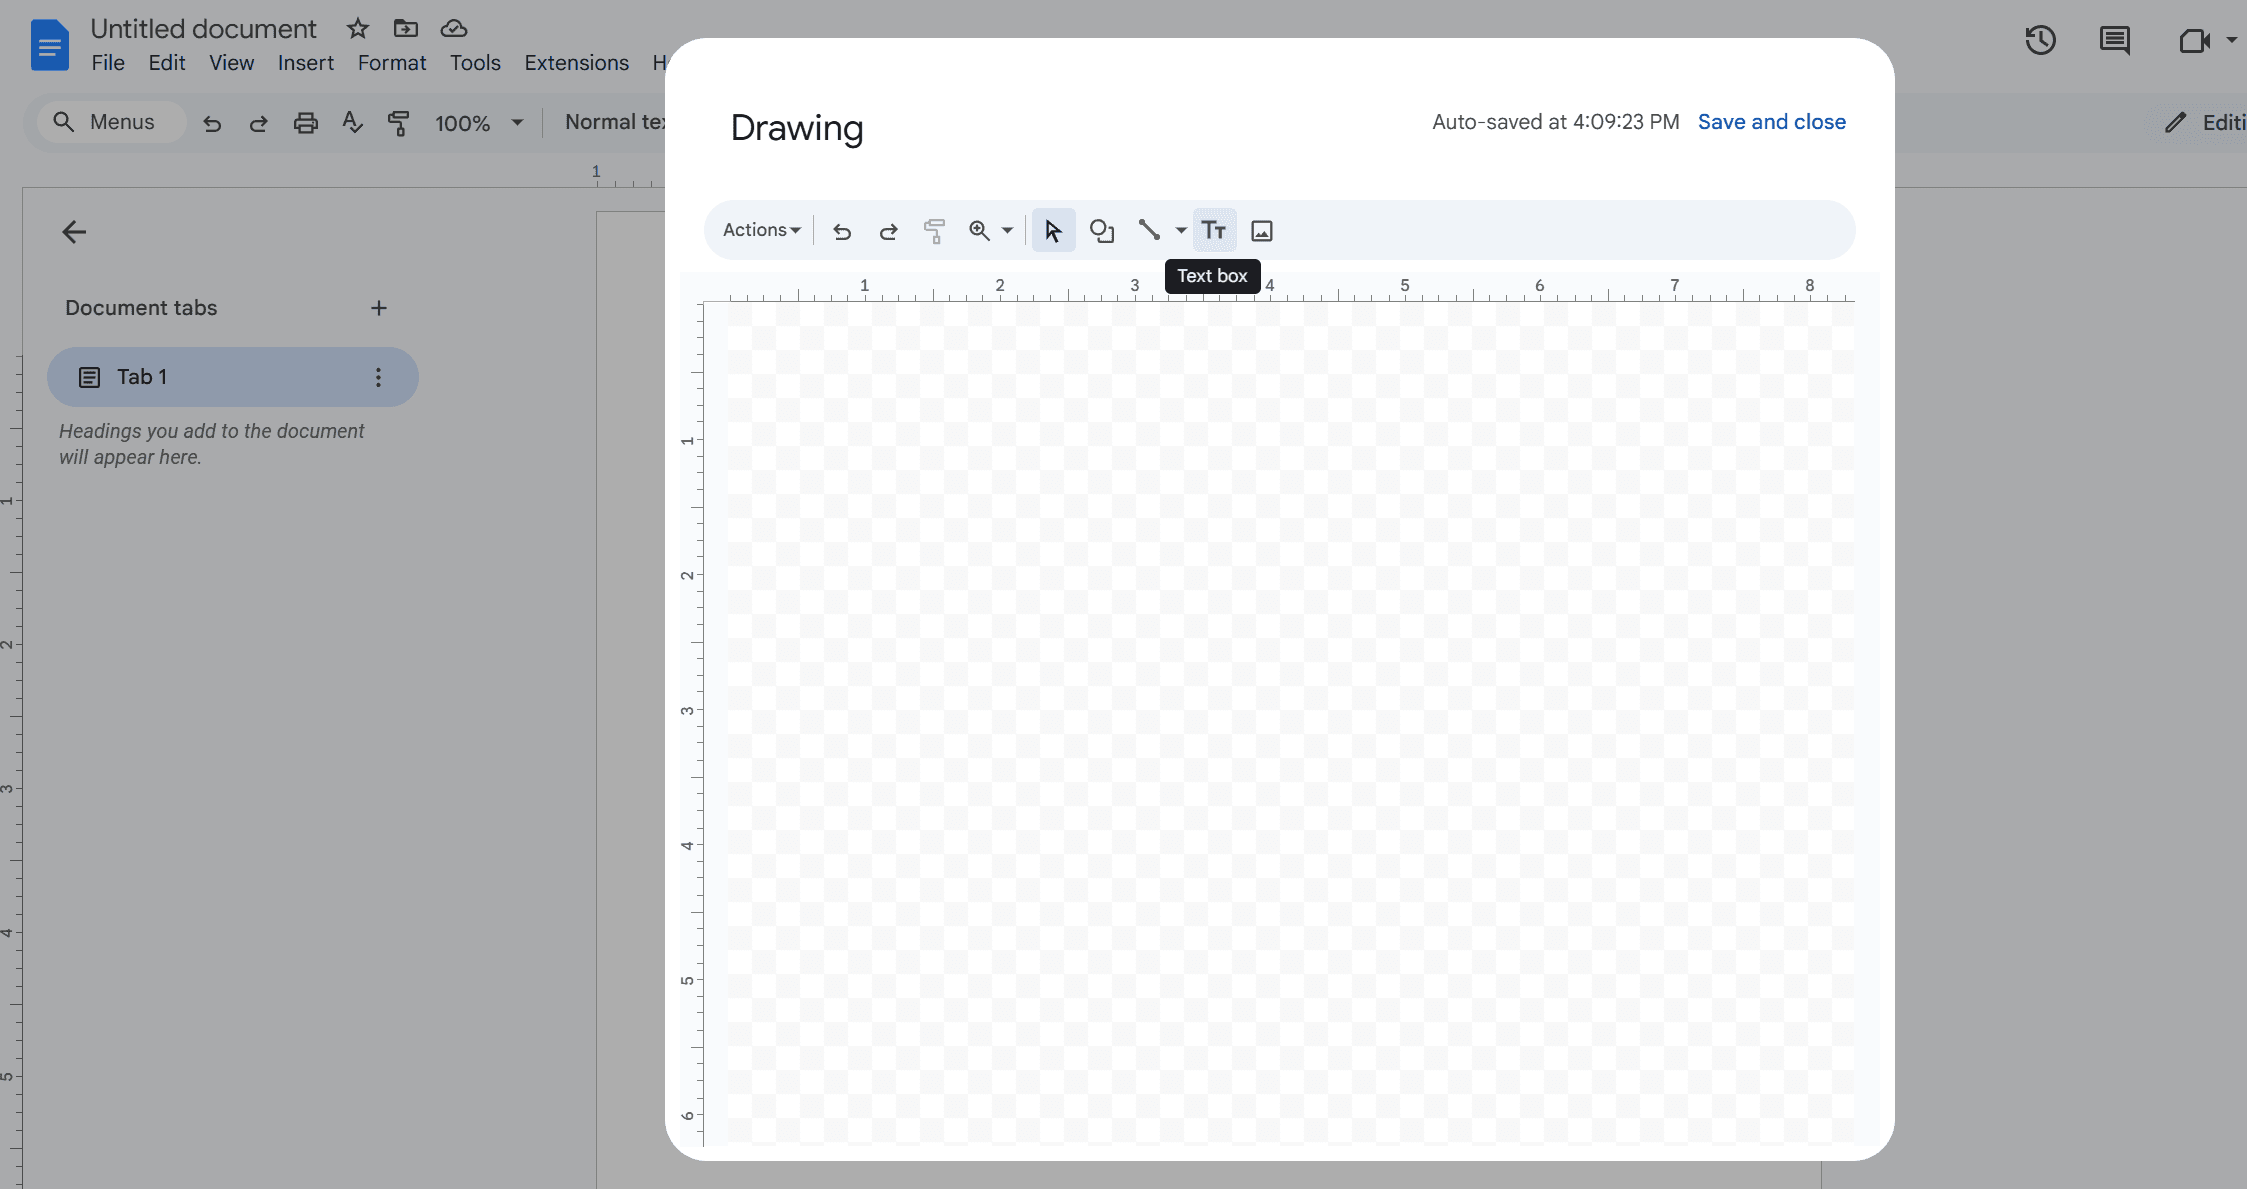
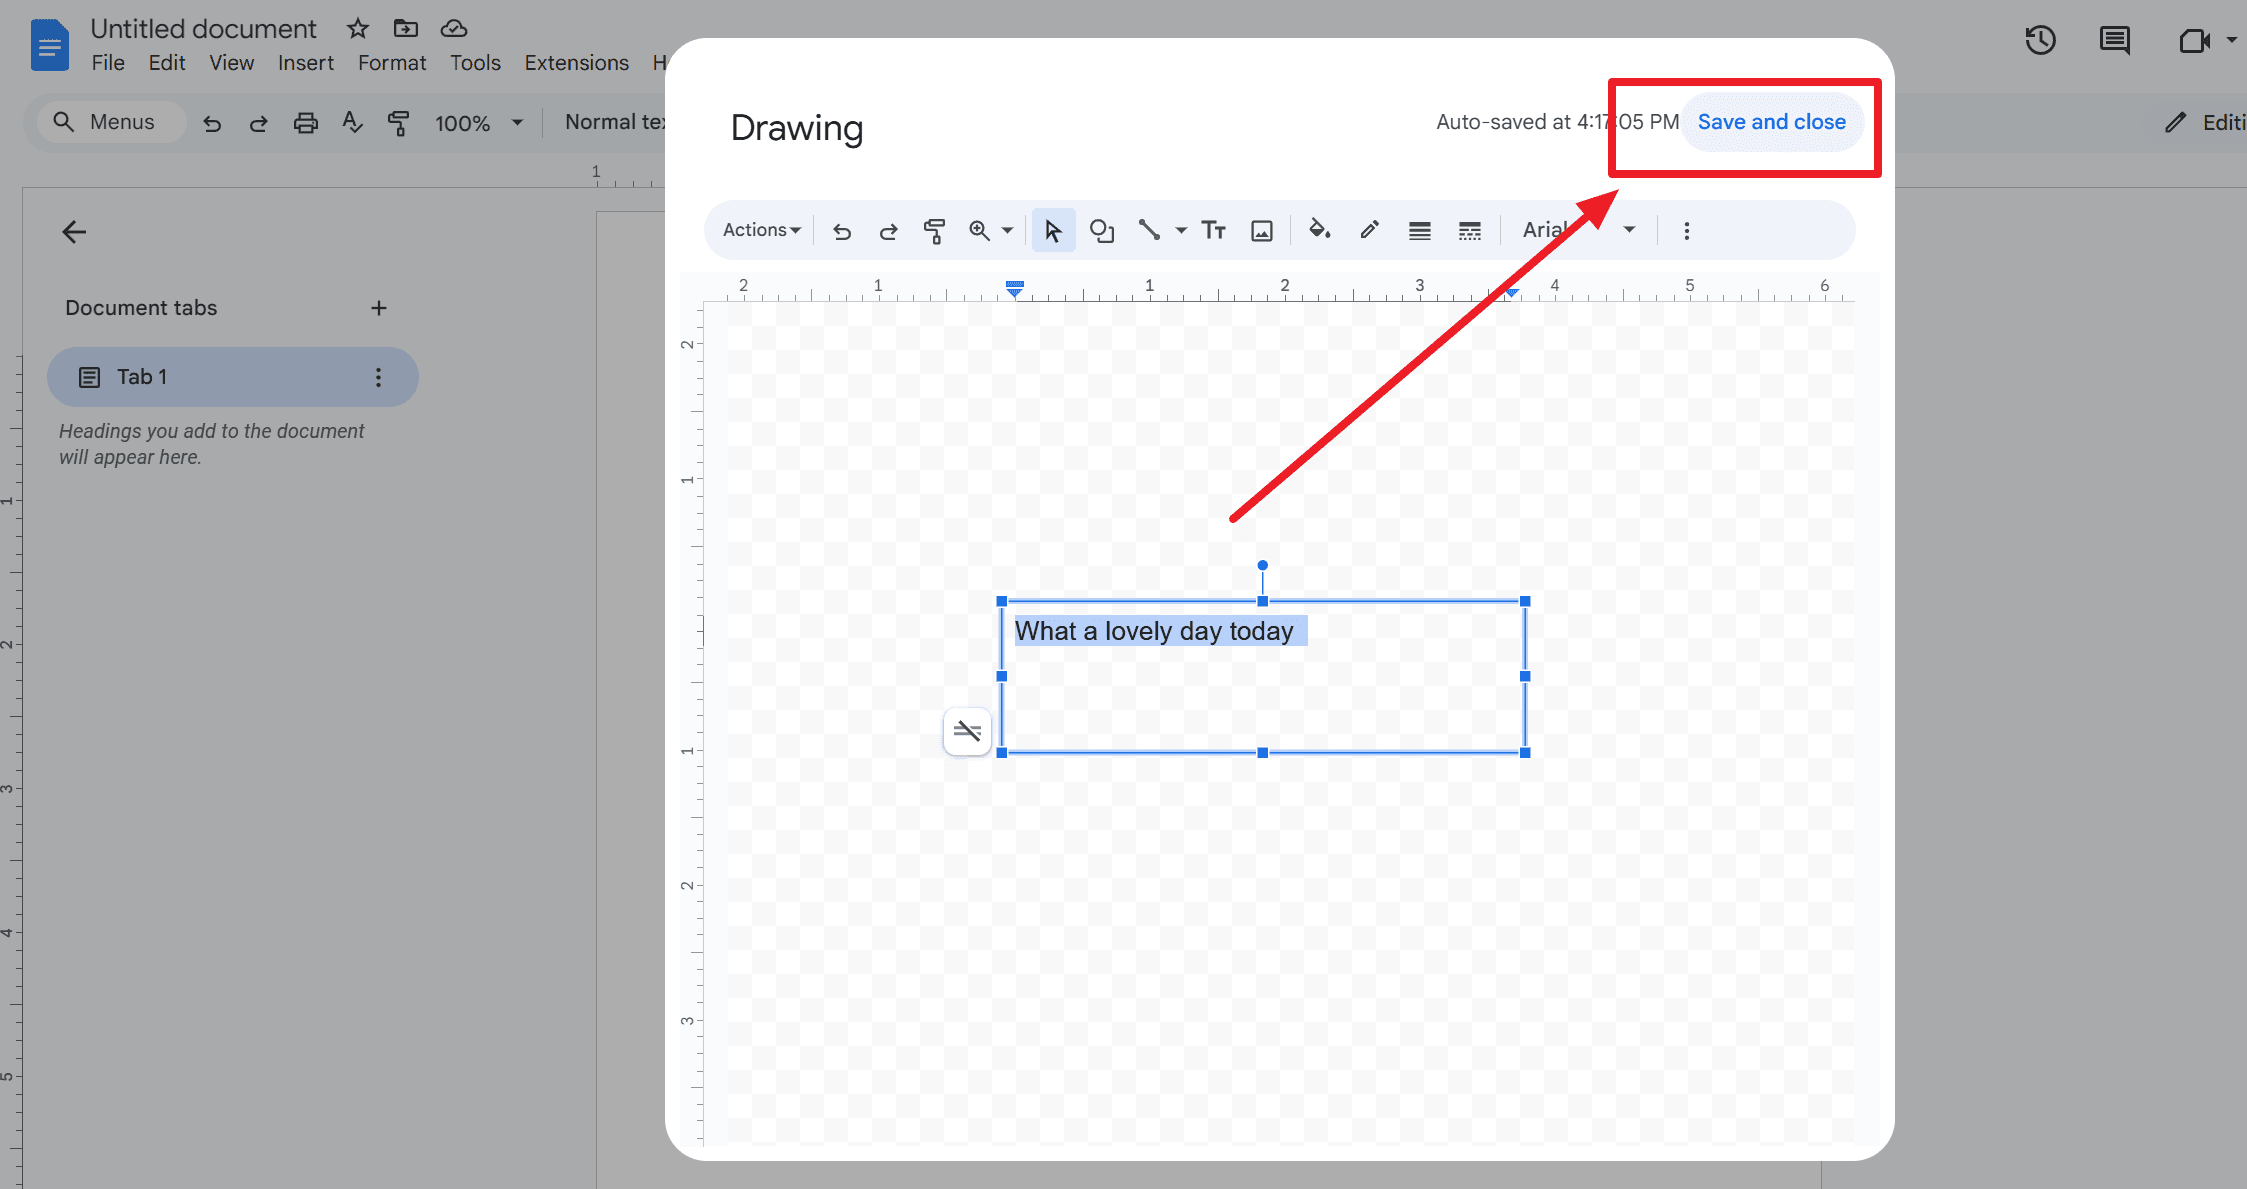
3. Click on the Text Box Icon
- In the Drawing tool window that appears, click on the text box icon, which looks like a little square with a 'T' inside.
4. Draw the Text Box on the Canvas
- Click and drag on the canvas to draw your text box to the desired size.
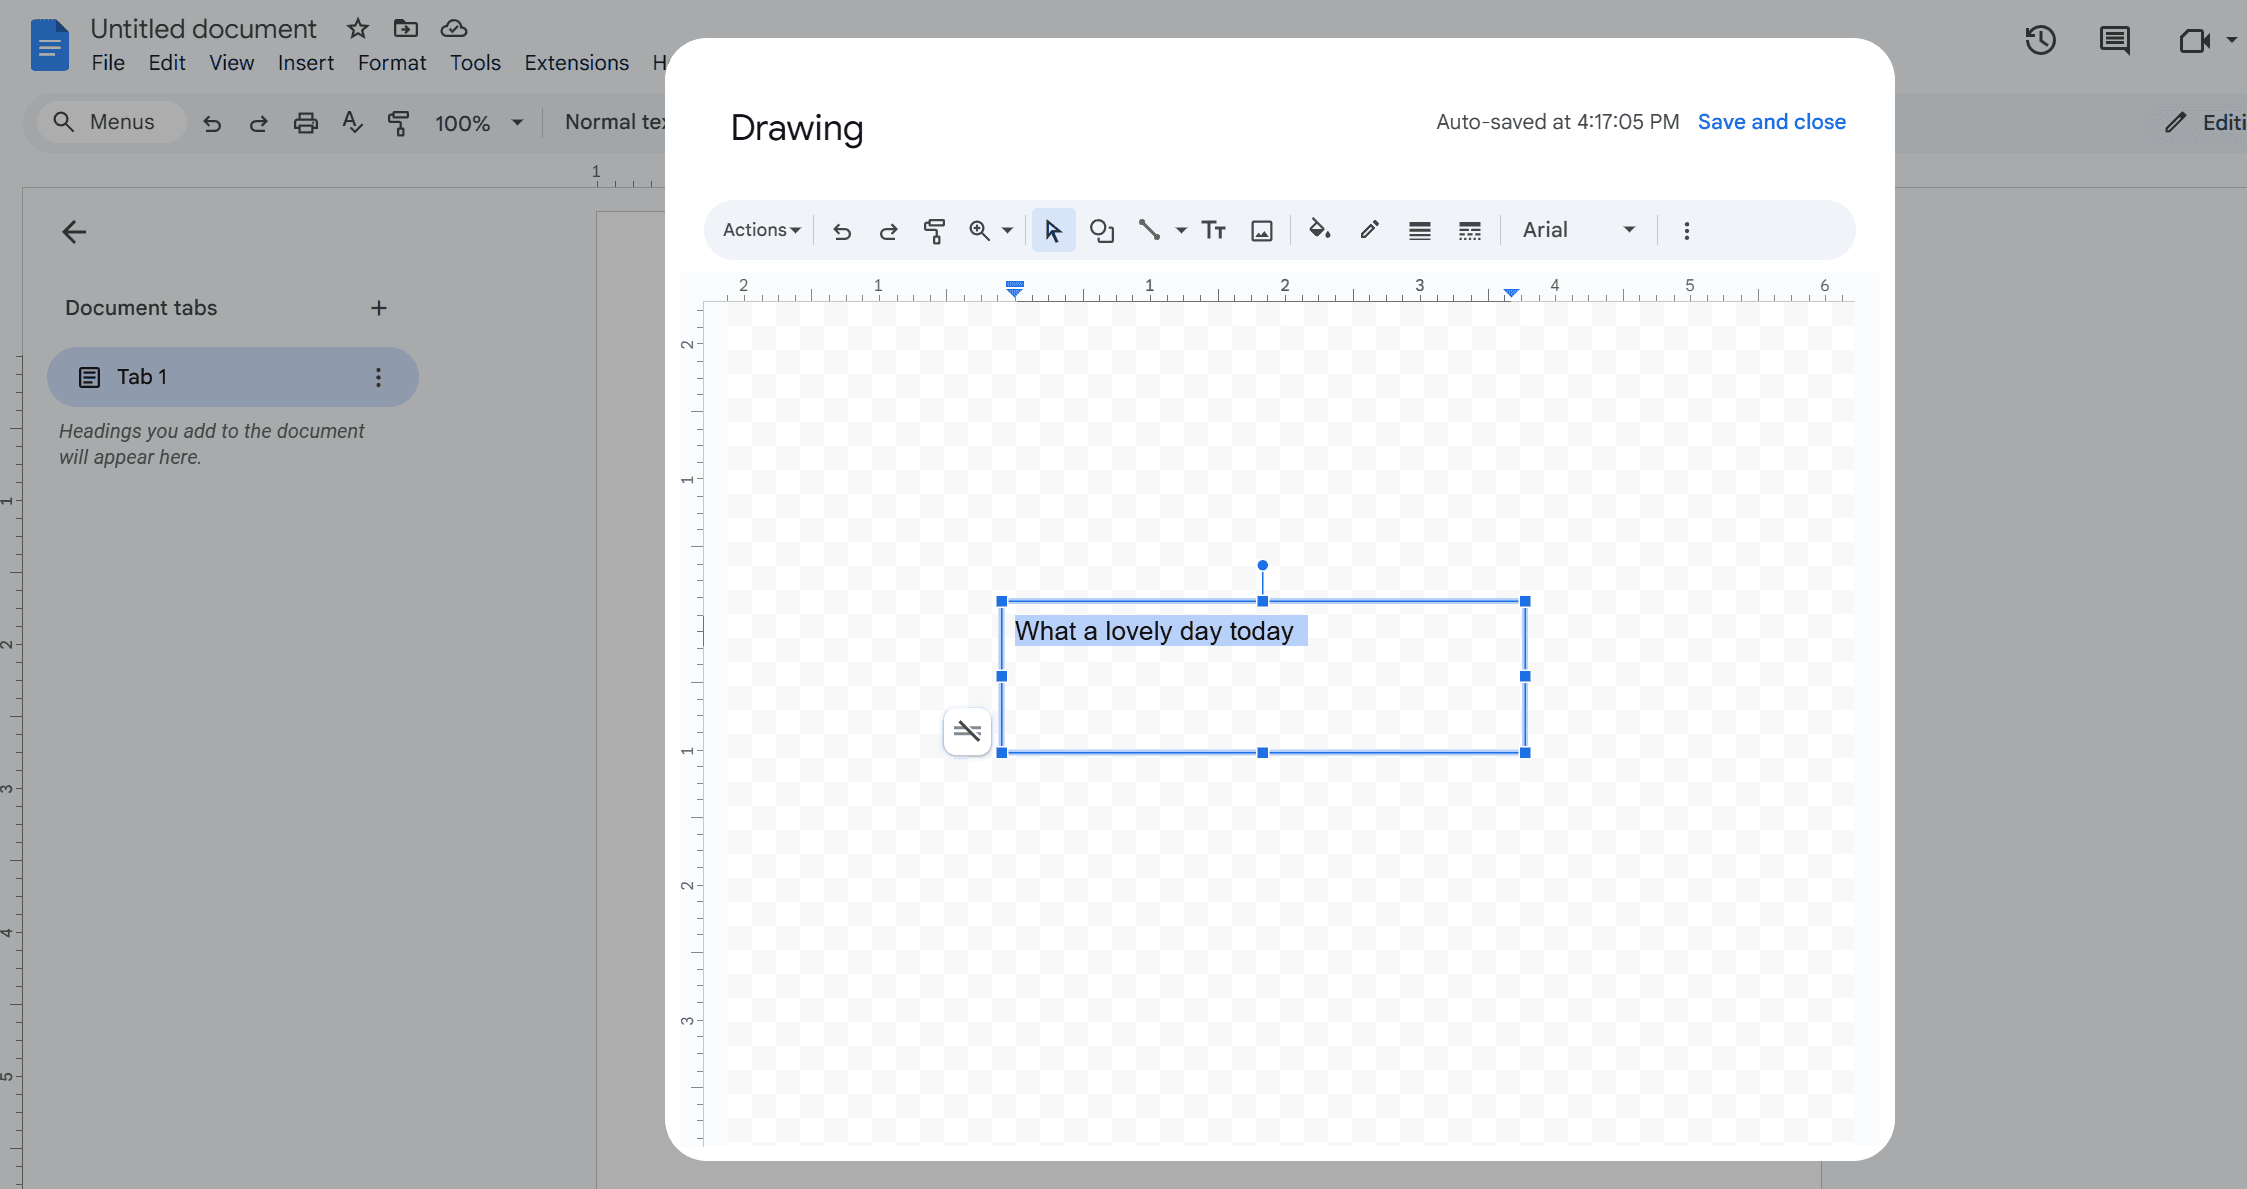
5. Enter Your Text and Format It as Needed
- Type in the text you want to include and use the formatting tools to style it to your preference.
6. Click "Save and Close" to Insert the Text Box into the Document
- Once satisfied with your text box, click "Save and Close" to add it to your document. The text box will appear at the current cursor location in your document.
Using Tables
Step-by-Step Guide
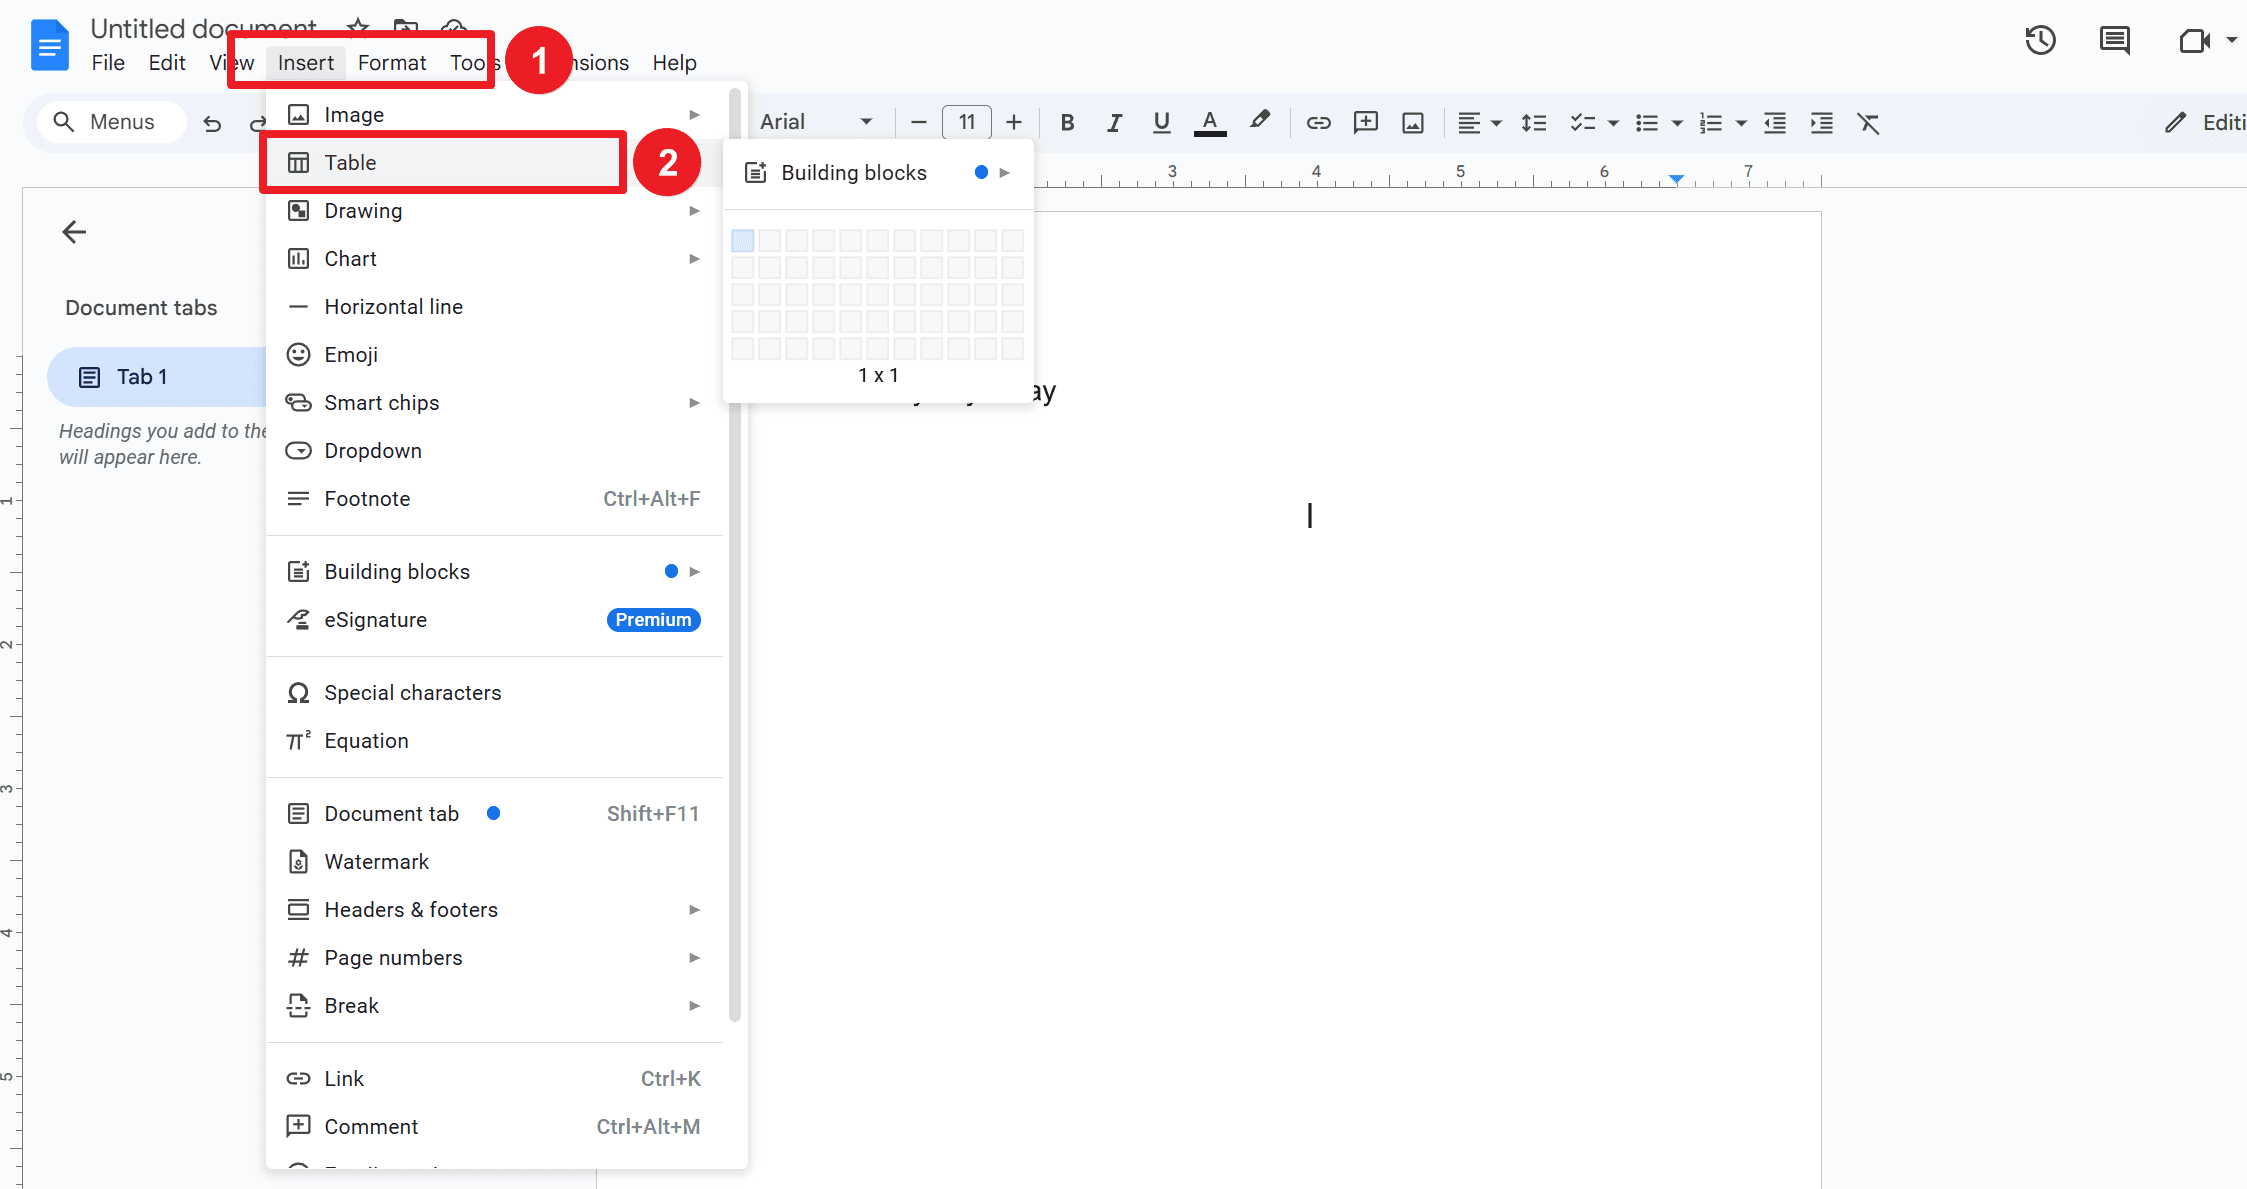
1. Insert a Single-Cell Table:
- Place your cursor where you want the text box to appear in your document.

2. Go to the "Table" Menu and Select the Number of Rows and Columns:
- Click on the "Table" menu at the top, then hover over it to select a single-cell (1x1) table from the grid.
3. Resize the Table as Needed:
- Adjust the table cell size by dragging the borders to fit your text requirements.
4. Enter Your Text and Format It Within the Table Cell
- Type your text into the table cell and use the document's formatting tools (font, size, color, etc.).
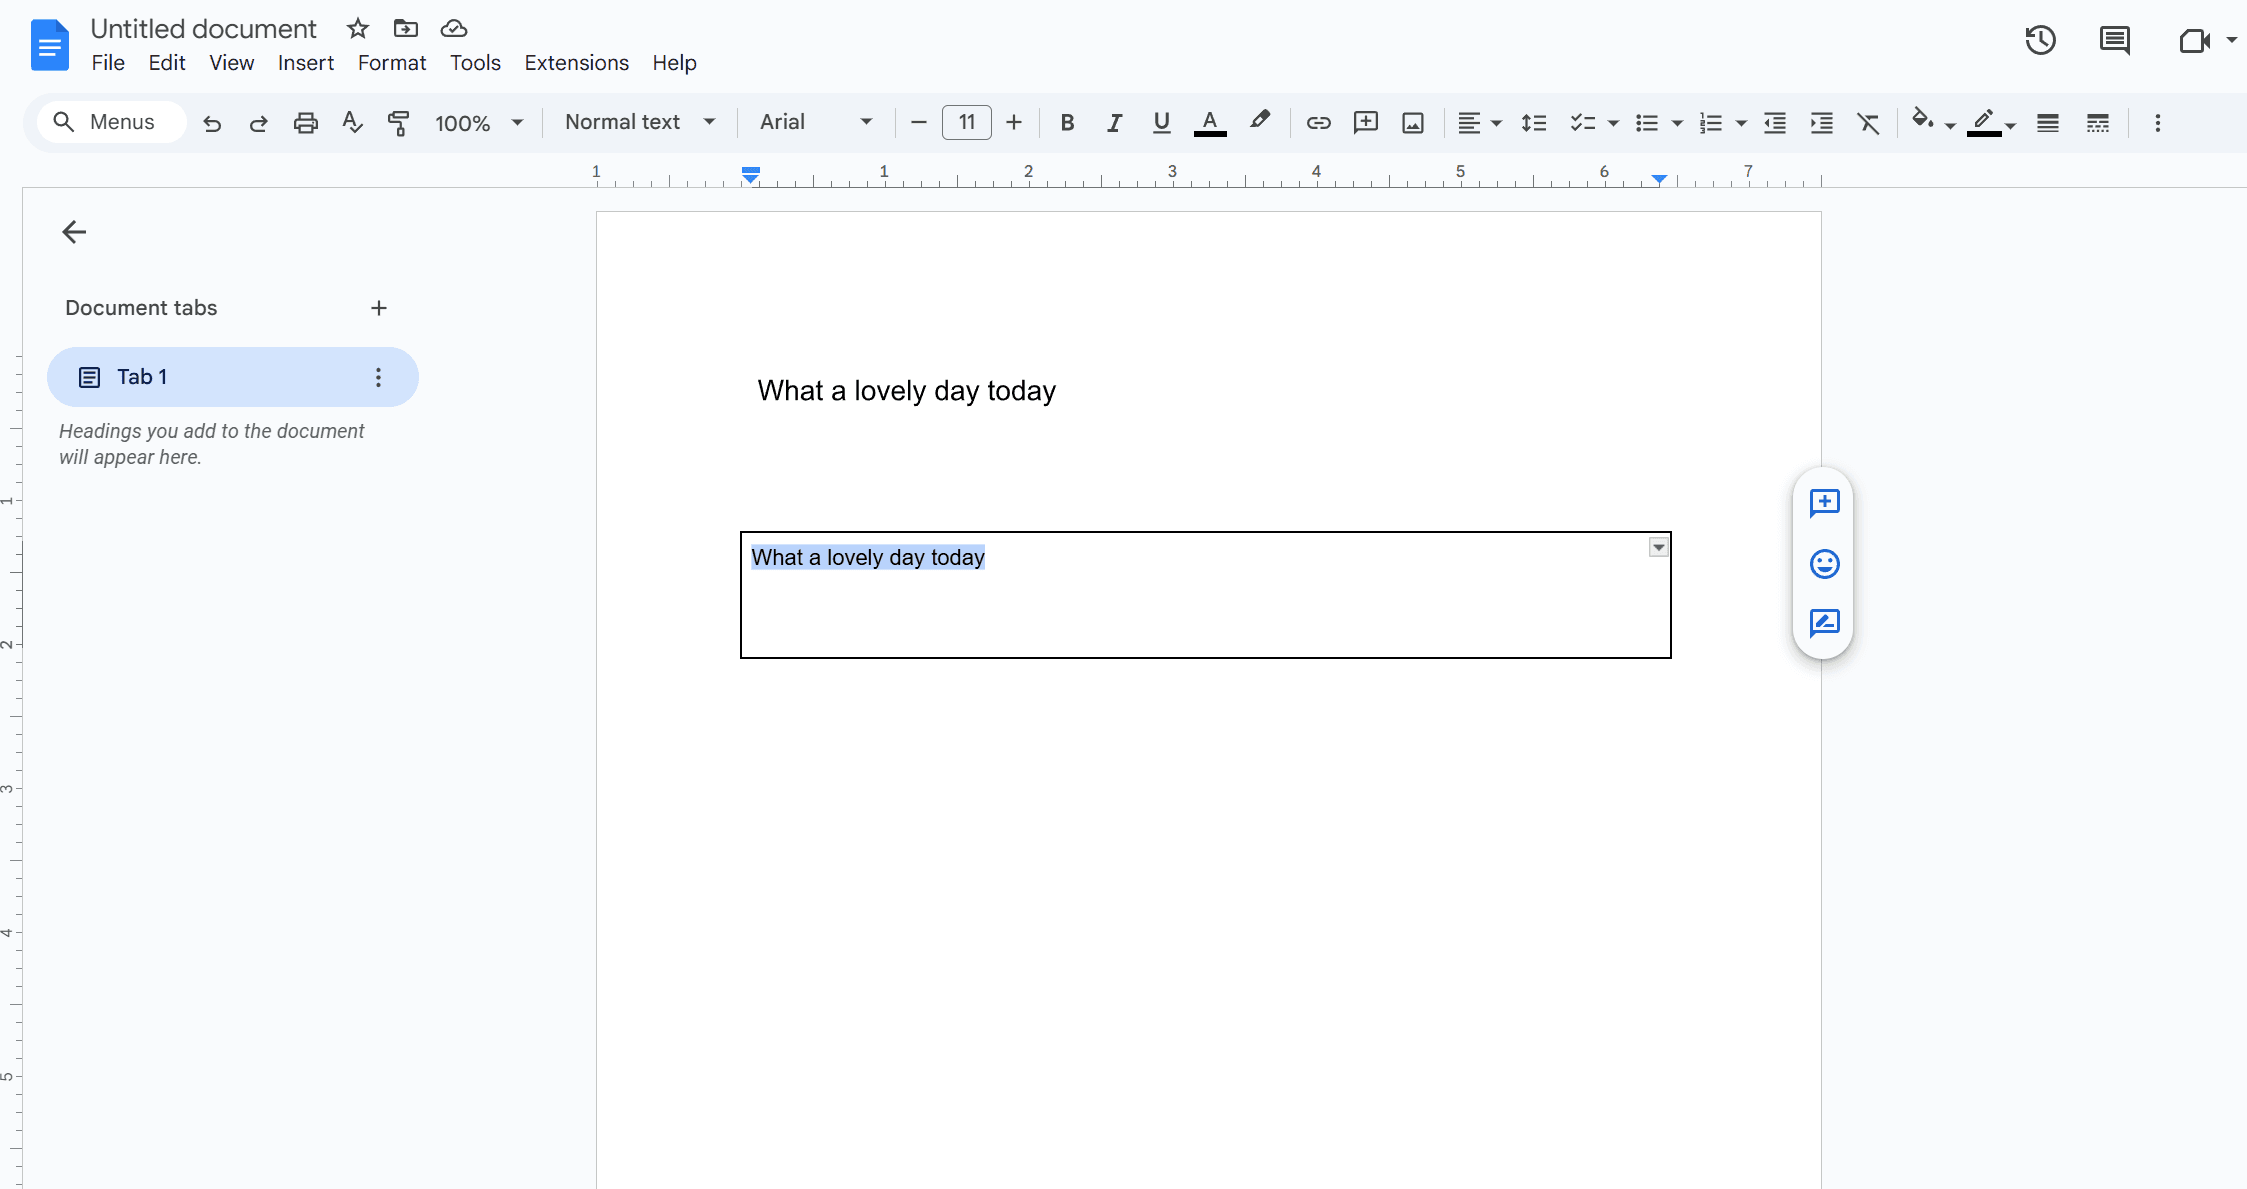
5. Adjust Borders and Cell Color for a Text Box Appearance
- Right-click on the table and select "Table properties." Here, you can set the border color to blend in or stand out and choose a background color for the cell to make it look like a traditional text box.
Using Third-Party Add-ons
1. Go to the "Add-ons" Menu and Click on "Get Add-ons":
- In your Google Docs toolbar, navigate to the "Add-ons" menu and select "Get add-ons."
2. Search for and Install Relevant Add-ons Like "TextBox":
- In the Google Workspace Marketplace, type keywords like "TextBox" into the search bar and find the most suitable add-on. Click "Install" to add it to your Google Docs.
3. Follow the Add-on's Instructions to Insert a Text Box:
- Once installed, the add-on will typically provide straightforward instructions or a tutorial on inserting and customizing text boxes within your document.
Customizing Your Text Box
Customizing a text box enhances its visual appeal and ensures it effectively conveys your message. Here's how you can do it:
1. Formatting Text Within the Text Box:
- Adjust the font size, color, and style according to your preference to make the text stand out.
2. Adjusting the Text Box Size and Position:
- Resize the text box by dragging its corners and repositioning it within the document to fit your layout needs.
3. Changing the Border Style and Color of the Text Box:
- Modify the border's style, thickness, and color to match your document's design.
4. Adding Background Color to the Text Box for Emphasis:
- Apply a background color to the text box to highlight its contents and draw attention.
Conclusion
Experimenting with text boxes can significantly enhance the design and readability of your documents. Don't hesitate to try different fonts, sizes, colors, and positions to discover what works best for your content. Customizing text boxes adds a professional touch and helps emphasize key points. We invite you to share your tips and experiences using text boxes in the comments. Your insights could be invaluable to others looking to improve their document design. Happy designing, and let your creativity flourish!

![How to Insert Text Box in Google Docs? [With Visual Instructions]](https://cms-cdn.pdfagile.com/How_to_Insert_Text_Box_in_Google_Docs_With_Visual_Instructions_0b0cf01ebf.png)
