All right, so picture this! You have spent ages getting your Excel spreadsheet just accurate. Line up all the numbers & the perfect formulas. Then someone jumps in and whoops. All of a sudden everything is a jumble. Sound familiar? Yes! It has happened to almost many people.
That's where locking cells come in. It's basically like putting a little "do not touch" sign on your data, so people (or even your future, slightly less careful self) can't accidentally wreck it. You can lock down the whole sheet, just certain bits, or even just the cells with all your fancy formulas. Think of it as your digital safety net.

How to Lock All Cells in an Excel Worksheet?
Let's start with the big one: locking everything. It is a great way to make sure your hard work stays exactly how you left previously. No more accidental edits, no more weird deletions. Just good, solid, protected data.
Step 1. Open the Review Tab
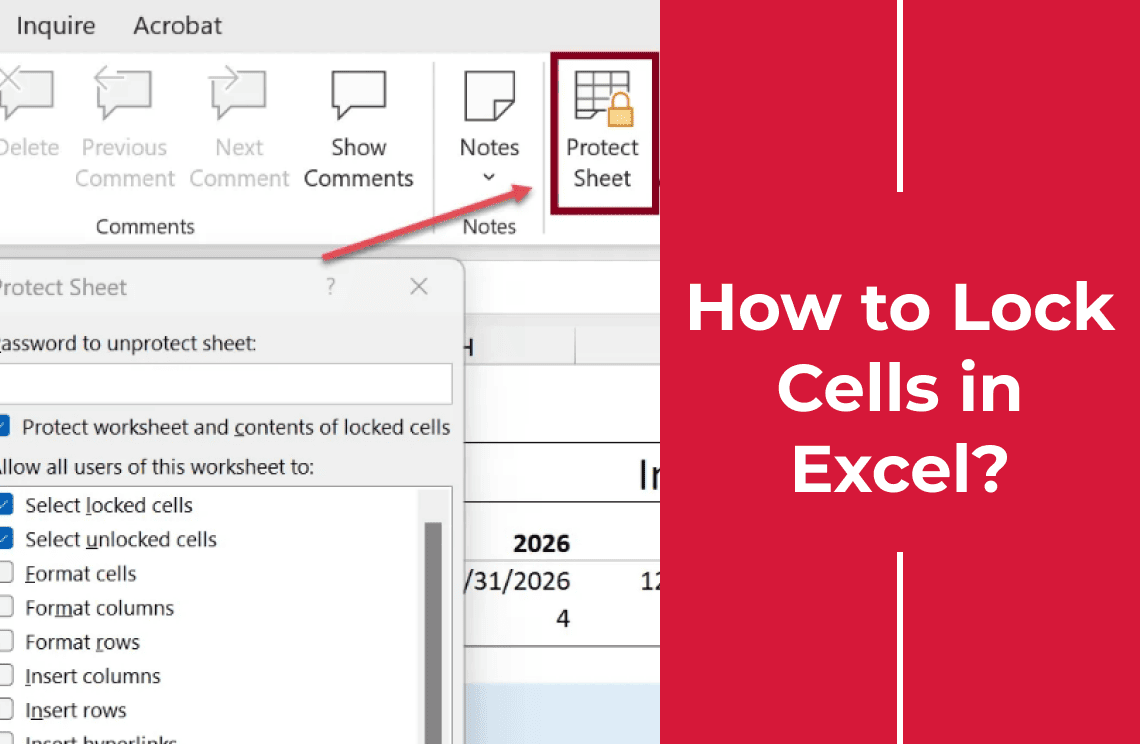
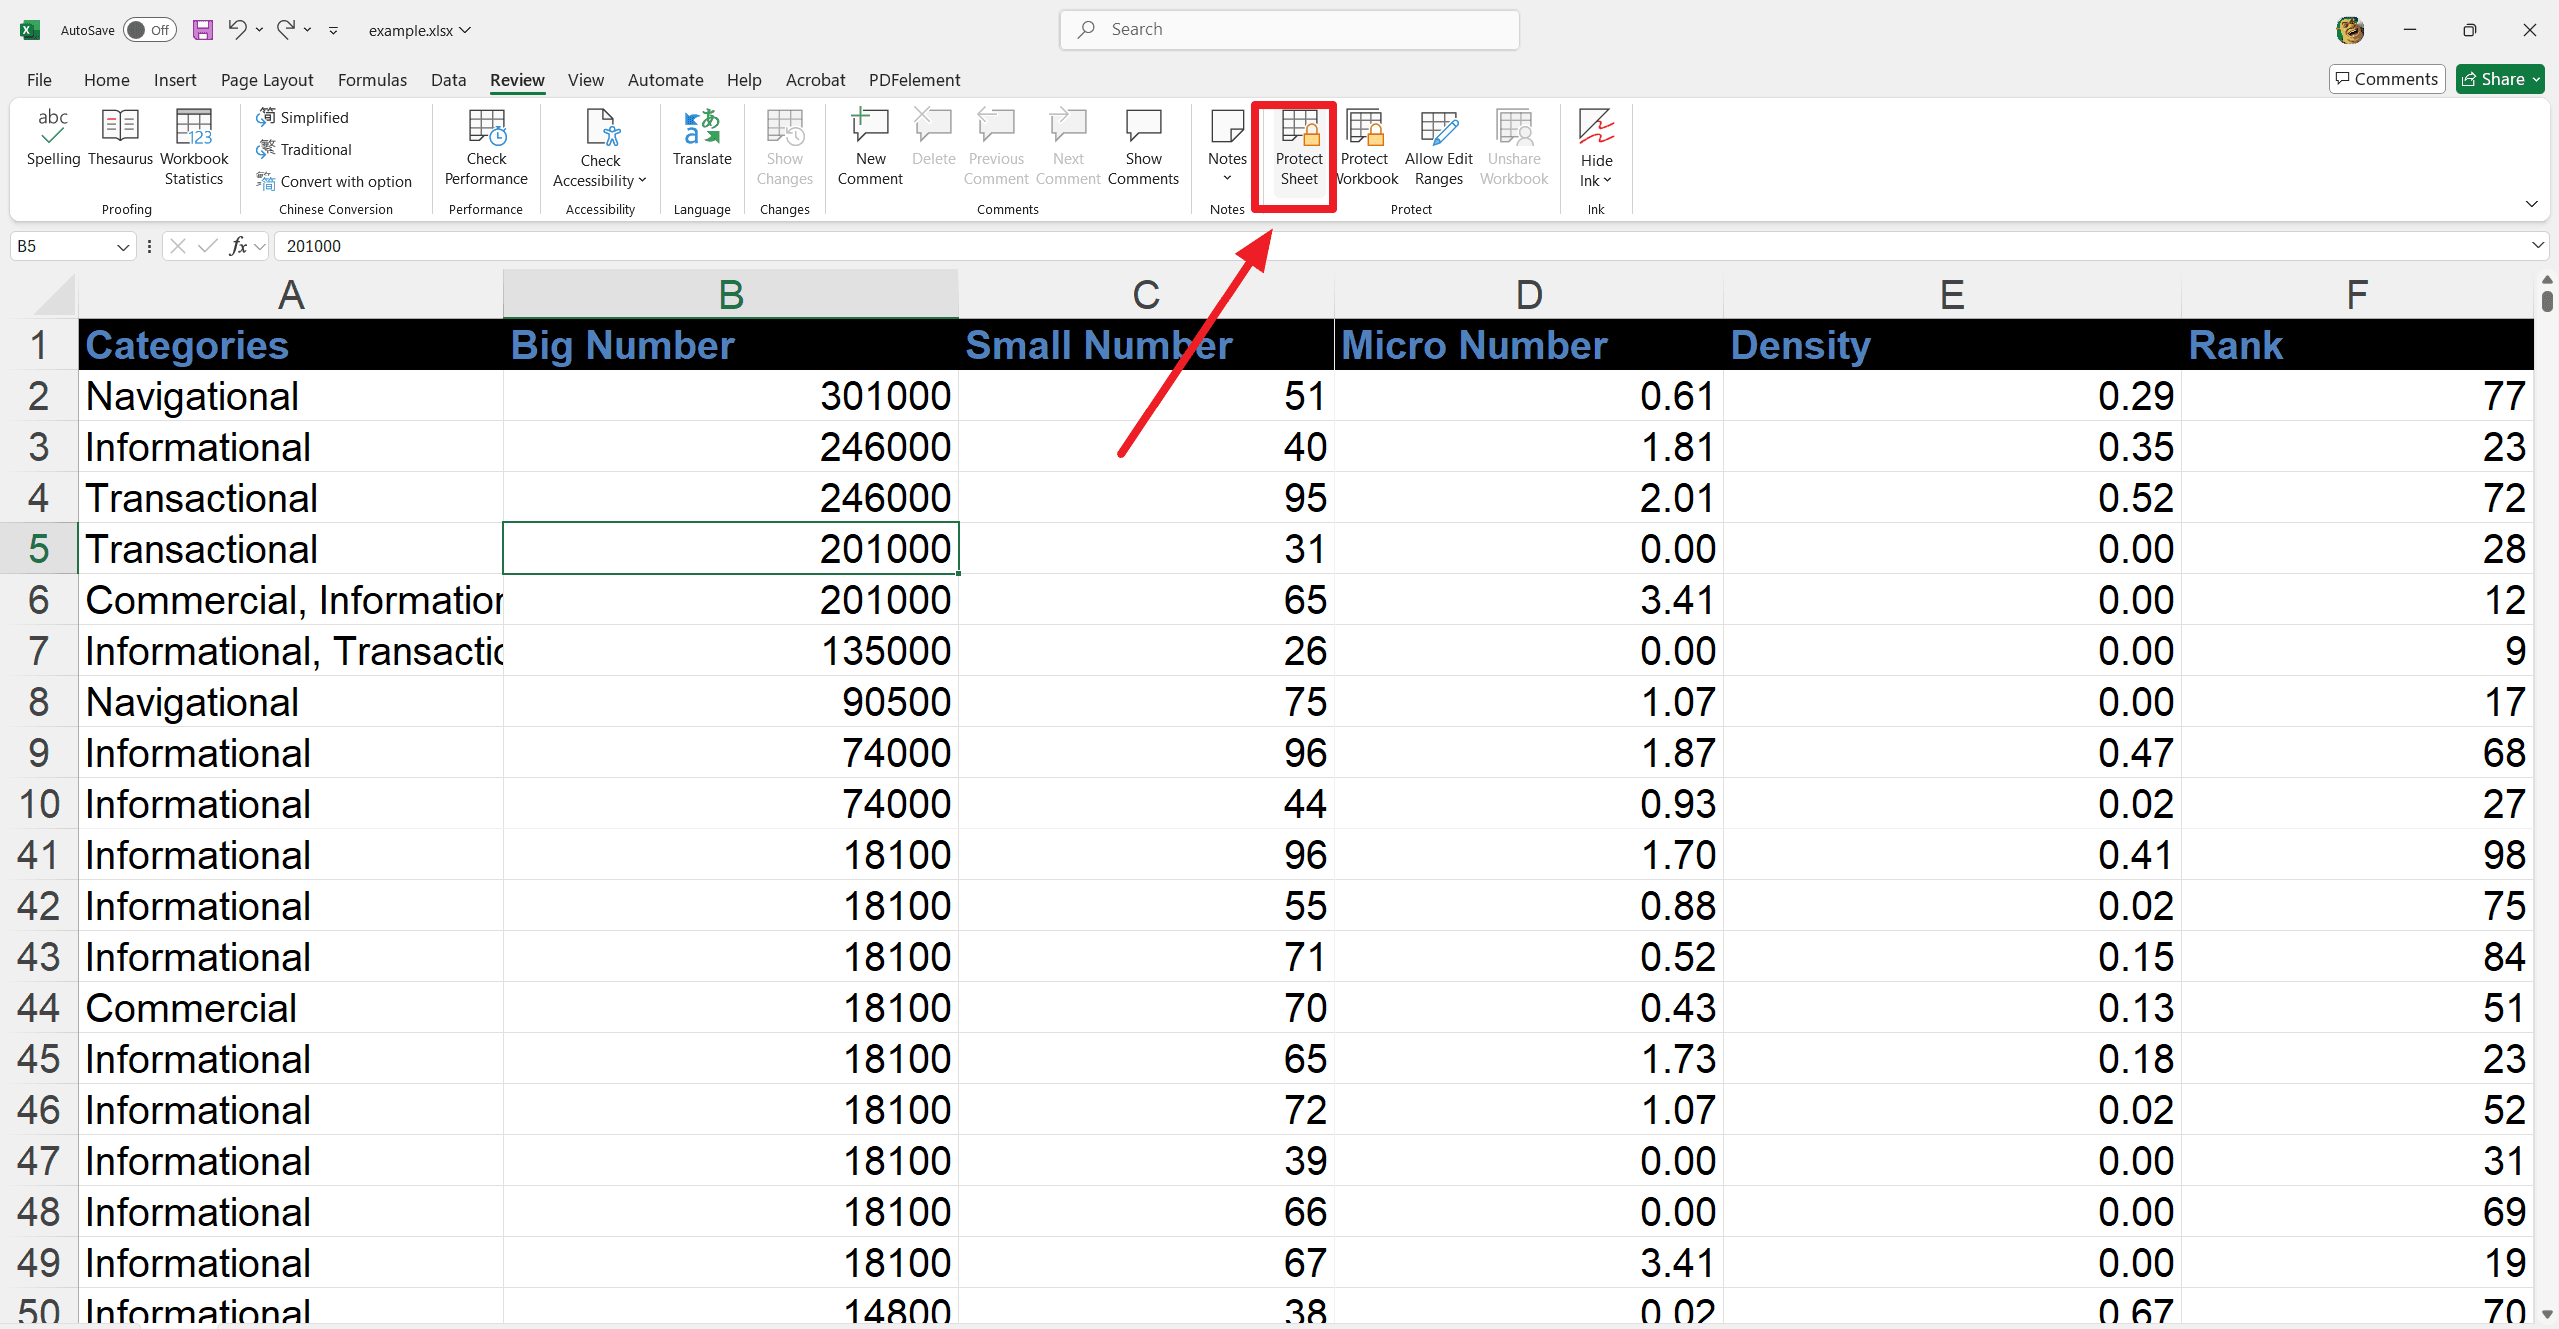
Open your Excel file and head to the Review tab at the top of toolbar. Here you will find all the options to protect your sheet perfectly.
Step 2. Click on 'Protect Sheet'
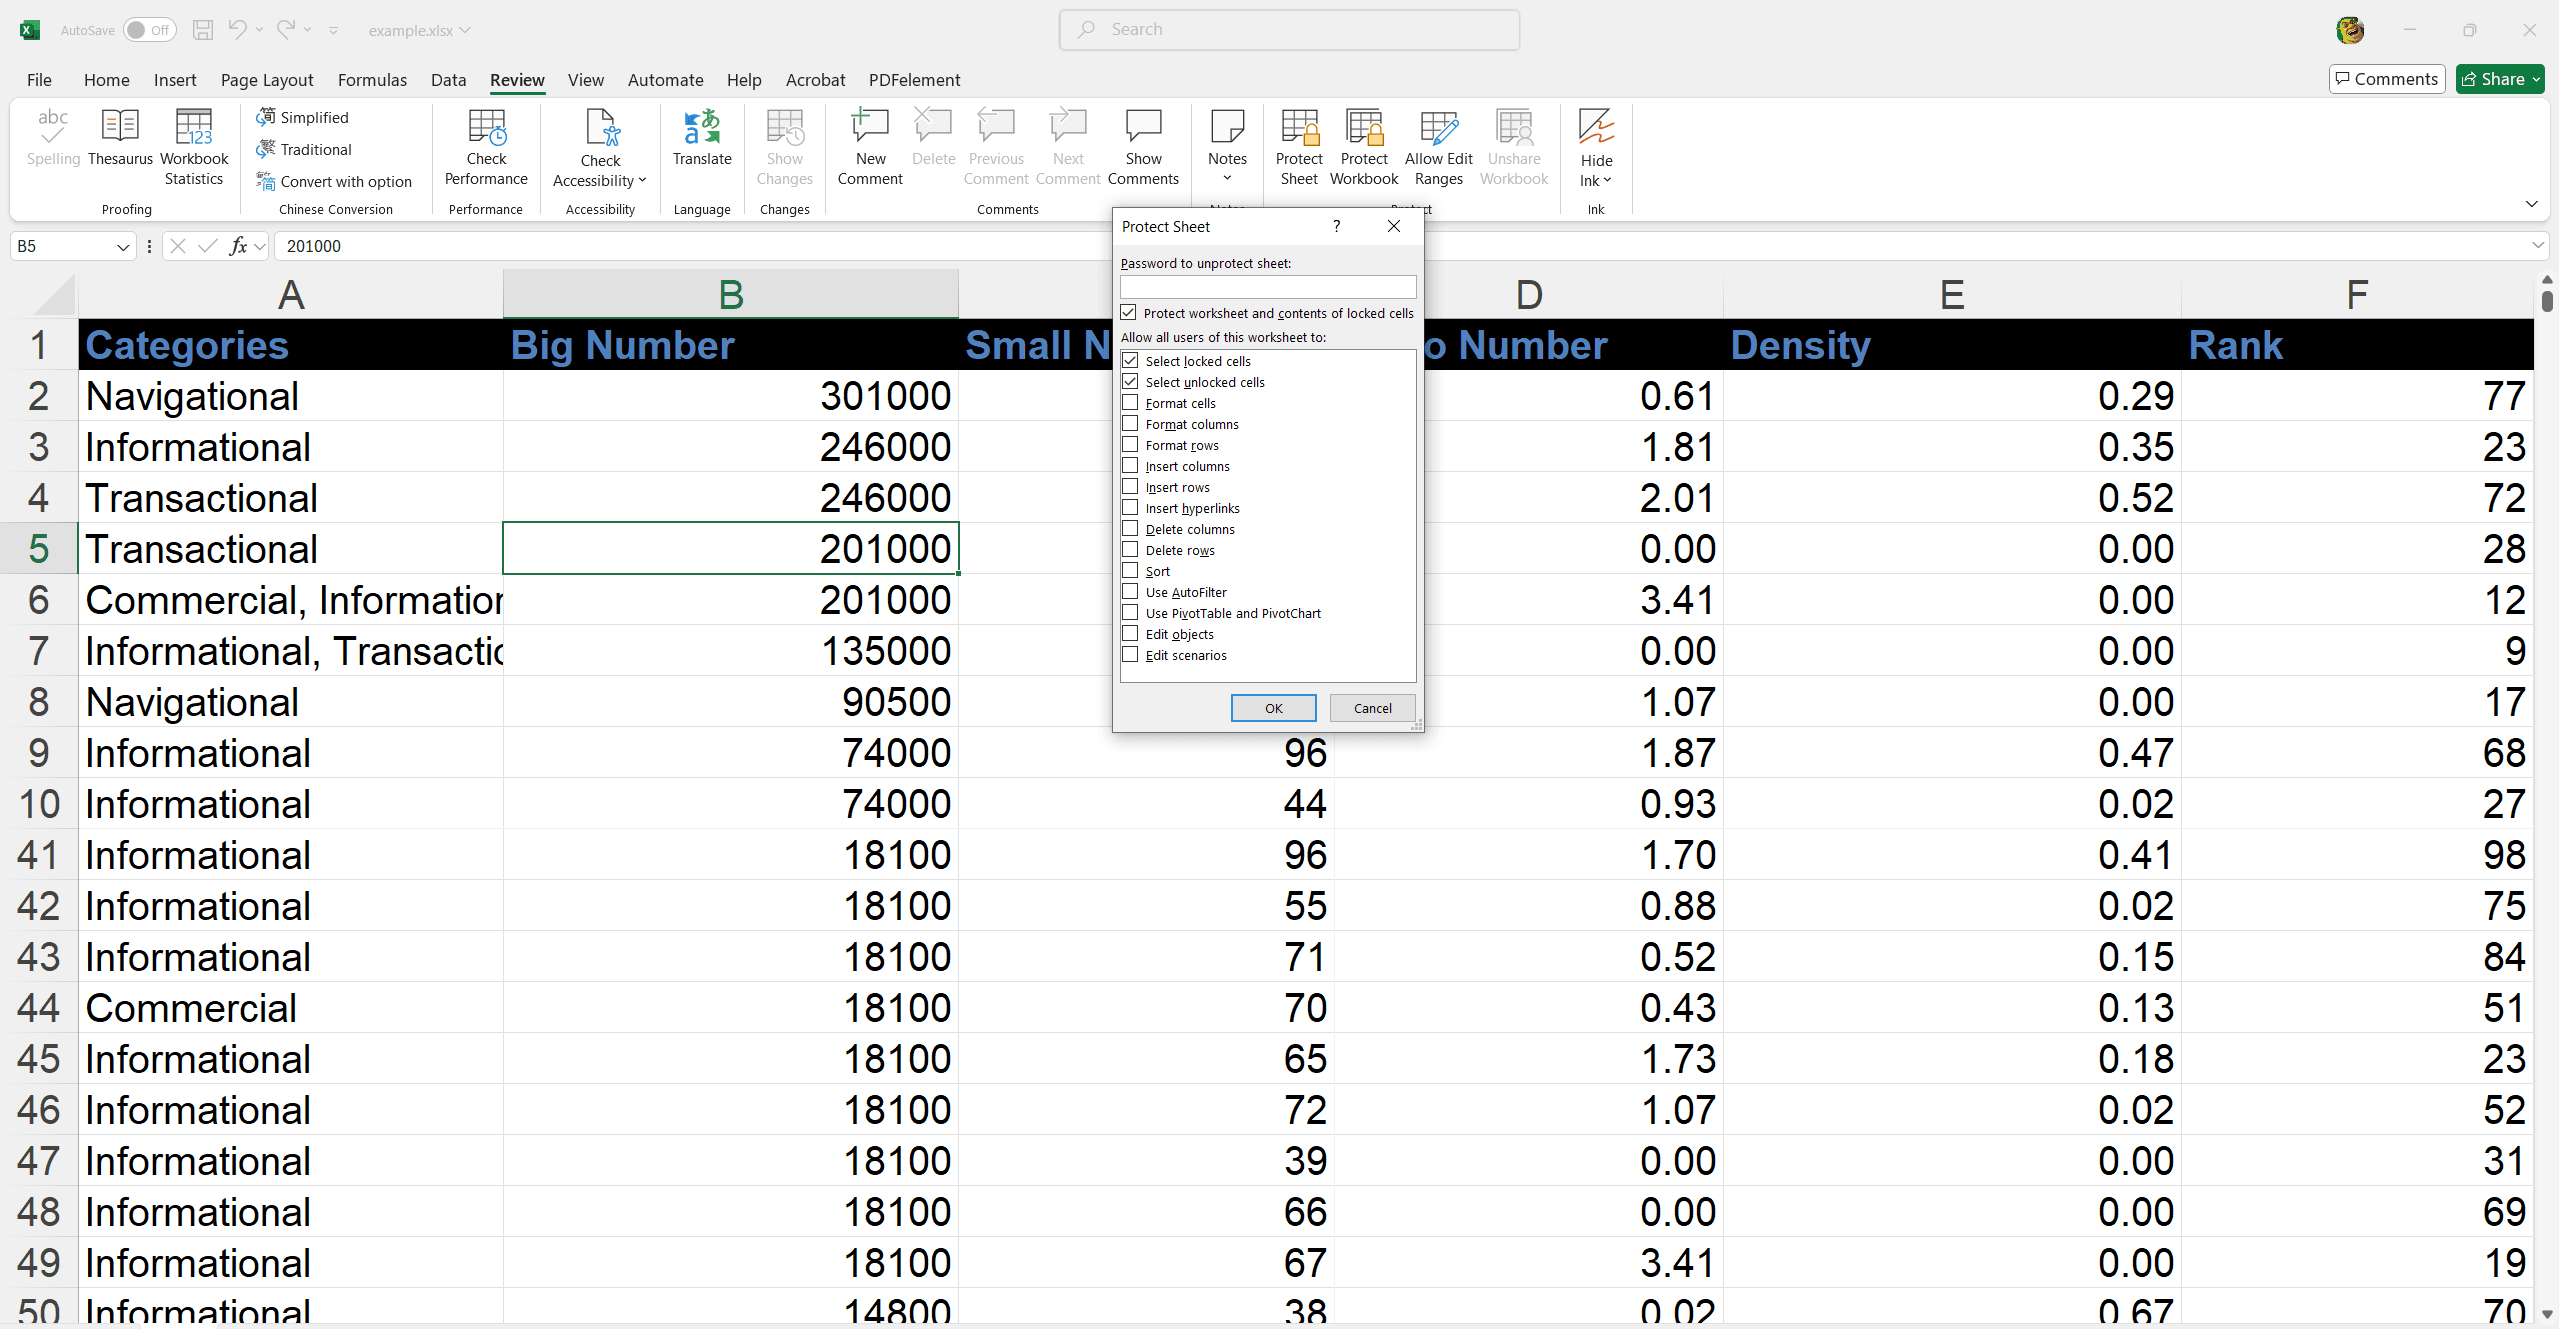
Next, select Protect Sheet. A pop-up will appear, allowing you to set a password (optional but highly recommended).
You'll also see some customization options—Excel lets you choose what actions others can still perform, like selecting or viewing certain cells.
Step 3. Confirm and Lock the Sheet
Click OK after setting your preferences! Your worksheet is now locked. Excel will display a warning message if someone tries to edit a locked cell. It lets them know the sheet is protected.
Now your data is safe from accidental edits. You can work without worrying about your document loss!
How to Unlock Your Worksheet?
Need to make some changes to your locked worksheet? No problem! Here's how to unlock it:
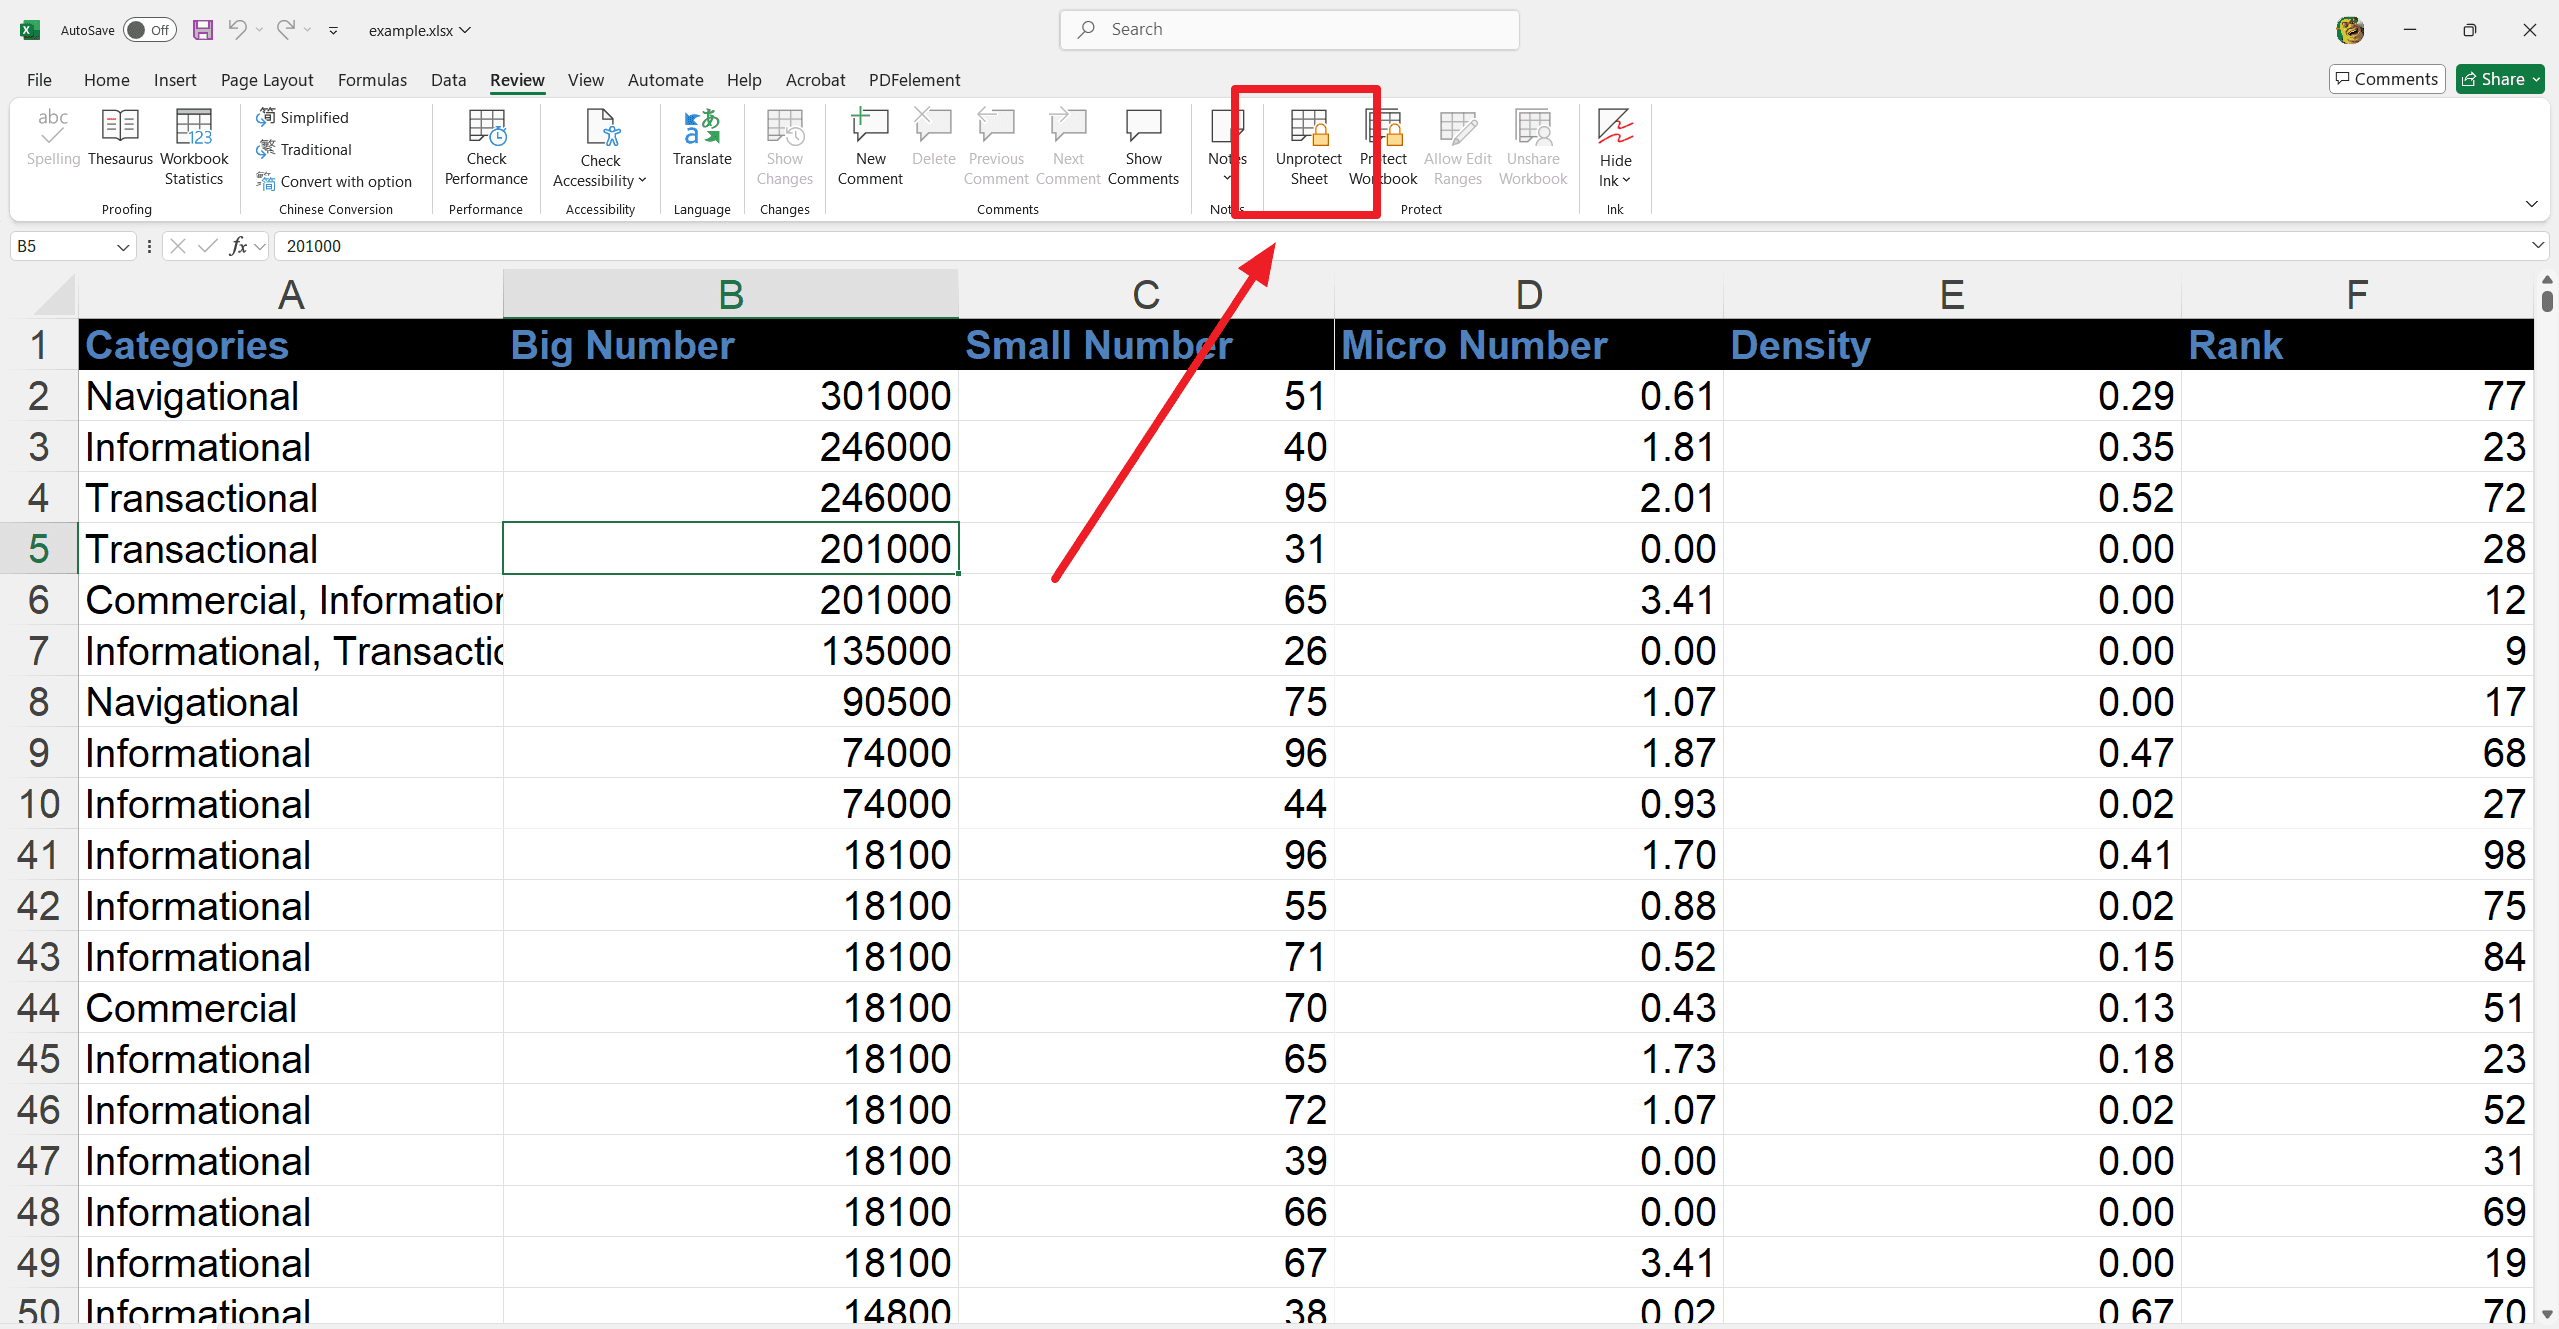
1. Go to the Review tab at the top of Excel.
2. Click Unprotect Sheet.
3. Enter your set password.
Now you can edit your worksheet as required.
How to Password Protect an Excel File?
Do you want to keep your Excel file extra confident? Password ensures that only authorized users can open your file. Thus encrypting your file is smart for confidential business data and personal records. See how you can lock your Excel file with a password in just a few easy steps:
Step 1. Open File: Open the Excel file you want to protect.
Step 2. Go to Info: Click "File" > "Info."
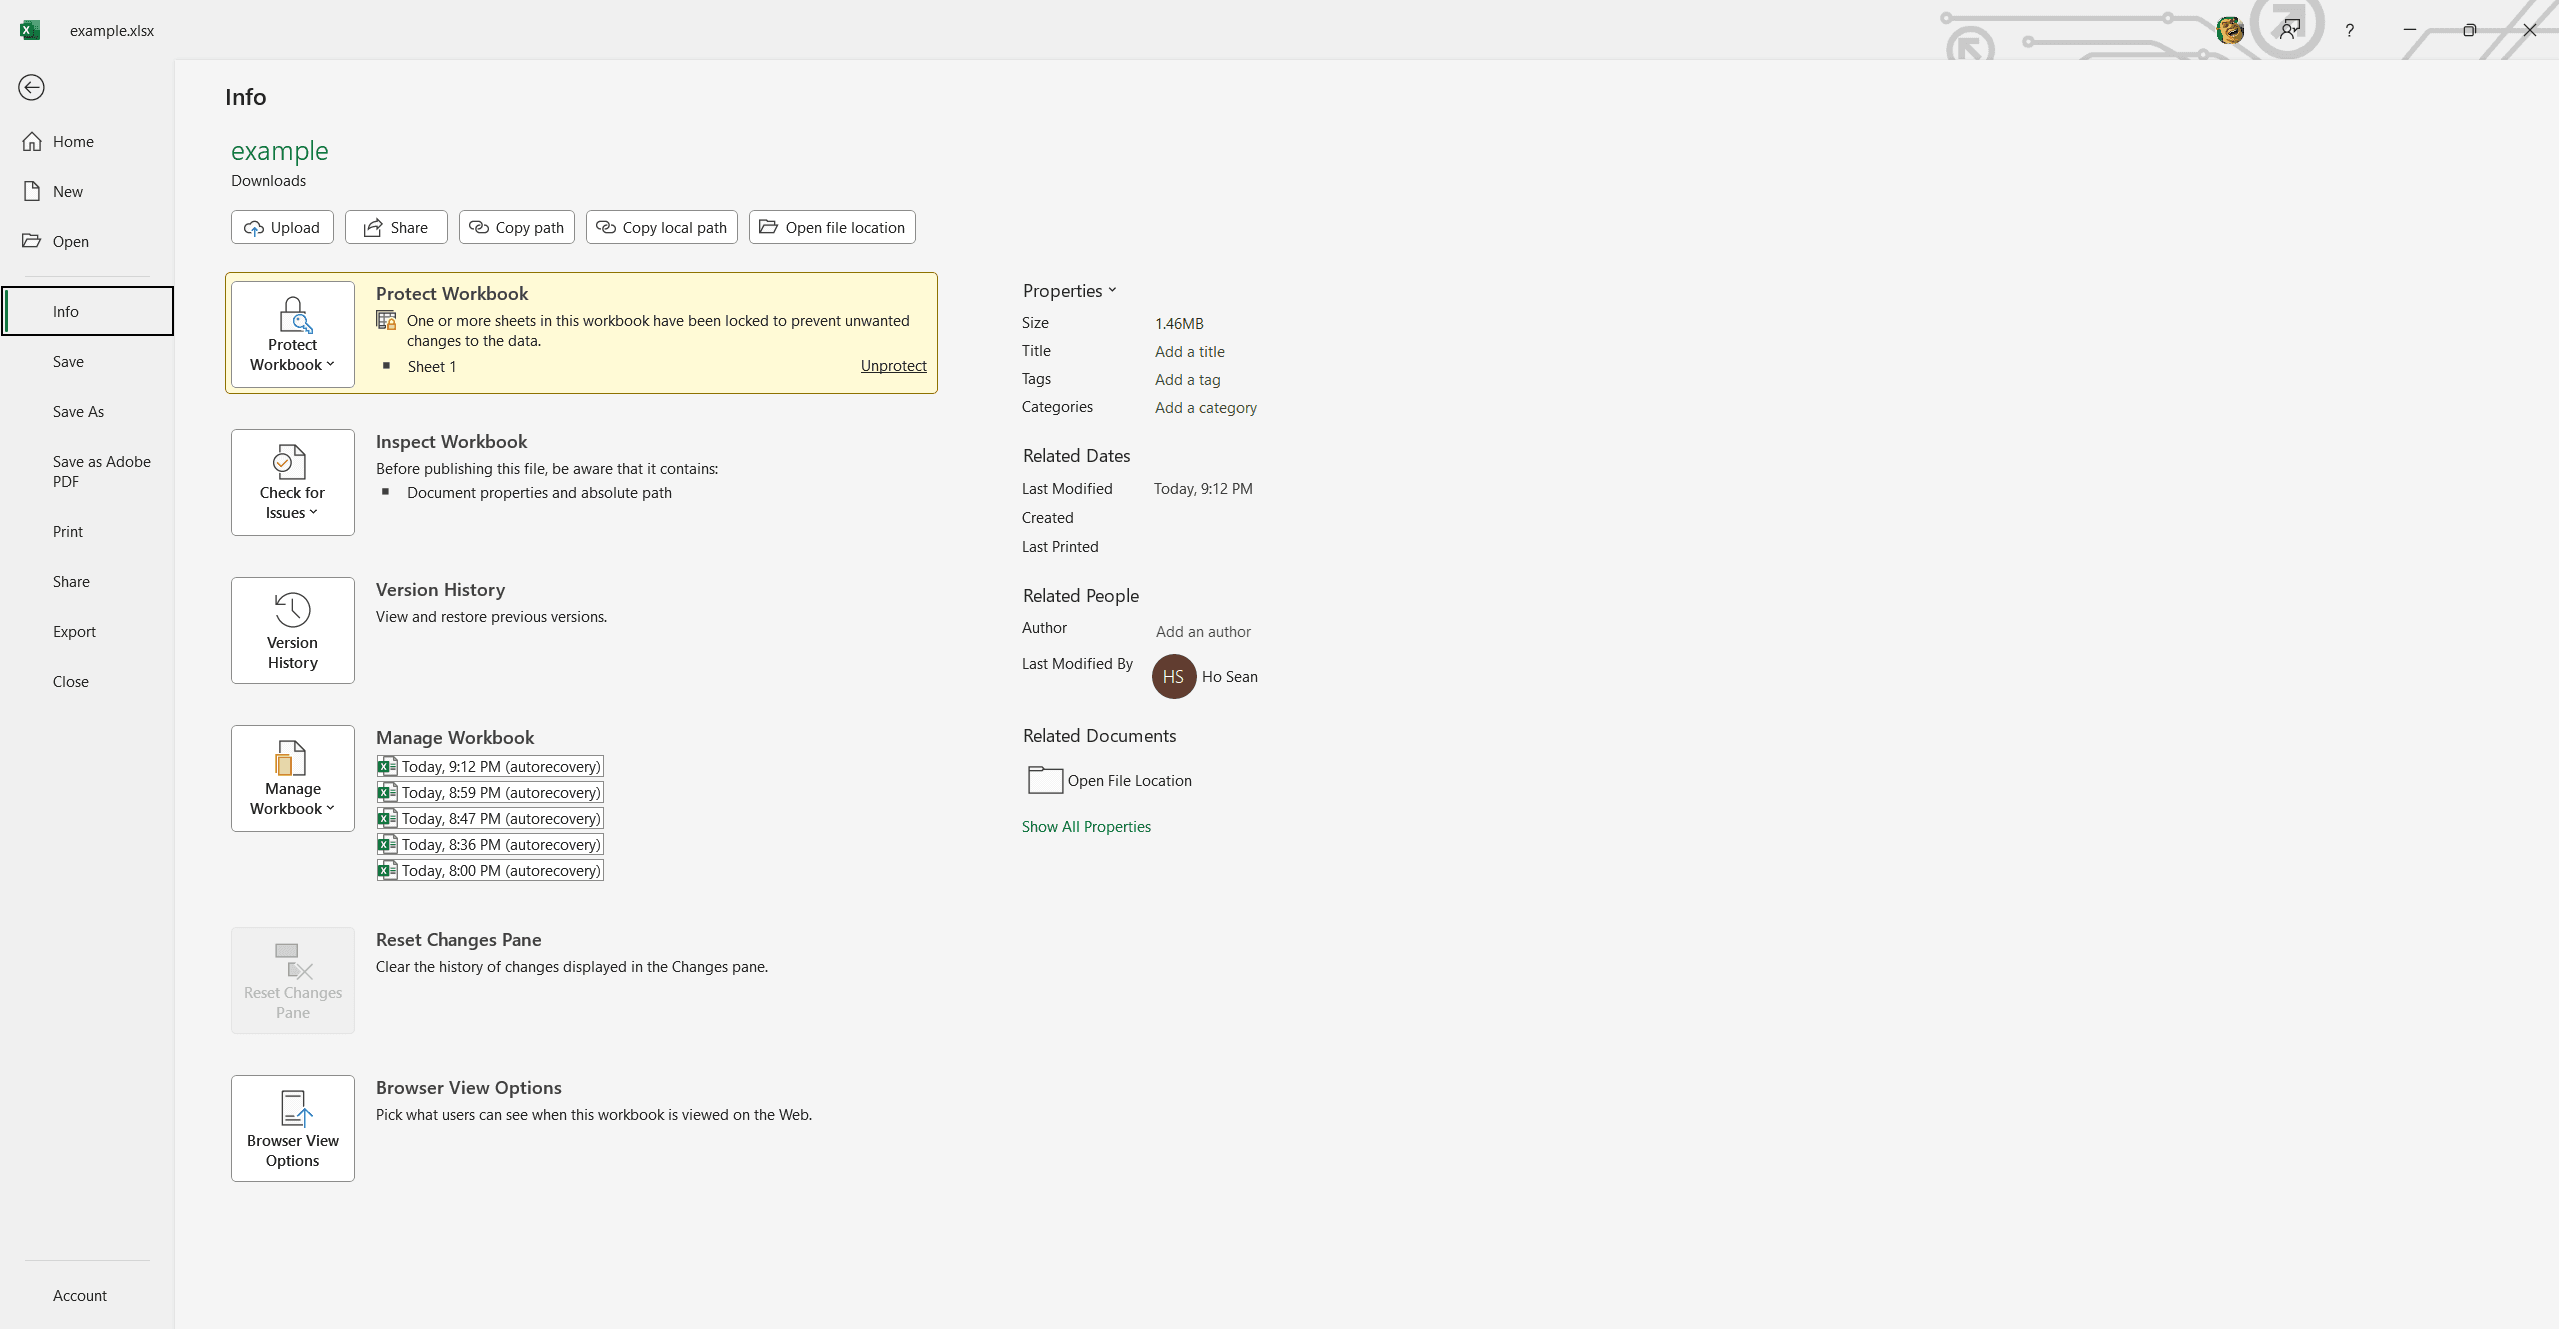
Step 3. Encrypt with Password: Click "Protect Workbook" > "Encrypt with Password."
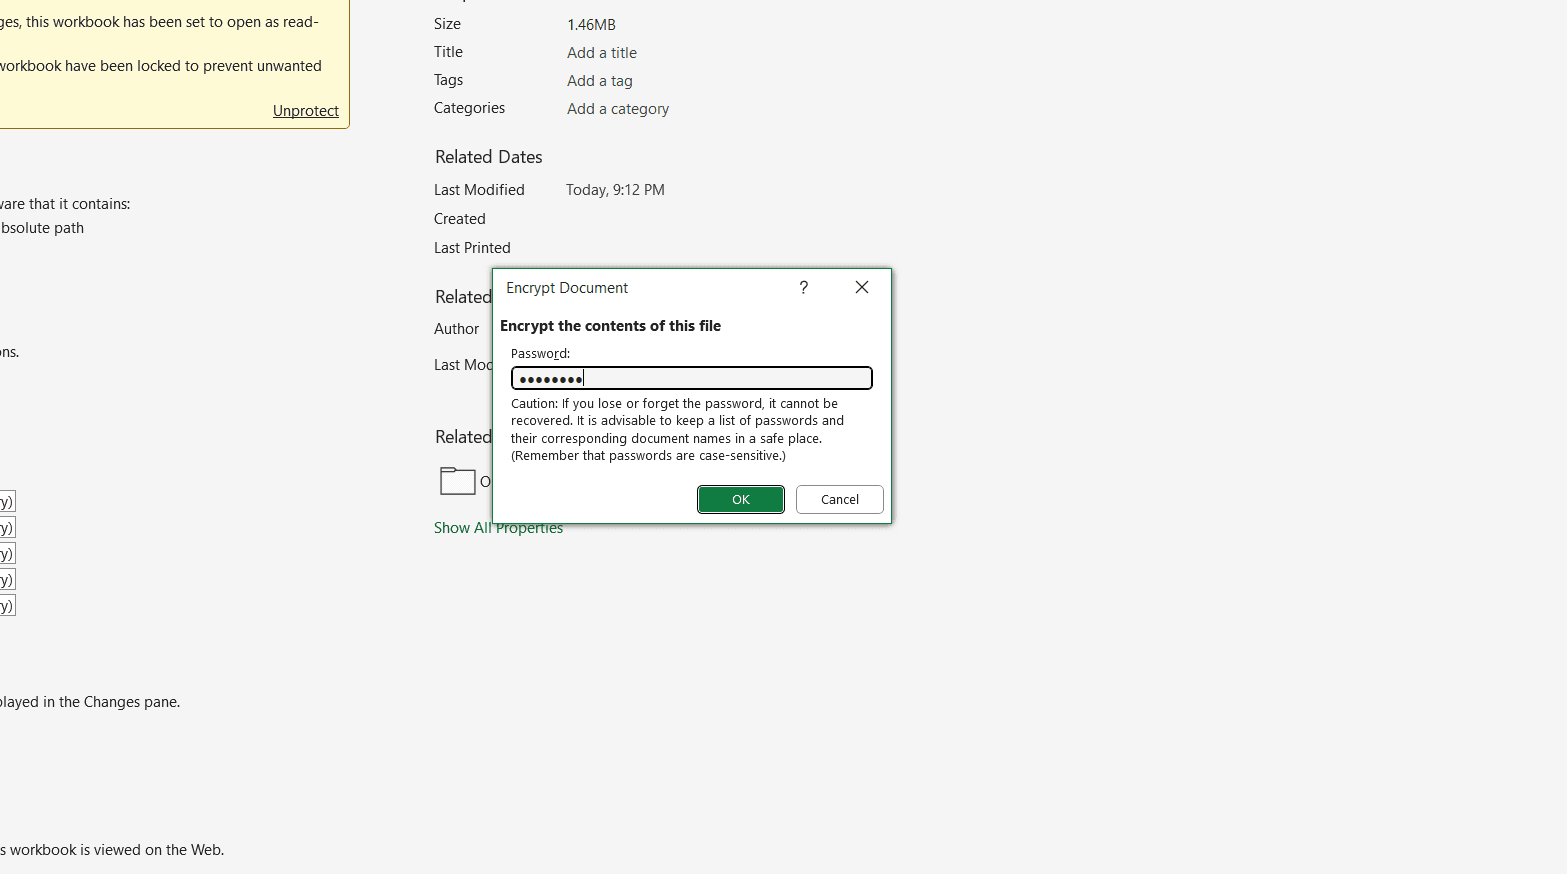
Step 4. Set Password: Enter your desired password and click "OK."
Step 5. Confirm Password: Re-enter the password and click "OK."
Step 6. Save: Save your file (Ctrl + S).
How to Lock Specific Cells in Excel?
You don't want to lock the entire worksheet sometimes specific cells only. This way, certain parts stay protected while others remain editable.
Let us take an example. You might allow changes to expense values while locking the formulas and category names to prevent accidental edits in a budget spreadsheet.
See how to do this:
Step 1: Change Cell Protection Settings
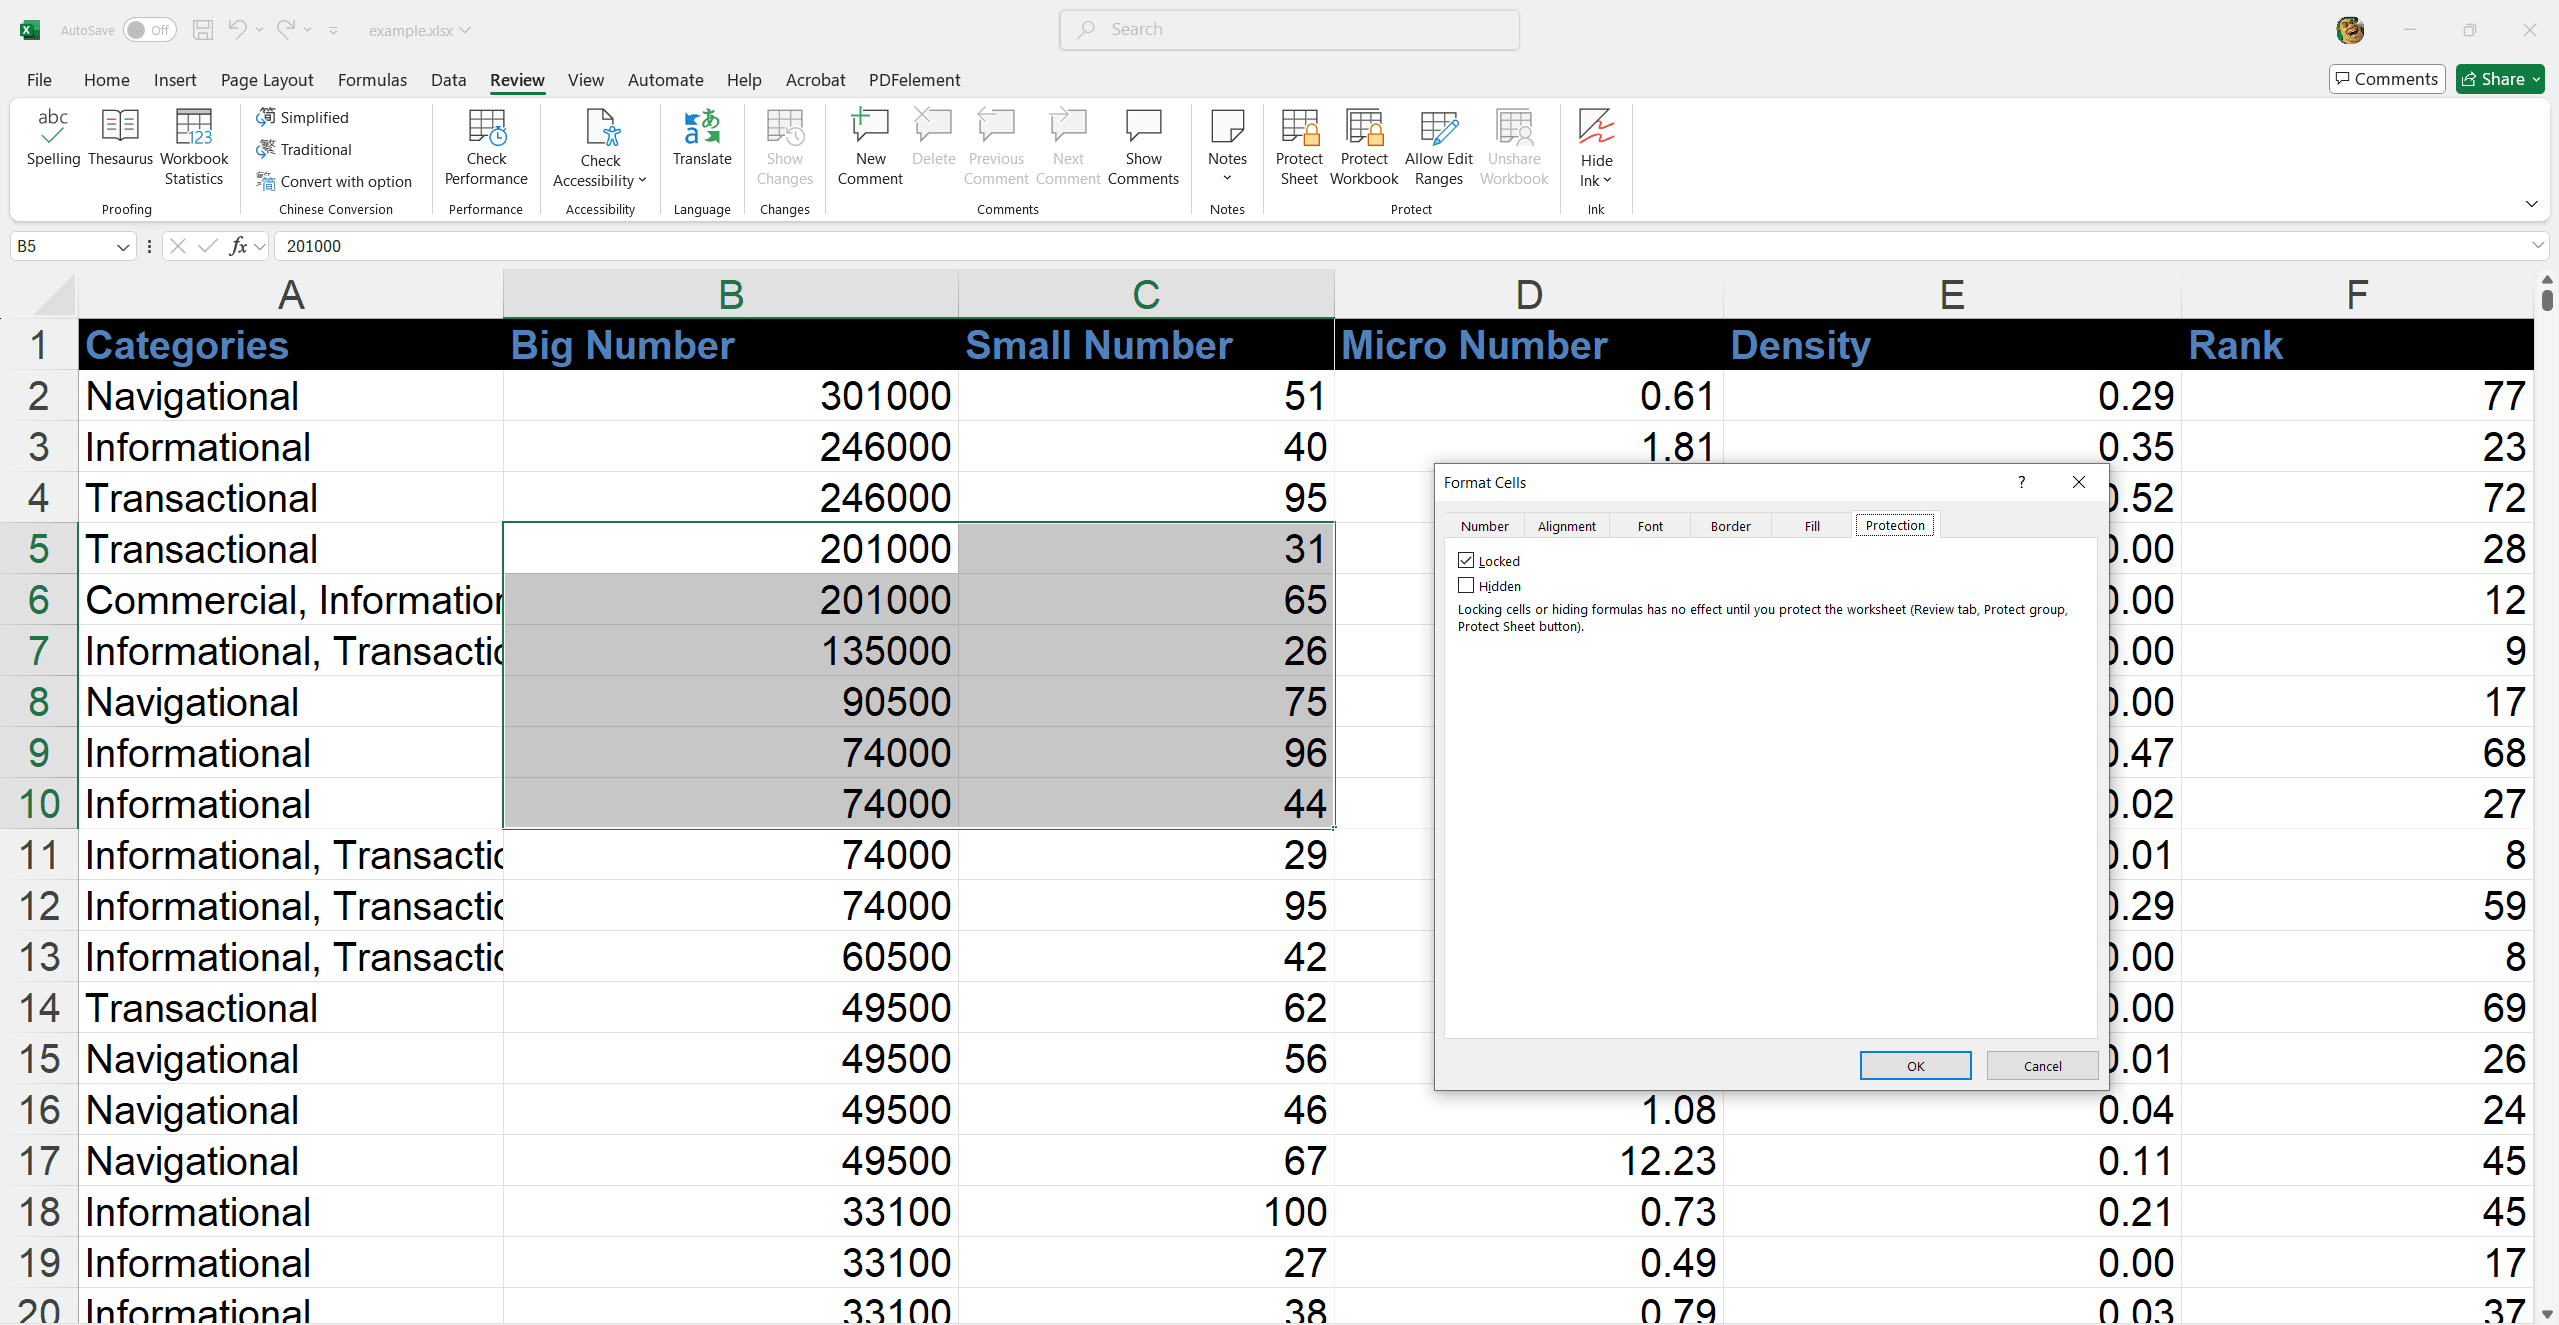
Unlock Editable Cells: Select the cells you want to allow editing. Right-click and choose "Format Cells." Go to the "Protection" tab. Uncheck "Locked" and click “OK.”
Step 2: Turn on Sheet Protection
Protect Sheet: Go to the "Review" tab. Click "Protect Sheet." (Optional) Enter a password. Click "OK."
How to Lock Formula Cells?
Step 1. Unlock All Cells: Select all cells, right-click, "Format Cells," "Protection" tab, uncheck "Locked," "OK."
Step 2. Select Formulas: "Home" tab, "Find & Select," "Go To Special," "Formulas," "OK."
Step 3. Lock Formulas: Press CTRL + 1, "Protection" tab, check "Locked" (and optionally "Hidden"), "OK."
Step 4. Protect Sheet: "Review" tab, "Protect Sheet," (optional password), "OK."
Final Words
Securing your Excel data is simple with the right protection settings. Whether you're locking a full sheet, specific cells, or formulas, these steps help prevent unwanted changes. You might find these resources helpful for more Excel tips and detailed guides: Excel Tips and How-To & Tips.

