In today's digital world, the Portable Document Format (PDF) has become the go-to standard for sharing and printing documents, owing to its consistent formatting across various platforms and devices. Whether you're printing important work files, academic papers, or personal documents, ensuring they maintain their formatting as intended is crucial. Thankfully, if you're a Mac user, you'll find that printing PDFs is incredibly straightforward owing to the robust built-in tools available on macOS. This guide is designed to simplify the process and help you understand "how to print PDF on Mac" easily, whether using the native Preview app or third-party applications like PDF Gear. With this step-by-step walkthrough, you'll quickly learn the efficient methods to print a PDF on Mac, ensuring your documents come out perfectly every time.
Understanding PDFs and Mac Compatibility
PDF, or Portable Document Format, is a versatile file type designed to present documents consistently across different devices and platforms. Developed by Adobe in the early 1990s, PDFs preserve fonts, images, graphics, and the overall layout of any source document, making it an ideal choice for professional and personal printing tasks. Its ability to be viewed without any formatting changes ensures accuracy, making it highly popular in both business and educational settings.
On a Mac, handling PDFs is seamless due to macOS's robust capabilities. The operating system’s native Preview app allows users to view, annotate, and print PDFs easily without requiring additional software. Moreover, macOS supports easy printer integration, offering a straightforward experience when managing print settings such as page range, orientation, and double-sided printing. These built-in features make Macs particularly user-friendly for anyone wondering how to efficiently print a PDF on a Mac.
Step-by-Step Guide: How to Print PDF on Mac
Printing a PDF on a Mac is a straightforward process thanks to its intuitive design and robust built-in features. This guide will walk you through the necessary steps to ensure a smooth printing experience, covering everything from opening your PDF in macOS Preview to adjusting key settings for optimal results. You’ll learn how to select specific pages, set the desired number of copies, and choose the best orientation and print quality. Utilizing both macOS’s native tools and potentially complementary third-party apps can enhance your printing capabilities, making document management both efficient and effective.
Method 1: Using macOS Preview
Step 1: Open the PDF File
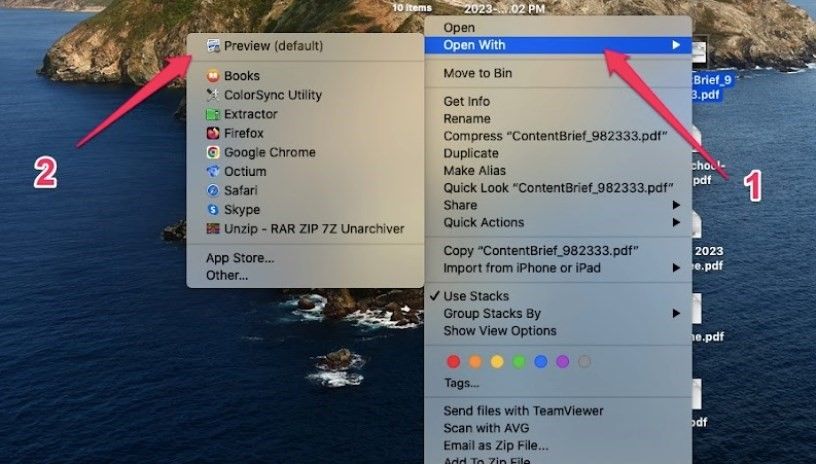
To open a PDF on your Mac, simply double-click the file, and it will automatically open in the Preview app. Alternatively, right-click the file, choose "Open With," and select a PDF-compatible app like Adobe Acrobat Reader if you prefer more advanced features.
Step 2: Access the Print Menu
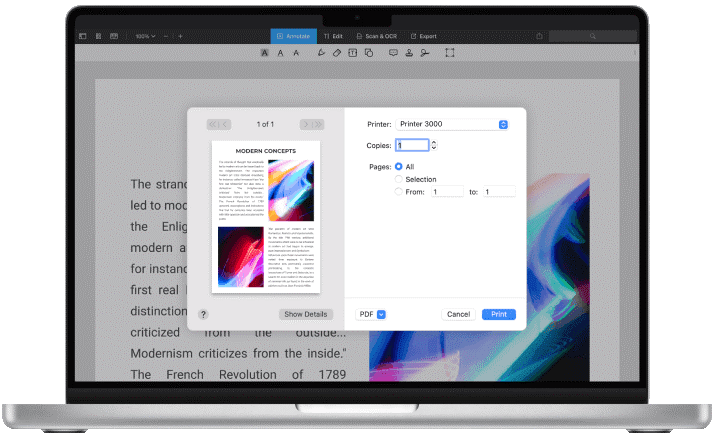
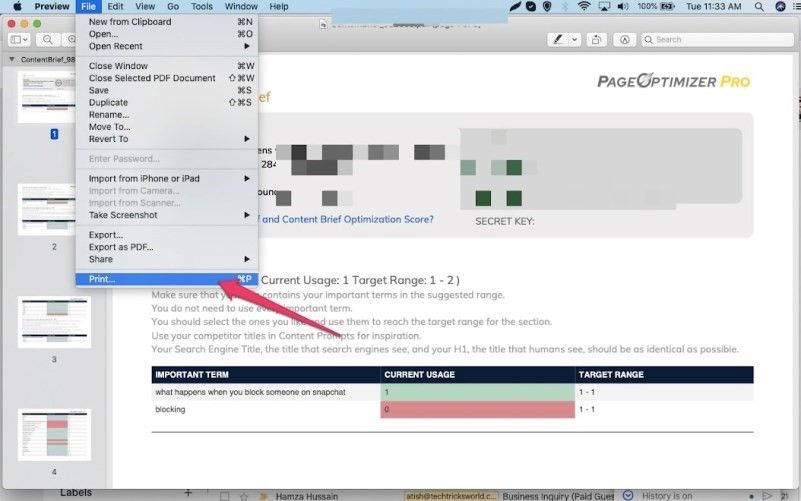
Press the "Command + P" shortcut to quickly access the print menu, or go to "File" > "Print" from the menu bar. Key settings to consider include selecting the printer, adjusting page range, setting orientation (portrait or landscape), and choosing double-sided printing if supported by your printer.
Step 3: Configure Print Settings
In the print menu, configure basic settings by selecting the page range, number of copies, and page orientation (portrait or landscape). For advanced settings, look for options like scaling to fit the page, enabling double-sided printing, and choosing between color or black-and-white printing to optimize your print job.
Step 4: Select the Printer
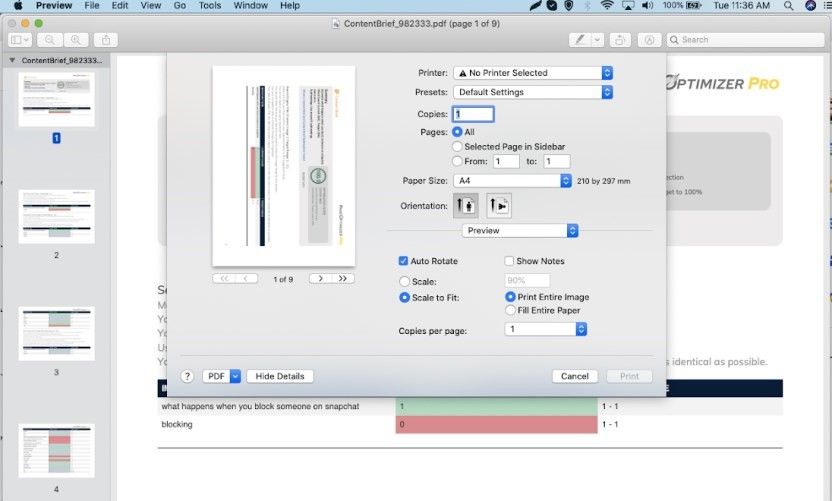
In the print menu, select your default printer from the dropdown list or choose from available printers connected to your network. If your printer isn’t listed, ensure it’s properly connected, powered on, and within network range. You may also need to add it using "System Preferences" > “Printers & Scanners.”
Step 5: Final Check and Print
Before printing, preview the document to ensure everything appears correctly. Check for any errors or formatting issues. Ensure sufficient ink and paper are loaded, and verify settings like color options and paper size. Once satisfied, click "Print" to complete the process for quality output.
Method 2: Using PDF Gear
Printing PDFs on a Mac using PDF Gear involves a few straightforward steps. Follow the guide below to efficiently print your documents:
Step 1: Download and Install PDF Gear
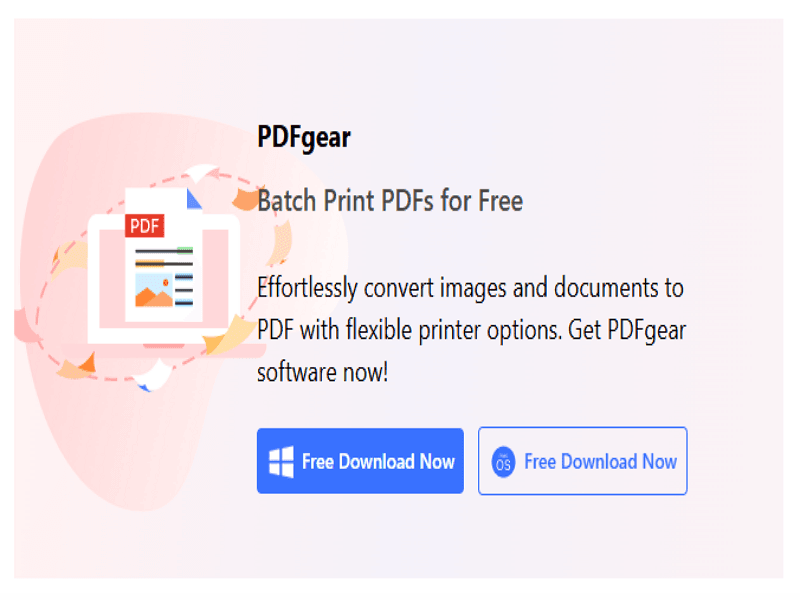
To start, you'll need to download PDF Gear from its official website. Once downloaded, open the installer and follow the on-screen instructions to complete the installation process. PDF Gear is a powerful third-party application designed to enhance your PDF handling capabilities, providing a robust alternative to the built-in macOS Preview.
Step 2: Open PDF Gear
Launch the PDF Gear application by either finding it in your Applications folder or clicking its icon in the Dock. The user interface of PDF Gear is intuitive, making it easy for you to get started quickly.
Step 3: Open Your PDF File
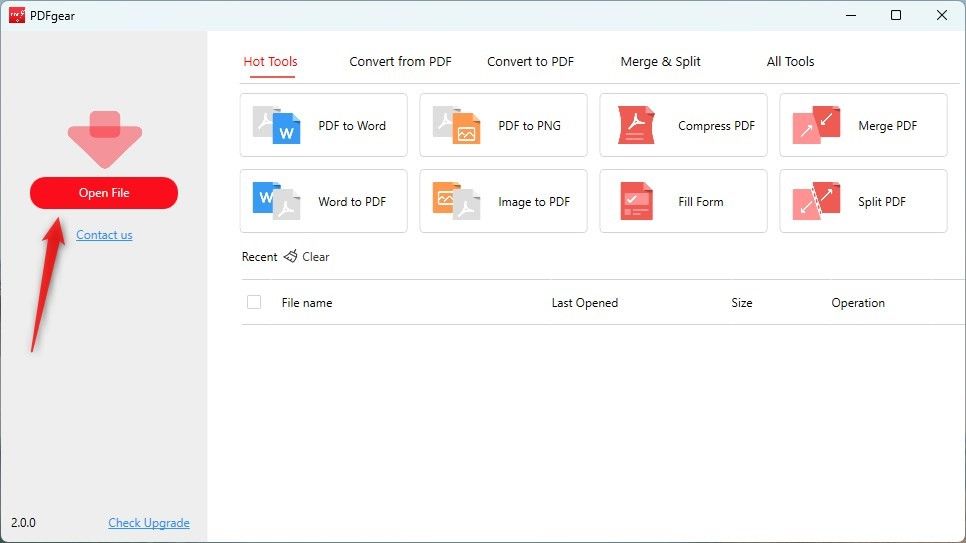
With PDF Gear open, import your desired PDF file by clicking on "File" in the top menu bar. Select "Open" from the dropdown menu and navigate to the location where your PDF file is stored. Select the file and click "Open" to load it into PDF Gear.
Step 4: Access Print Settings
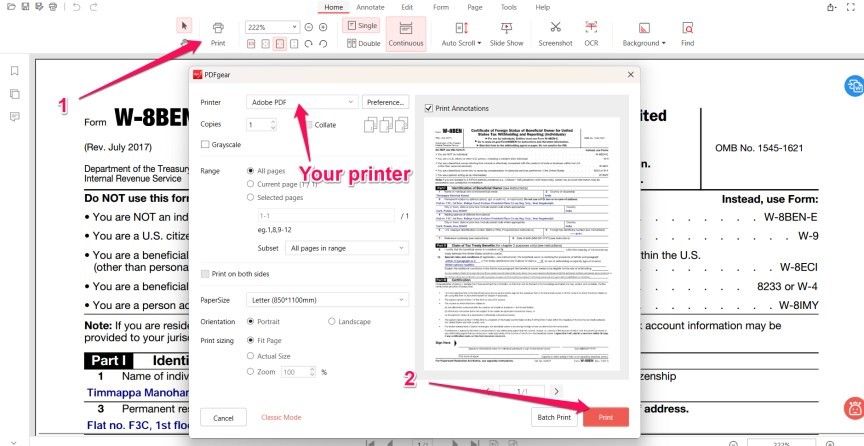
Once your PDF file is open in PDF Gear, proceed to the printing process by selecting "File" in the top menu bar again, and then clicking "Print." Alternatively, you can use the keyboard shortcut Command (⌘) + P.
Step 5: Configure Print Options
In the print dialog box that appears, you'll have various options to customize your print job. These options include selecting specific pages to print, setting the number of copies, choosing the paper size, and adjusting the scaling for your desired print output. PDF Gear’s intuitive interface makes it simple to tweak these settings for the best results.
Step 6: Advanced Settings
For more detailed adjustments, click on "Printer Properties" or "Print Settings." These options allow you to configure duplex printing, select specific print resolutions, and choose the paper tray for your print job. These advanced settings are especially useful for users dealing with complex or high-quality PDFs.
Step 6: Preview Your Document
Before printing, always check the print preview to ensure that everything looks correct. This step can help you catch any potential issues and make adjustments as needed before the final print.
Step 7: Print Your PDF
Once you’ve configured all your settings and double-checked the preview, click the "Print" button to start the printing process. PDF Gear will handle the rest, delivering high-quality prints tailored to your specifications.
Troubleshooting Common Issues
Even with a robust application like PDF Gear, you might occasionally encounter some issues while printing PDFs. Here are some common problems and their solutions:
1. PDF Does Not Open in PDF Gear:
Solution: Ensure that your PDF file is not corrupted. Try opening it in another PDF reader to verify its integrity. If the file opens successfully elsewhere, consider reinstalling PDF Gear or updating it to the latest version, as an outdated version might have compatibility issues.
2. PDF Prints Out Blank Pages:
Solution: This can occur if there are layers or transparency settings in the PDF that the printer cannot process. In PDF Gear, try flattening the document before printing. You can do this by opening the “Print” dialog and selecting options like “Print as Image” or similar settings. Also, make sure that the correct page range is selected.
3. Page Scaling Issues:
Solution: If your printouts are not scaling correctly (cutting off text/images, etc.), check the scaling settings in the print dialog box of PDF Gear. Make sure that you have selected the appropriate scaling options such as “Fit to Page” or “Actual Size.” You might also need to adjust the margins or paper size settings to ensure everything fits properly.
4. Printer Driver Issues:
Solution: Printer driver problems can occur if the driver is out-of-date or corrupt. Visit your printer manufacturer’s website to download the latest driver. After downloading, install the driver and restart your Mac to apply the changes.
5. Cannot Print Certain Pages:
Solution: Sometimes specific pages in a PDF may not print due to embedded elements that are not recognized by the printer. Try converting the problematic pages to images or flattening them as suggested earlier. You can also use PDF Gear to save the specific page as a new PDF and then print it separately.
Conclusion
In conclusion, efficient document management and high-quality printing are well within reach, whether using macOS's built-in tools or third-party apps like PDF Gear. By understanding and utilizing features such as page range selection, print settings configuration, and troubleshooting common issues, users can significantly enhance their workflow and productivity. Don't hesitate to explore and leverage the full potential of macOS Preview for its simplicity and effectiveness. Additionally, integrating robust third-party applications like PDF Gear can provide advanced customization and optimization options, making document handling and printing even more efficient. Embrace these tools to streamline your document management process and achieve professional-quality prints with ease.

