Imagine this: you capture a hilarious work chat mishap, a breathtaking online view, or a crucial error message. Screenshots, those digital lifesavers, freeze these fleeting moments on your screen. But what happens next? Buried in your clipboard or scattered across folders, they lose their power.
This is where the magic of PDFs comes in. Forget the chaos – PDFs transform your screenshots into organized, accessible assets. Imagine a world where you can share them with anyone, easily find them later, and even bundle them together for presentations or tutorials. Intrigued? Dive into this guide and discover how to effortlessly convert your screenshots into powerful PDFs! Converting screenshots to PDF offers a treasure trove of benefits:
Universal Appeal: PDFs are like the Rosetta Stone of document formats, readily viewable across any device without formatting headaches. Share your screenshots with colleagues, friends, or family – platform compatibility is a non-issue.
Archiving Powerhouse: Unlike ephemeral clipboard captures, PDFs are built for long-term storage. They can be easily saved, organized, and retrieved for future reference, ensuring those crucial screenshots don't get lost in the digital abyss.
Enhanced Organization: Imagine the chaos of juggling multiple screenshot images. PDFs allow you to neatly bundle them together, creating a single, organized document. This is perfect for tutorials, presentations, or documenting workflows where multiple screenshots are involved.
So, ditch the clutter and embrace the power of PDFs! This guide will equip you with the knowledge to effortlessly convert your screenshots into a more versatile and manageable format. We'll delve into the user-friendly methods available on both Windows and Mac, ensuring a smooth transition for everyone. Let's turn those fleeting screen captures into organized and accessible assets!
Saving Screenshots as PDF with Dedicated Software: PDF Agile
This section dives into the user-friendly way to save screenshots as PDFs using PDF Agile, a powerful PDF editing and management tool. With PDF Agile, you can not only convert existing screenshots but also capture them directly within the software, streamlining the process.
Capturing Screenshots Directly in PDF Agile
Step 1: Launch PDF Agile and open a new document (File > New).
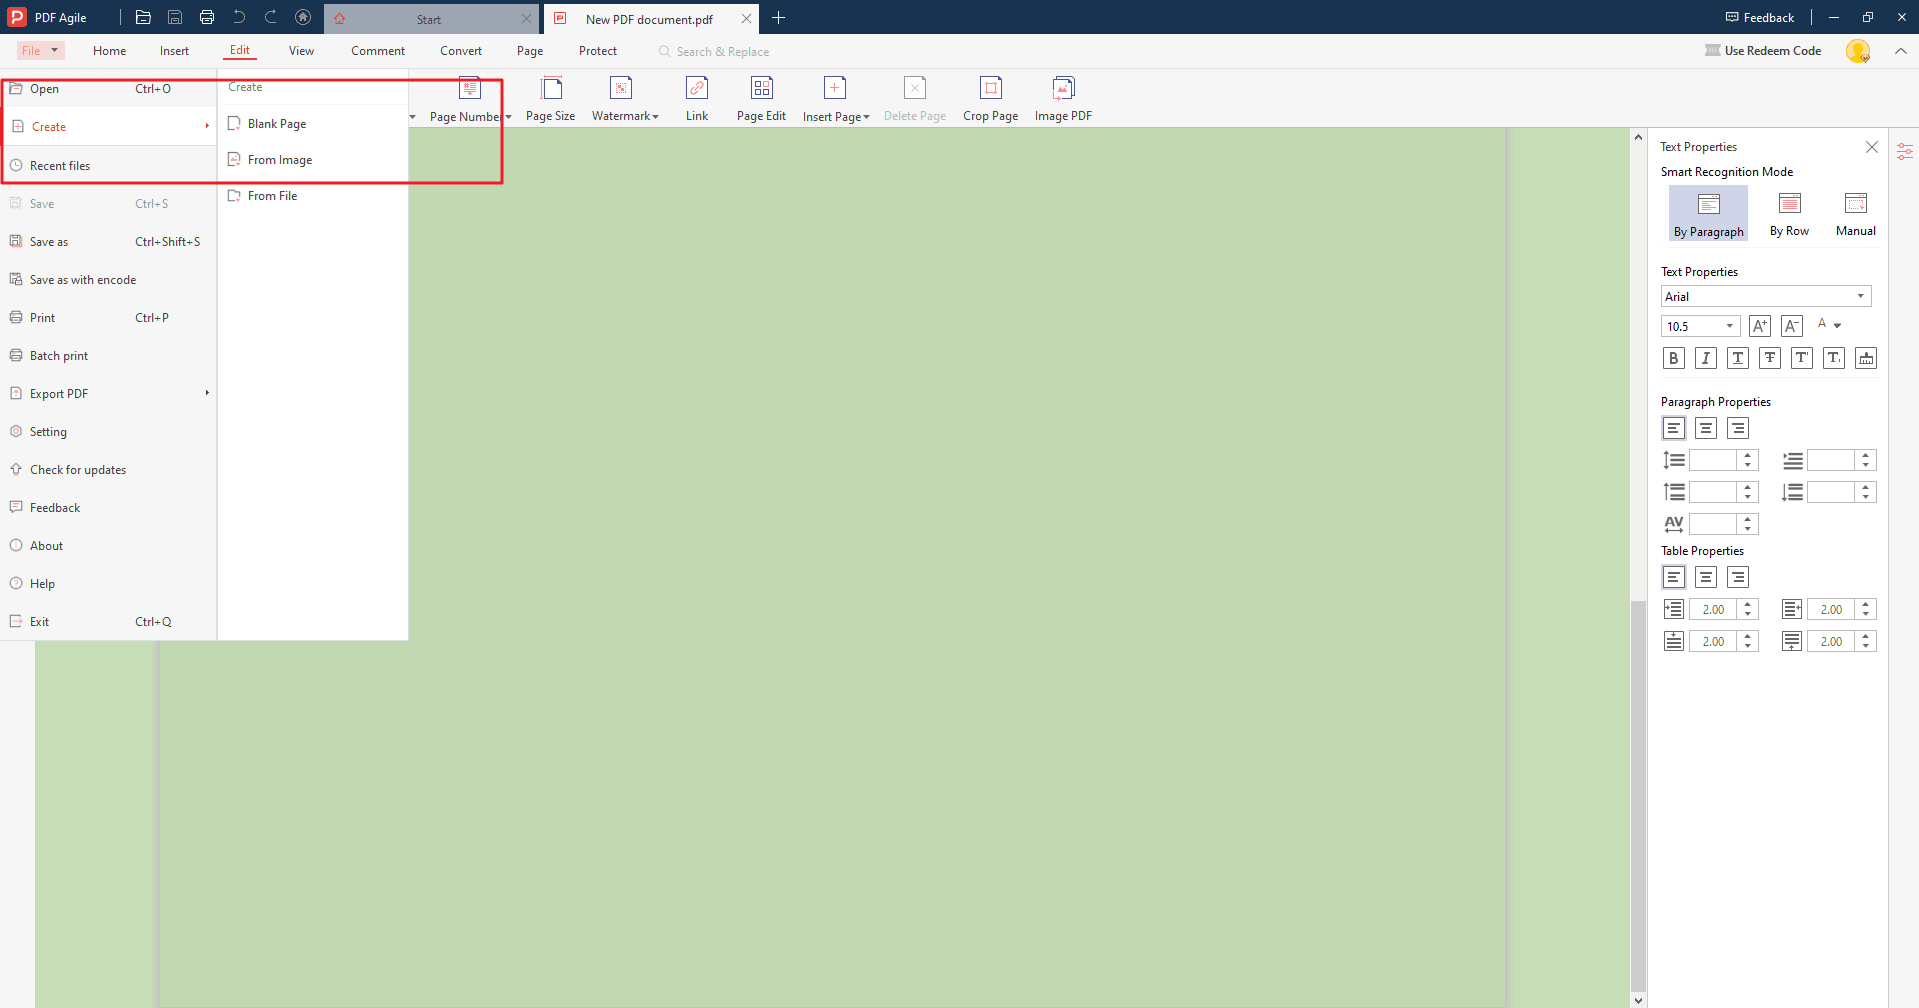
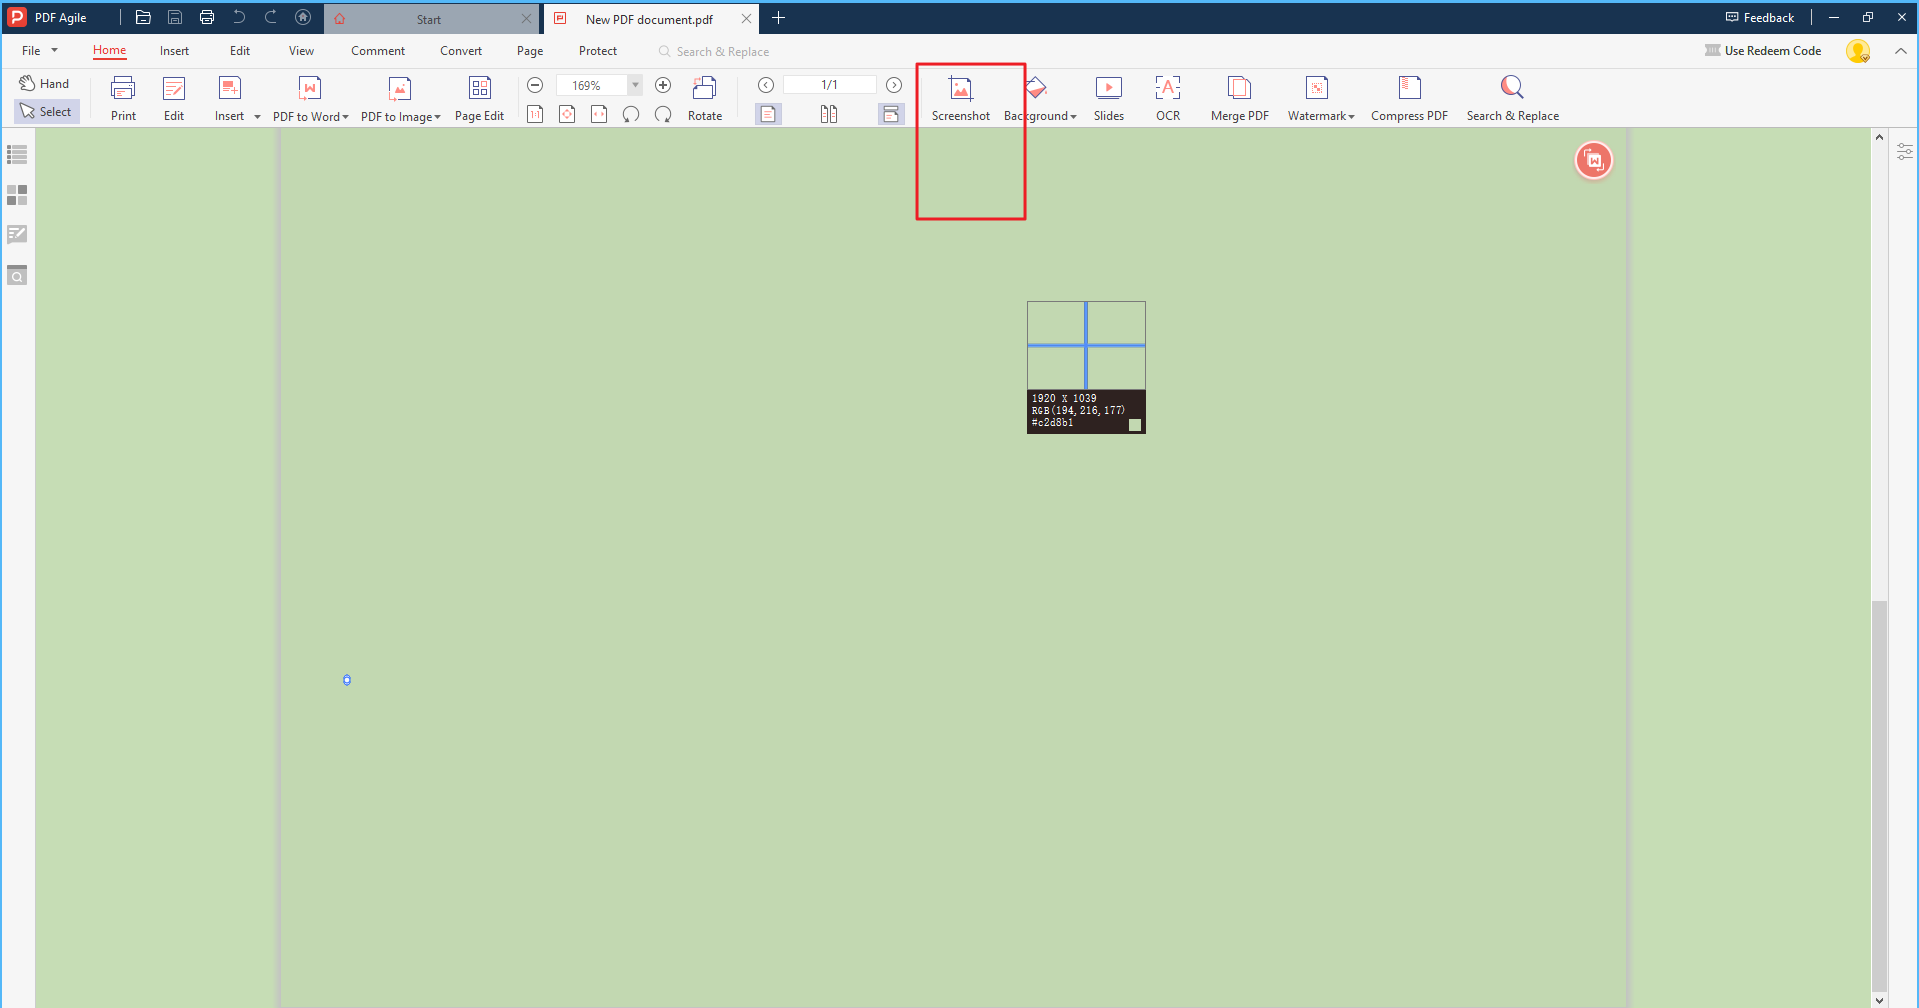
Step 2: Enter the "Home" Tab and click the "Screenshot" button in the toolbar.
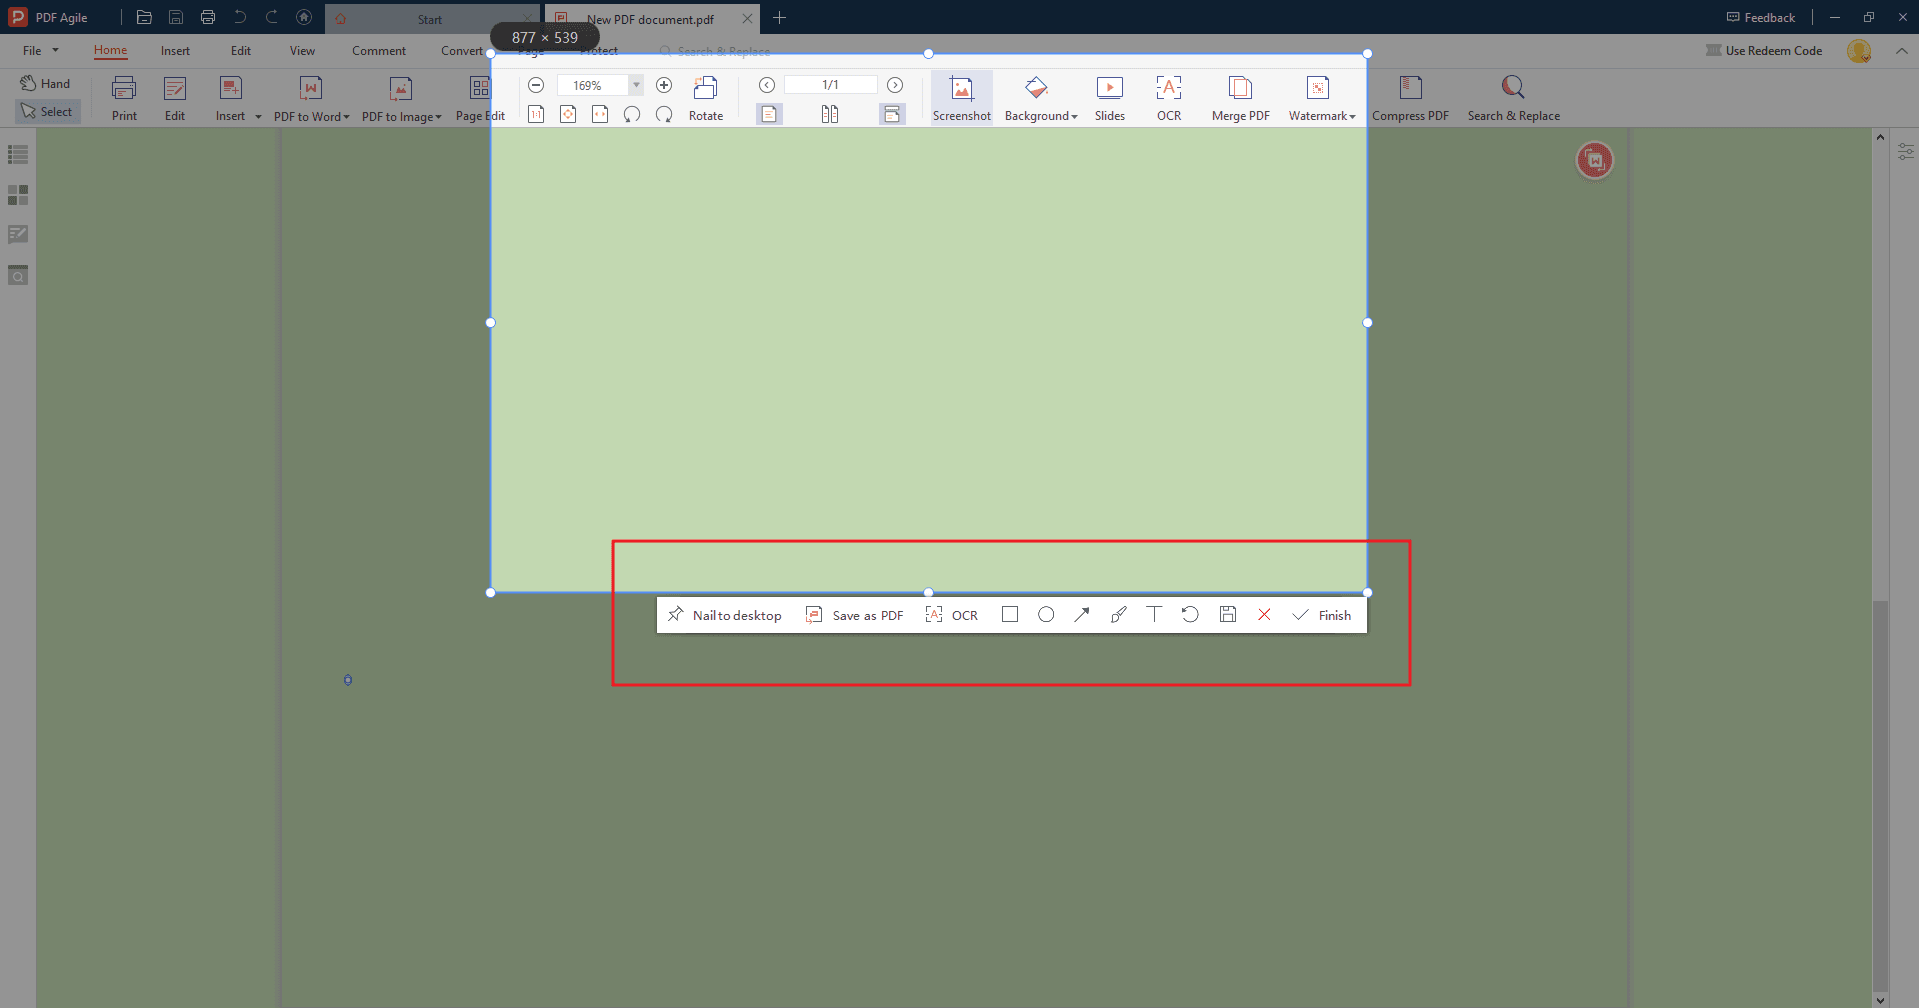
Step 3: Clicking the button will activate the screenshot tool. Depending on your preference, you can choose one of the following capture methods:
- Full Screen Capture: Capture the entire contents of your screen.
- Window Capture: Capture the active window currently in focus.
- Area Capture: Click and drag to select a specific rectangular area of your screen.
After selecting the desired capture method, your screen will briefly dim. Click (or hold and drag for area capture) to capture the screenshot.
Converting Existing Screenshots to PDF in PDF Agile
Step 1: With a new document open in PDF Agile, navigate to the "Insert" tab in the top menu. Thereafter, select "Image". This will open a file explorer window.
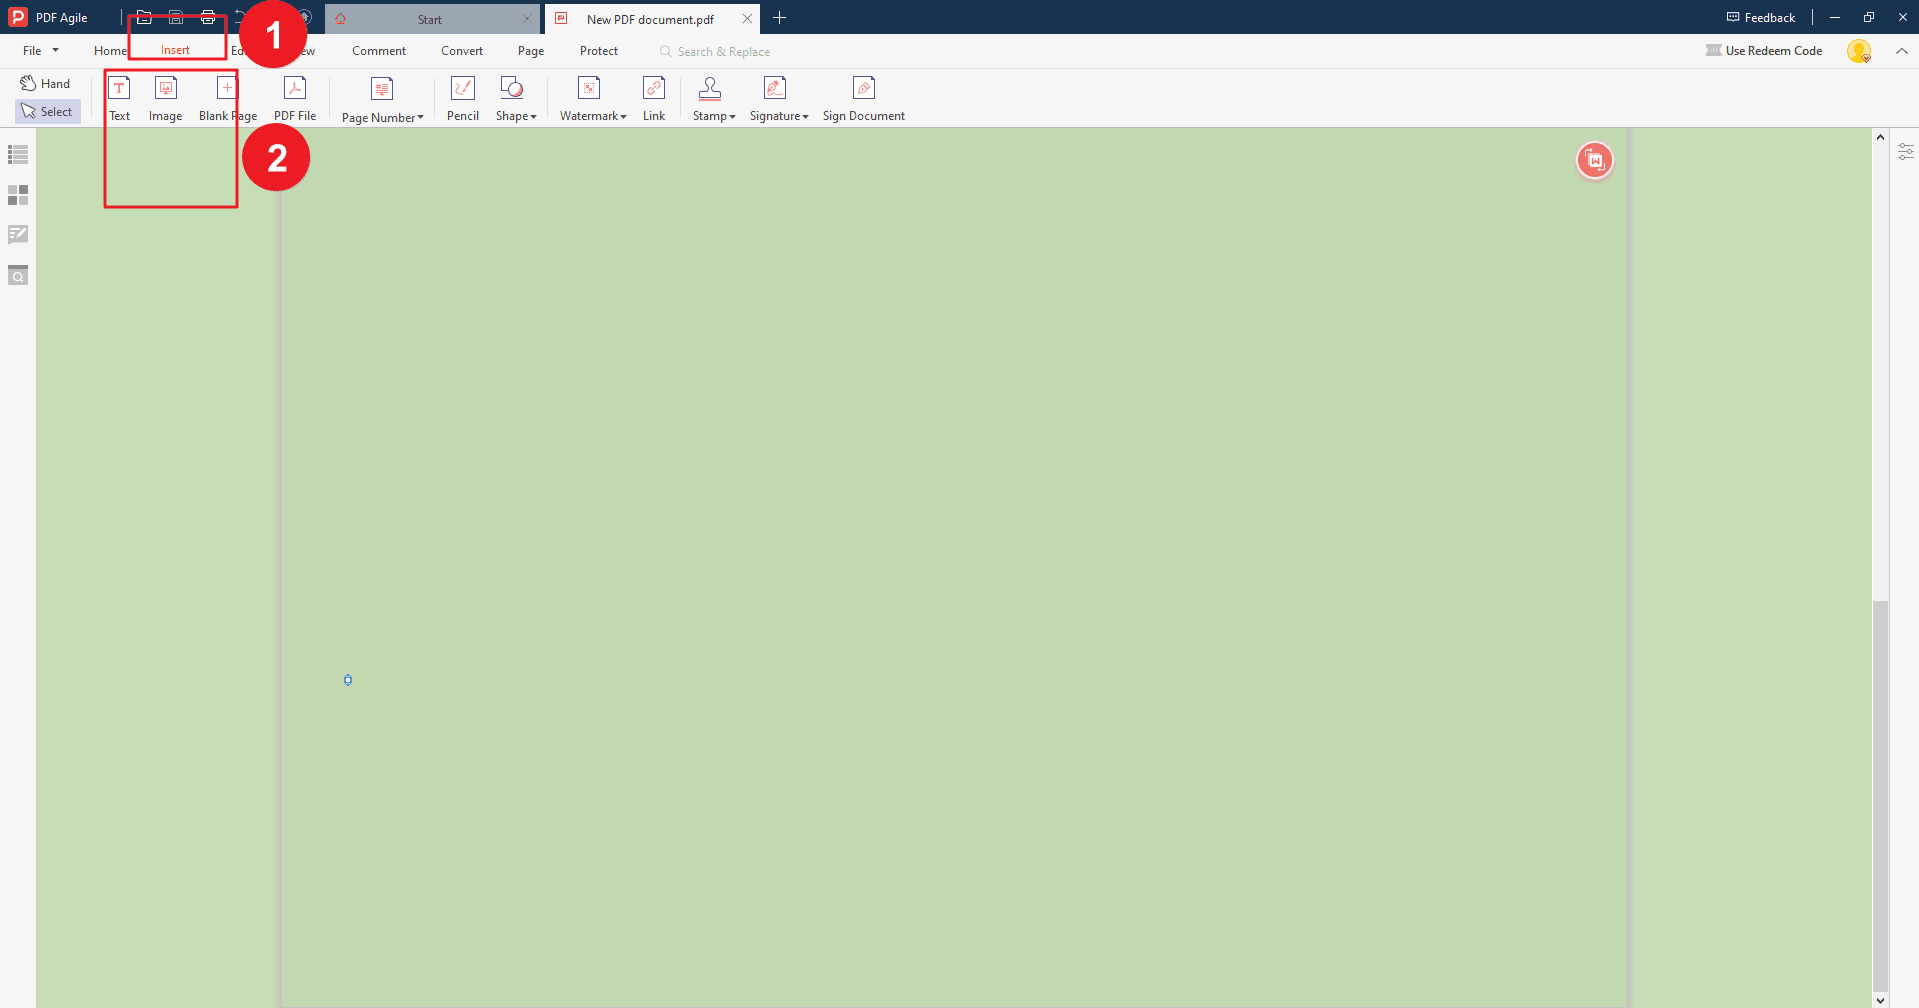
Step 2: Locate the image file containing your screenshot on your computer. Select the file and click "Open". The screenshot image will be inserted into the blank PDF document. Once you have captured or inserted your screenshot, you can edit it directly within PDF Agile using the editing tools available in the software.
Saving Screenshots as PDF with Dedicated Software: Adobe Acrobat
While PDF Agile offers a convenient solution, Adobe Acrobat Pro boasts a robust set of features for capturing and converting screenshots to PDF. Here's a detailed guide on utilizing this functionality:
Capturing Screenshots with Adobe Acrobat
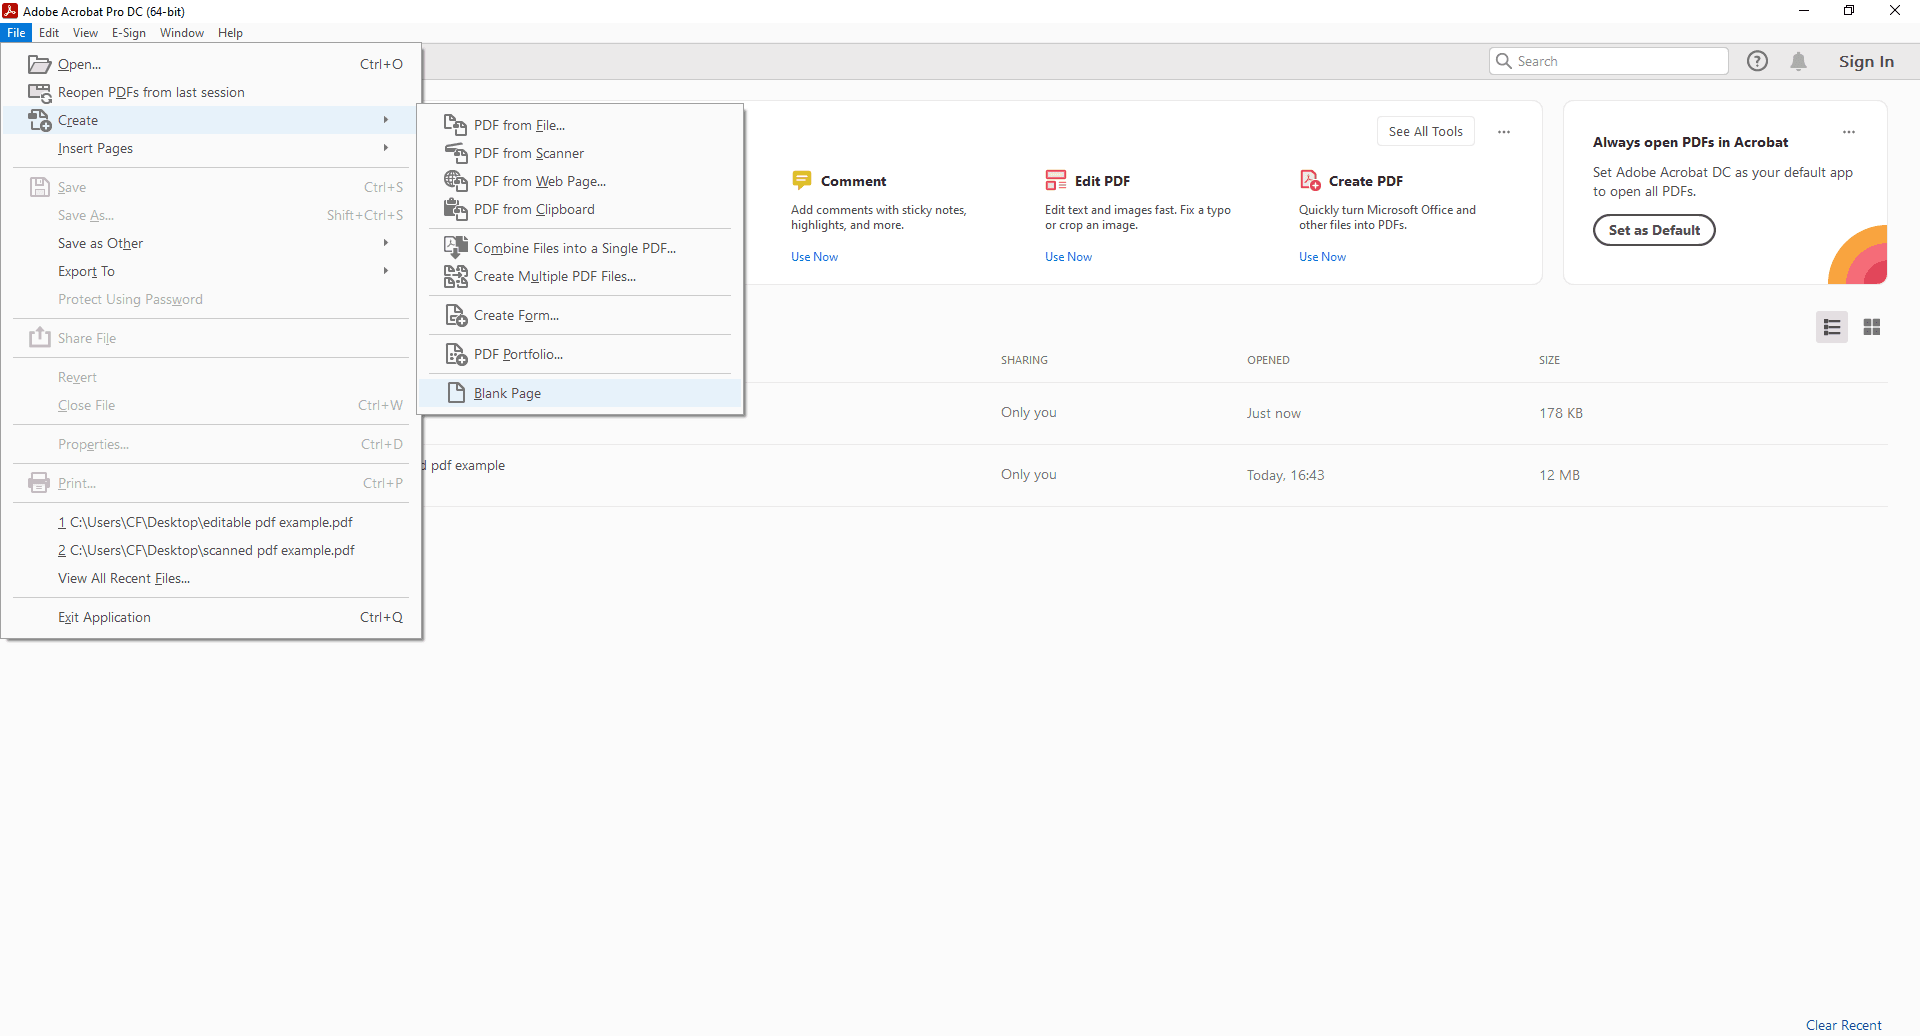
Step 1: Launch Adobe Acrobat
Open the software on your Windows or Mac computer. Depending on your demand, you can open your PDF document or create a blank page.
Step 2: Access the Screenshot Tool
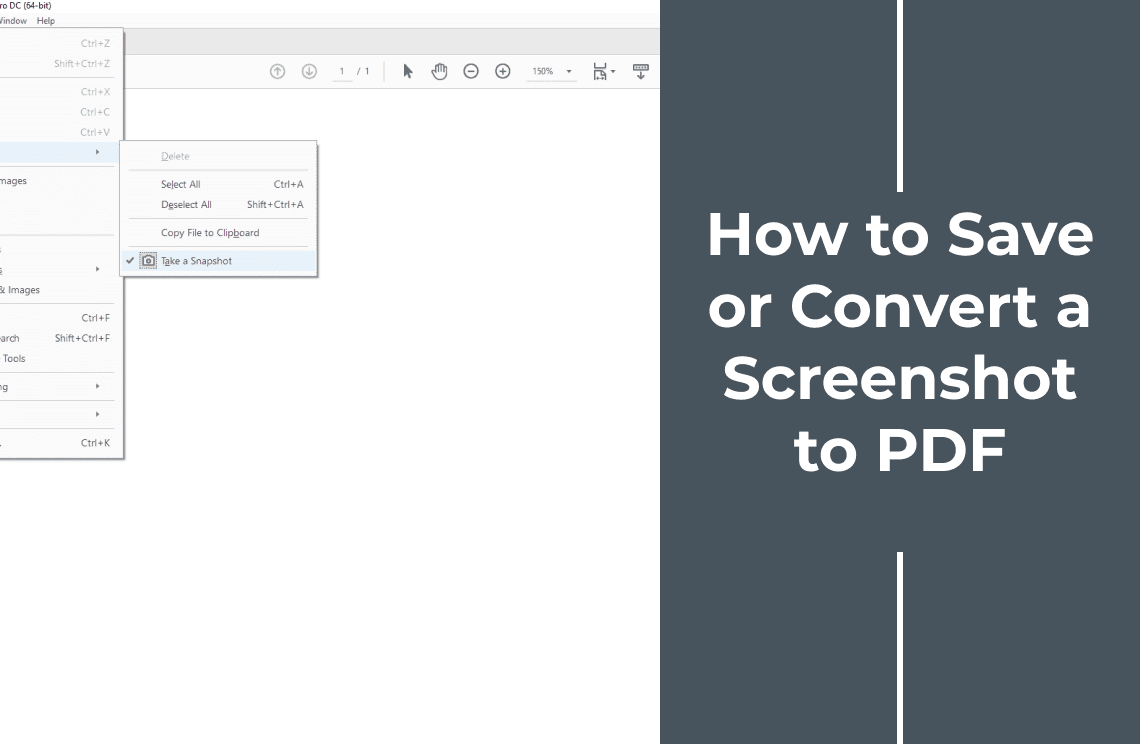
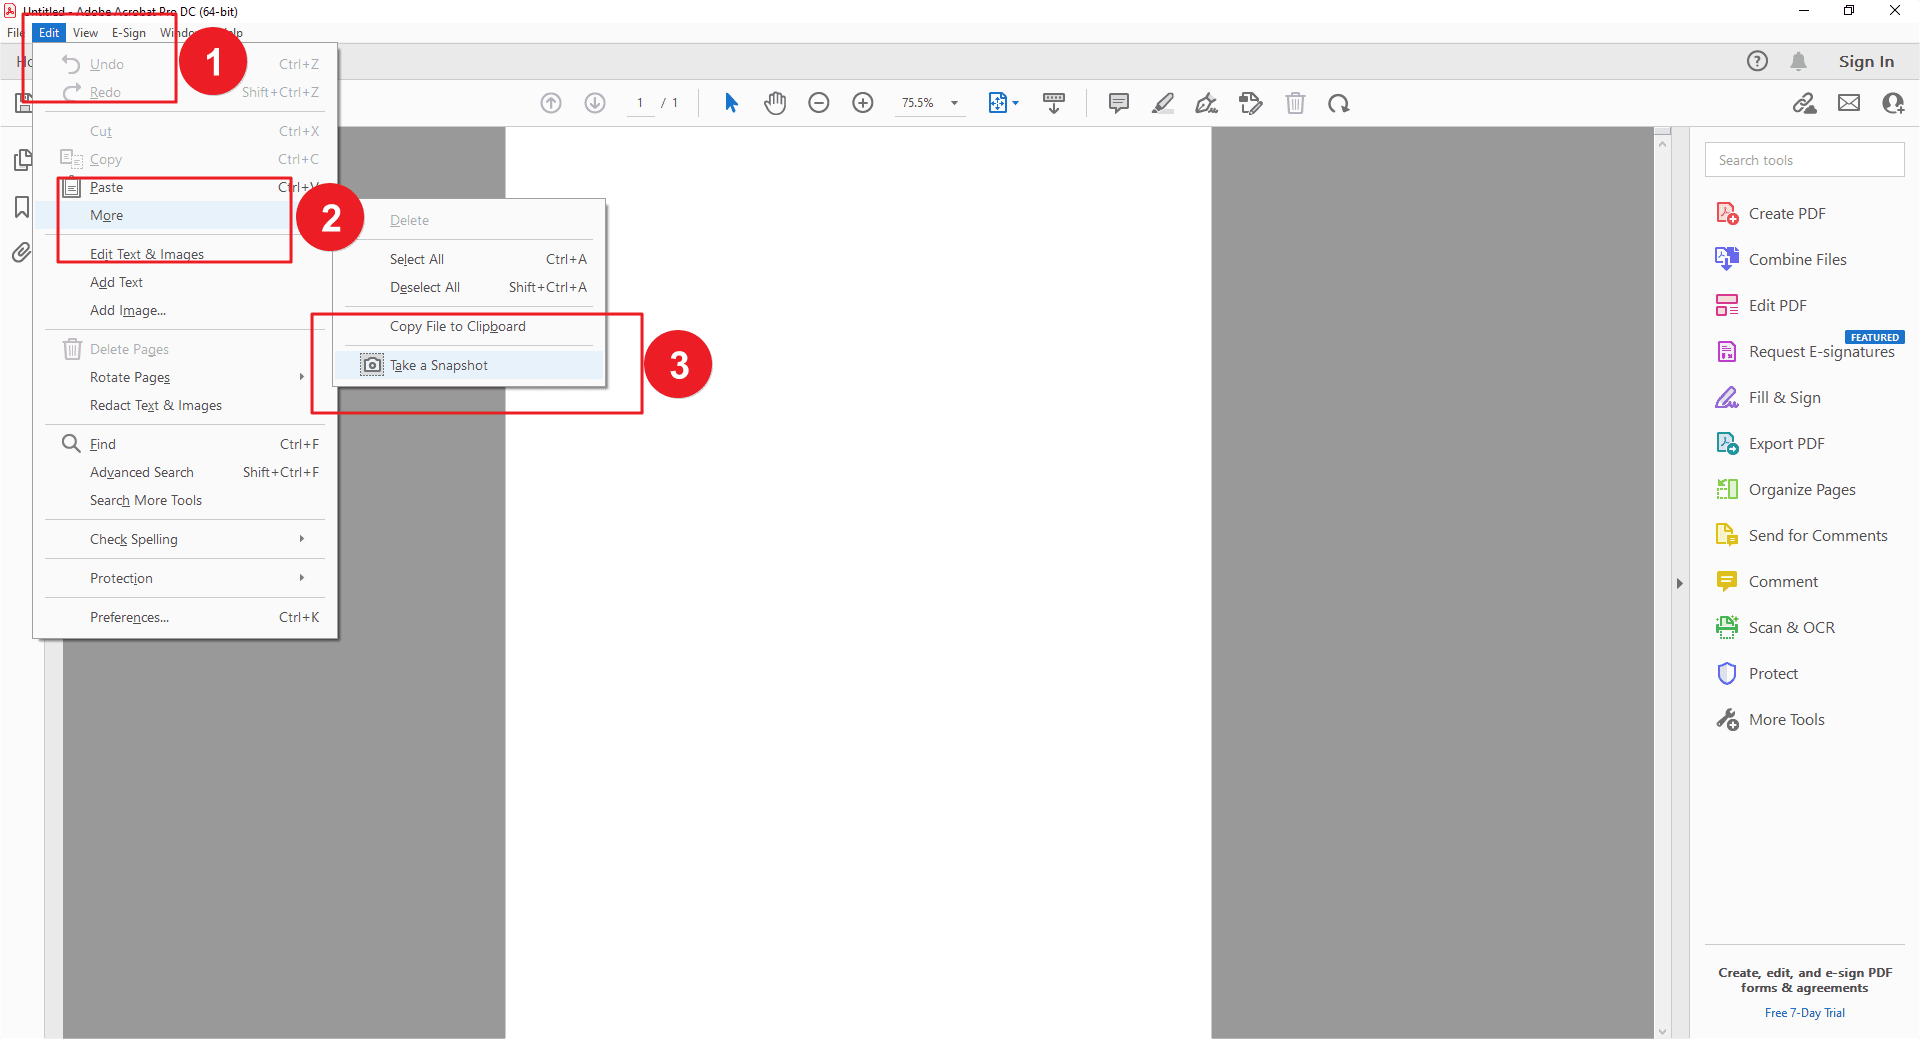
Click on the "Edit" menu in the top navigation bar. Thereafter, select "More" from the dropdown options. Finally, choose "Take a snapshot" within the "Edit" submenu. Thereafter, you are able to capture screenshots.
Step 3: Select Capture Area: Once the screenshot tool opens, you'll see options to choose the specific area you want to capture:
- Entire Screen: Click the "Entire Screen" thumbnail to capture your whole desktop.
- Window: Select the "Window" thumbnail and hover your cursor over the desired window to capture its contents.
- Rectangle: Choose the "Rectangle" thumbnail and drag your mouse to create a custom selection area for the screenshot.
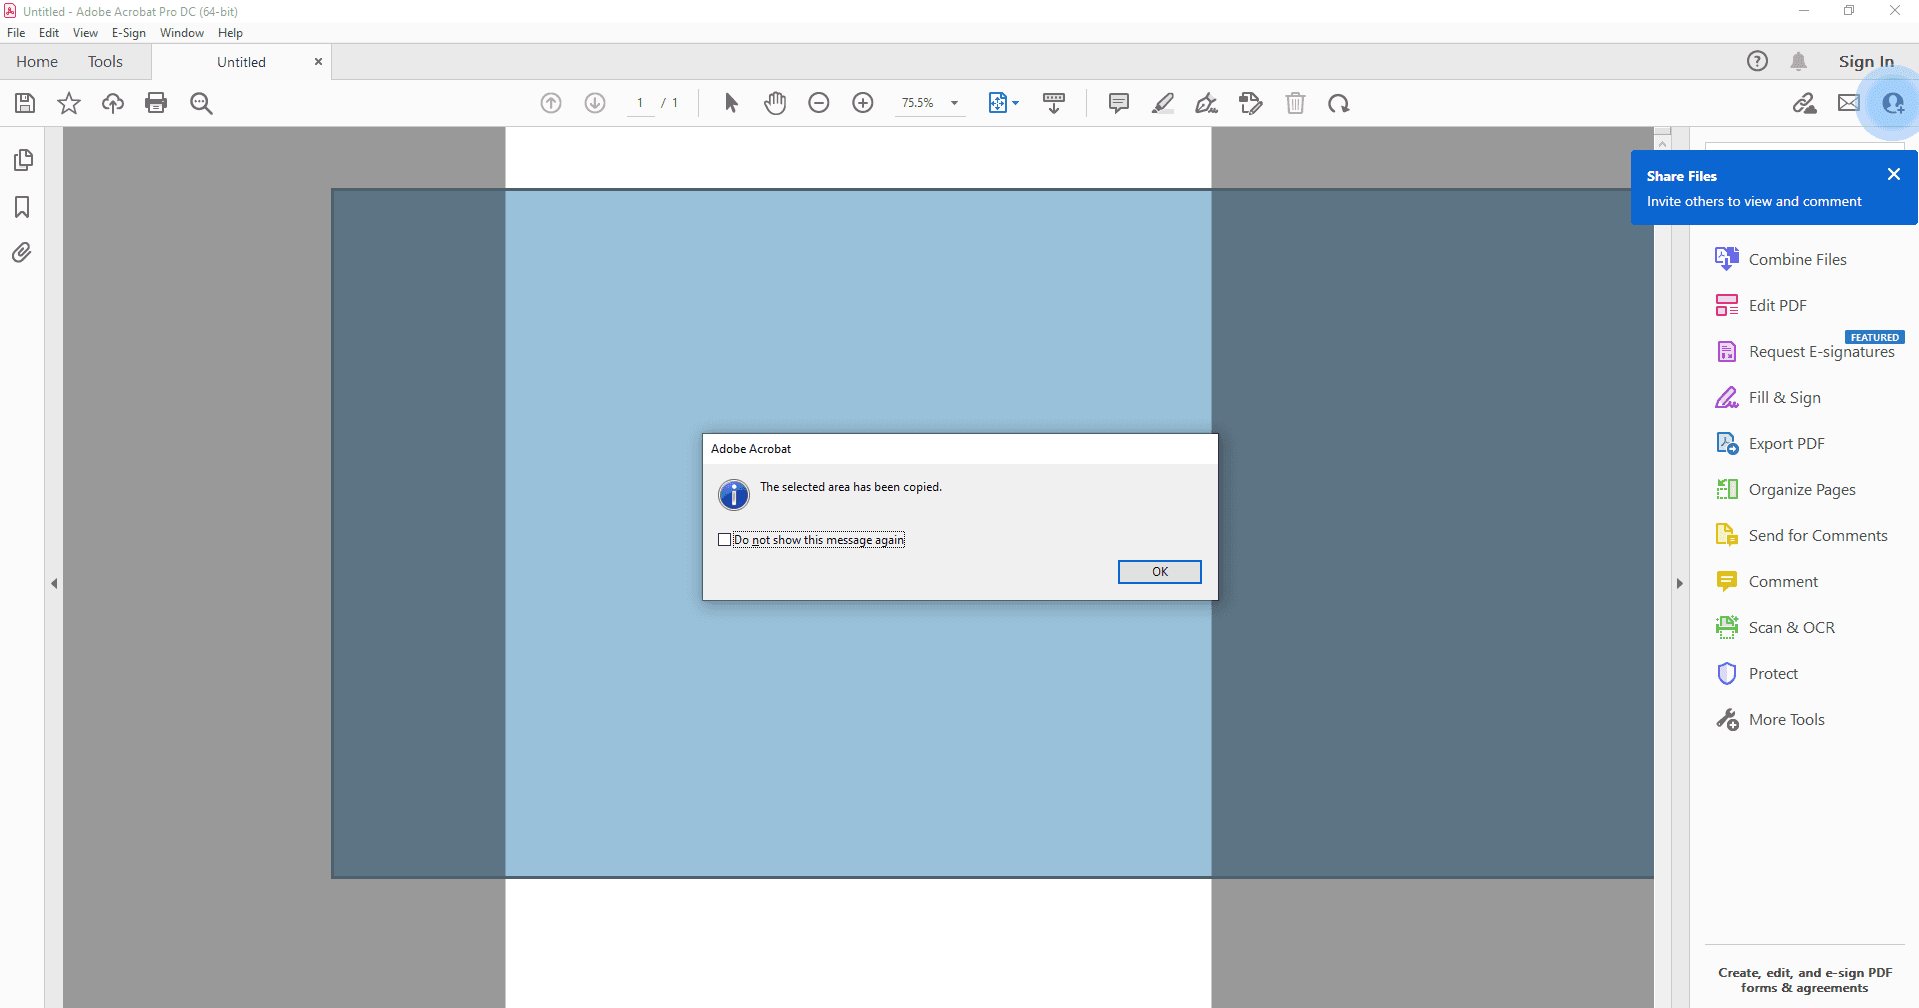
While the basic capture and save functionality is straightforward, Adobe Acrobat Pro offers additional tools for more complex workflows:
- Multiple Captures: You can capture multiple screenshots consecutively and combine them into a single PDF document using the "Merge Files" option in the "Save" dropdown menu.
- Annotations and Editing: Unlike a basic screenshot, your captured image becomes a fully editable PDF. You can use the extensive annotation tools in Acrobat Pro to highlight areas, add text comments, or use shapes for emphasis.
Remember: Adobe Acrobat Pro is paid software. However, this detailed guide provides a step-by-step approach to utilizing its screenshot capture and conversion functionalities for efficient PDF creation.
Converting Existing Screenshots to PDF with Adobe Acrobat
Step 1: With a new document open in Adobe Acrobat, navigate to the "Edit PDF" tab in the right menu. Thereafter, select "Add Image". This will open a file explorer window.
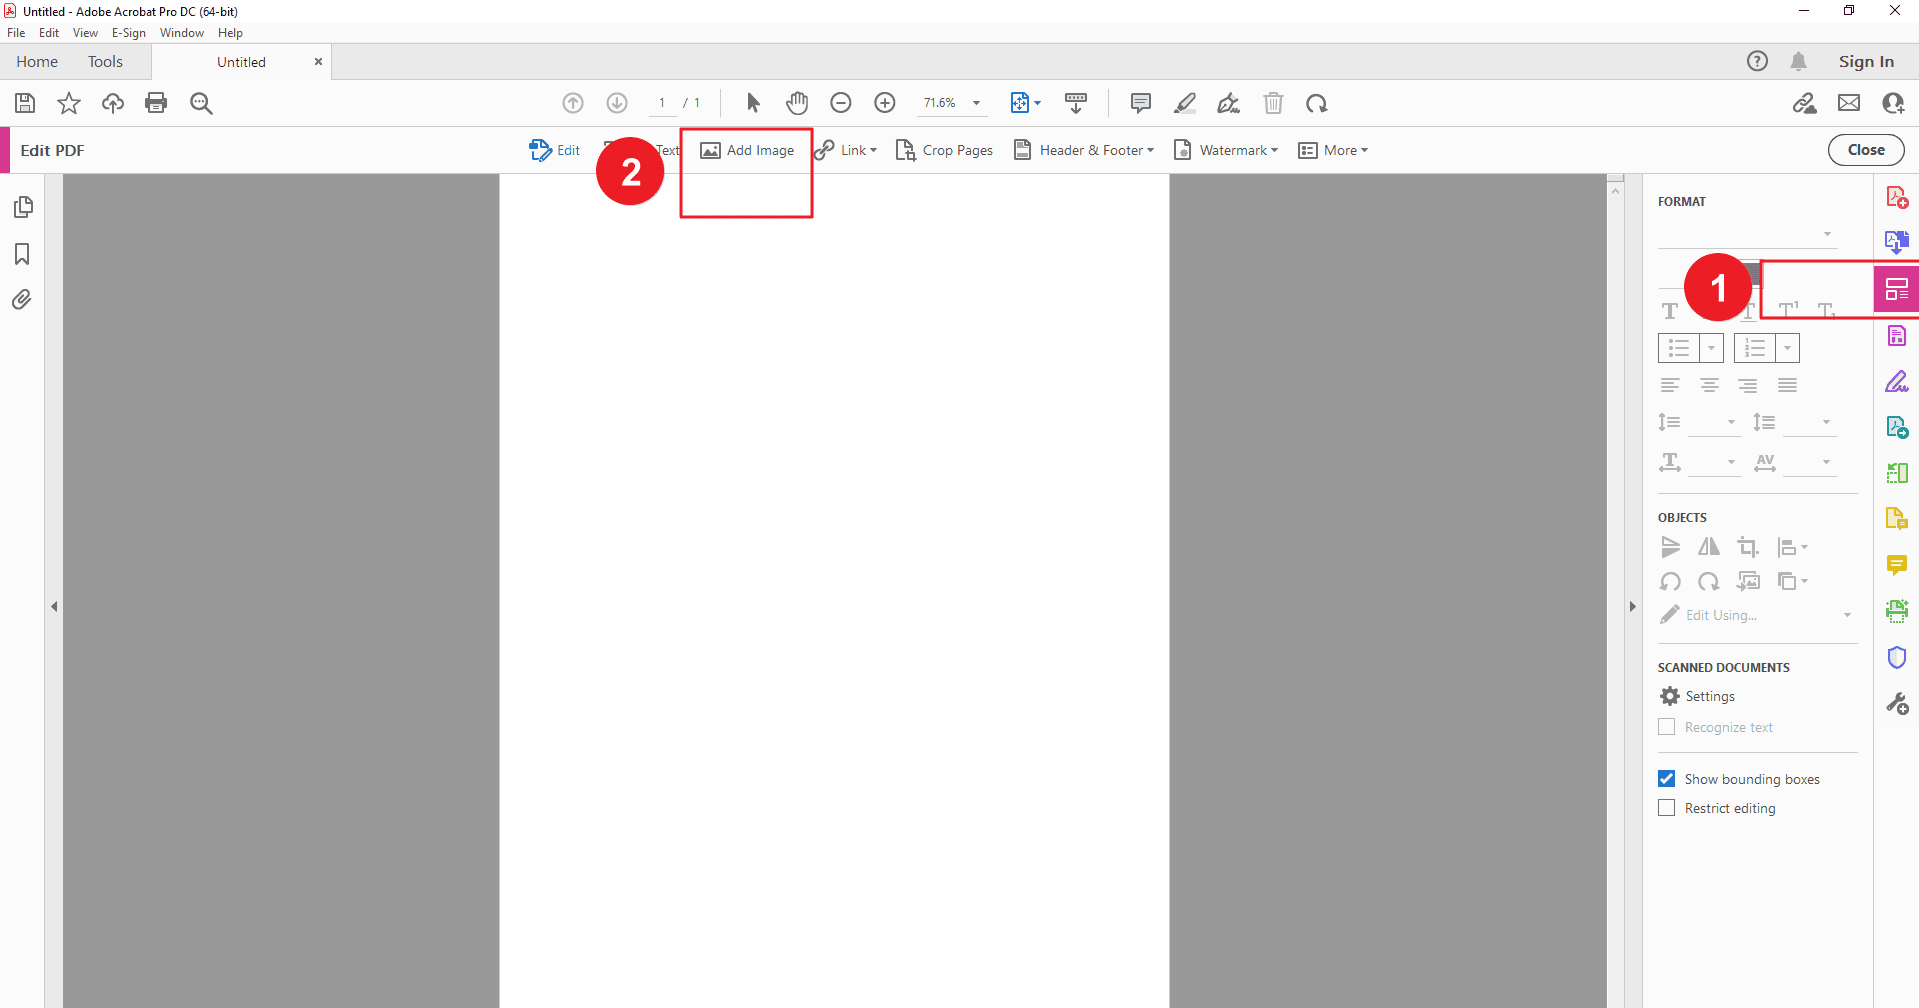
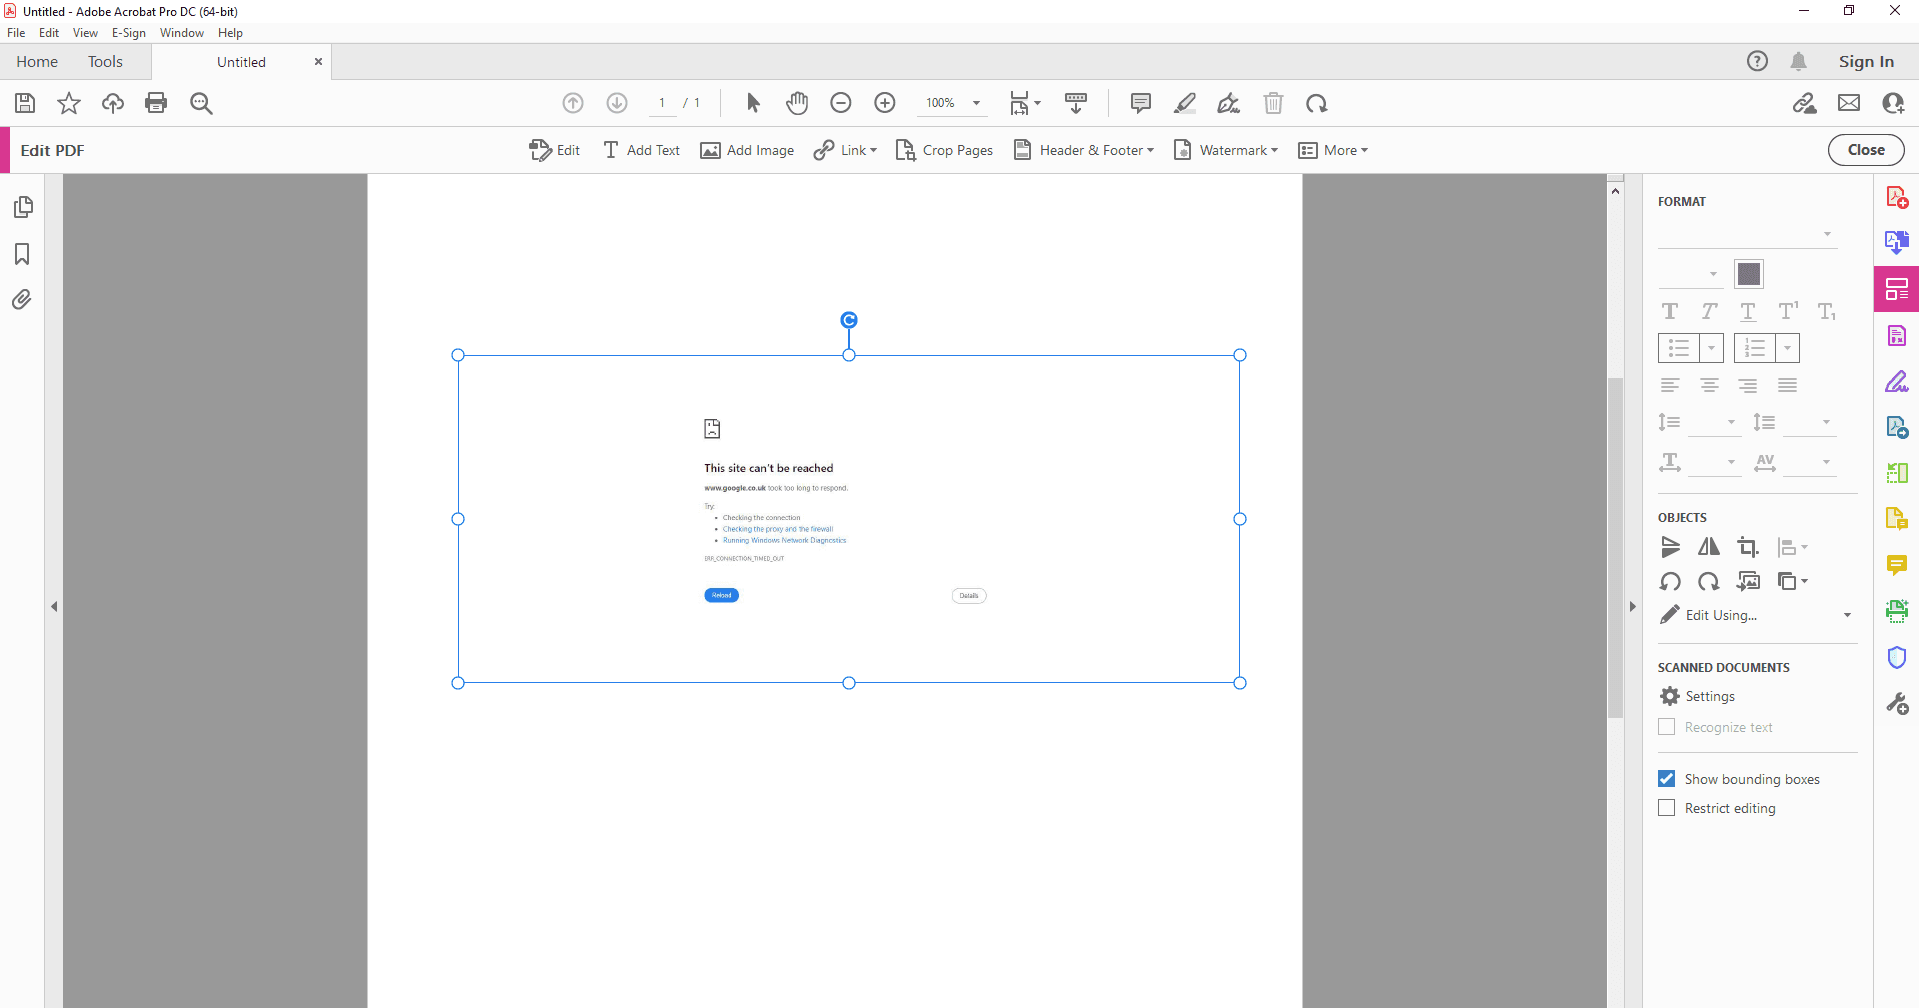
Step 2: Locate the image file containing your screenshot on your computer. Select the file and click "Open". The screenshot image will be inserted into the blank PDF document.
Alternative Methods
While dedicated software like PDF Agile and Adobe Acrobat Pro offer convenient screenshot capture and conversion features, other options exist:
Online PDF Converters:
Examples:
Smallpdf: A user-friendly online converter with a clean interface. Free to use for basic conversions, with paid plans offering higher file size limits and additional features.
Sejda PDF online: Another well-regarded option with various conversion tools, including screenshot to PDF. Offers a free plan with limitations and paid tiers for more functionality.
Advantages: Free to use and readily accessible from any device with an internet connection.
Disadvantages: Security concerns arise when uploading screenshots containing sensitive information. Additionally, some online converters have file size limitations or may require subscriptions for advanced features.
Third-Party Screenshot Tools:
Examples:
Lightshot: A lightweight and free screenshot tool that lets you capture specific areas, add annotations, and save directly as a PDF.
GoFullPage: This free browser extension excels at capturing entire webpages as screenshots. While its primary function isn't screenshot editing, it allows you to download the captured webpage as a PDF, making it a handy tool for converting web content.
Advantages: Some dedicated screenshot tools offer built-in PDF saving options, allowing for streamlined capture and conversion.
Disadvantages: Requires additional software installation and may come with associated costs. Functionality might vary depending on the chosen tool.
Choosing the Right Method:
For frequent screenshot capture and conversion, dedicated software like PDF Agile or Adobe Acrobat Pro offers a comprehensive solution with additional editing, annotation, and management capabilities. However, if you only need occasional conversion or have security concerns about online tools, consider the built-in operating system methods or explore reputable online converters with limitations in mind.
Conclusion
In today's digital landscape, screenshots are invaluable tools for capturing fleeting moments on our screens. But their true potential is unlocked when you transform them into a more organized and accessible format – the PDF.
By leveraging dedicated software like PDF Agile or Adobe Acrobat Pro, you gain a streamlined workflow for saving screenshots as PDFs. These tools offer intuitive interfaces, built-in screenshot capture functionalities, and seamless conversion processes.
This guide focused on the user-friendly methods offered by PDF Agile and highlighted its additional features, allowing you to not only convert but also edit, annotate, and organize your screenshot PDFs. For those seeking advanced functionalities, Adobe Acrobat Pro provides even more capture options and editing capabilities.
Remember:
PDFs offer universal compatibility, long-term archiving potential, and improved organization for your screenshots. Dedicated software streamlines the conversion process and unlocks additional functionalities.
Ready to take control of your screenshots? Explore the options outlined in this guide, embrace the power of PDFs, and transform those fleeting screen captures into valuable and manageable assets!

