Hey there! Ever find yourself lost while trying to navigate a lengthy document or struggling to reference specific sections? I’ve been there too, and that’s where line numbers come in as a game-changer in Microsoft Word. As someone who’s spent countless hours editing and writing, I can attest to how line numbers can greatly improve document clarity and precision. They’re invaluable for academic work, legal documents, or any collaborative project requiring exact references. However, they might not always be necessary, especially in creative writing where flow and readability are top priorities. In this guide, I’ll show you how to add, customize, and remove line numbers, and even troubleshoot common issues along the way. Ready to enhance your document management skills? Let’s get started!
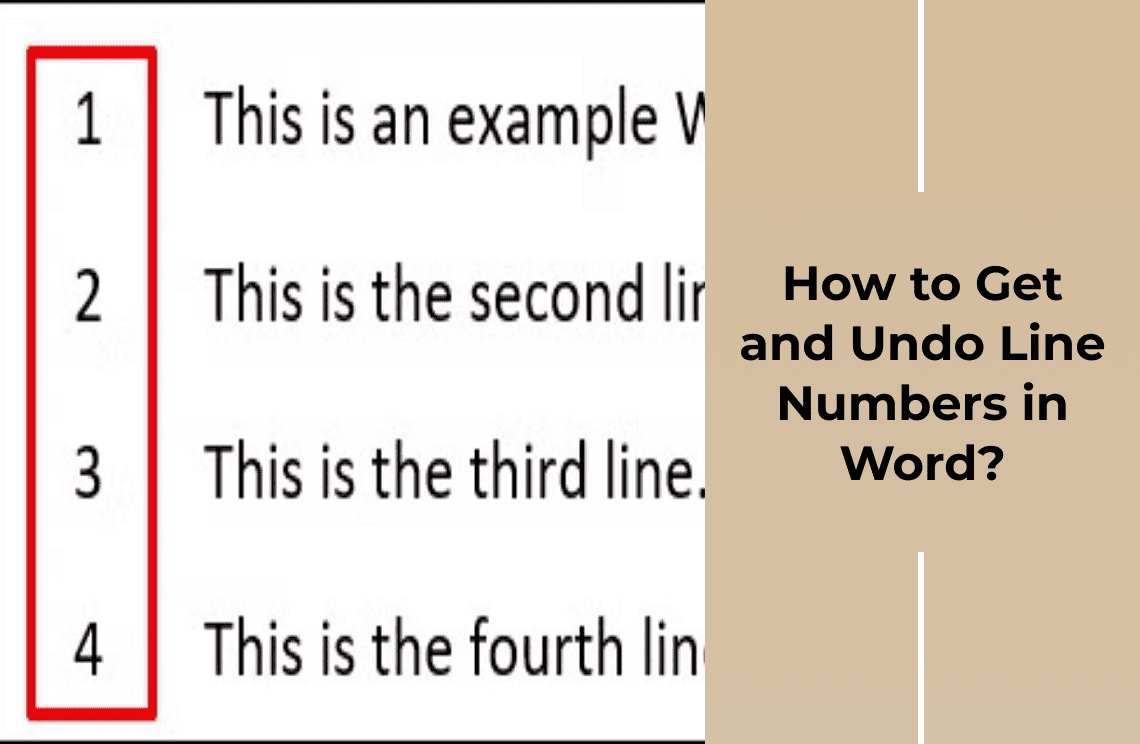
How to Add Line Numbers in Microsoft Word?
Applying Line Numbers Across the Document
Adding line numbers to your document is a straightforward process that can significantly enhance navigability and referencing. Here’s how you do it:
Step 1: Launch your Word file.
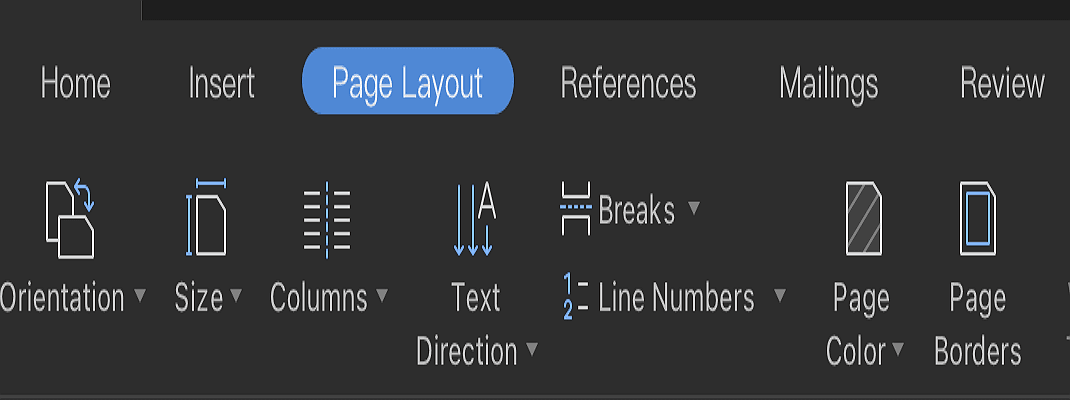
Step 2: Navigate to the "Layout" section in the toolbar.
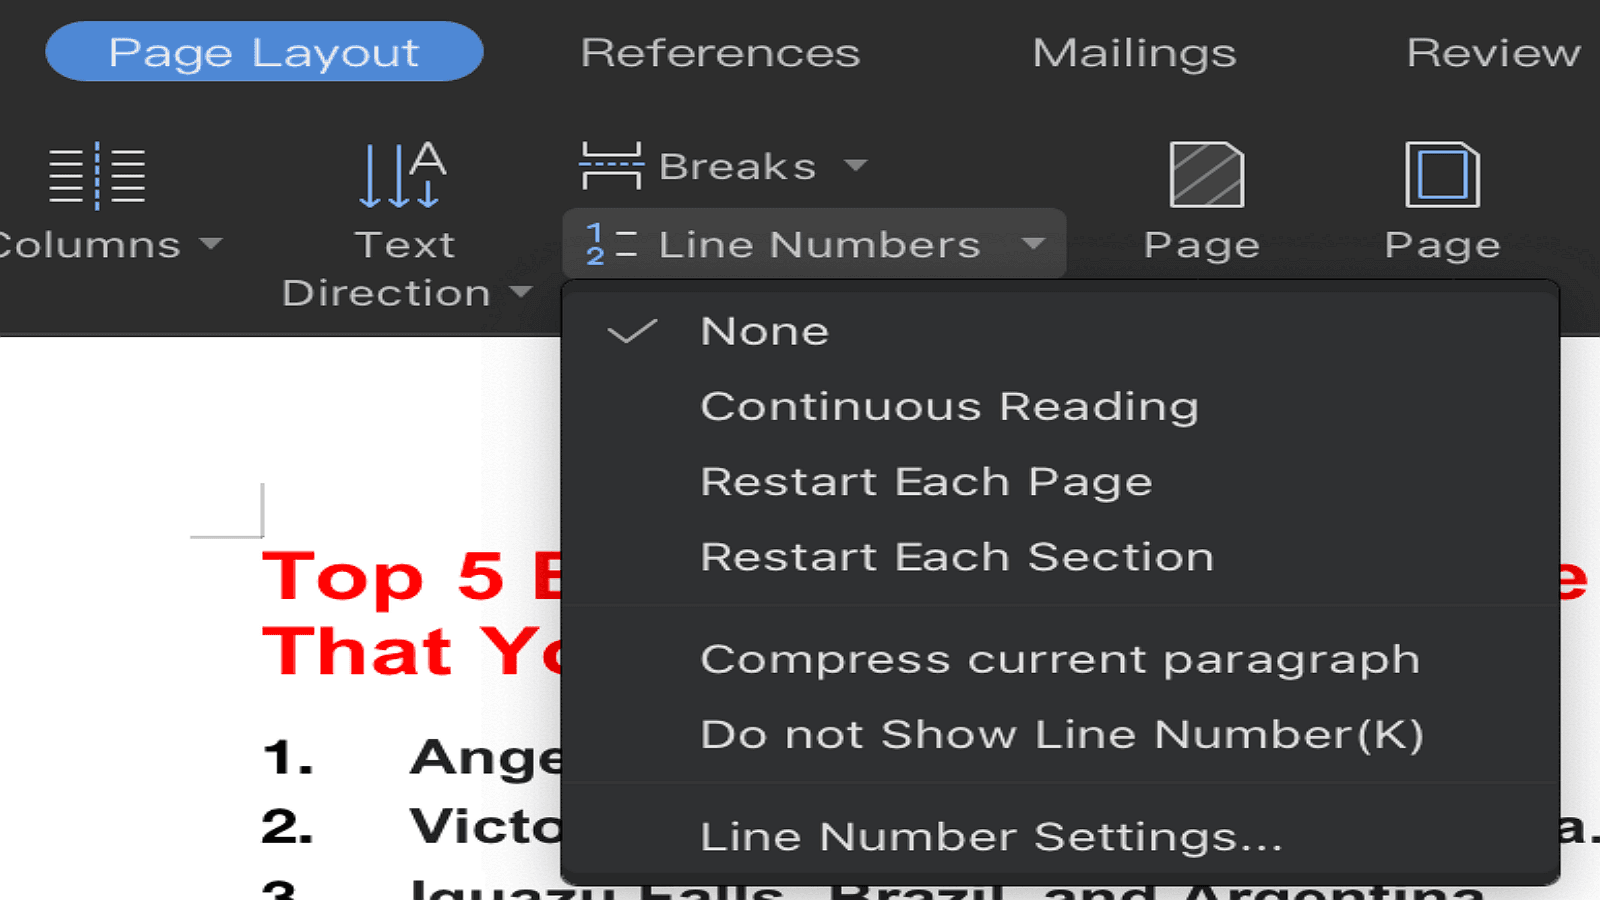
Step 3: Select the "Line Numbers" option from the drop-down menu.
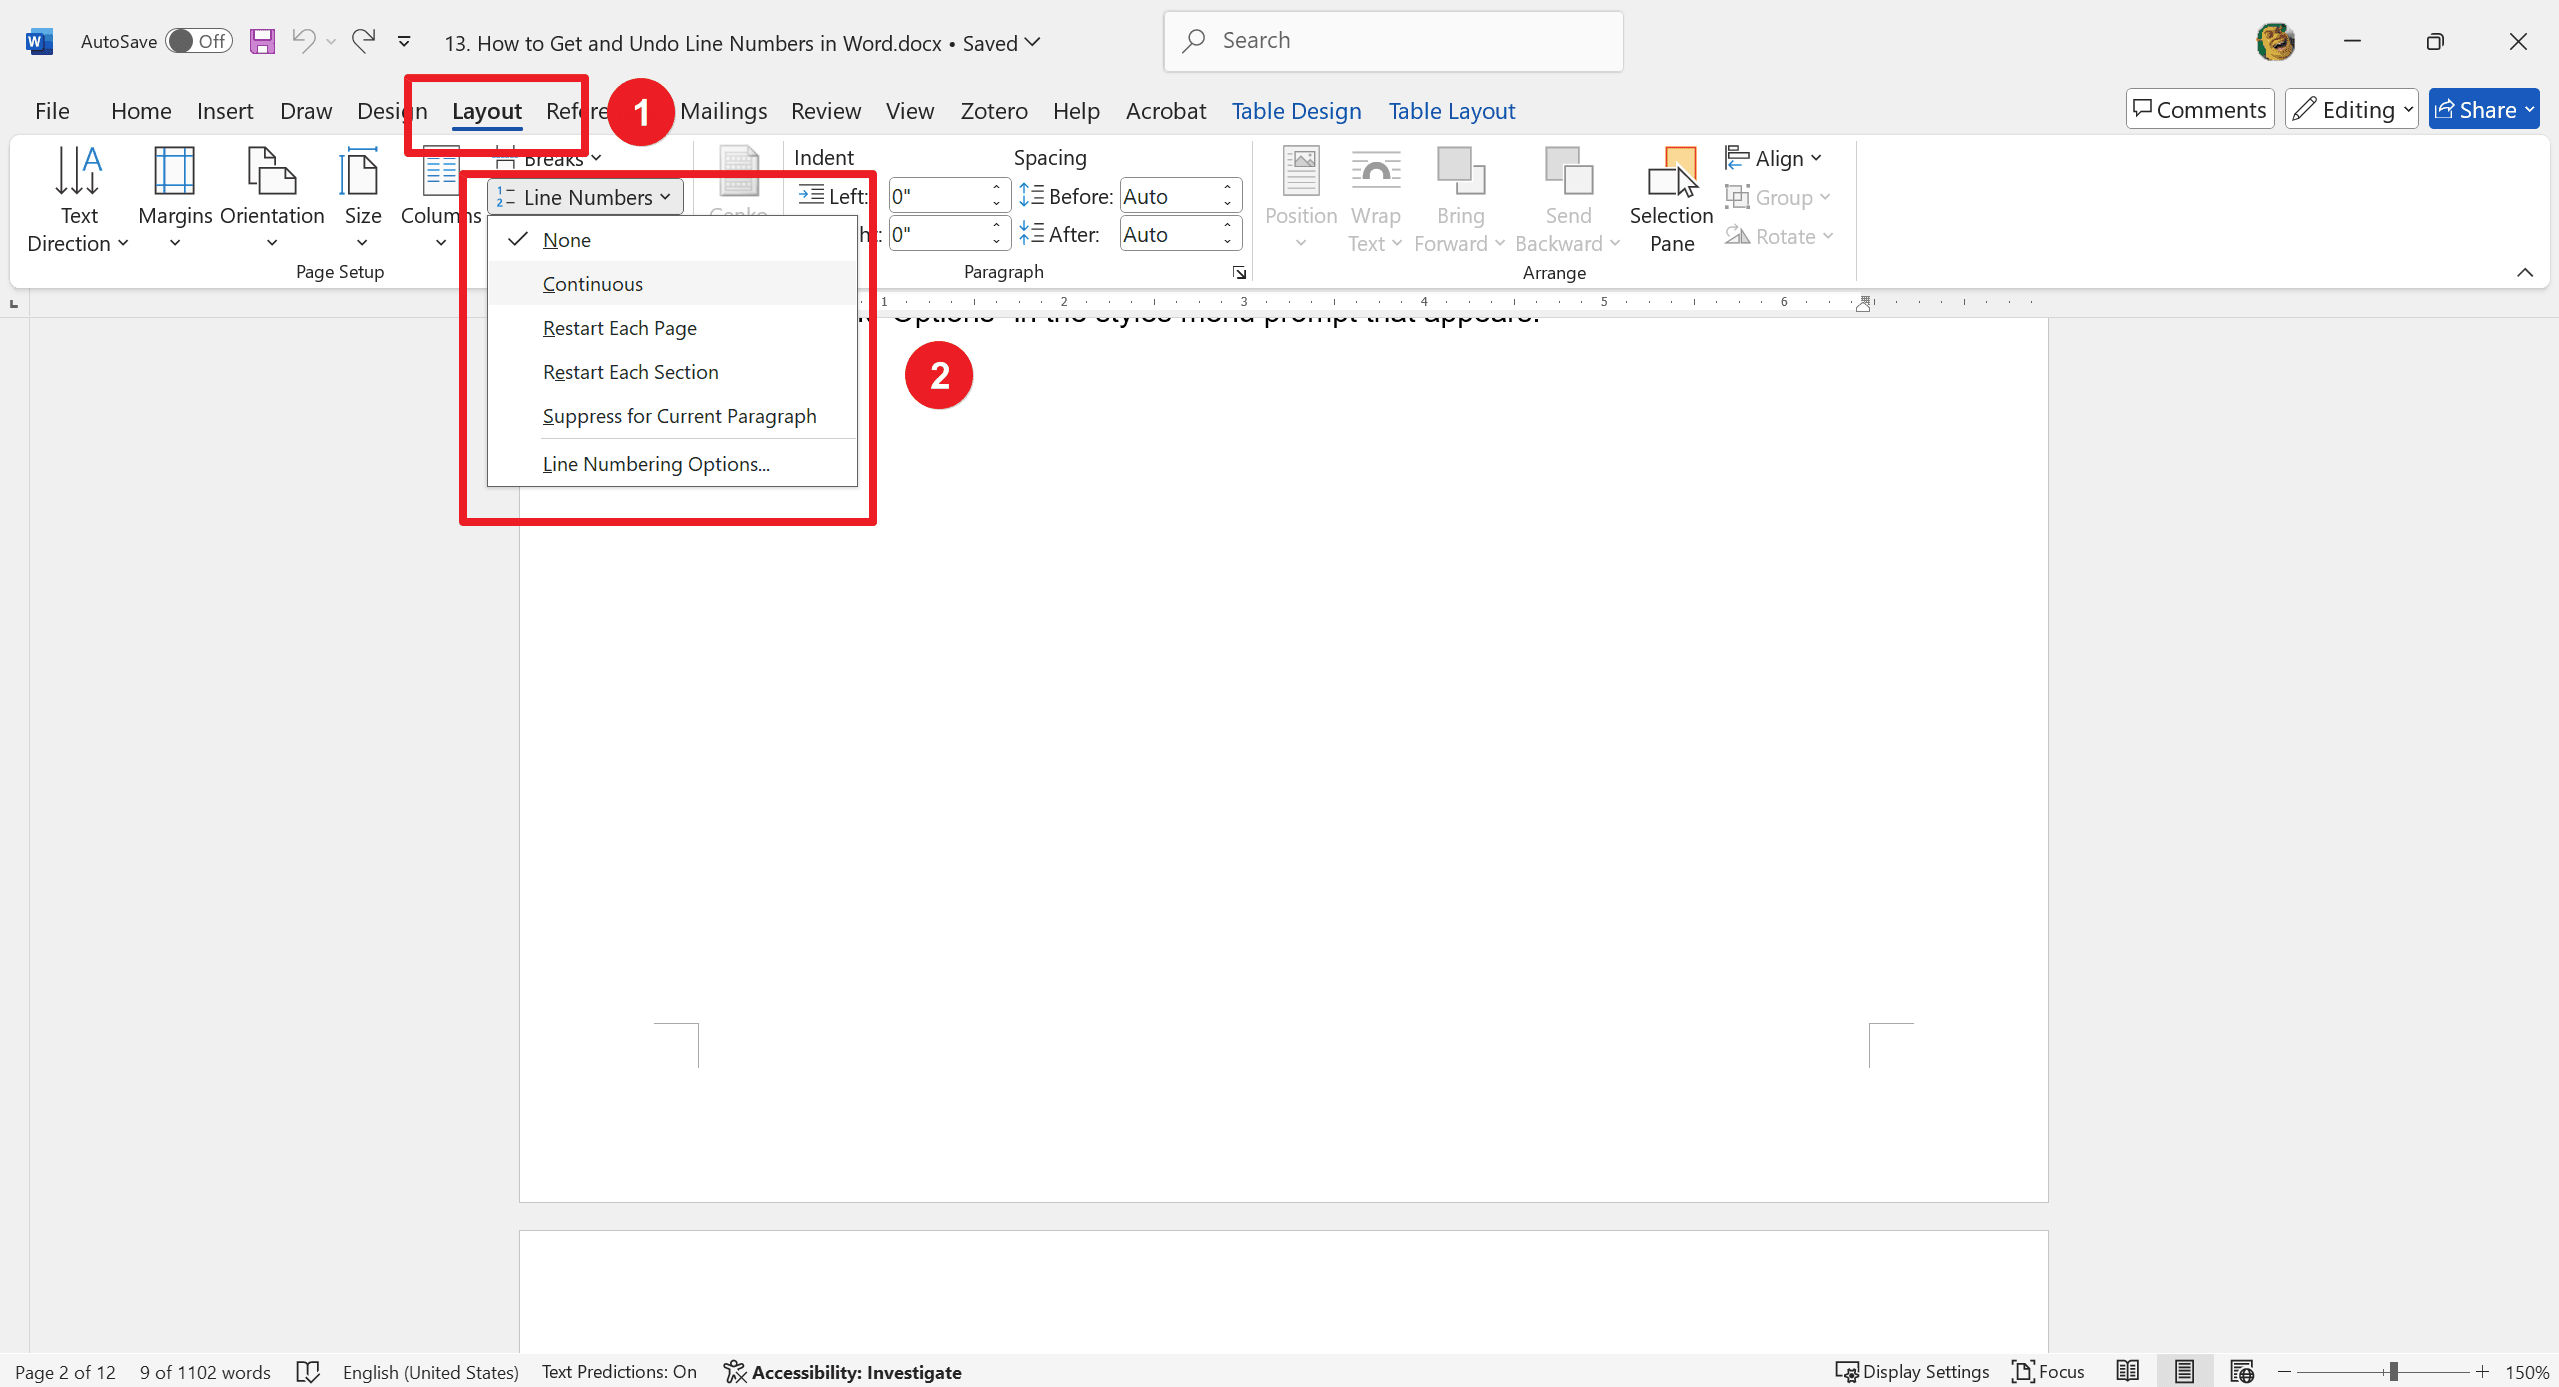
Step 4: Opt for "Continuous" to apply numbering consistently throughout the entire document.
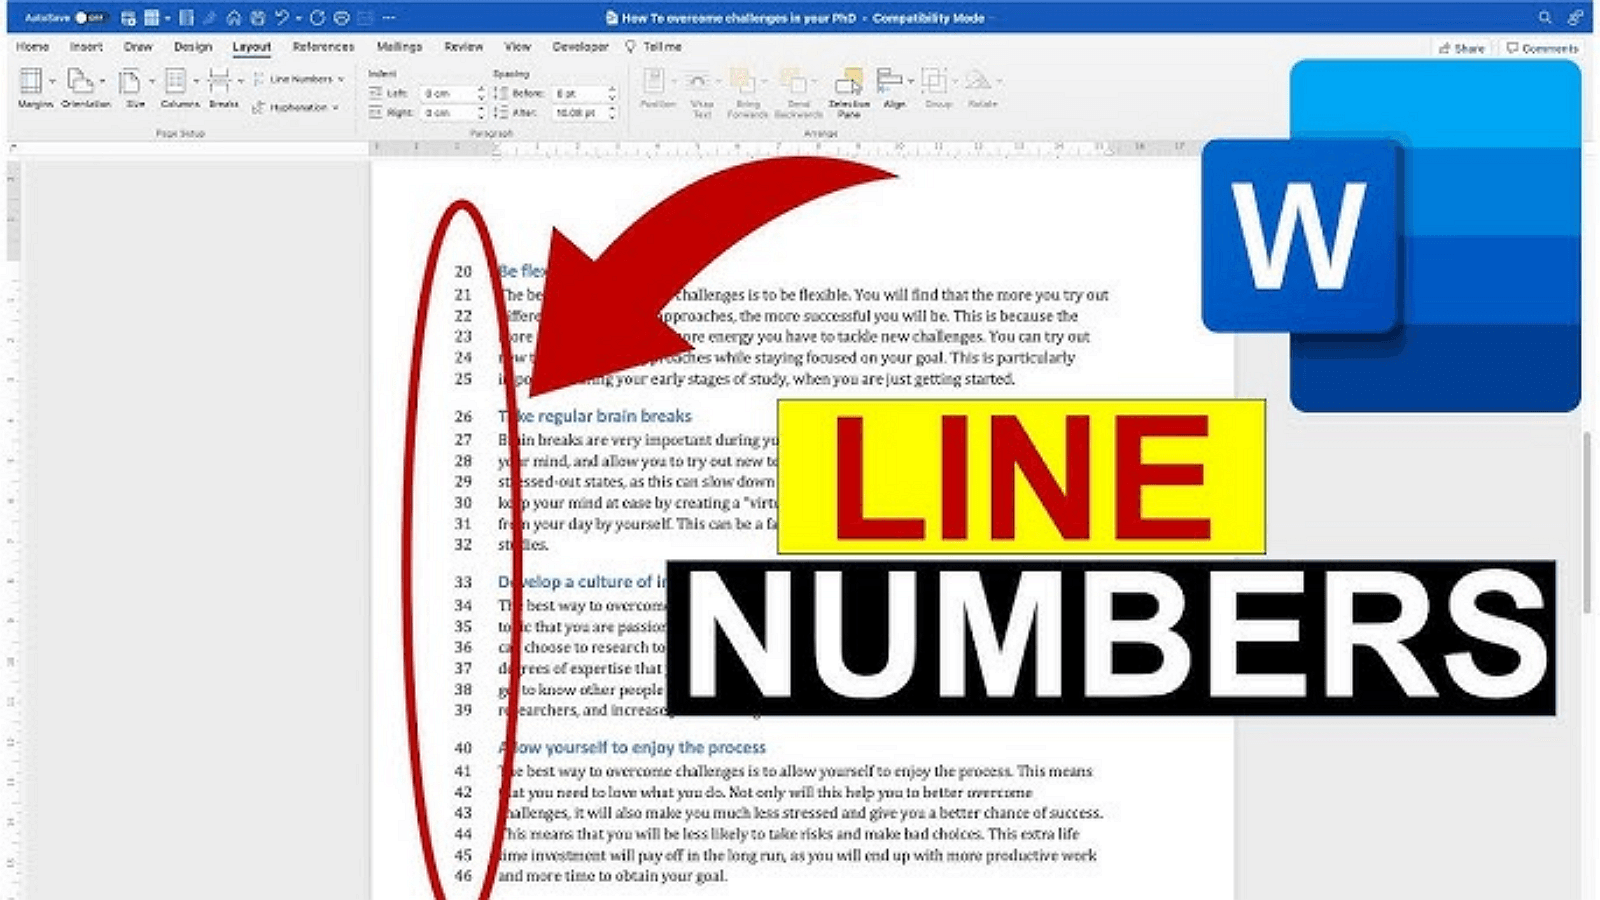
Step 5: Confirm the presence of line numbers by checking the print preview mode, where they should appear on the left margin.
By following these steps, you'll have a clear and organized document with easy-to-reference line numbers.
Customizing Line Numbers for Specific Sections
Tailoring line numbers for specific sections can enhance the organization and readability of your document. Follow these steps:
Step 1: Highlight the section where you want to apply line numbering.
Step 2: Go to the "Layout" tab on the toolbar.
Step 3: Click on “Line Numbers.”
Step 4: Select "Restart Each Section" to ensure each section has its own unique line numbering.
Step 5: Insert a section break by navigating to the "Breaks" menu and choosing the appropriate break (e.g., "Next Page" or "Continuous").
Step 6: Choose "Continuous" in the "Breaks" menu to maintain a seamless flow between sections without causing page jumps.
By following these steps, you’ll be able to customize line numbers for specific sections effectively, making your document more organized and easy to navigate.
Styling Line Numbers
Customizing the appearance of line numbers can add a unique touch to your document. Follow these steps to style line numbers:
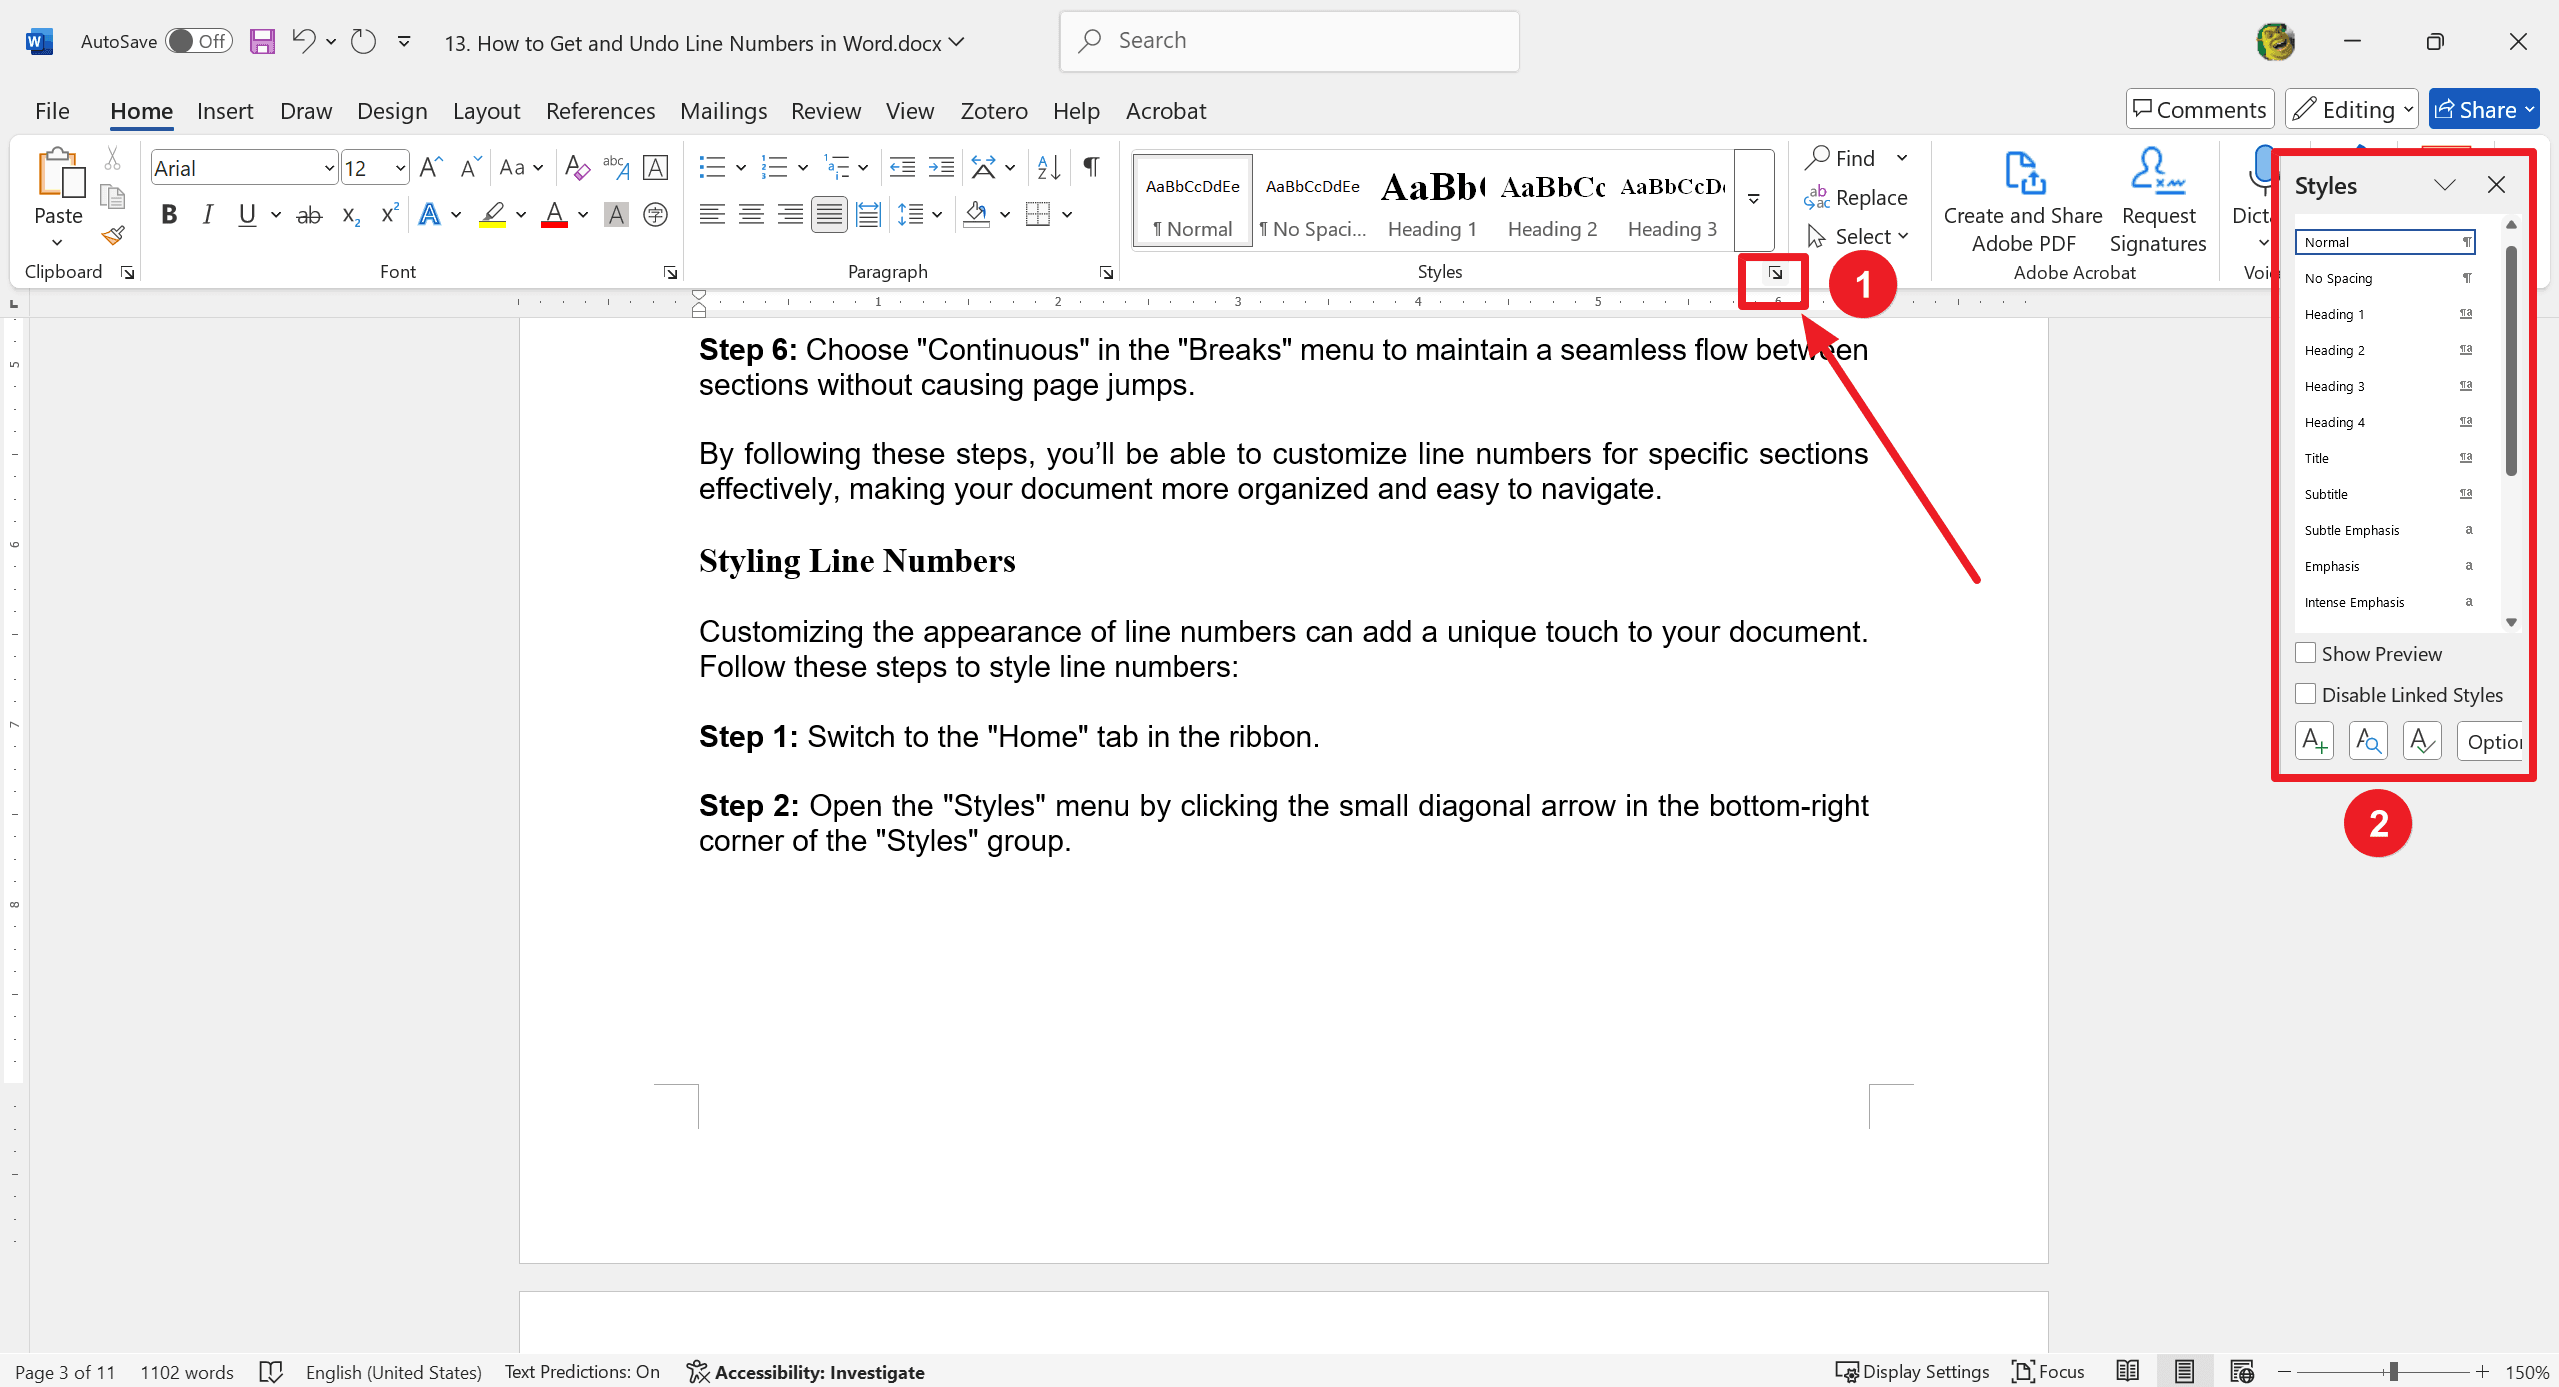
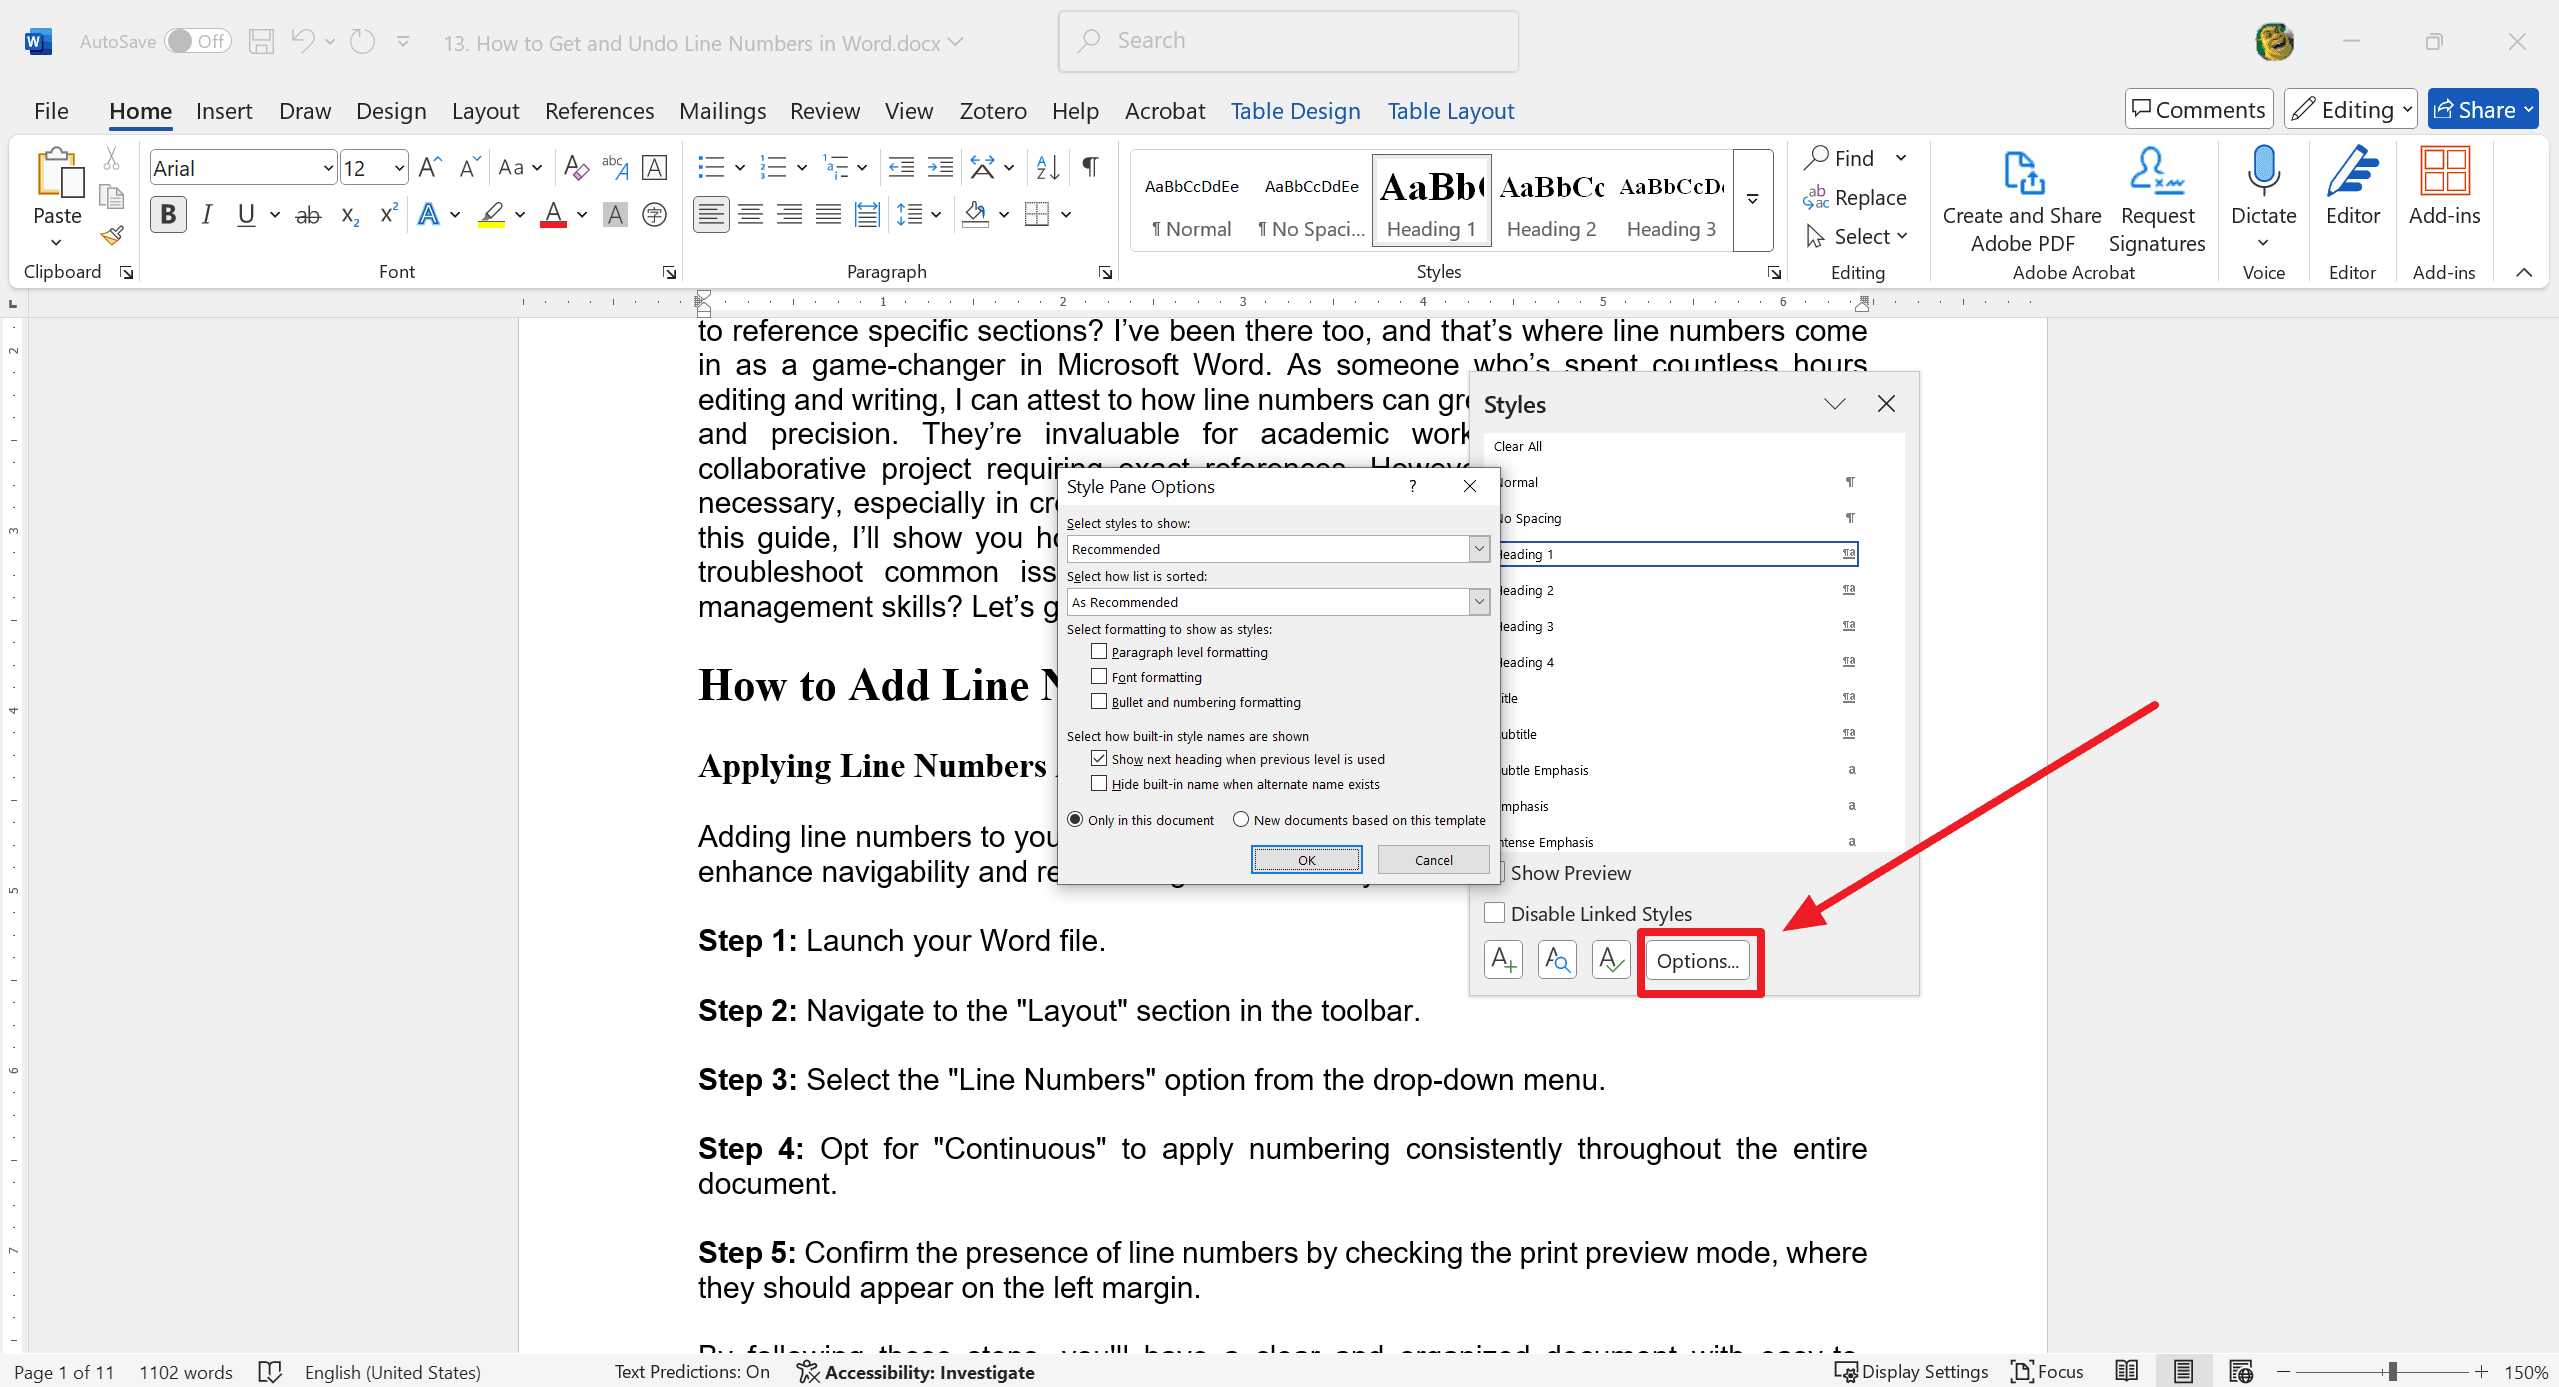
Step 1: Switch to the "Home" tab in the ribbon.
Step 2: Open the "Styles" menu by clicking the small diagonal arrow in the bottom-right corner of the "Styles" group.
Step 3: Click "Options" in the styles menu prompt that appears.
Step 4: Choose "All Styles" from the dropdown visibility option to display all available styles.
Step 5: Locate the "Line Number" style, then click "Modify" to adjust the format settings, such as font, size, and color.
Step 6: Apply the style changes to see their effect on the line numbers throughout your document.
By following these steps, you can personalize the look of your line numbers to better fit the overall design of your document.
Tip:
Switch to "Draft" view under the "View" tab for a cleaner display of line numbers, making them easier to see and manage.
How to Remove Line Numbers in Microsoft Word?
Deleting Line Numbers from the Entire Document
To remove line numbers from your entire document, follow these straightforward steps:

Step 1: Access the "Layout" tab in the ribbon.
Step 2: Locate the "Line Numbers" feature within the "Page Setup" group and click on it.

Step 3: From the dropdown menu, choose "None." This option will erase all existing line numbers throughout your document.
By following these simple steps, you can efficiently remove line numbers from your Microsoft Word document, resulting in a cleaner and more streamlined appearance.
Eliminating Line Numbers from Targeted Paragraphs
If you need to remove line numbers from specific paragraphs rather than the entire document, follow these steps:
Step 1: Place the cursor on the paragraph from which you want to remove the line numbers.
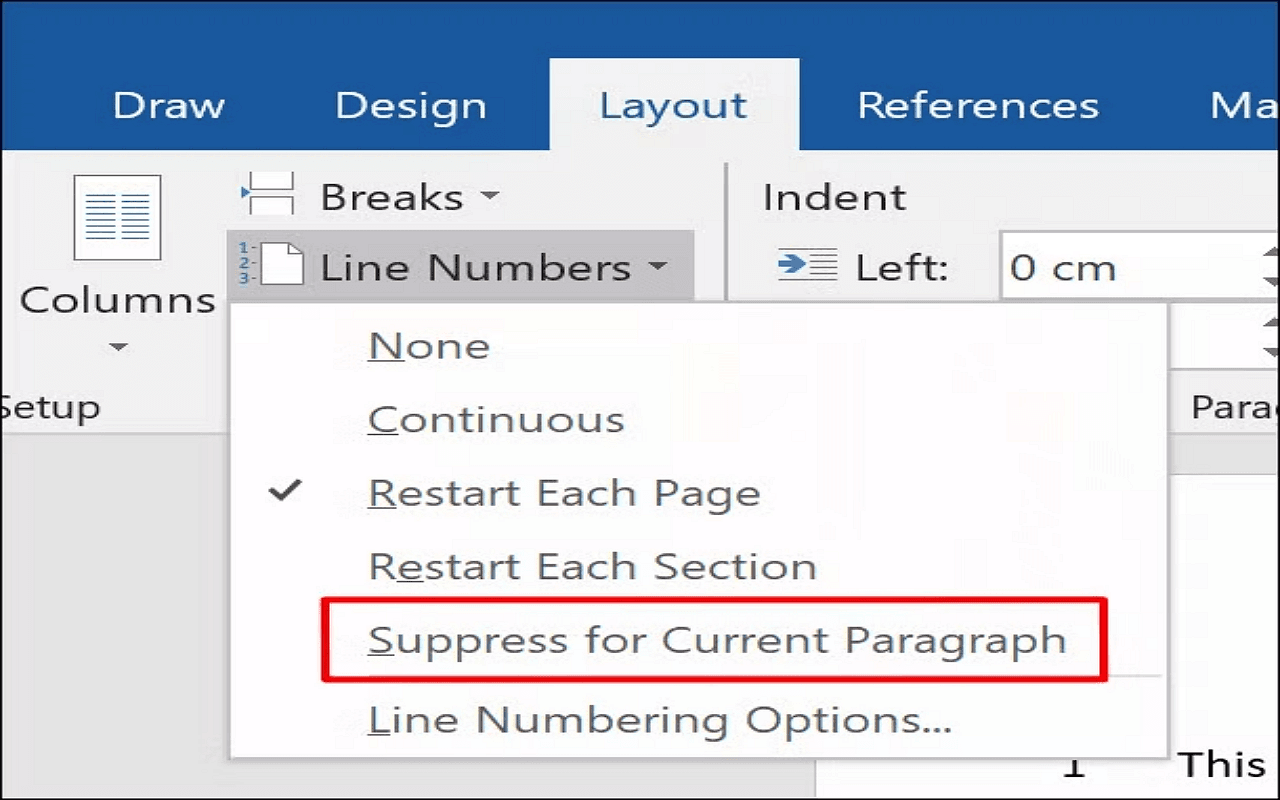
Step 2: Navigate to the "Layout" tab in the ribbon.
Step 3: Click on the "Line Numbers" command within the "Page Setup" group.
Step 4: Choose "Suppress for Current Paragraph" from the dropdown menu to exclude the selected paragraph from line numbering.
By following these steps, you can effectively eliminate line numbers from targeted paragraphs, ensuring that your document remains organized while emphasizing the sections that require unique formatting.
Advice
Regularly save document versions when applying extensive formatting changes. Use "Save As" to maintain different versions, ensuring you have backups and can revert to earlier versions if needed. This practice helps in tracking changes and preventing data loss.
Troubleshooting Common Issues
Missing Line Numbers
If line numbers are missing, check if you're in a view mode that doesn't display them, such as "Web Layout" or "Read Mode." Switch to "Print Layout" or "Draft" under the "View" tab. Document formatting conflicts, like text boxes or columns, may also hide line numbers. Adjust these elements to re-enable line number visibility.
Unwanted Line Number Persistence
If line numbers persist in unintended sections, inspect your document for section breaks or specific paragraph settings. Go to the "Layout" tab, check "Line Numbers," and ensure "Suppress for Current Paragraph" is appropriately selected. Adjusting these settings can help resolve line number placement issues.
For Further Reading
Effectively managing line numbers in your Microsoft Word documents significantly enhances both clarity and structure. By adding or removing line numbers, you can make it easier to reference specific sections, ensuring improved readability and organization.
Line numbers can be particularly useful for academic papers, legal documents, and collaborative projects where referencing exact lines is crucial. On the other hand, removing line numbers can make creative or informal documents look cleaner.
We encourage you to explore and utilize these features to tailor your documents to meet your specific needs. Whether you need to make a document easy to navigate or visually appealing, line number management offers the flexibility to achieve your desired outcome.