Hello fellow Word enthusiasts! Let's be honest, nothing says polished and professional quite like a well-organized document. A simple line can work wonders—not just dividing sections, but also improving readability and giving your document a more cohesive look. Maybe you’ve overlooked this seemingly minor detail, but adding lines is a powerful way to upgrade your Word game. Ever wondered how to do it effortlessly? You're in the right place. In this guide, I'm excited to share with you various straightforward techniques to insert lines in Word, whether you’re looking for a quick auto-format solution or something a bit more customized. Ready to elevate your document design? Let's get started!
Quick Line Creation with AutoFormat
Creating lines in Word can be a breeze with AutoFormat. Here’s how:
- Position the Cursor: Place your cursor where you want the line to appear.
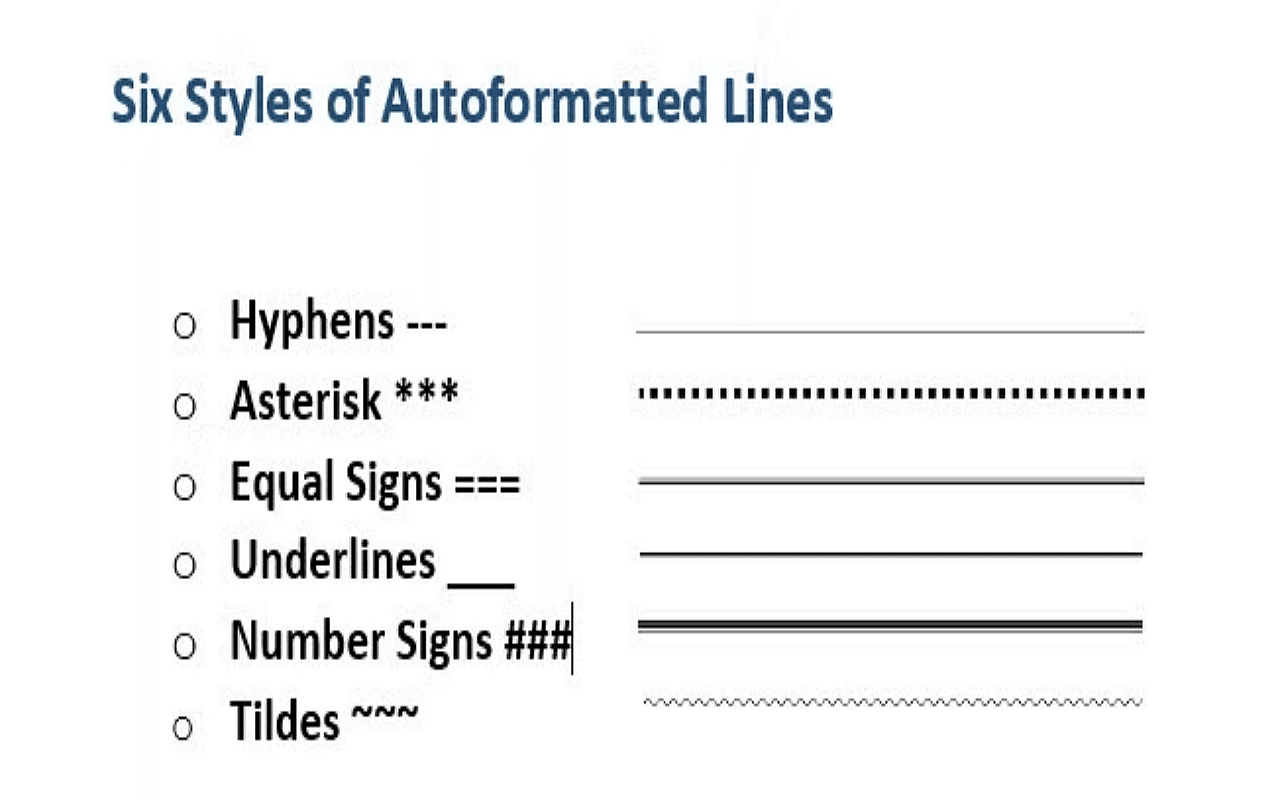
- Use Character Sequences: Simply type three or more hyphens (---), underscores (___), or equals signs (===) and press Enter.
- Experiment with Characters: Each character sequence creates a different line style. Try asterisks (***), tildes (~~~), or hashes (###) for variety.
Adjusting AutoFormat Settings
If AutoFormat isn't working as expected, you can customize the settings. Here are the steps:
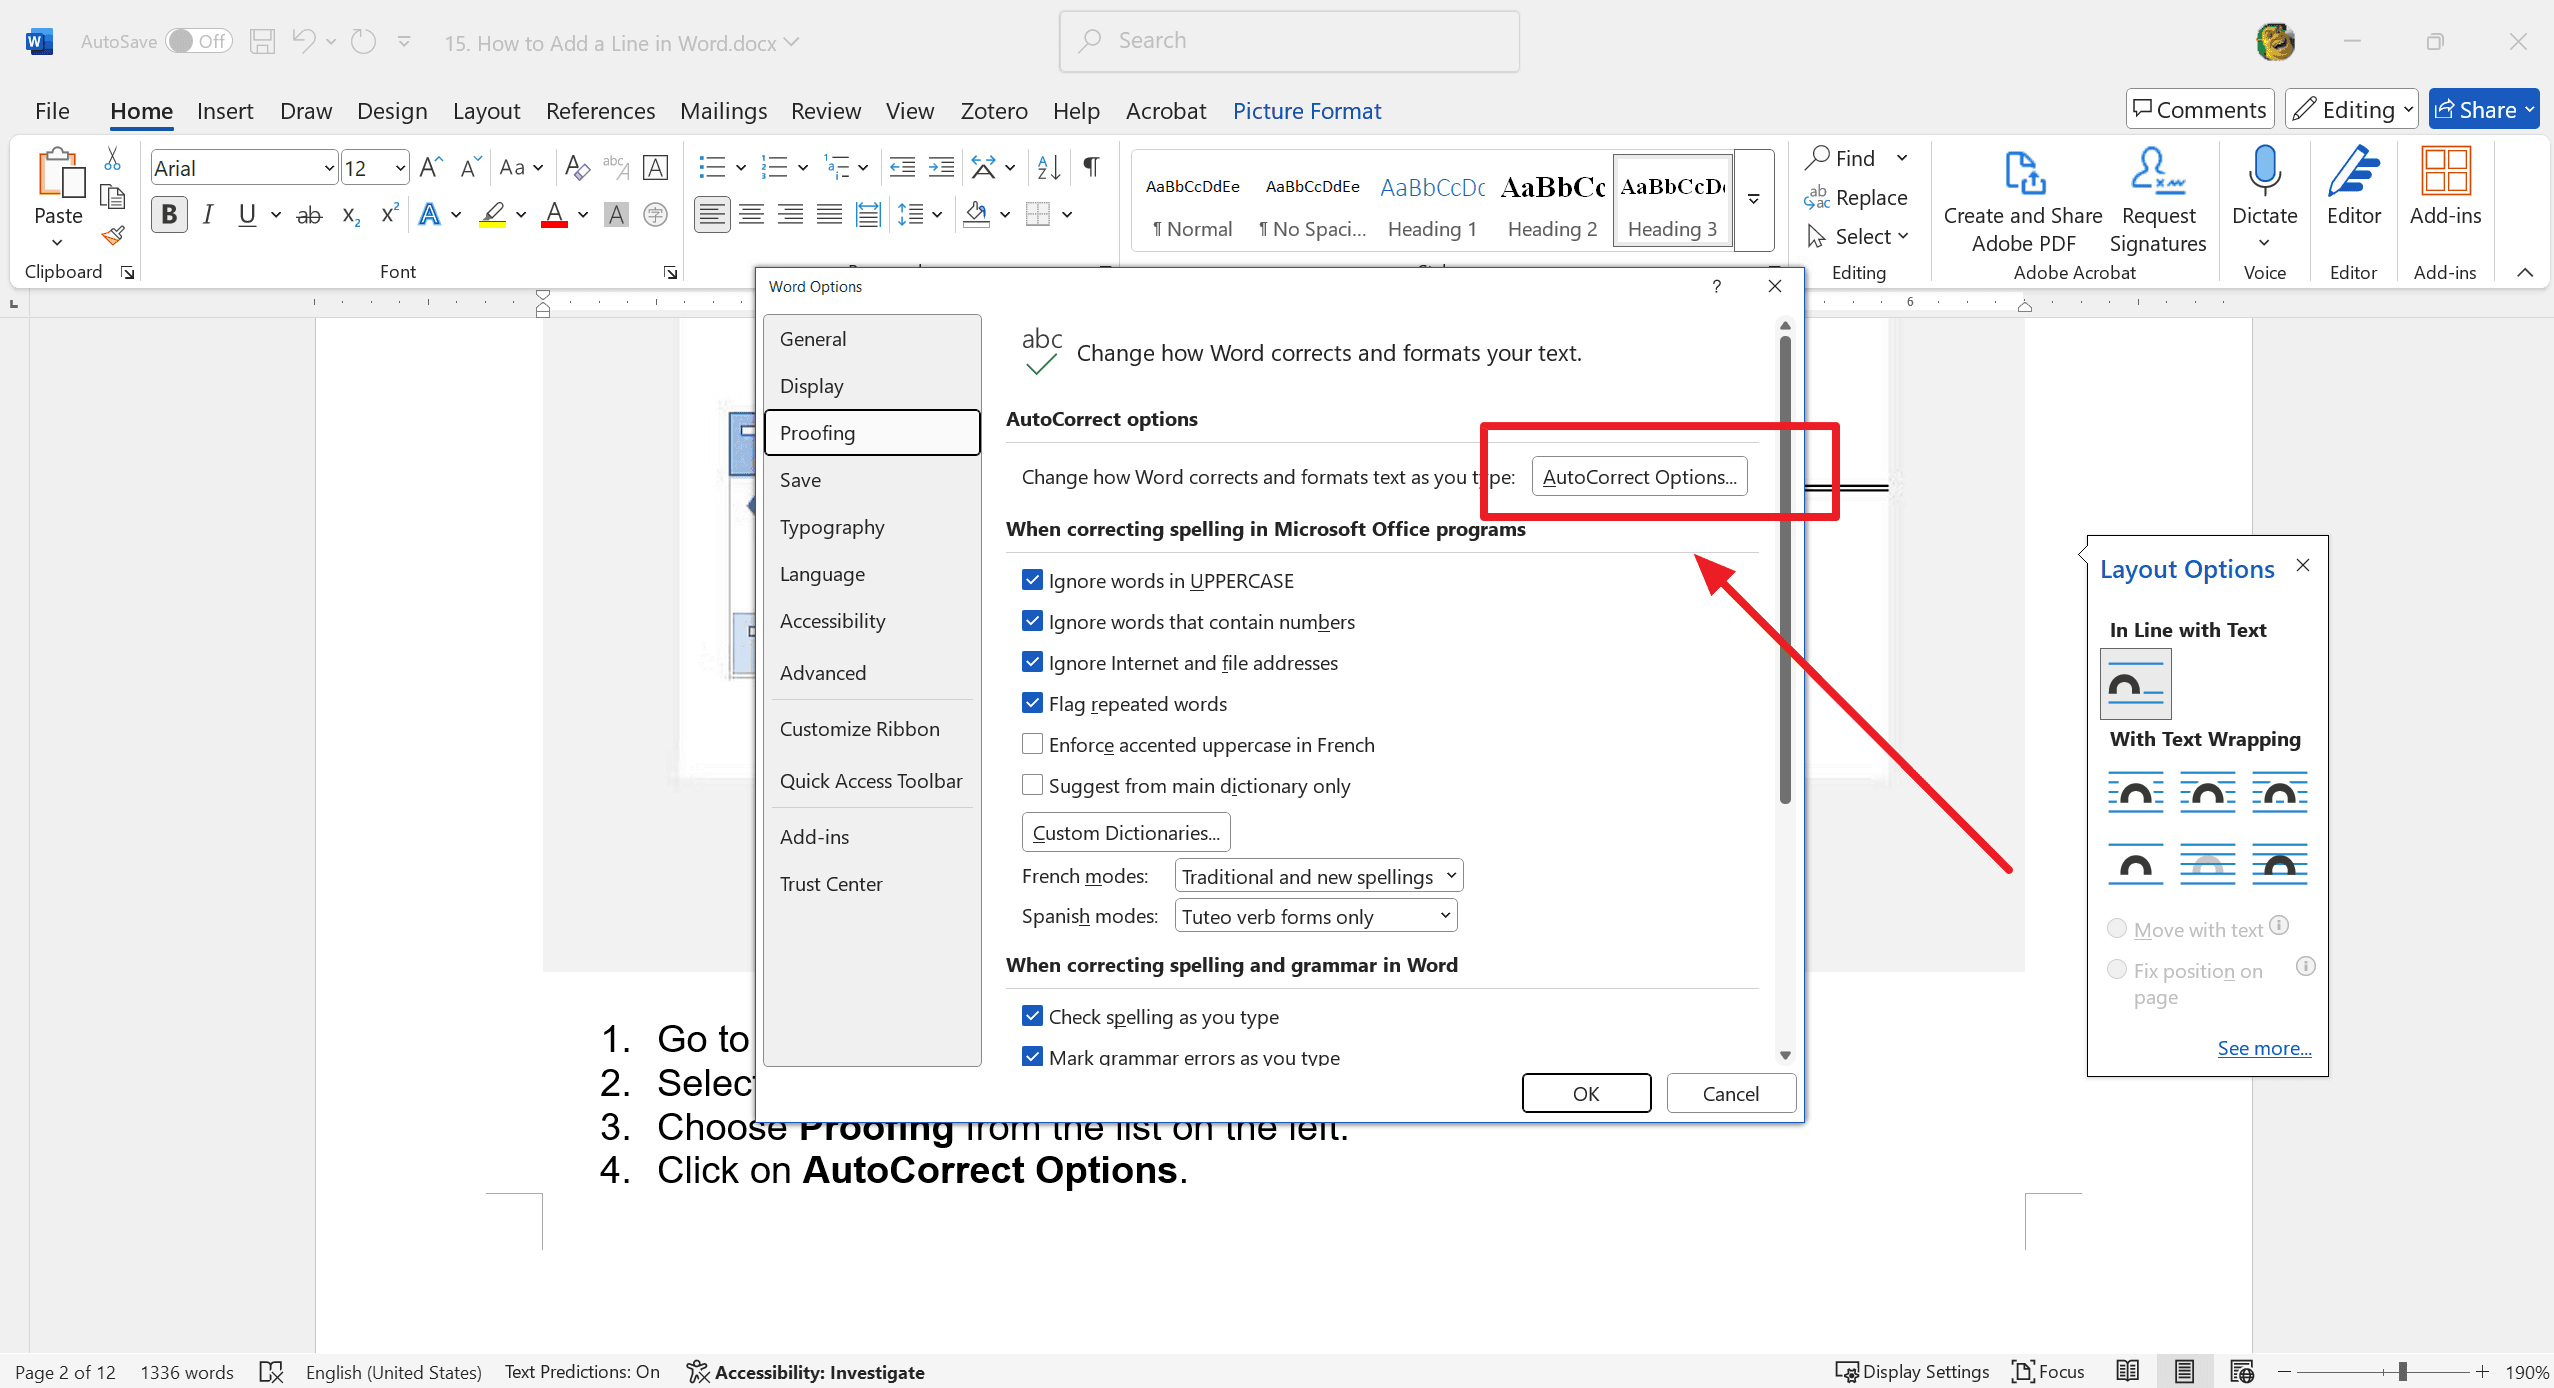
1. Go to File in the menu. And then, select Options.
2. Thereafter, choose Proofing from the list on the left. Click on AutoCorrect Options.
3. Navigate to the AutoFormat As You Type tab. And, adjust the settings for automatic line creation and other formatting features.
Ribbon Method: Adding Lines with Built-in Tools
1. Position the Cursor: Place your cursor where you want the line to be inserted.
2. Access the 'Home' Tab: Click on the Home tab in the Ribbon interface at the top of the screen.
3. Find 'Borders': In the Paragraph group, click the small arrow next to the Borders button to open the border options menu.
4. Choose 'Horizontal Line': Select Horizontal Line from the dropdown menu. This will insert a horizontal line at the cursor's position.
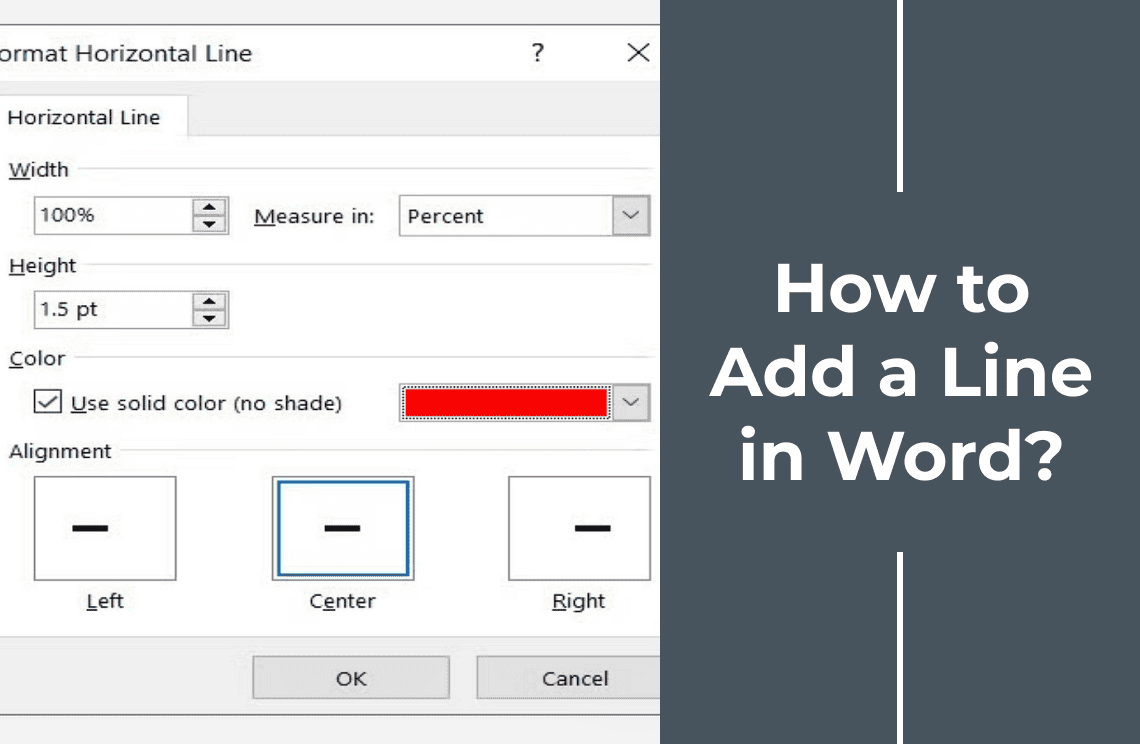
5. Personalize the Line: For further customization, right-click on the newly inserted line and select Format Horizontal Line. Here, you can adjust the width, height, color, and alignment of the line.

Border Techniques for Versatile Lines
1. Highlight Text or Position Cursor: Start by highlighting the text that needs a border or place your cursor where you want the border line to appear.
2. Access the 'Borders' Menu: Navigate to the Home tab on the Ribbon. In the Paragraph group, click the small arrow next to the Borders button to display the border options.
3. Apply Borders: Choose from various options like bottom, top, left, or right borders to fit your styling needs.
4. Modify Borders: For more customization, select Borders and Shading from the Borders menu. This allows you to adjust border style, color, and width, making your lines more versatile.
Crafting Lines with the Shapes Tool
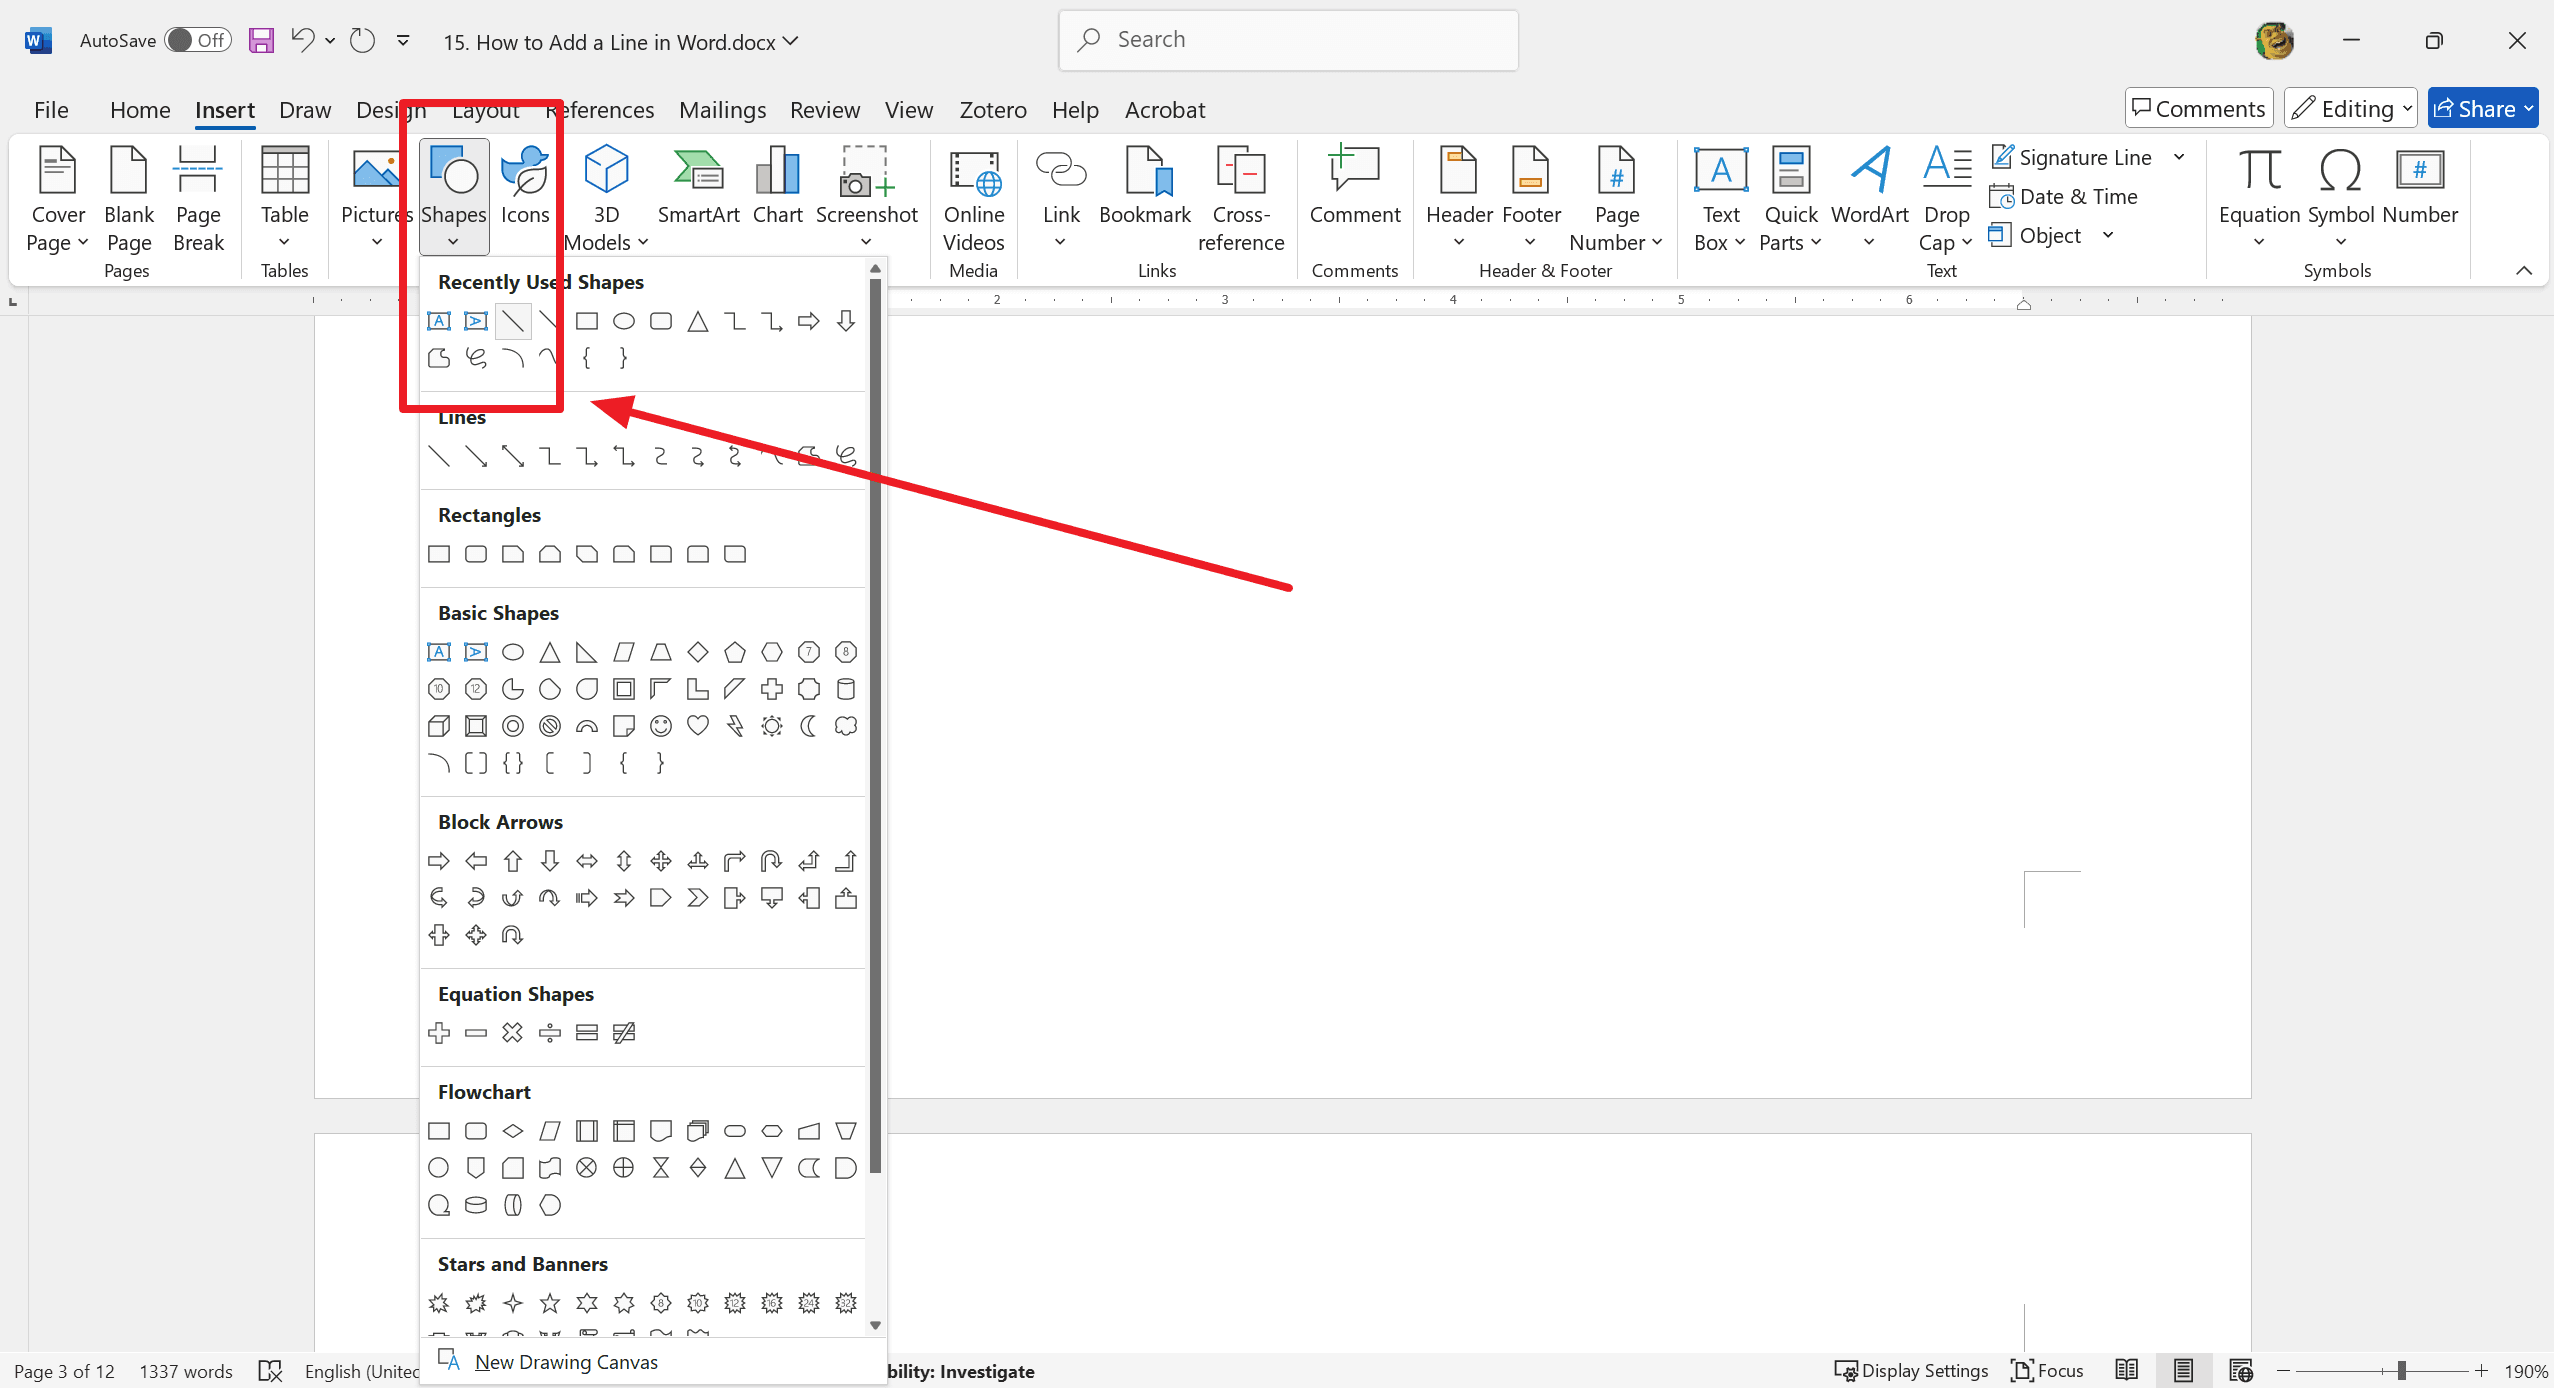
1. Navigate to the 'Insert' Tab: Open your document and click on the Insert tab in the Ribbon.
2. Select 'Shapes': From the drop-down menu, choose the type of line you'd like to draw, such as a straight line or arrow.
3. Draw on Your Document: Click and drag the cursor on the document to create the line. Release the mouse button when the line is at your desired length.
4. Adjust Properties: Use the Shape Format tab that appears when the line is selected. Here, you can adjust the line's color, thickness, style, and more.
5. Snap Line to Grid: For precise alignment, hold down the Shift key while drawing the line. This helps snap the line to the grid, ensuring straightness.
Column Trick for Vertical Lines
Roadmap:
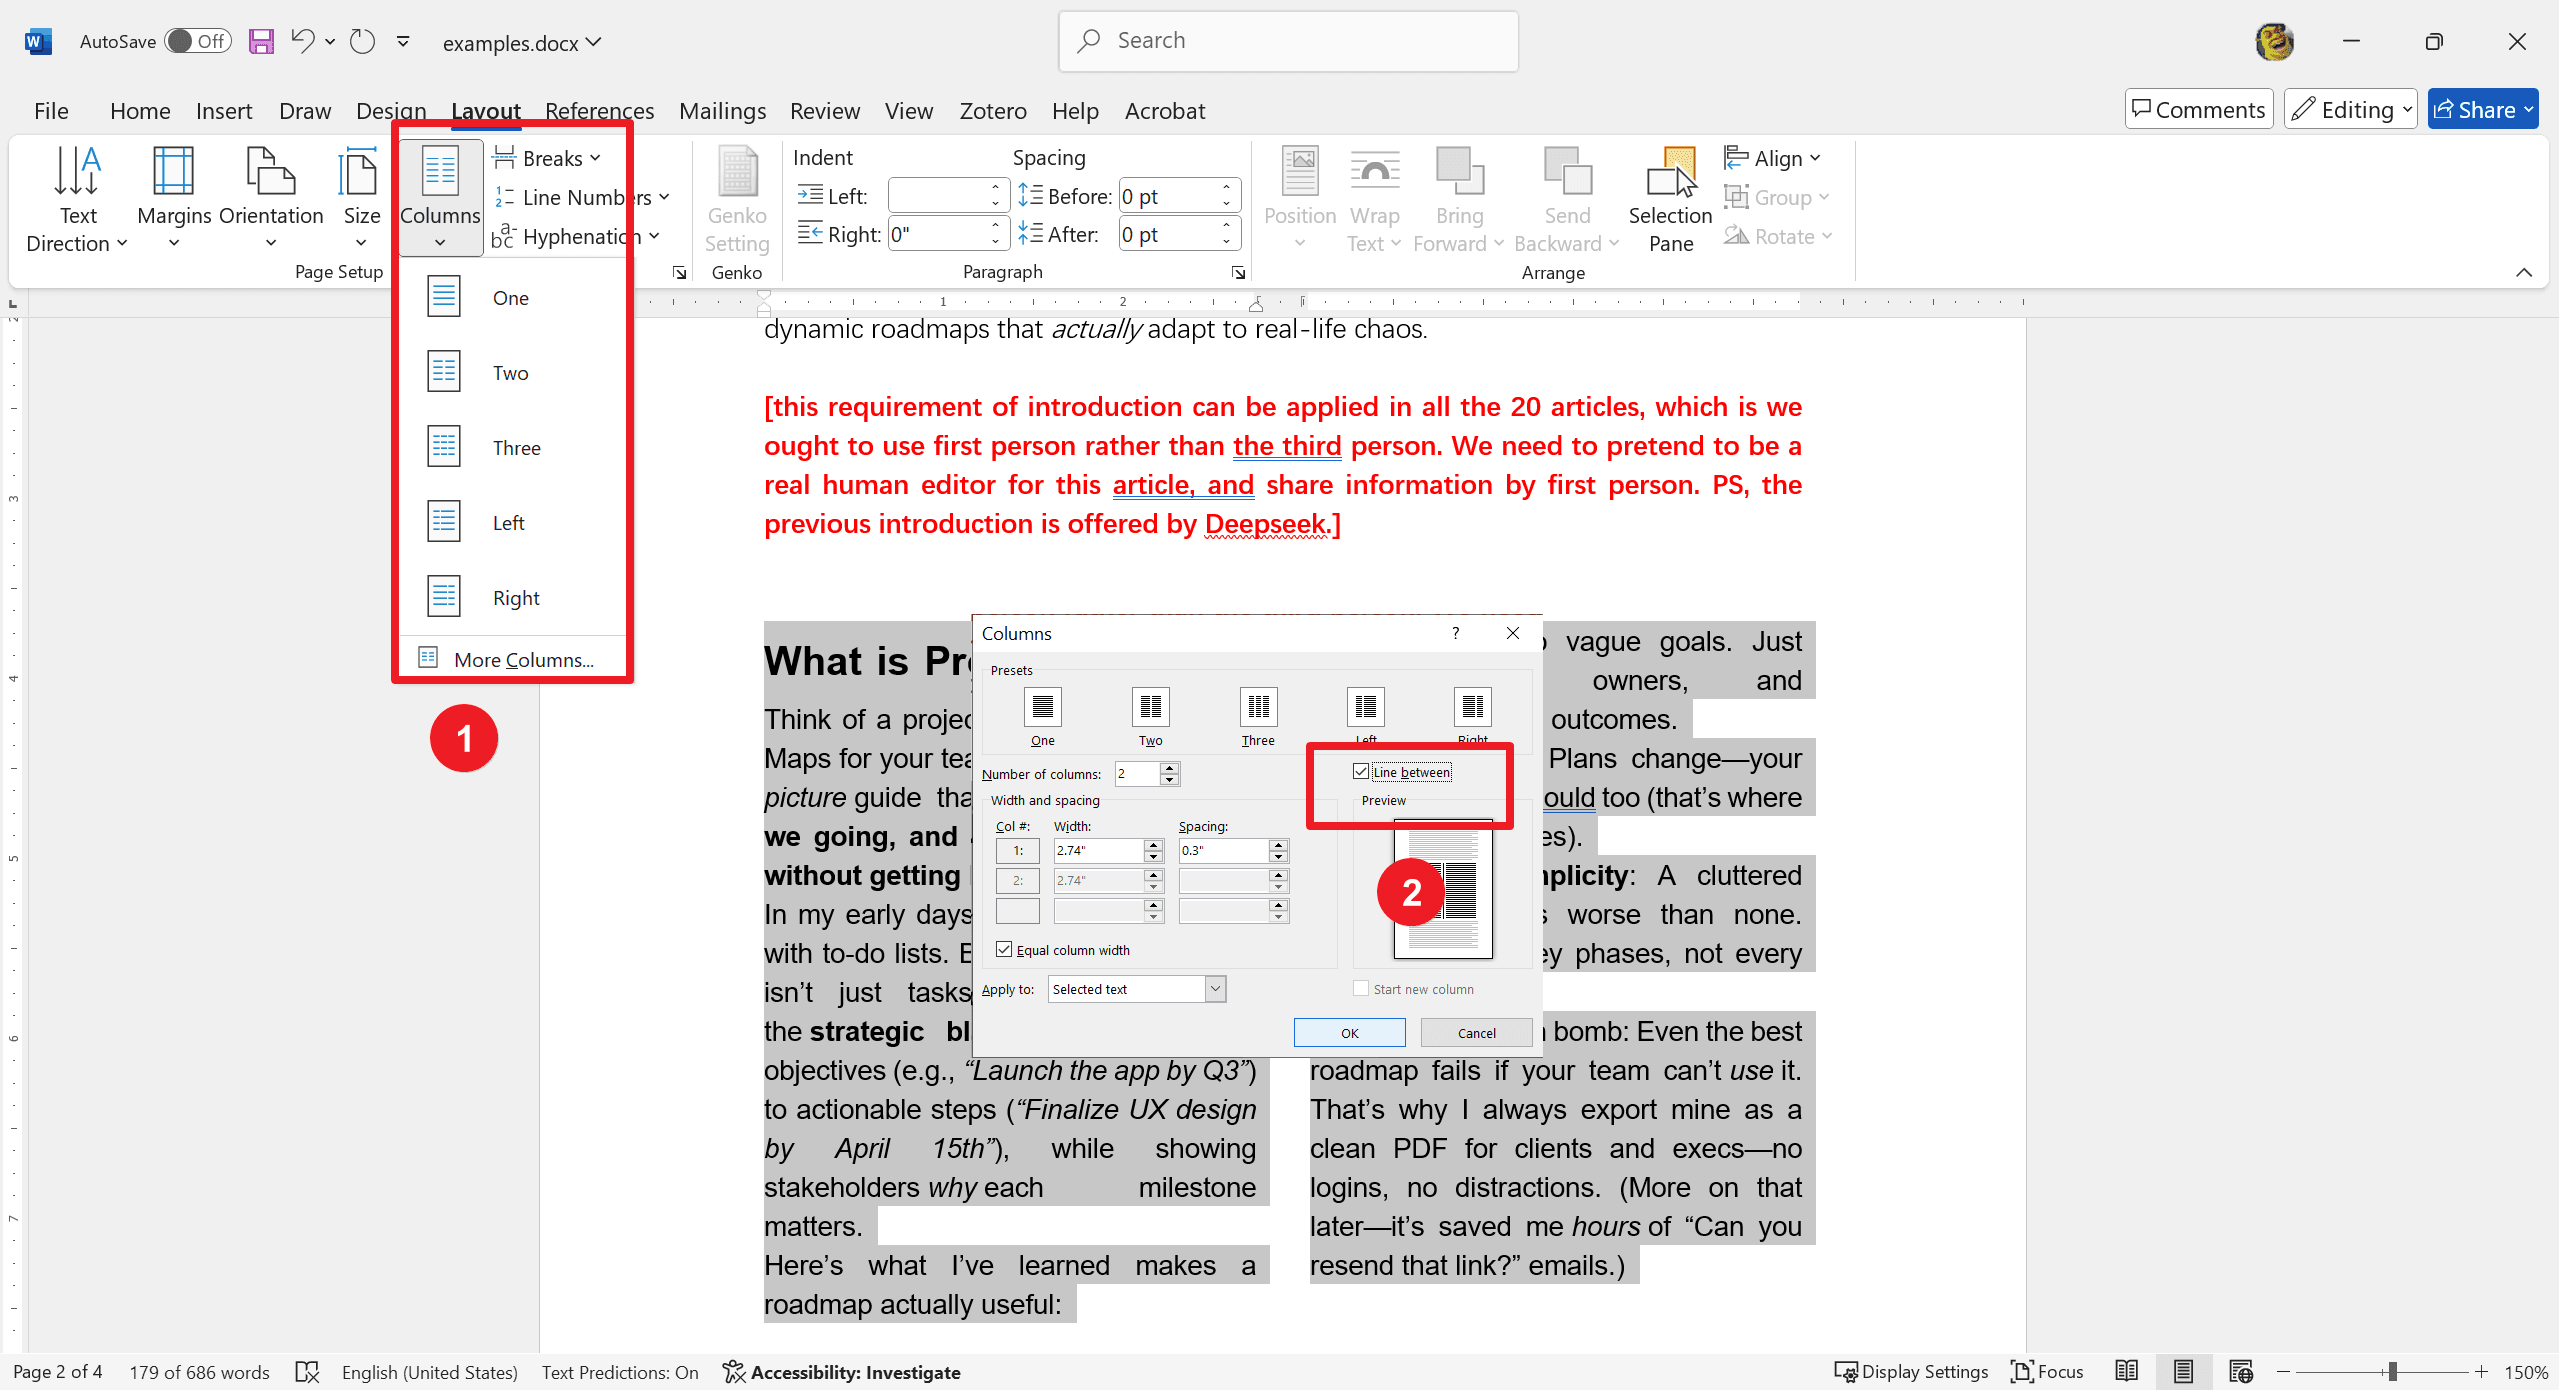
1. Highlight the Text Area: Start by highlighting the text area that you want to split into columns.
2. Access 'Layout': Go to the Layout tab in the Ribbon.
3. Choose 'Columns': Click on Columns and then select More Columns from the dropdown menu.
4. Enable 'Line Between': In the Columns dialog box, check the Line Between option. This will insert vertical lines between your columns.
5. Configure Column Widths and Spacing: Adjust the number of columns, column widths, and spacing as needed. Use the preview window to see how your changes will look.
Creative Alternatives
1. Using the Bar Tab: Add Vertical Lines: Set tab stops to create vertical lines at specific points in your text. This can be done via the Ruler or Tabs menu.
2. Integrating Graphics: Artistic Effects: Embed images or graphics to enhance document aesthetics. Use the Insert tab to add pictures or shapes, and adjust their size and position via the Format options for best visual impact.
Troubleshooting Common Line Issues
Line Stuck or Misplaced
If a line is stuck or misplaced, it can disrupt your document’s layout. Use the undo feature to revert unintended changes quickly or manually reposition the line by dragging it to the desired location. This ensures precision and maintains the document’s structure.
Unwanted AutoFormat Lines
AutoFormat can sometimes insert lines where they aren’t needed. To prevent this, manage your auto-correct settings by disabling specific auto-line features. This gives you greater control over the appearance of your document and avoids unintentional formatting.
For Further Reading
I have explored a variety of methods to enhance your documents with borders and lines, each offering unique advantages and creative possibilities. From using the Borders menu for neatly defined edges to crafting lines with the Shapes Tool for artistic flexibility, these techniques can meet diverse needs. Employing the Column Trick introduces vertical lines for structured, professional layouts, while using the Bar Tab provides precise control over vertical line placement. Integrating Graphics elevates the visual appeal of your projects.
Moreover, for those seeking to optimize their document management and processing skills, it is highly recommended to consult How-to & Tips Articles | PDF Agile and Microsoft Word Tips and Tricks | PDF Agile. These resources offer in-depth insights and practical guidance on Microsoft Word and PDF, enabling users to harness the full potential of this ubiquitous tool. Access these valuable articles at PDF Agile for comprehensive support and advanced techniques.