Page breaks can be a double-edged sword in our Word documents. On one hand, they help organize our content by starting text on a new page, giving it a clean and professional look. On the other hand, a misplaced page break can disrupt the flow, leaving us with awkward gaps and uneven formatting. If you've ever found yourself struggling with these unwelcome page interruptions, you're not alone. In this article, I'll walk you through the process of undoing page breaks, sharing strategies to smooth out your document layout effortlessly. Whether it's accidental manual breaks or an automatic one that doesn't fit your vision, we'll tackle these hurdles step by step. Let's dive into how to undo page breaks in Word.
Techniques to Remove Page Breaks in Word
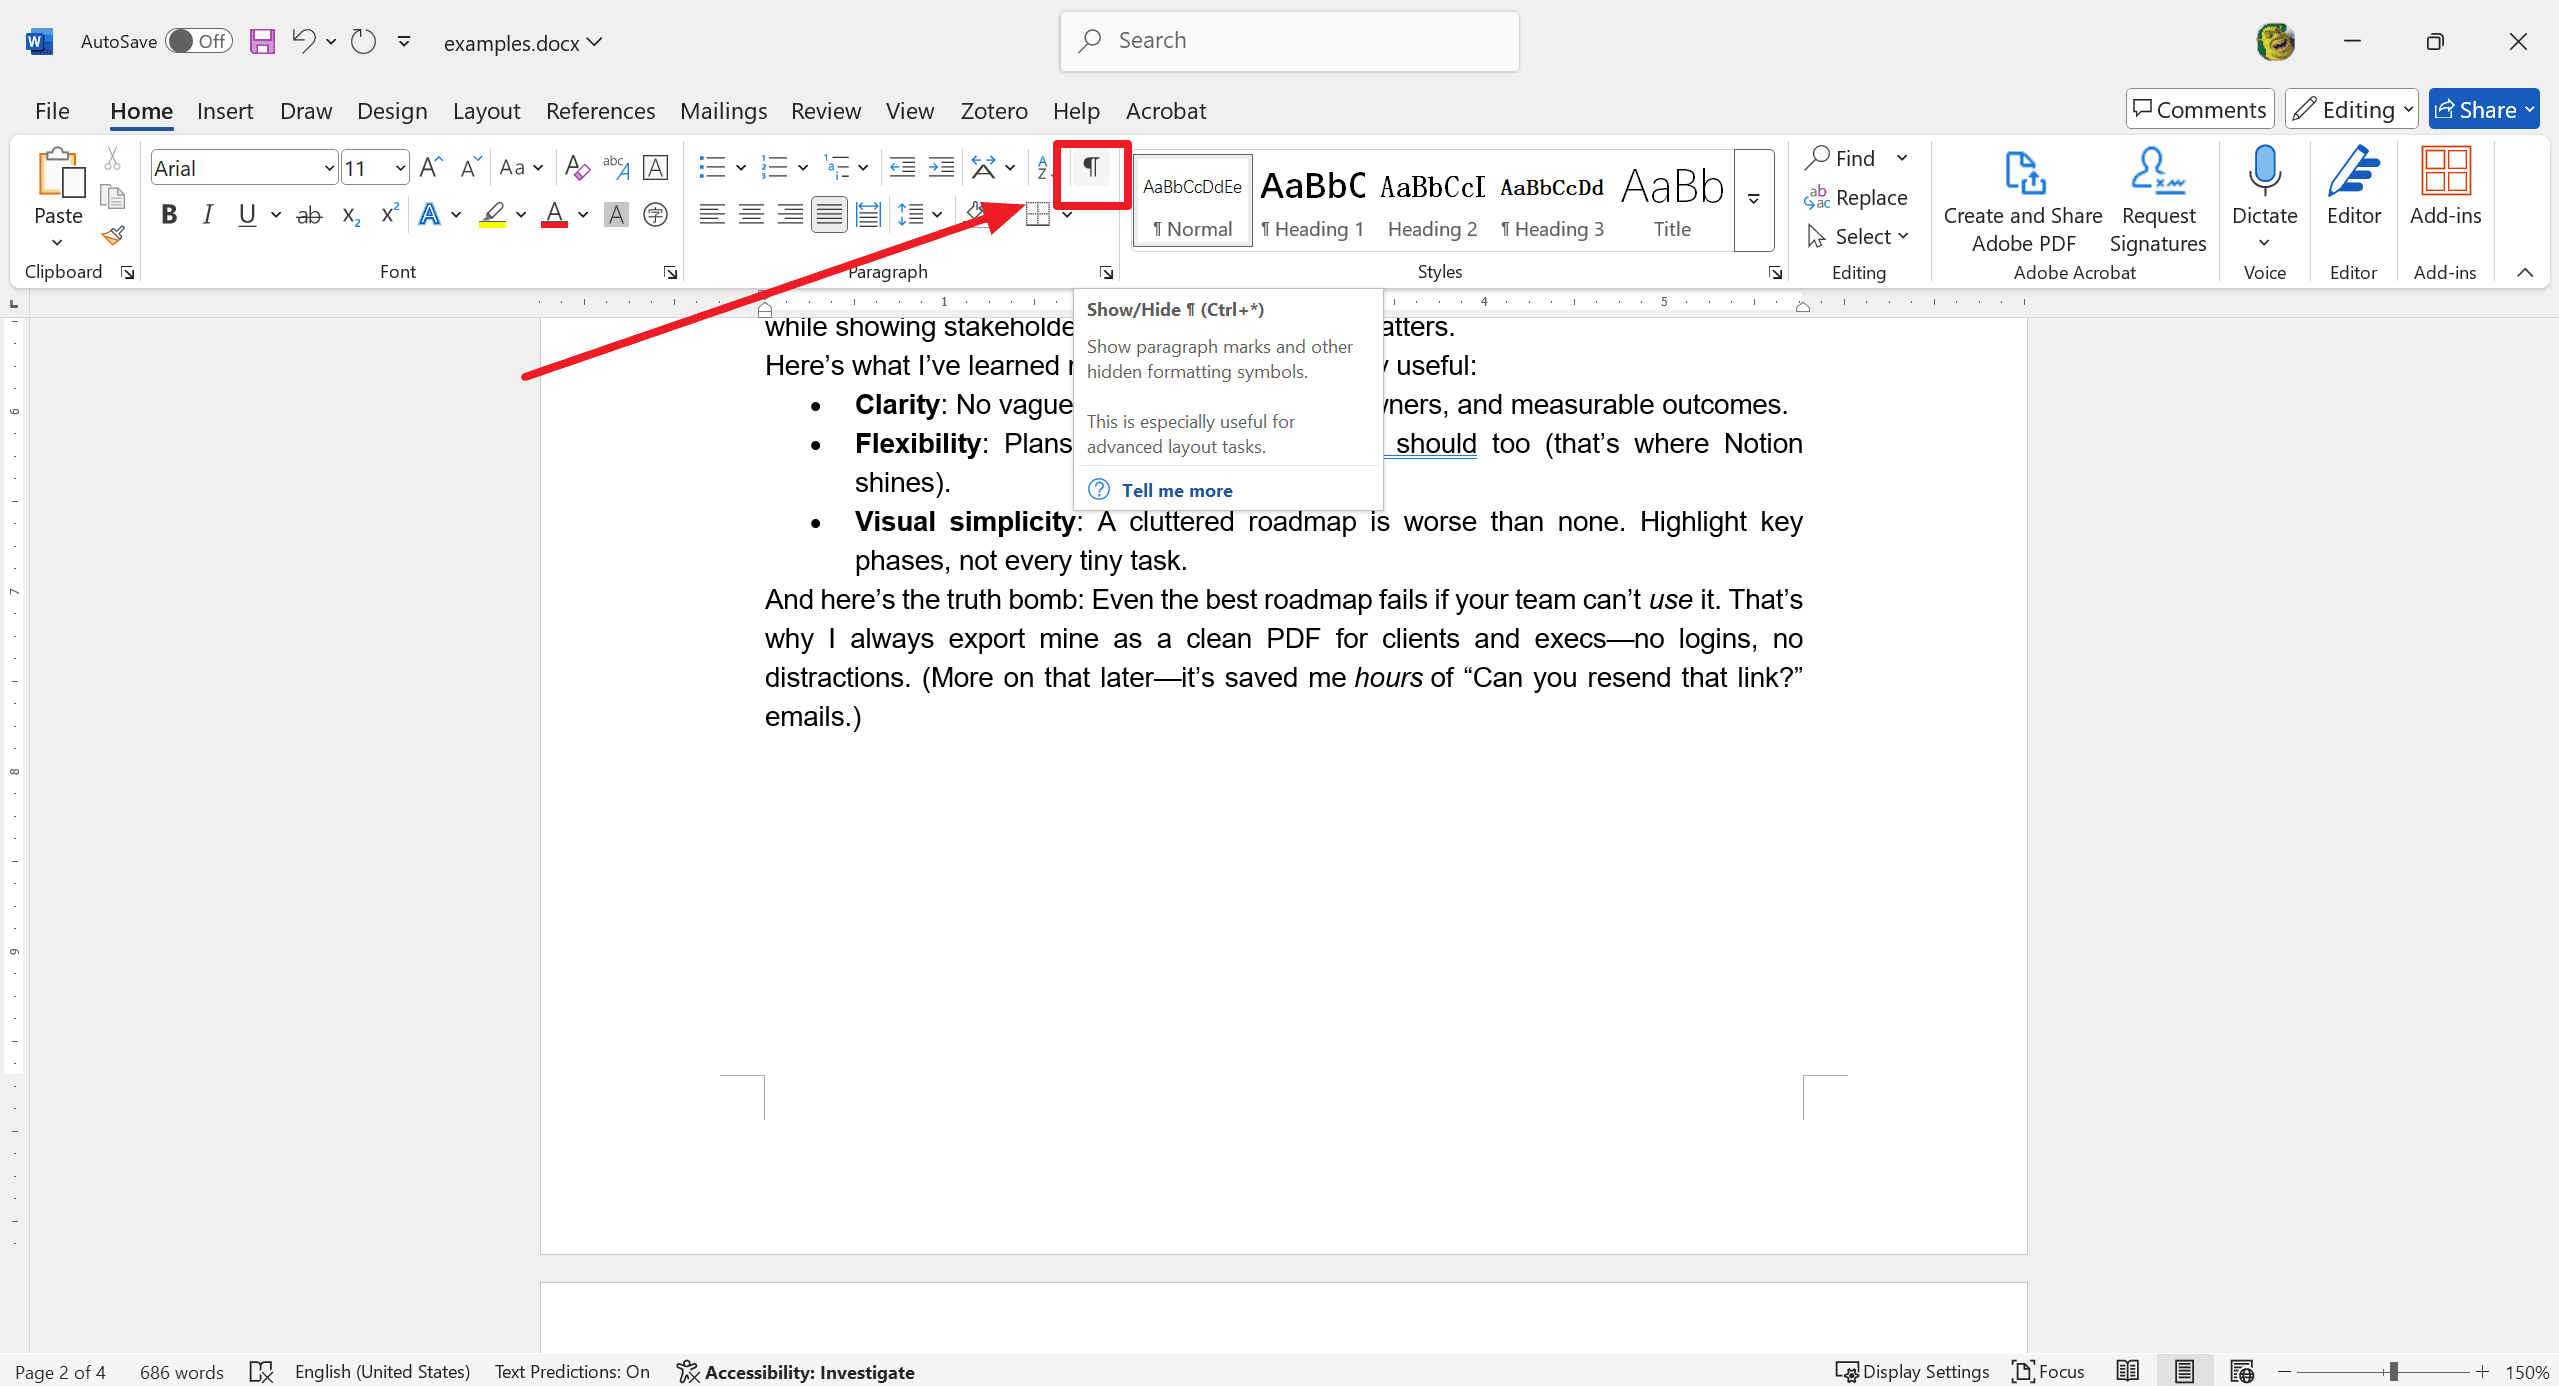
Method 1: Utilizing the Show/Hide Function
Step 1: Enable the Show/Hide Feature
- Go to the Home tab in your toolbar.
- Click on the ¶ symbol (Show/Hide command).
Step 2: Locate the Page Breaks
- Scroll through your document.
- Look for dotted lines labeled "Page Break".
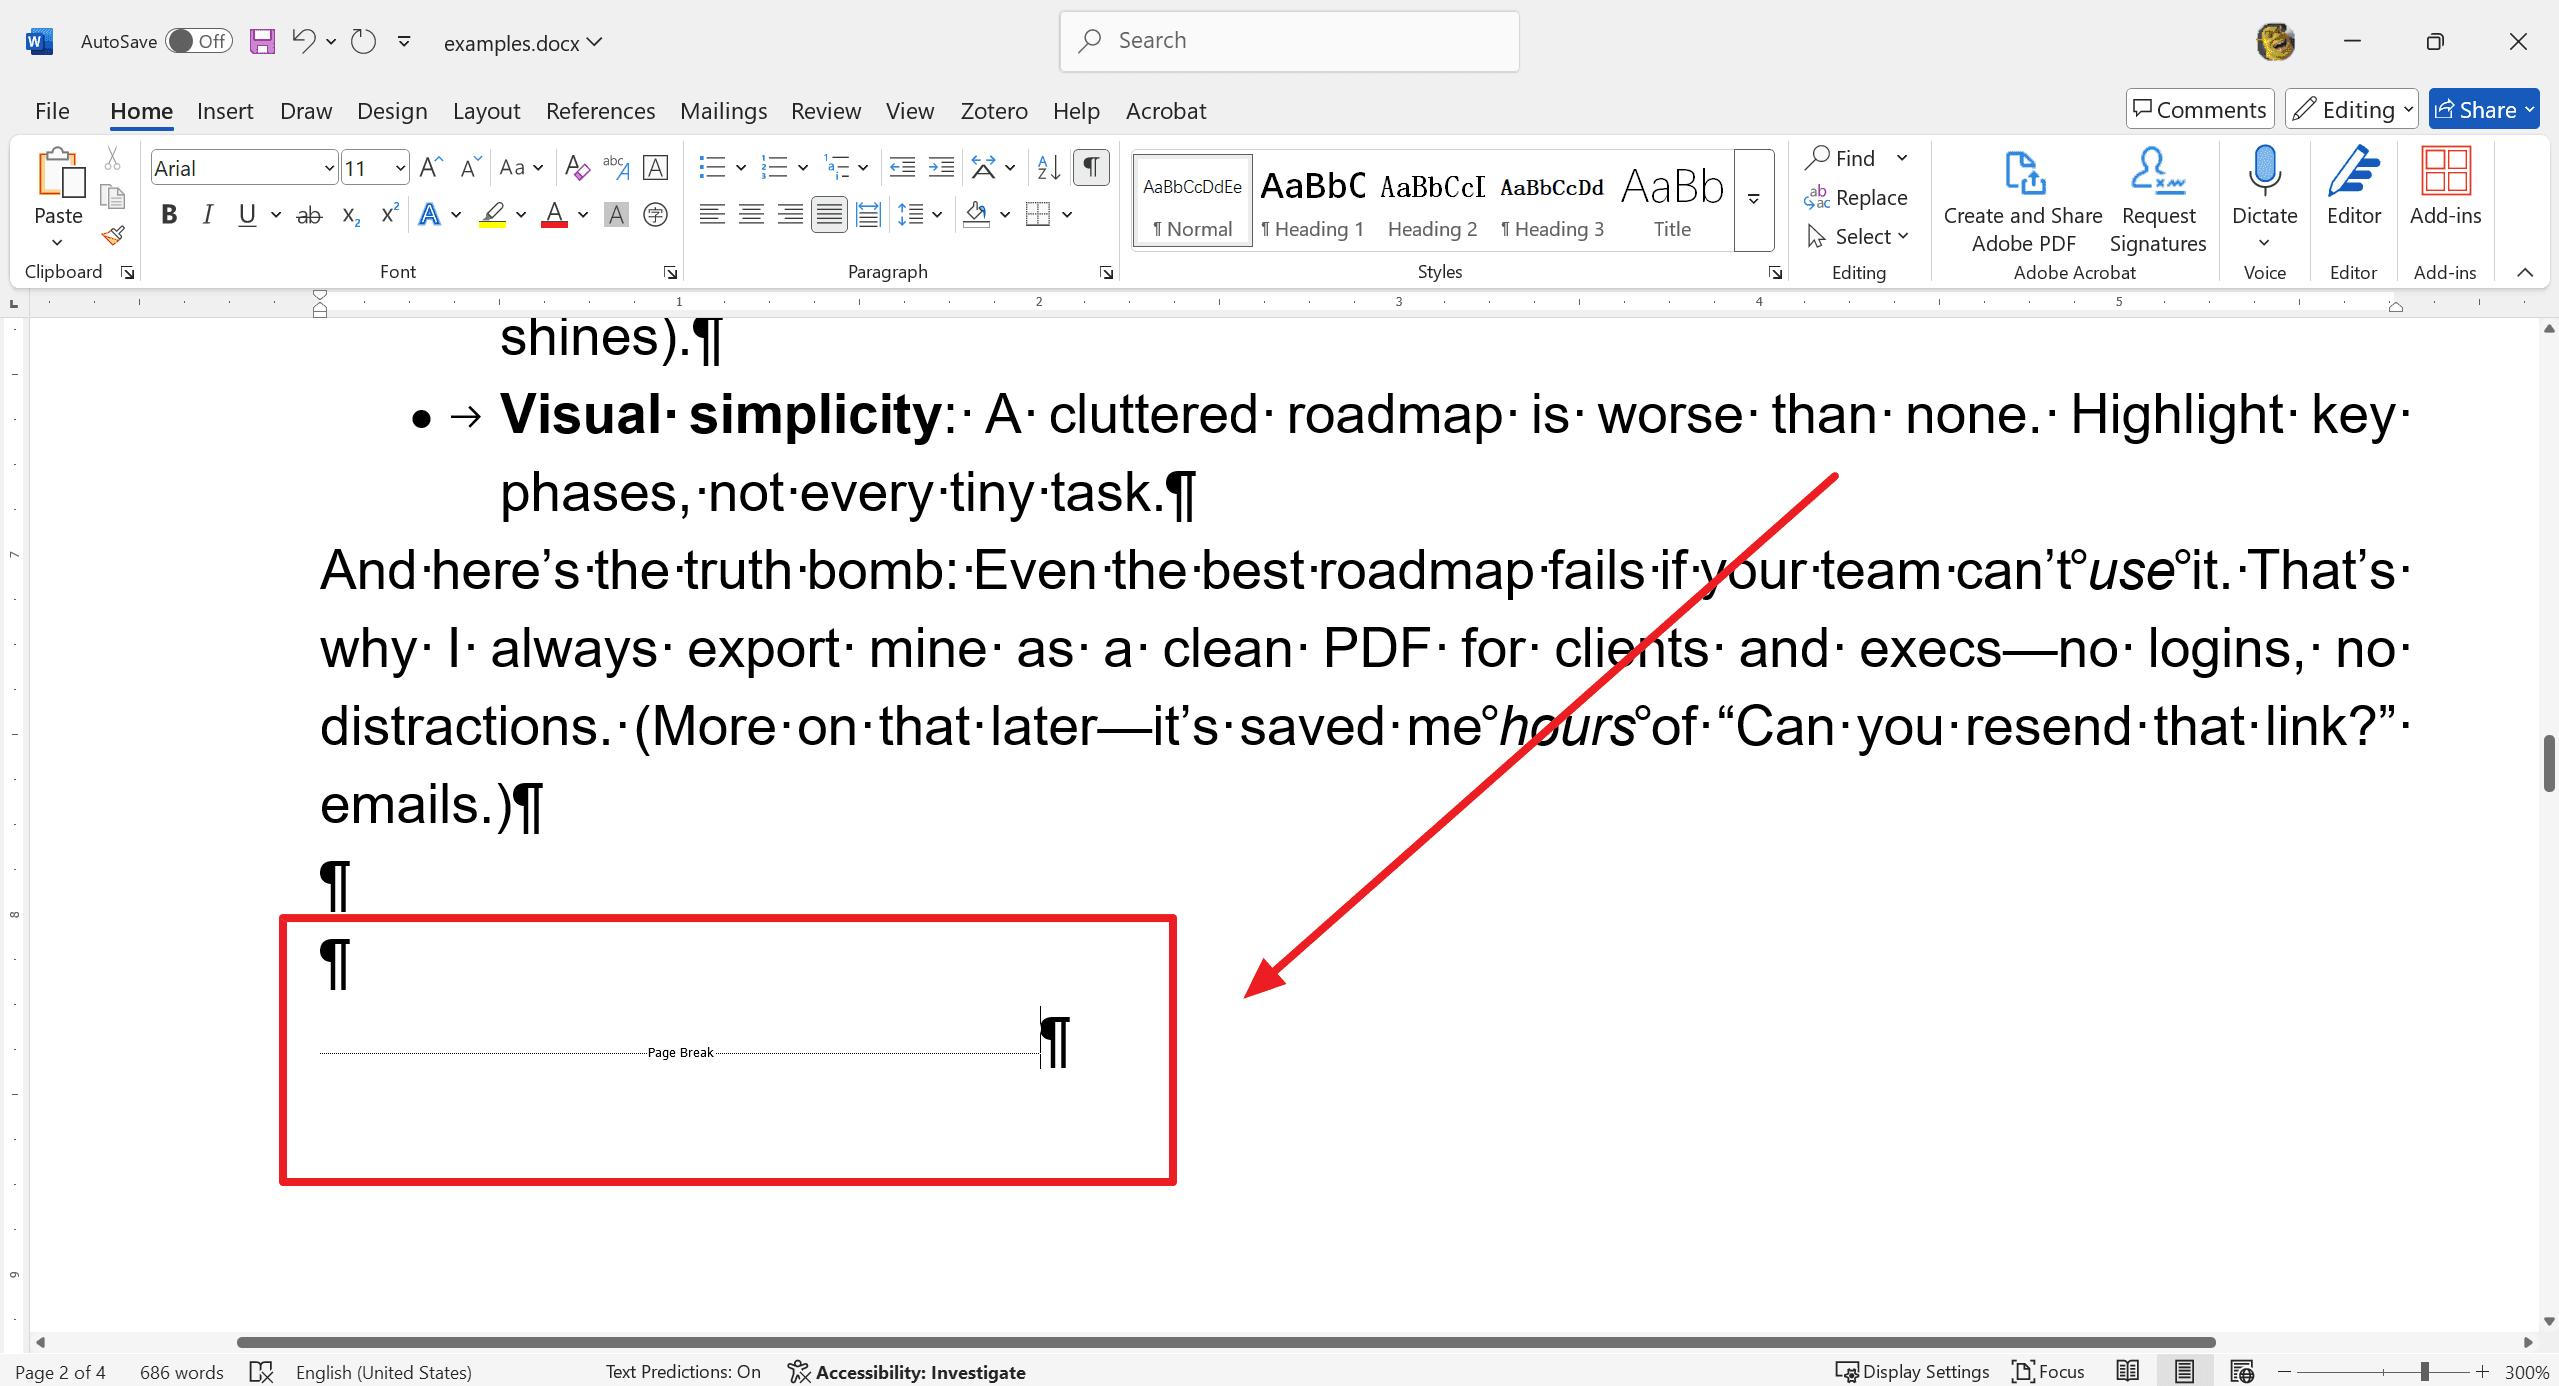
Step 3: Delete the Page Breaks
- Place your cursor just before the page break.
- Press the Delete key.
Method 2: Using the Delete or Backspace Key
Step 1: Position the Cursor
- Navigate to the page break.
- Place your cursor just before the page break.
Step 2: Press Delete or Backspace
- Press the Delete key, or use the Backspace key.
Step 3: Review and Adjust Document Flow
- Review your document.
- Check for any changes in text flow.
- Adjust paragraphs to ensure a natural flow and polished look.
Advanced Approach: Find and Replace Method
Find and Replace on Windows
Step 1: Accessing the Find and Replace Dialog Box
- Open your document in Word.
- Press Ctrl + H to open the Find and Replace dialog box.
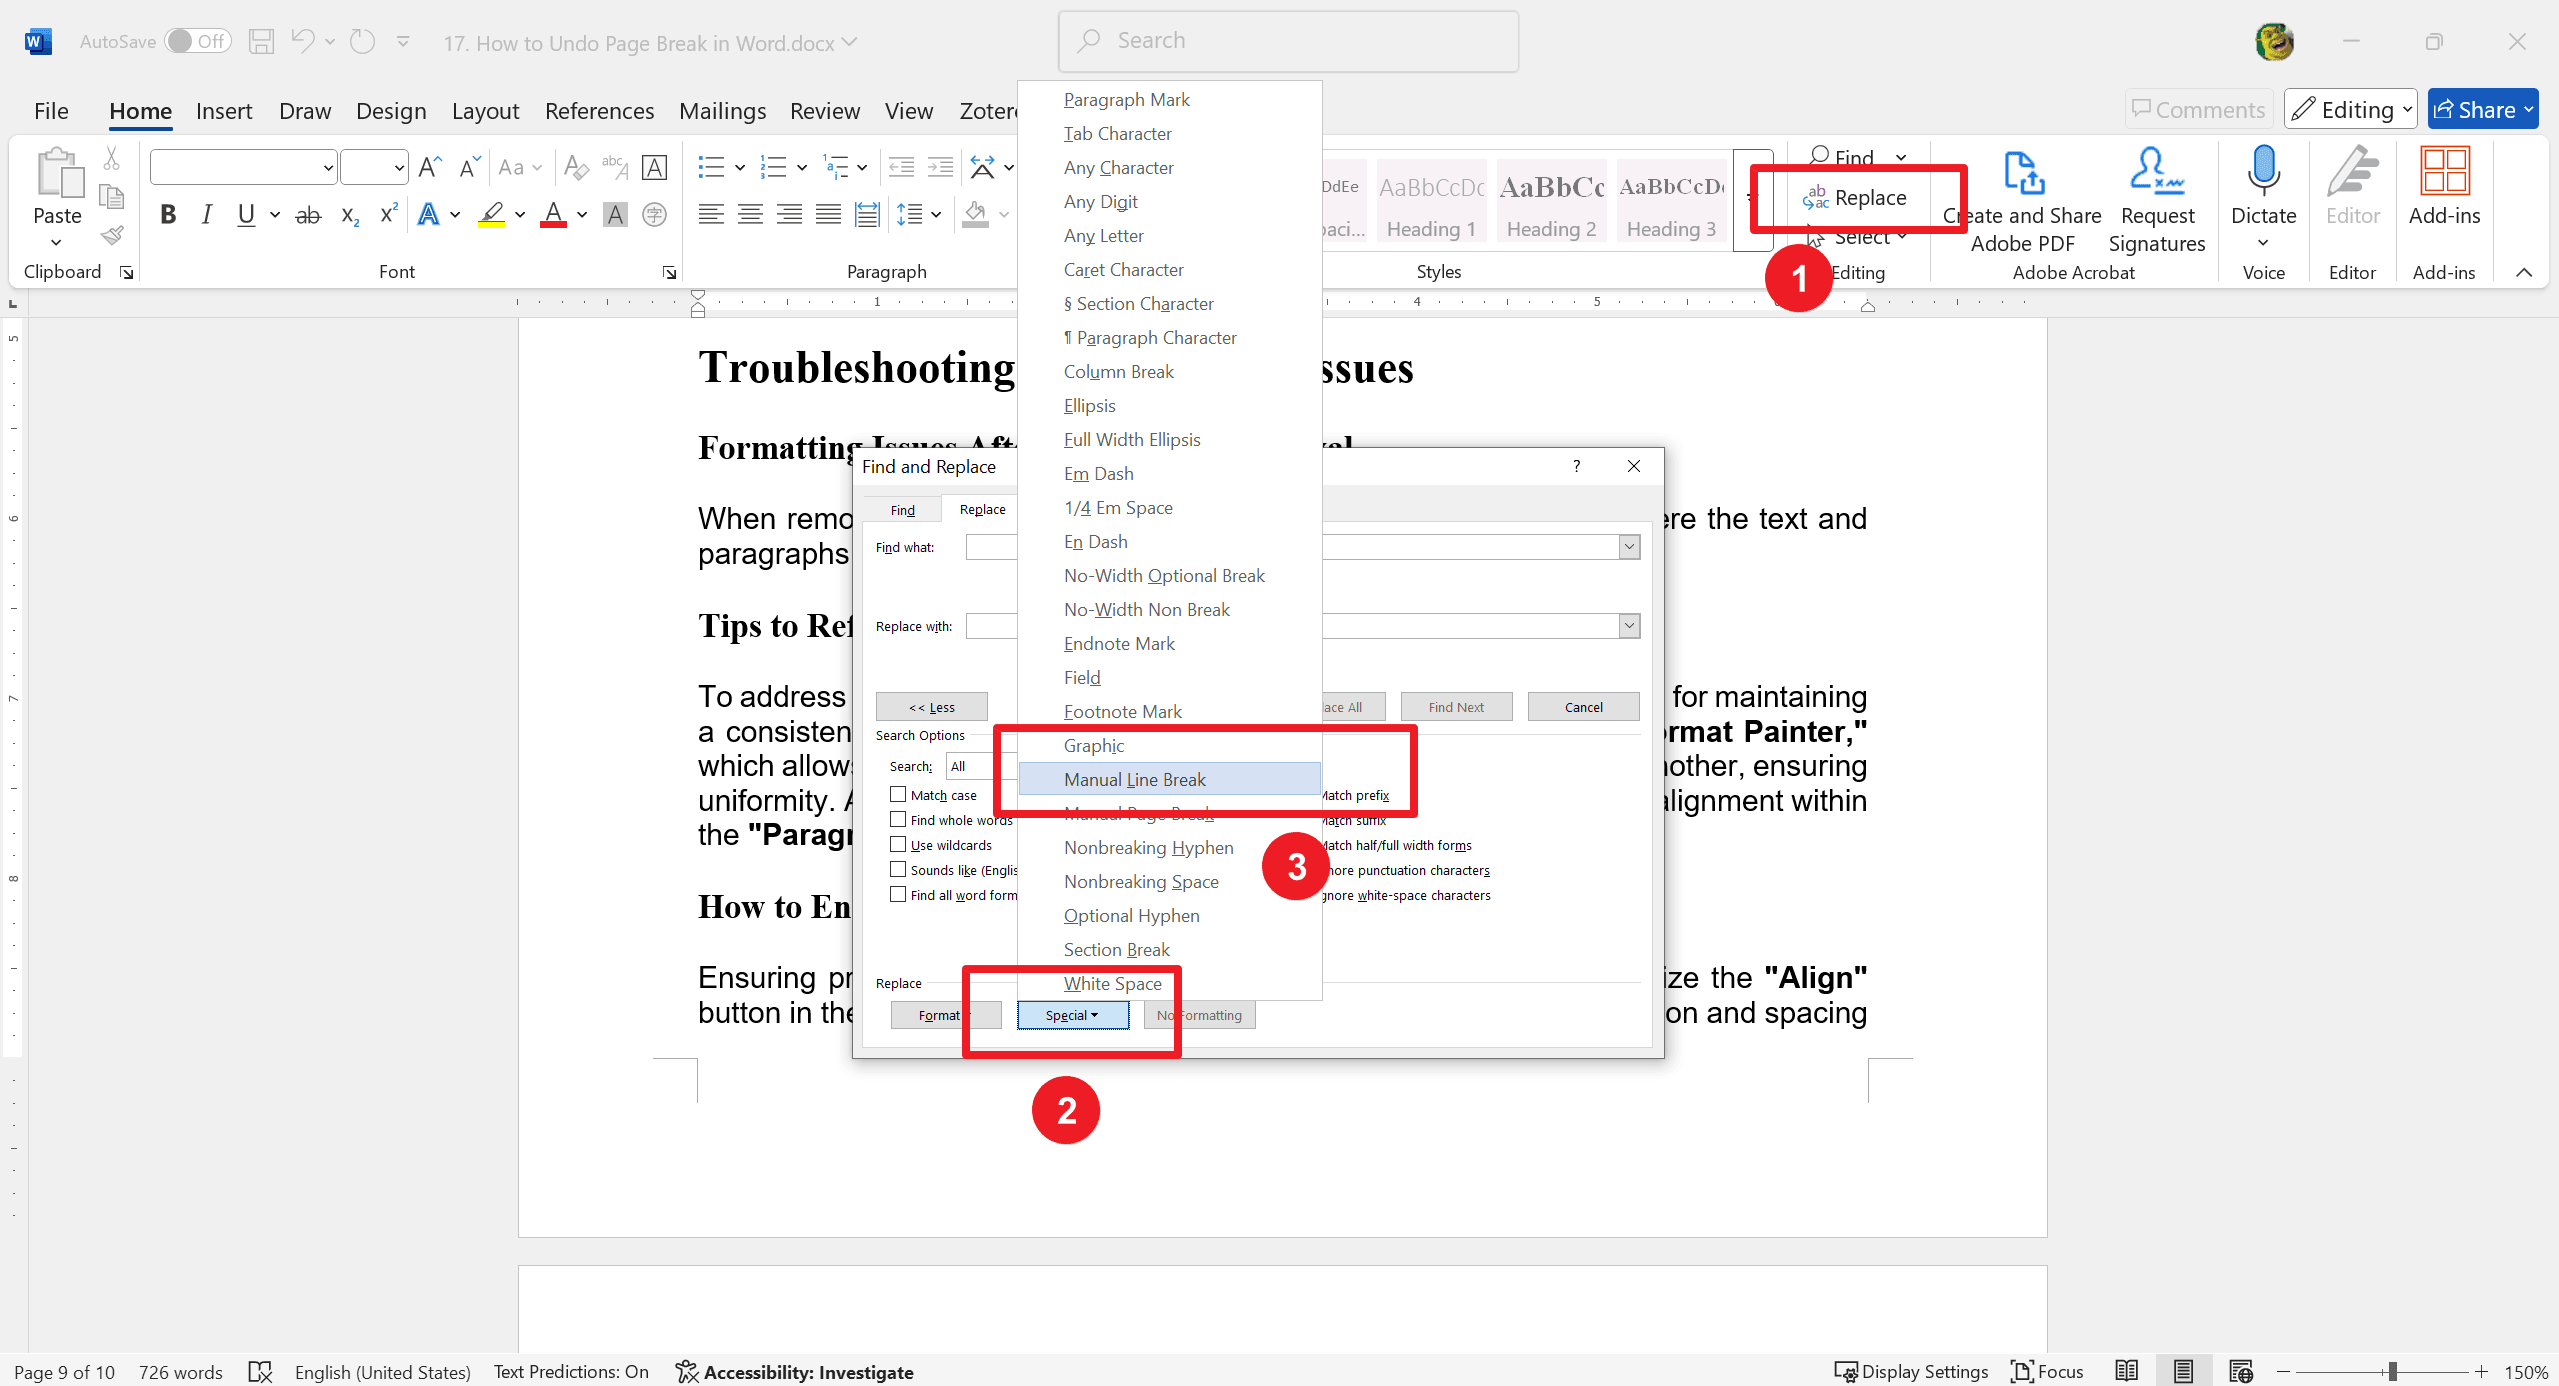
Step 2: Using the "Special" Characters Feature
- In the Find and Replace dialog box, click on the "More" button.
- Click on the "Special" button
- Select "Manual Page Break". Word will enter "^m" in the "Find what" box.
Step 3: Replacing Page Breaks
- In the "Replace with" box, enter a space or another character you choose.
- Click "Replace All" to remove all manual page breaks and replace them with your specified character or space.
Find and Replace on Mac
Step 1: Opening the Find and Replace Pane
- Open your document in Word.
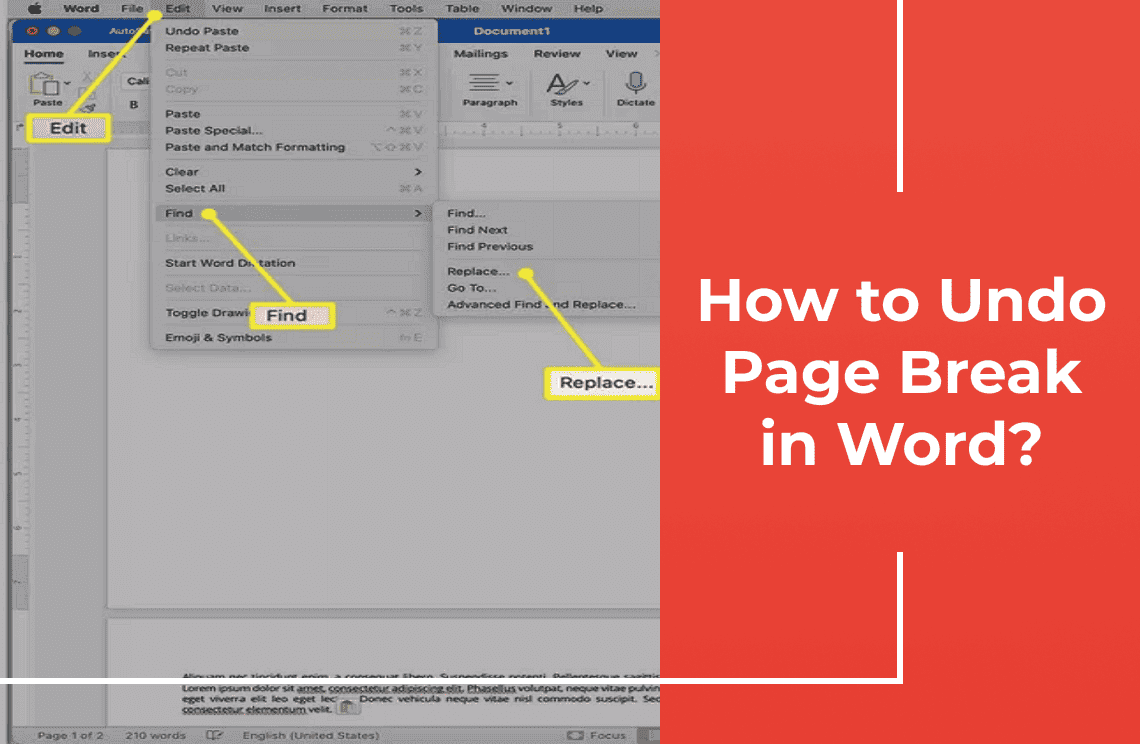
- Press Command + Option + G or go to Edit > Find > Advanced Find and Replace.
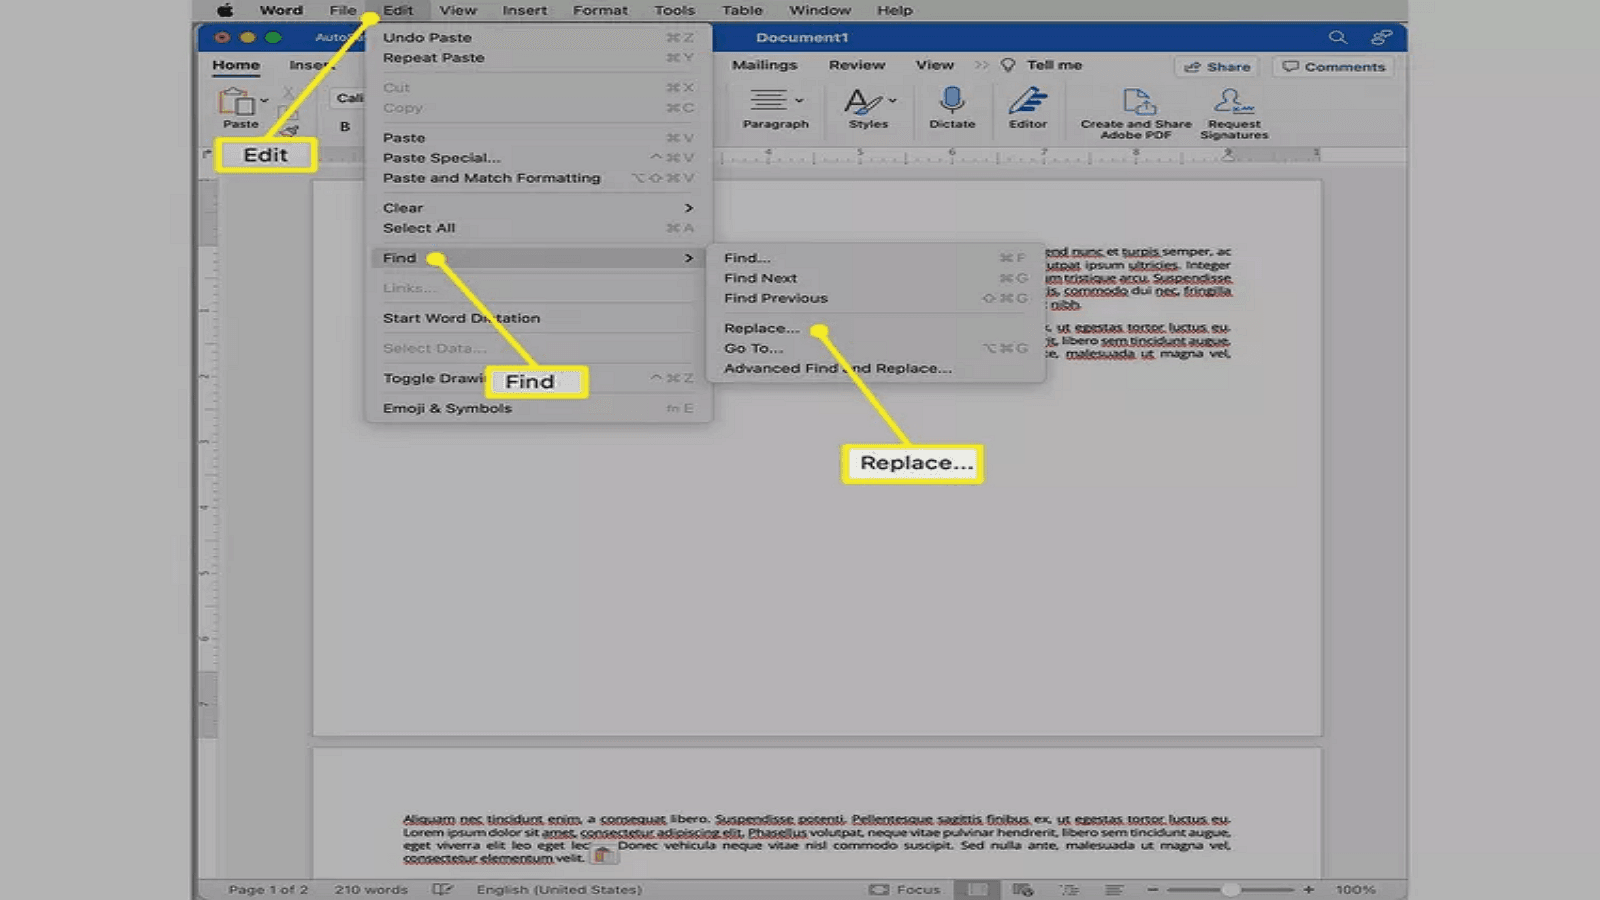
Step 2: Locating and Replacing Manual Page Breaks
- In the Find and Replace pane, click on the "Replace" tab.
- Click on the "Special" button and select "Manual Page Break". Word will enter "^m" in the "Find what" box.
- Enter a space or other character in the "Replace with" box.
- Click "Replace All" to remove all manual page breaks.

Tips to Clean Up the Document Post Page Break Removal
- After using Find and Replace, review your document for any formatting issues.
- Adjust paragraph spacing as needed to maintain a consistent and professional layout.
- Ensure that headings and sections flow naturally and check for any inadvertent changes in formatting.
Handling Automatic Page Breaks
Automatic page breaks are inserted by Word based on your document's formatting and layout. This feature helps manage content flow without manual intervention. Word dynamically adjusts page breaks as you edit your document, ensuring text fits neatly within the margins and pages.
Find and Replace on Mac
For better control:
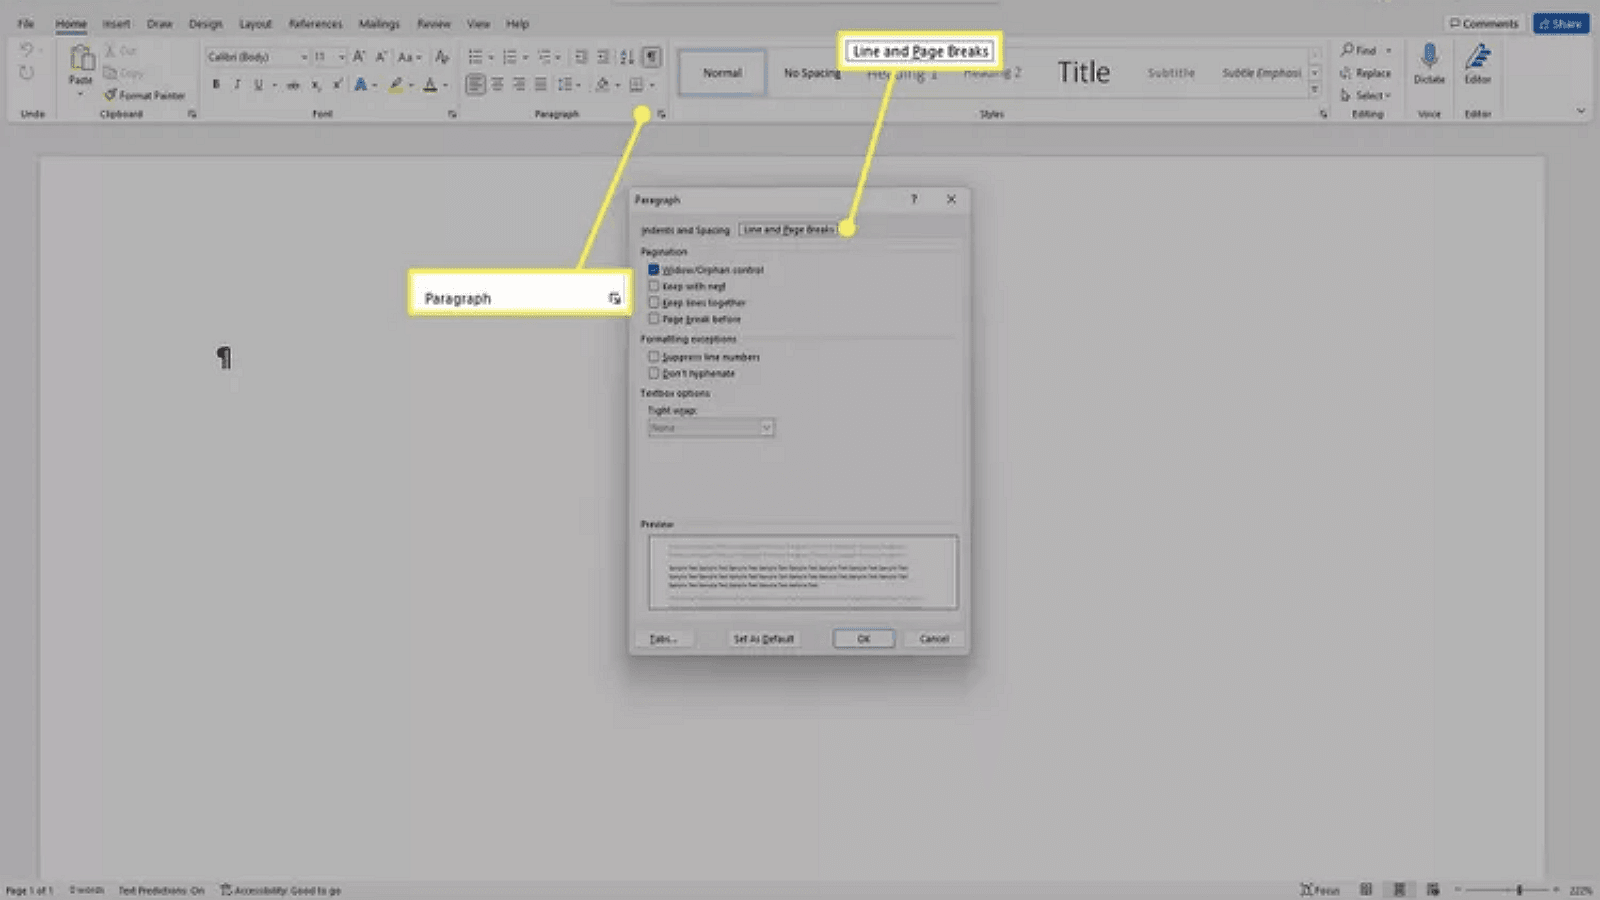
- Go to the Layout tab.
- Select Paragraph settings.
- Under the "Line and Page Breaks" tab, adjust options like "Keep lines together", "Keep with next", and "Page break before" to manage automatic breaks.
Troubleshooting and Common Issues
Q: Formatting Issues After Page Break Removal?
A: When removing page breaks, you may encounter formatting issues where the text and paragraphs become misaligned.
Q: Tips to Reformat for Consistency
A: To address these issues, reformatting the text and paragraphs is essential for maintaining a consistent look throughout your document. One useful tool is the "Format Painter," which allows you to copy the formatting from one section and apply it to another, ensuring uniformity. Additionally, you can manually adjust paragraph spacing and alignment within the "Paragraph" settings to fine-tune your document's layout.
Q: How to Ensure Proper Alignment?
A: Ensuring proper alignment is also crucial for a polished document. Utilize the "Align" button in the "Home" tab to align text as needed, and verify that indentation and spacing are consistent throughout the document. Proper alignment helps maintain readability and a professional appearance.
For Further Reading
Wrapping up, mastering document formatting is your secret weapon for creating a polished and professional presentation. Whether you're wielding the power of tools like the "Format Painter" or fine-tuning settings manually, choose strategies that best fit your document's needs. Consistent alignment and spacing transform chaos into clarity, making your content shine. Remember, good formatting isn’t just about aesthetics; it's about crafting a seamless reading experience that captivates your audience. With these skills in your toolkit, your document will stand out with elegance and precision, leaving a lasting impression every time.
Moreover, for those seeking to optimize their document management and processing skills, it is highly recommended to consult How-to & Tips Articles | PDF Agile and Microsoft Word Tips and Tricks | PDF Agile. These resources offer in-depth insights and practical guidance on Microsoft Word and PDF, enabling users to harness the full potential of this ubiquitous tool. Access these valuable articles at PDF Agile for comprehensive support and advanced techniques.