I used to think Google Docs was just for words. A place to write reports, collaborate on essays, you know, the usual. But then I hit a wall. I was trying to explain a complex process in a document, and my words just weren't cutting it. Paragraph after paragraph, I felt like I was losing my readers in a sea of jargon. Frustrated, I started poking around, and that's when I stumbled upon the drawing tool. It was like discovering a hidden room in my house! Suddenly, I could visualize the process, create a flowchart, and actually show people what I was talking about. It was a game-changer. That's what this is about – sharing that "aha!" moment. Because I'm betting there are others out there who, like me, are just scratching the surface of what Google Docs can do. This isn't just a tutorial; it's a guide to unlocking a whole new level of communication and creativity within Google Docs. Let me show you how.
Method 1: Use the Google Docs Built-In Drawing Tool
Step 1: Access Google Docs
Visit Google Docs, sign in with your Google account, and either open an existing document or create a new one. This will set the stage for you to start using the built-in drawing tool to enhance your document with visuals.
Step 2: Insert a Drawing
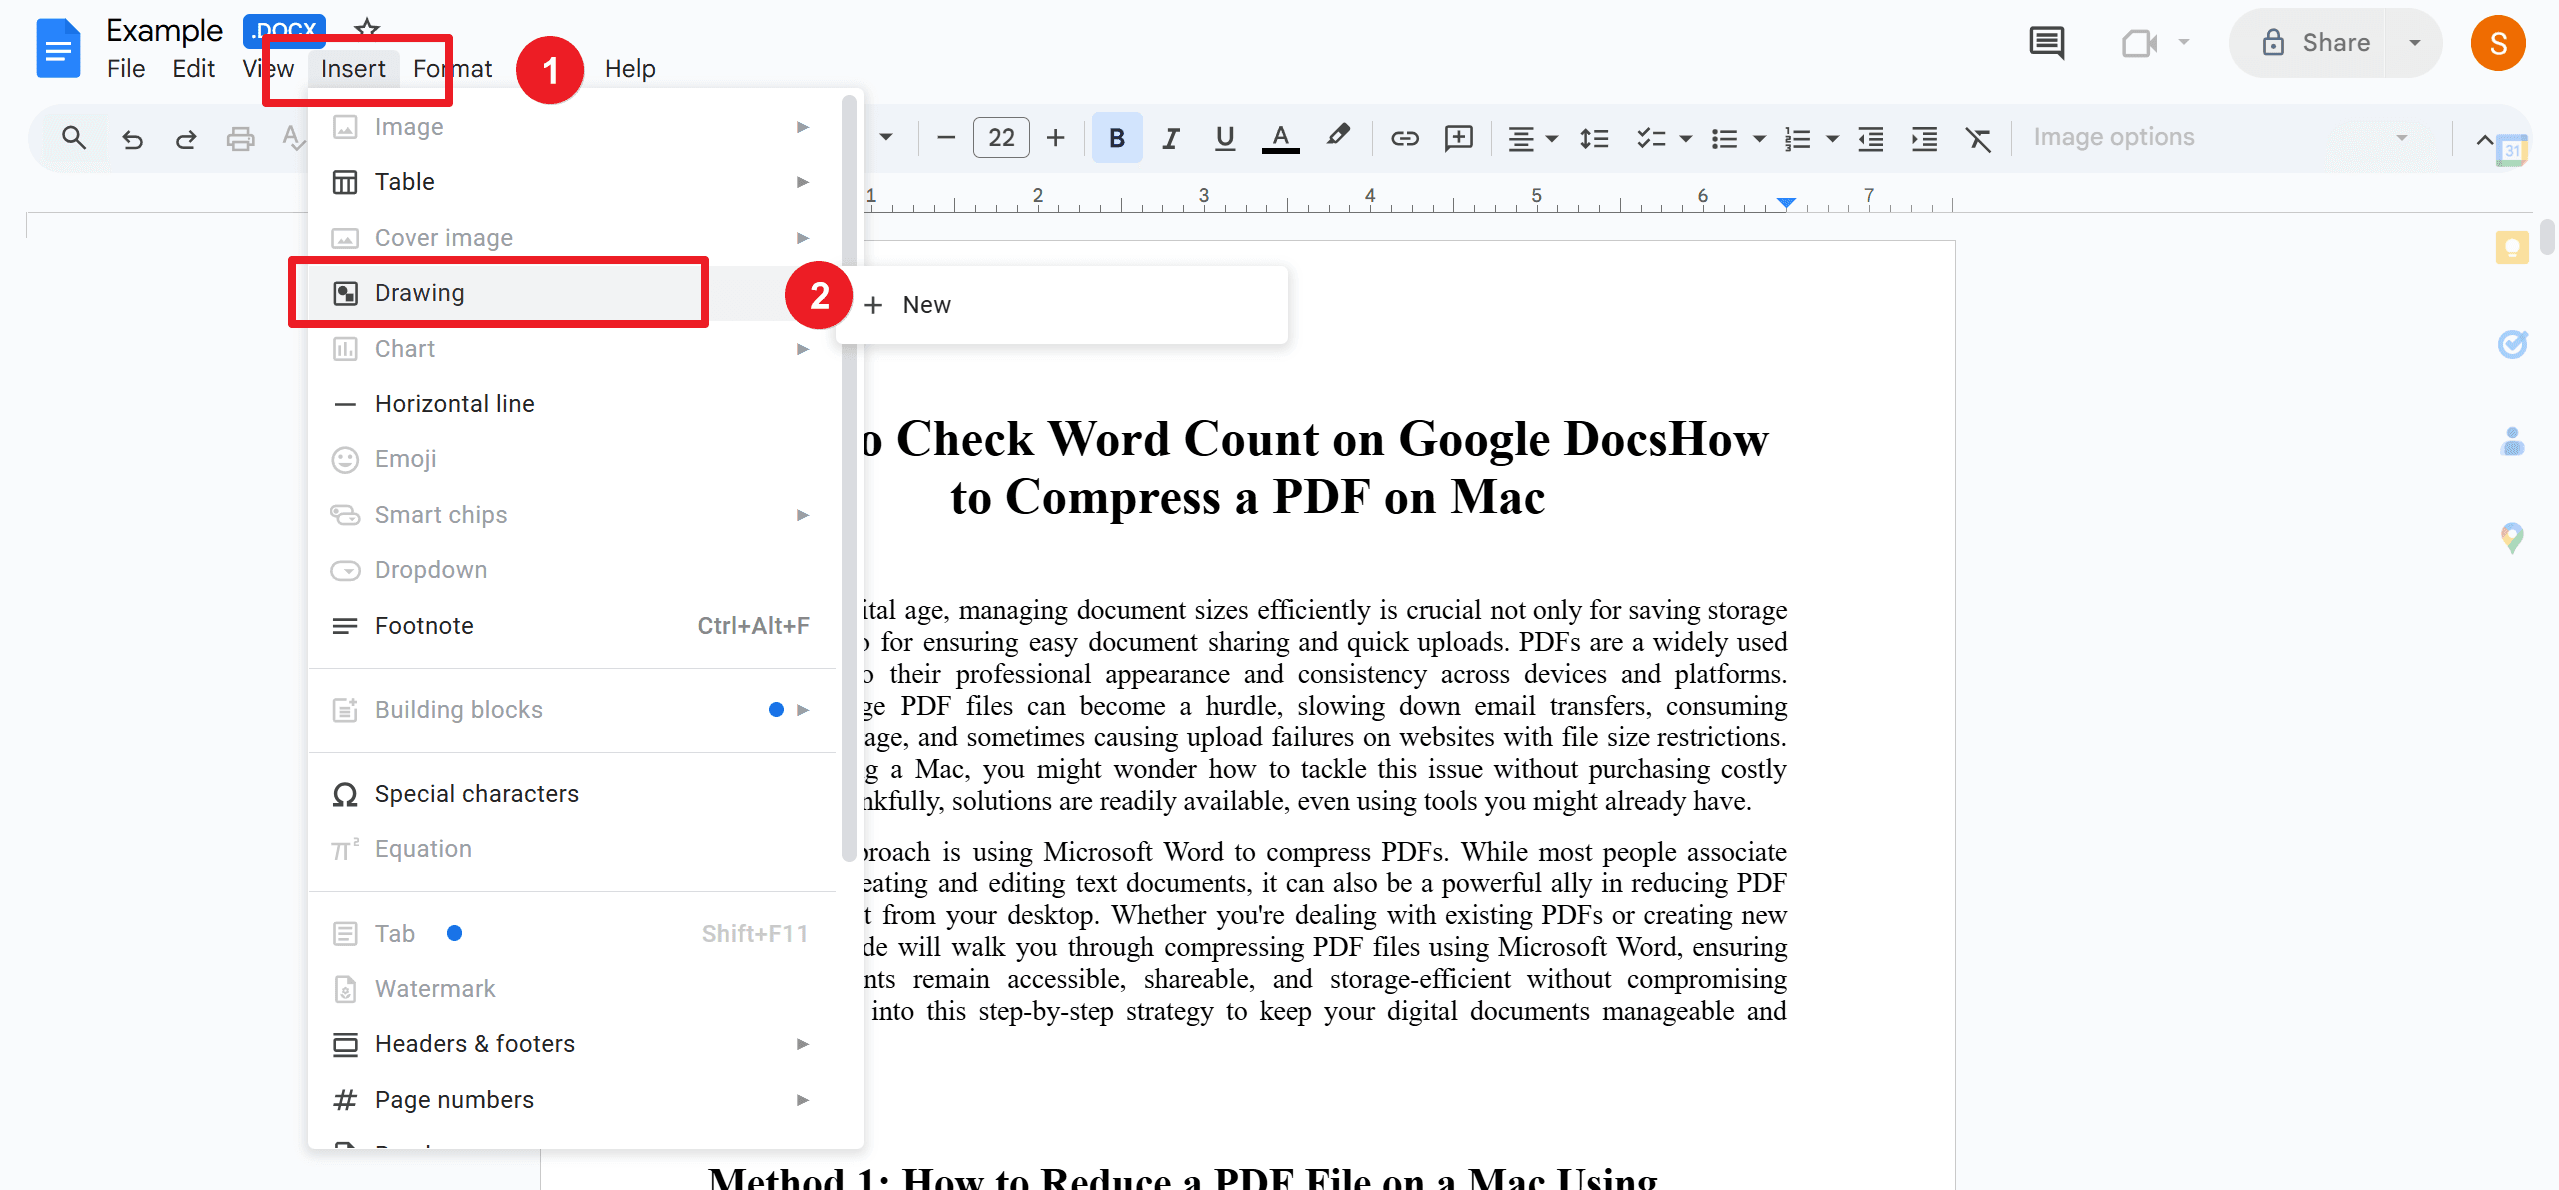
1. Place your cursor in the document where you want the drawing.
2. Navigate to the top menu and click on Insert.
3. From the dropdown menu, select Drawing.
4. Click on + New to open the Drawing tool and start creating your visual content.
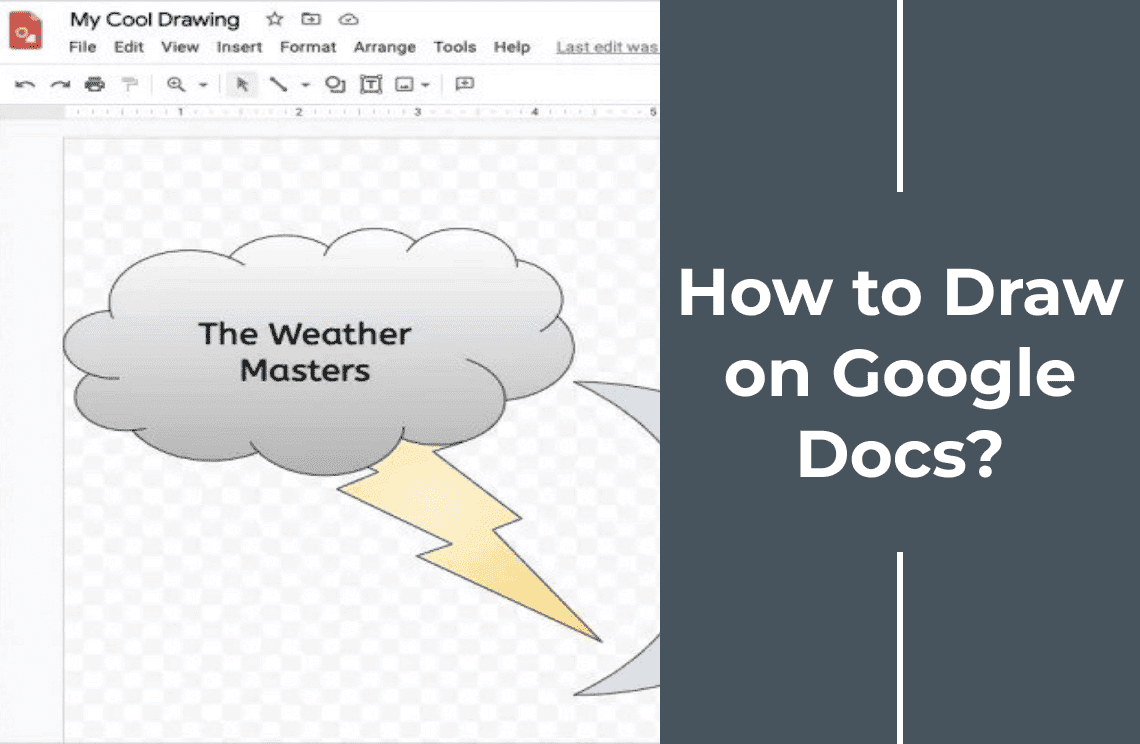
Step 3: Create Your Drawing
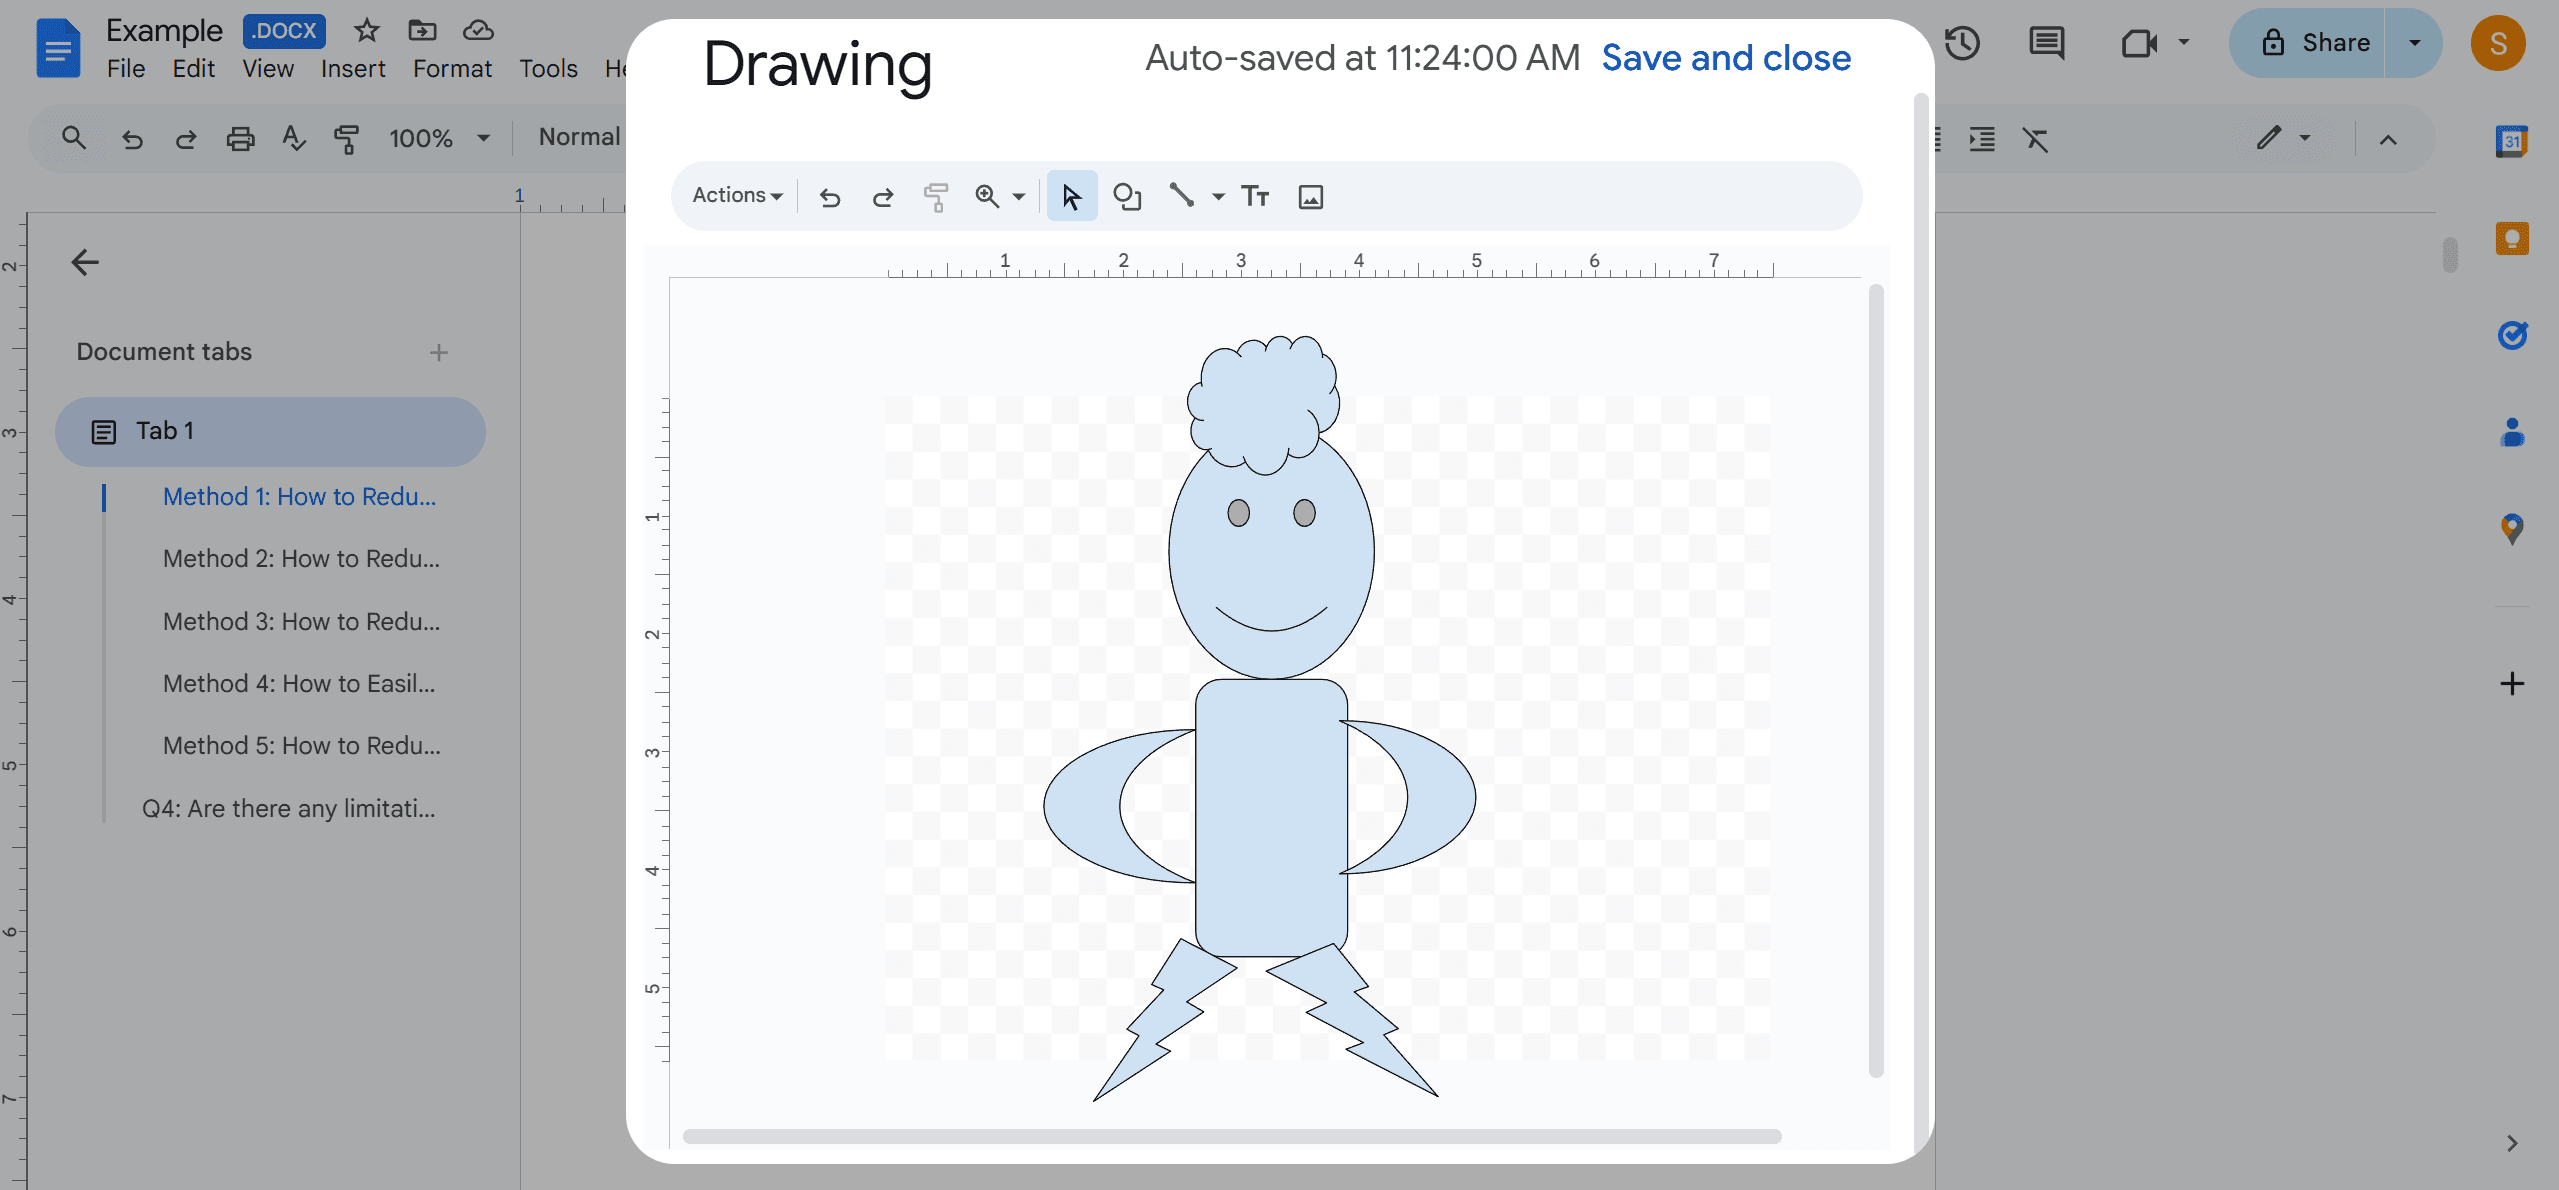
1. Use the drawing tool in the pop-up window.
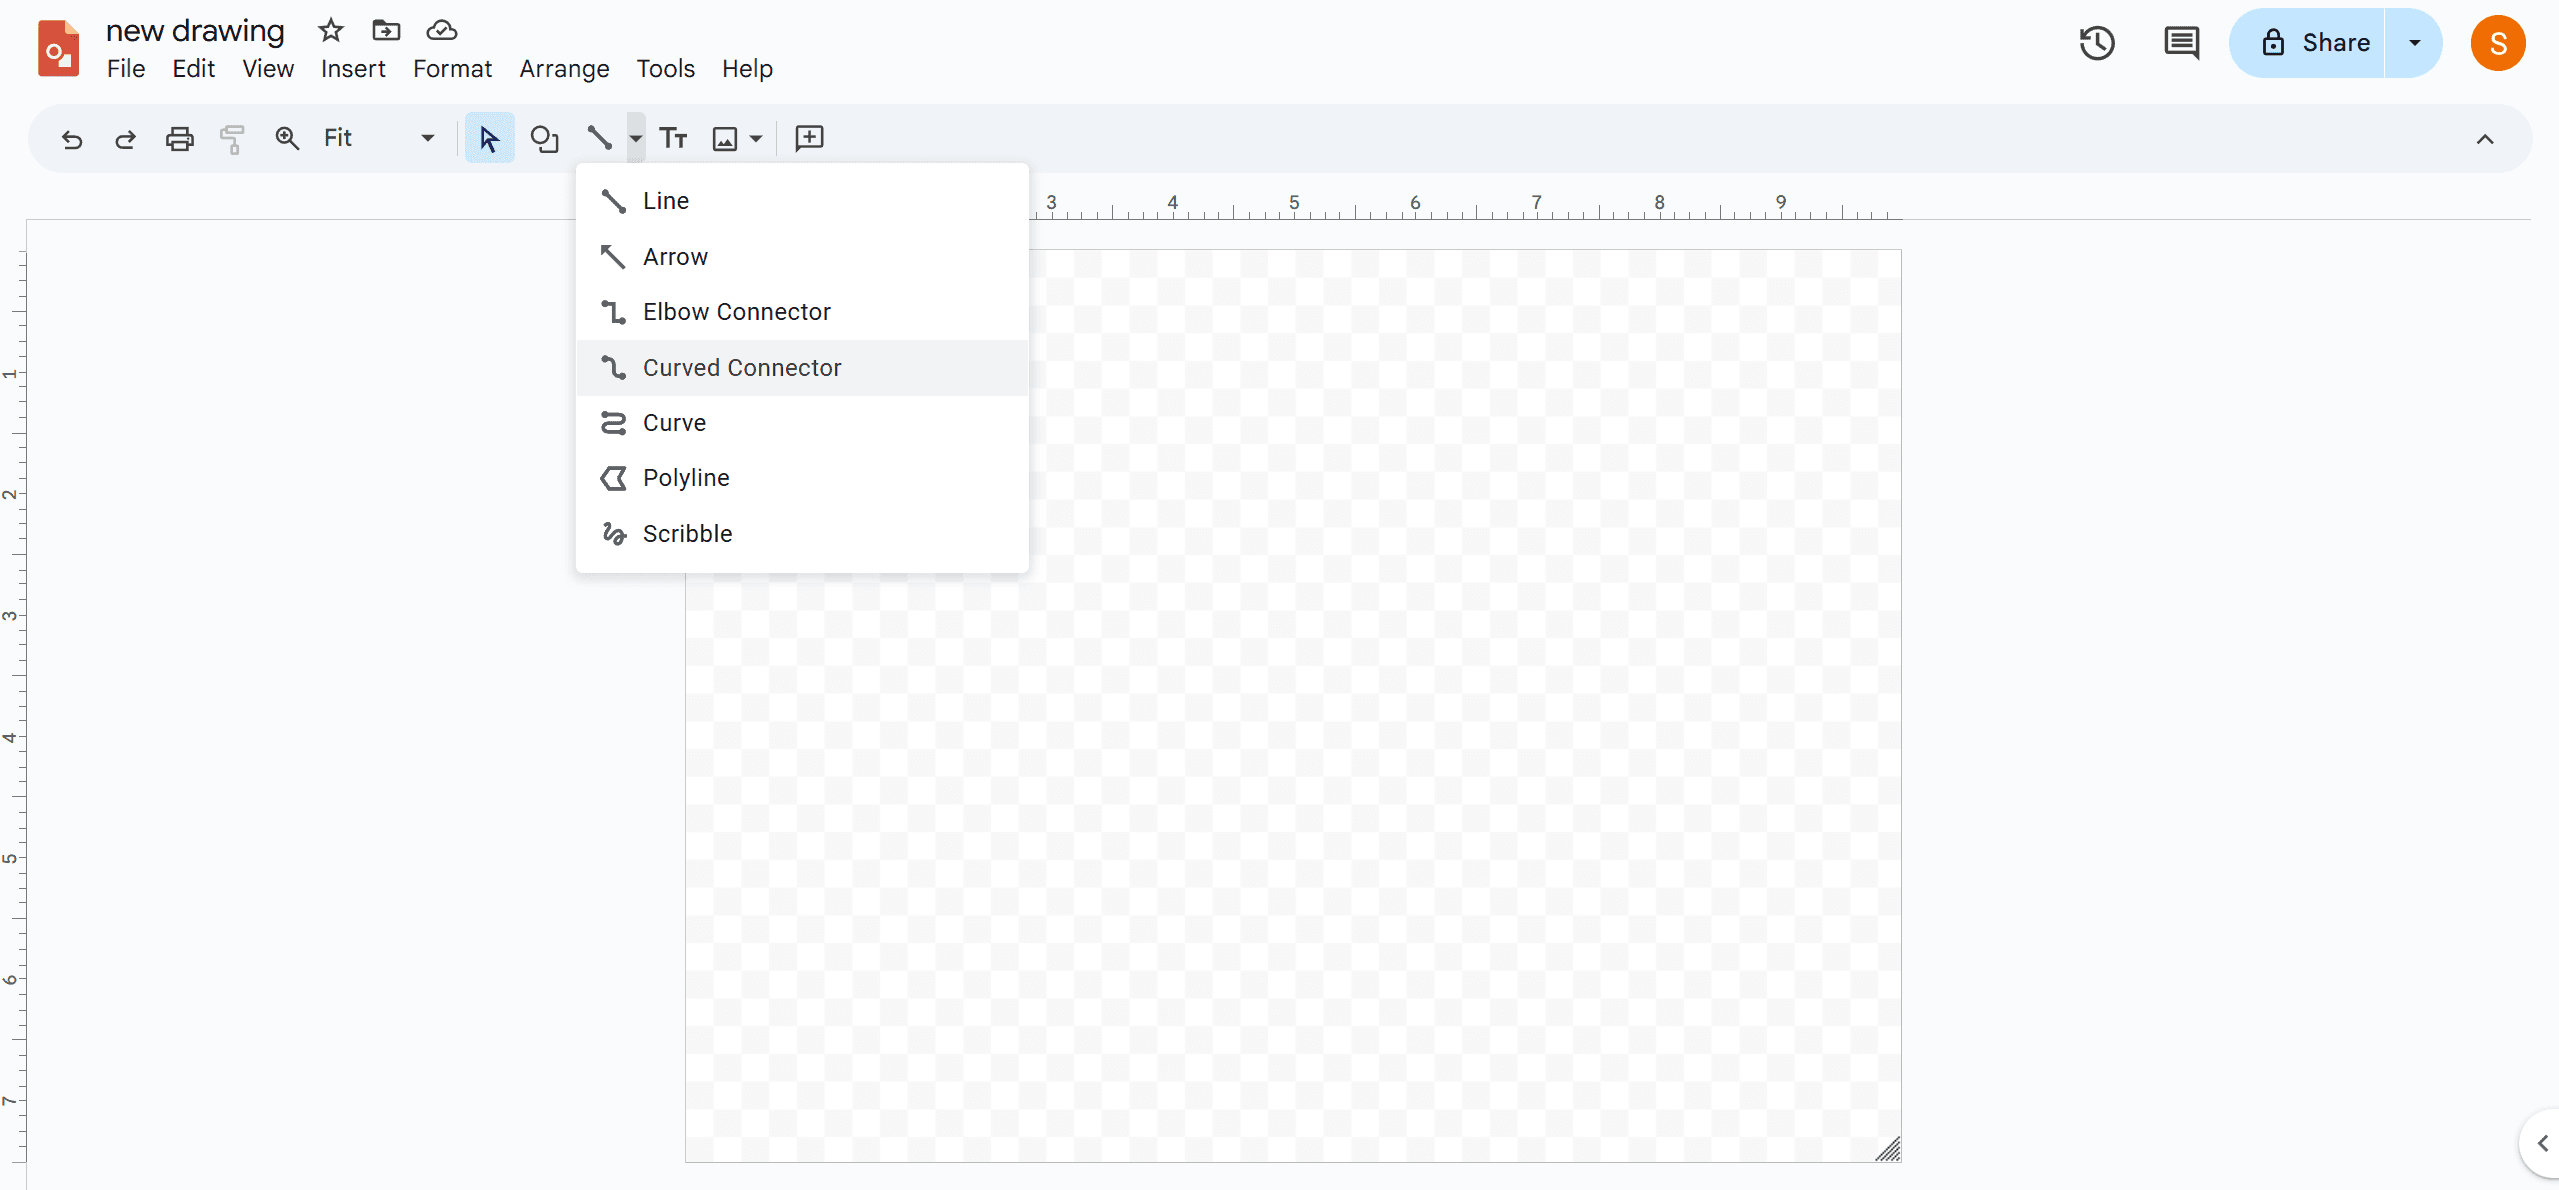
2. Explore toolbar options such as lines, shapes, text boxes, and images.
3. For freehand drawing, click on the Line drop-down arrow and select Scribble.
Step 4: Save and Insert Drawing
1. Once you’ve completed your drawing, select Save and close.
2. Your drawing will automatically appear in the document at the cursor's location.
3. You can move, resize, or edit the drawing as needed within the document.
Method 2: Use Google Drawings and Insert Your Sketch
Step 1: Access Google Drawings
Visit Google Drawings and log in with your Google account. This will give you access to a blank canvas where you can start creating your sketch.
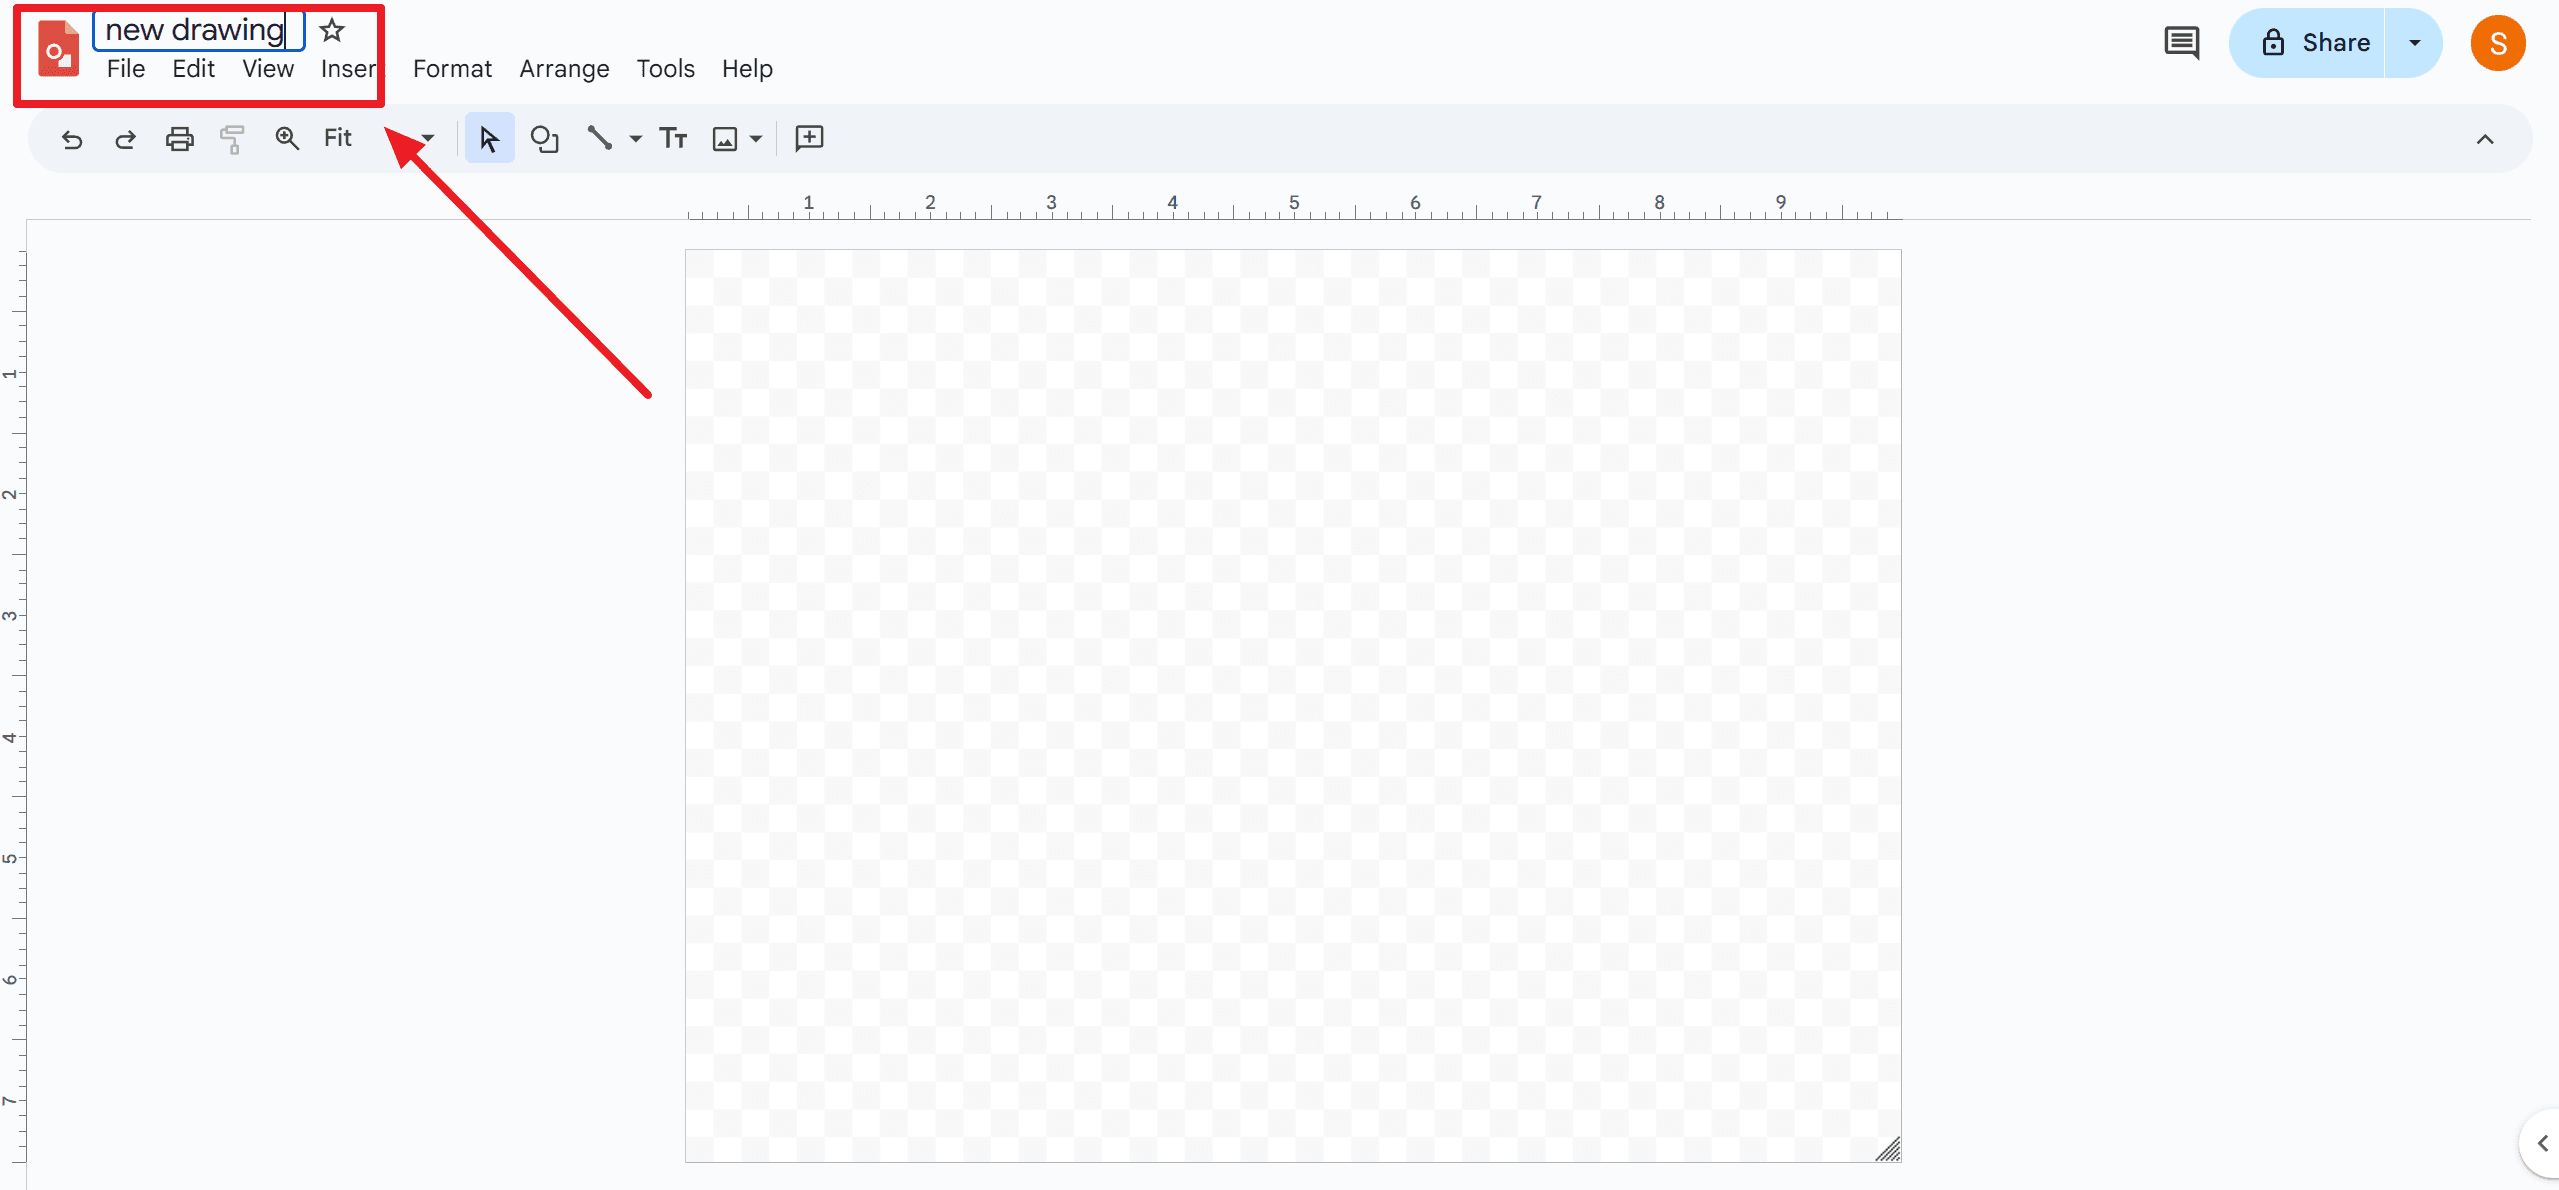
Step 2: Title Your Drawing
Provide your drawing with a meaningful title by clicking on the "Untitled drawing" text at the top left. A proper title helps in organizing and finding the drawing later.
Step 3: Create Your Sketch
Utilize the menu options and toolbar to create your sketch. Insert shapes, images, text, and lines to build your drawing. If you prefer freehand drawing, select the Scribble option from the Line drop-down menu. Customize your elements with different colors, borders, and fonts as needed. Your drawing will be saved automatically in Google Drive, ensuring you don't lose your work. You can access it anytime from your Drive account.
Step 4: Insert Drawing in Google Docs
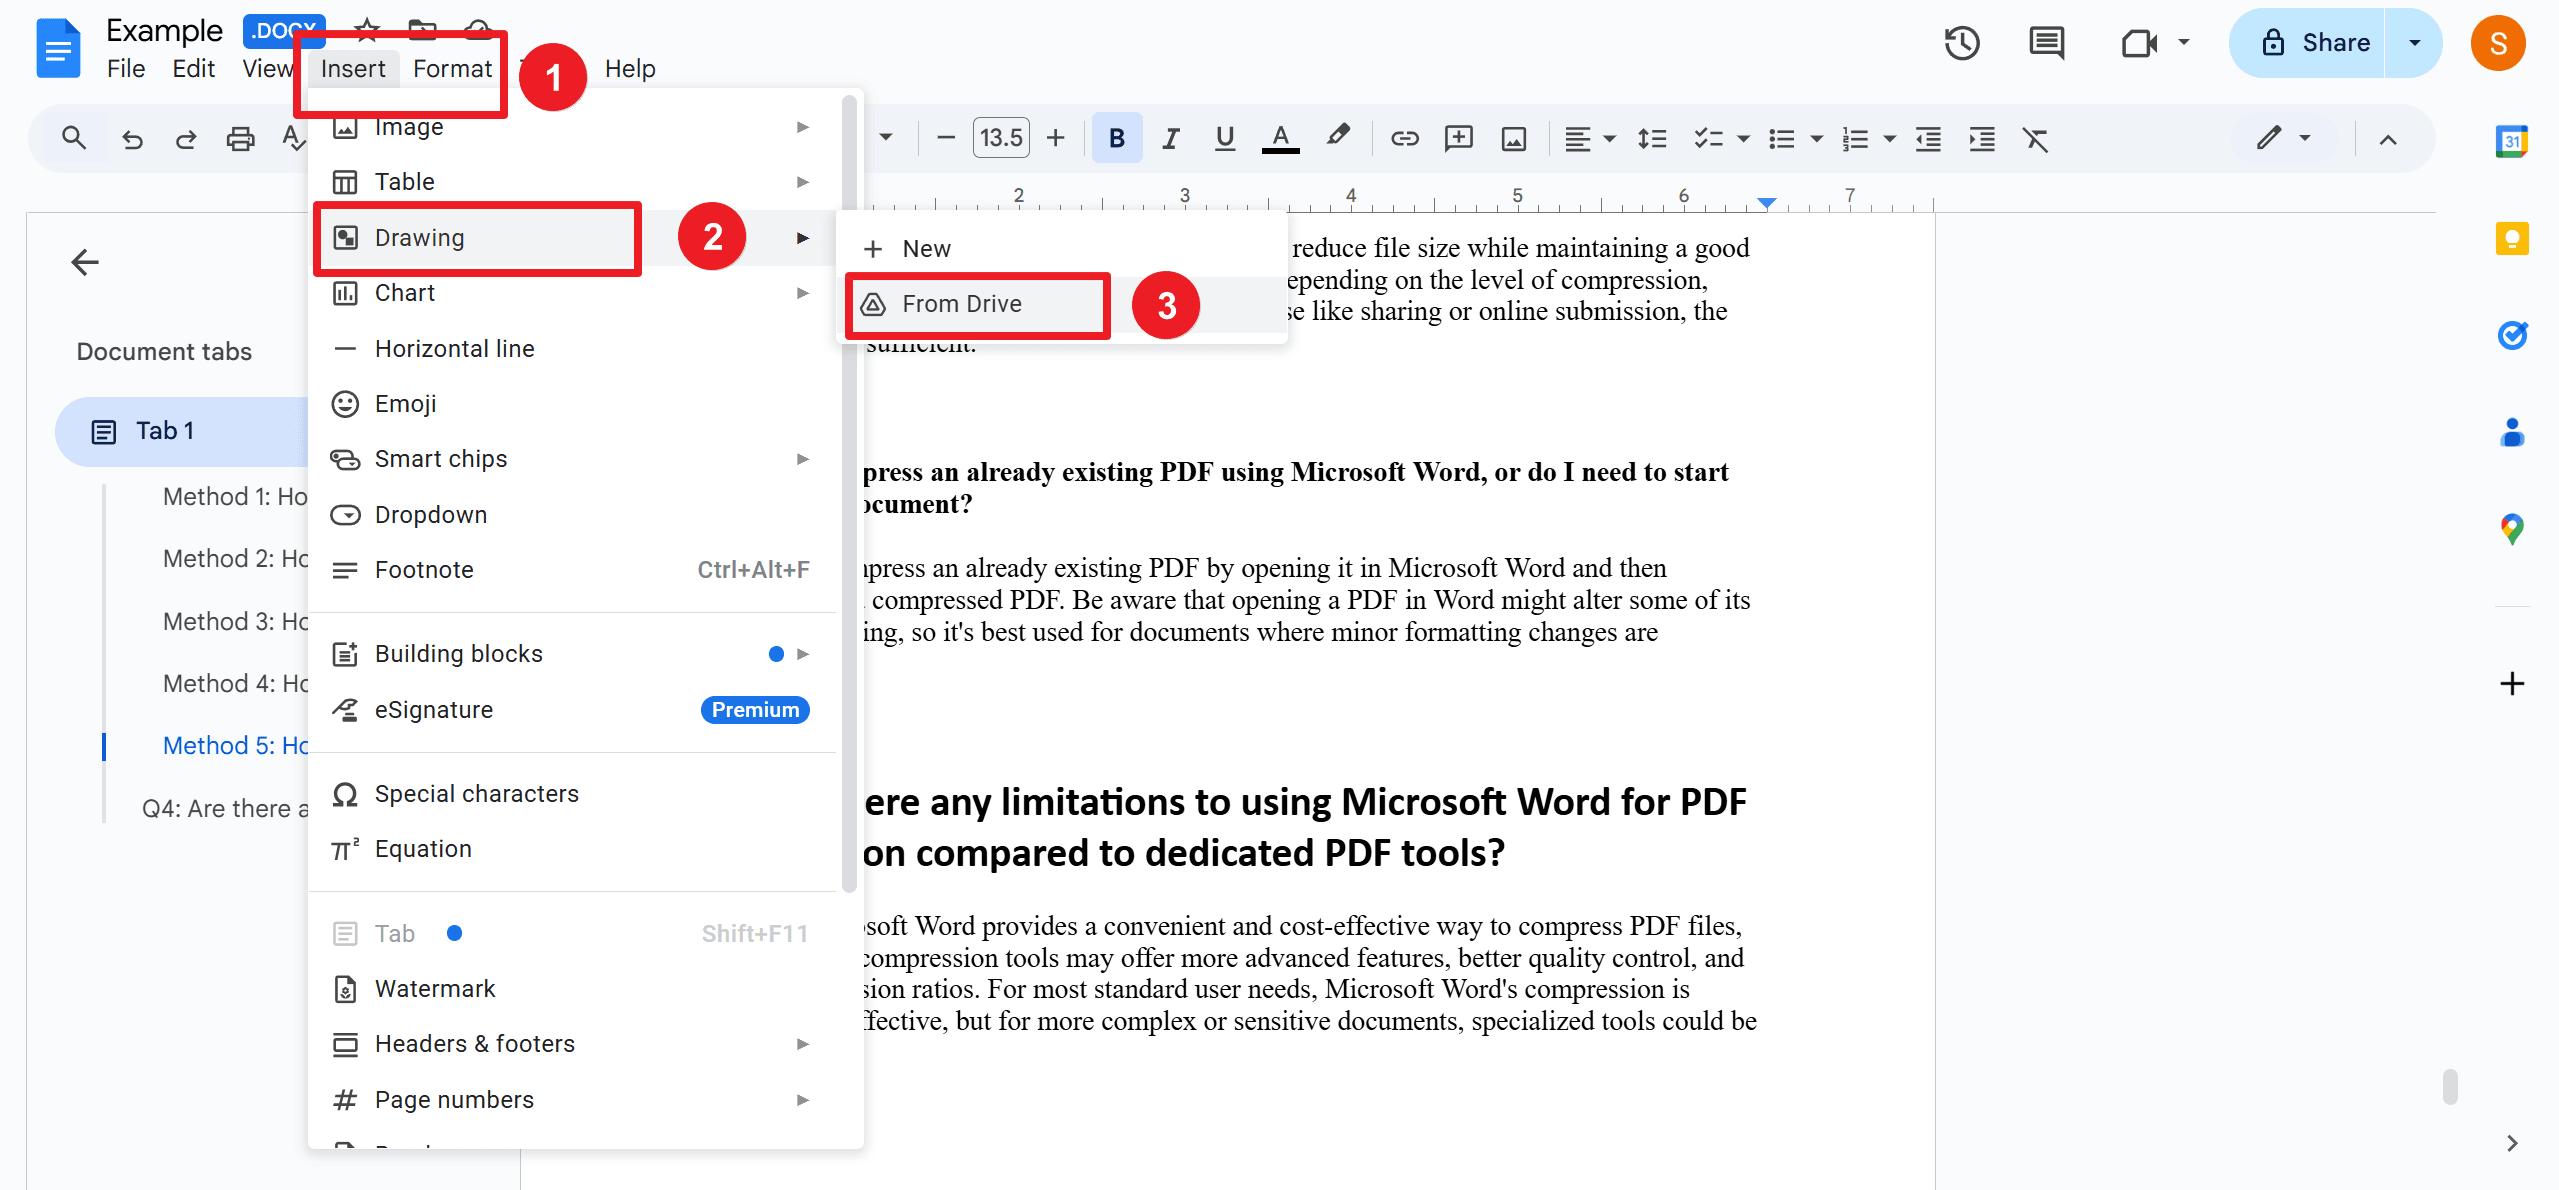
1. Navigate back to Google Docs where you want to insert the drawing.
2. Use the menu path Insert > Drawing > From Drive and then locate and insert your saved drawing from Google Drive.
Method 3: Draw in Google Docs on Mobile (Android & iPhone)?
Step 1: Open Google Docs
Launch the Google Docs app on your mobile device and open the document where you want to create your drawing.
Step 2: Access the Insert Menu
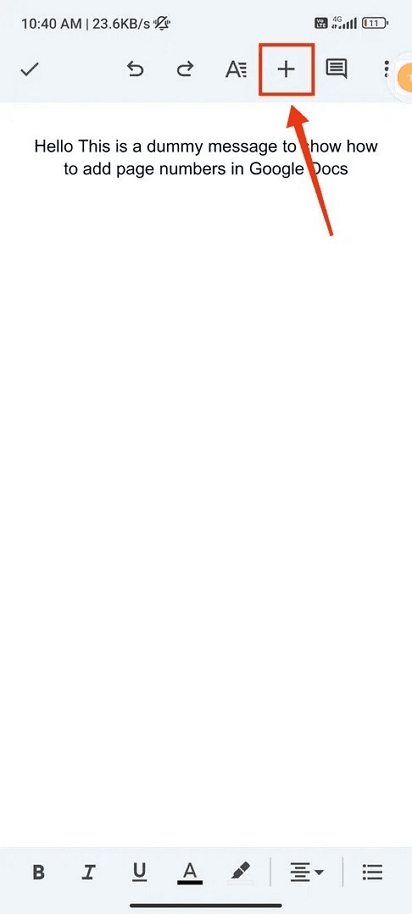
Tap on the + (plus) icon located at the top or bottom of the screen to open the Insert menu.
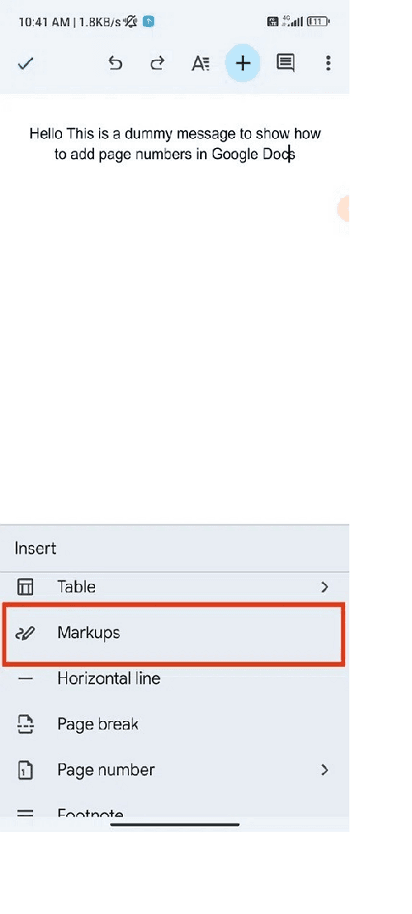
Step 3: Choose Markup Option
From the list of insert options, select Markup. This option allows you to create a freehand drawing within your document.
Step 4: Create Your Drawing
Use your finger or a stylus to draw on the screen. You can draw shapes, text, or any freehand sketch. Use the available tools for customized drawing options like different colors and line thickness.
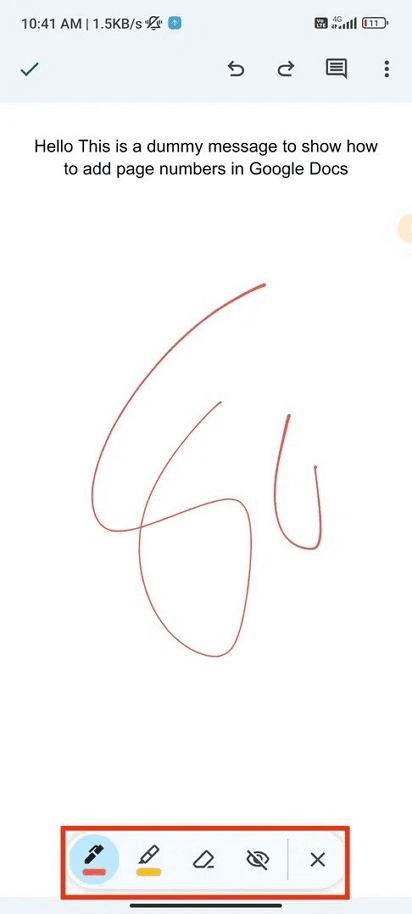
Step 5: Tap on Icon
Once your drawing is complete, tap on the checkmark icon to save and insert your drawing into the document. Your sketch will now appear in the Google Doc, and you can move or resize it as needed.
Tips for Using Google Docs
- Use Gridlines for Accuracy: Enable gridlines to align elements precisely.
- Try Different Drawing Tools: Experiment with various tools like shapes, lines, and scribbles to enhance your drawings.
- Zoom In for Details: Zoom in for finer details and to ensure accuracy.
- Group Elements Together: Group related elements to move and resize them efficiently.
- Add Color for Clarity: Use different colors to highlight important sections and improve visual clarity.
- Keep It Simple: Simplify your drawings to avoid clutter and confusion.
- Use Google Keep for Detailed Sketches: For more detailed sketches, create them in Google Keep and then insert them into your document.
- Collaborate in Real-Time: Leverage Google Docs' real-time collaboration to work with others simultaneously and share feedback instantly.
Final Thoughts
On the computer, you can leverage Google Drawings to create and insert detailed sketches, while on mobile, the Markup option allows for quick and intuitive drawings directly within your document. Both methods offer customization and ease of use, ensuring your visual content enhances your text.
Moreover, for those seeking to optimize their document management and processing skills, it is highly recommended to consult How-to & Tips Articles | PDF Agile and Google Docs Tips and Tricks | PDF Agile. These resources offer in-depth insights and practical guidance on Microsoft Word and PDF, enabling users to harness the full potential of this ubiquitous tool.